26. Your WPMU DEV Account
Your Account page is where you can view and manage everything related to your WPMU DEV account, including membership information, your billing details, paid add-on services & contact info.
26.1 Getting Started
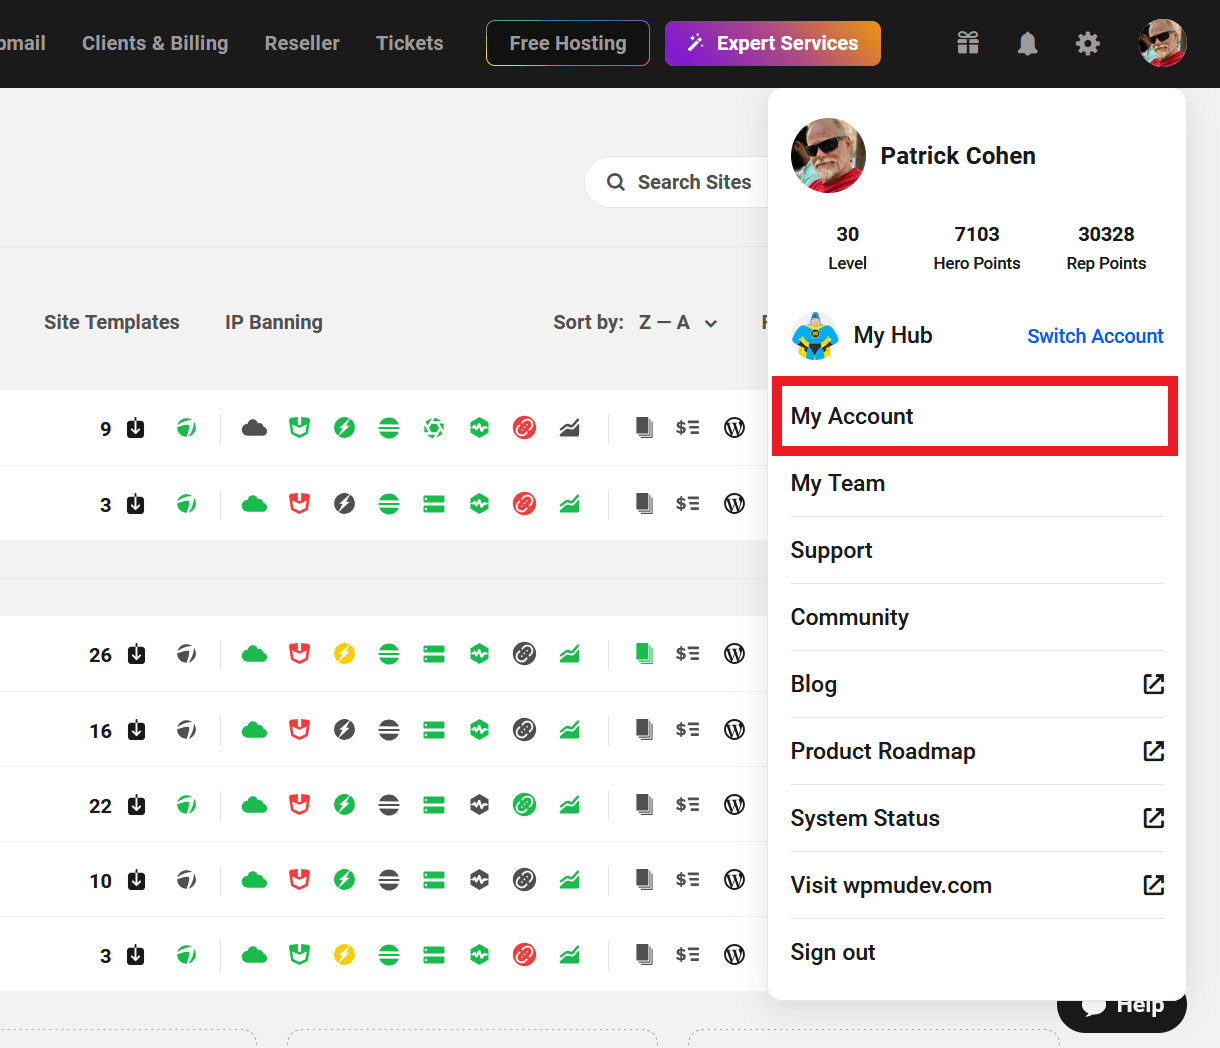
Copy chapter anchor to clipboardAccess your account page by clicking My Account under your profile image at the far-right of the main menu in your Hub.
26.2 My Membership
Copy chapter anchor to clipboardYou’ll find all the information related to your WPMU DEV membership in the My Membership section.
You can click the Edit Profile link at the top-right at any time to update your WPMU DEV profile.
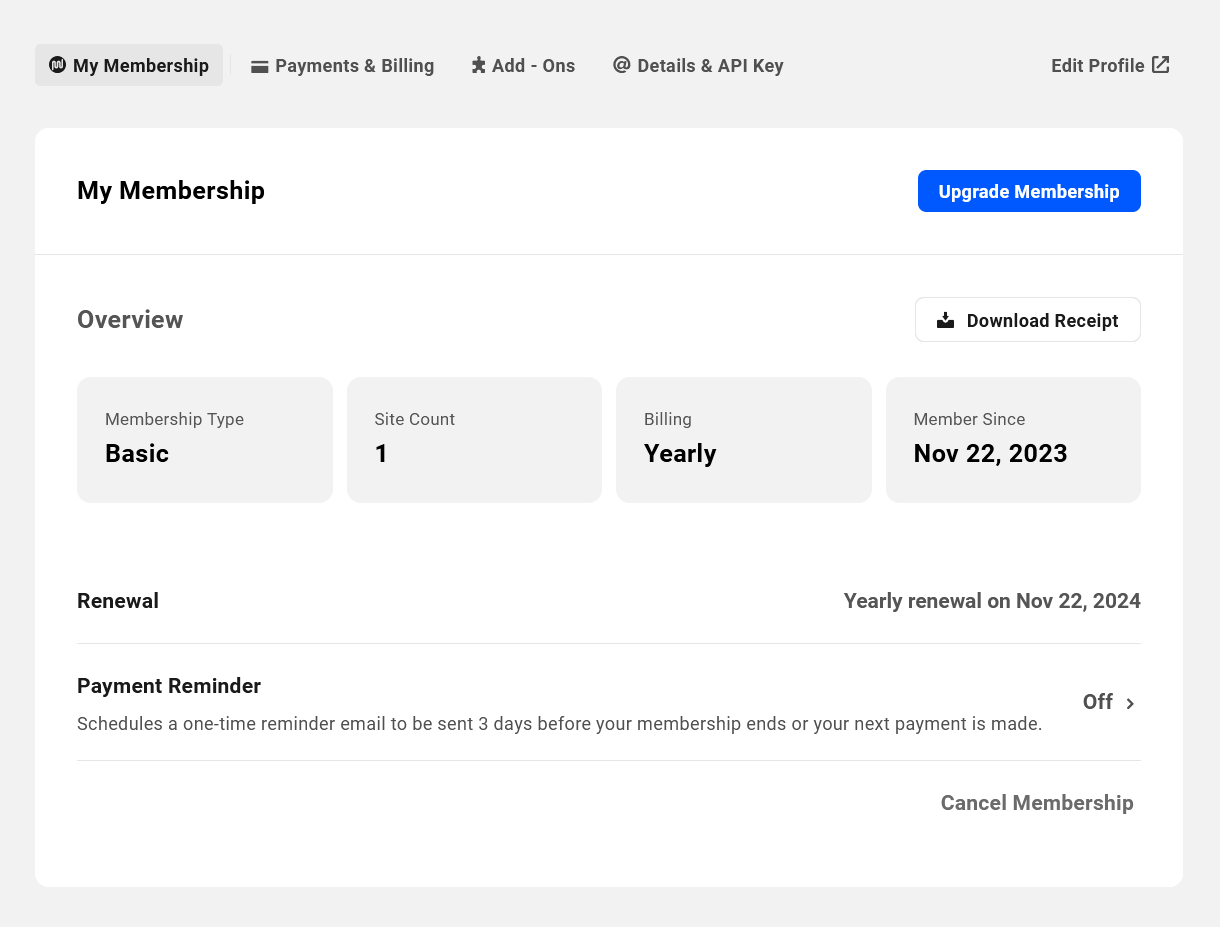
If you are on our Free, Basic, Standard or Plus memberships, you can click the Upgrade Membership button to move to a higher plan with more features if desired (this button will not appear if you are already on our Premium plan).
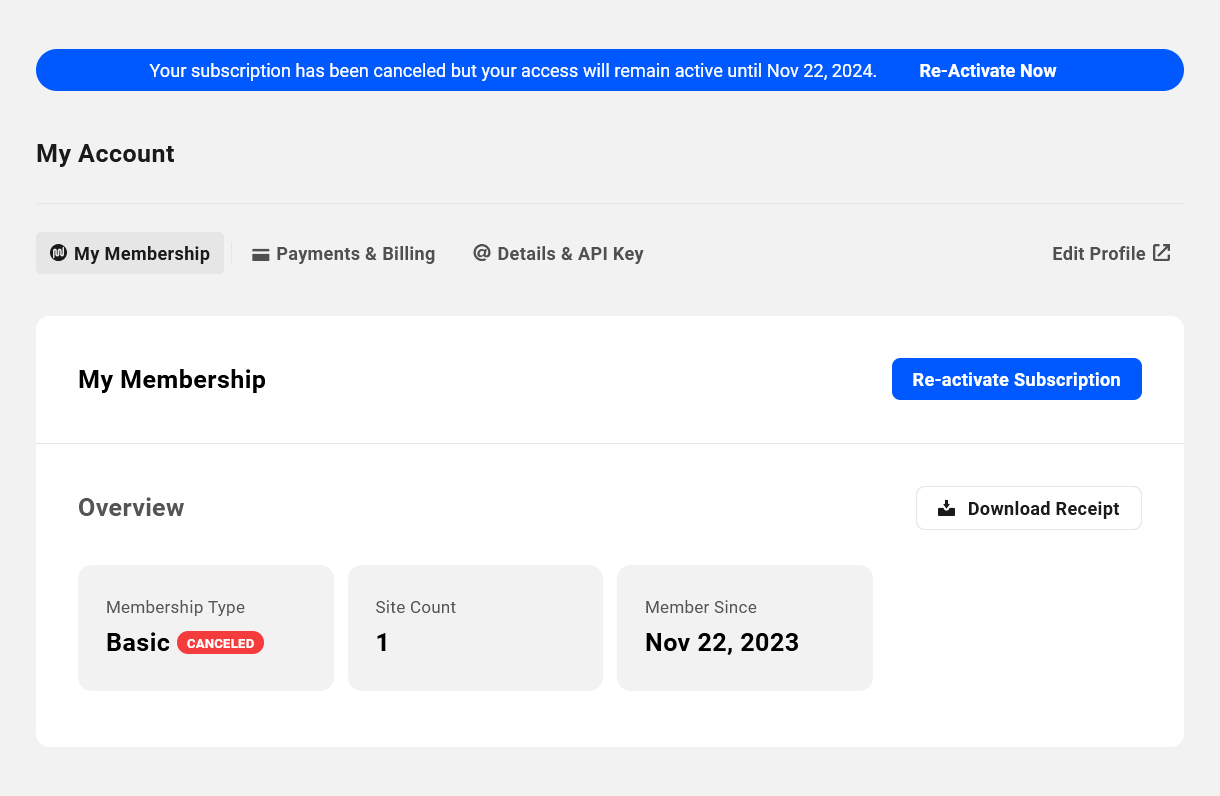
Overview
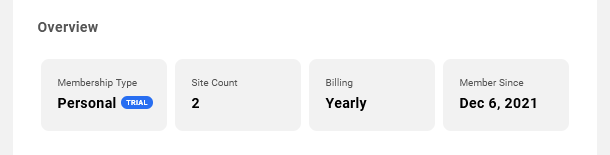
The Overview section on this screen displays the following information:
- Membership Type – This is the membership plan you are currently subscribed to.
- Site Count – The number of 3rd-party-hosted sites that you can add & manage in your Hub according to the membership plan you’re subscribed to.
- Billing – The billing frequency of your membership.
- Member Since – The date you first signed up to WPMU DEV.
Renewal
This indicates the frequency and date upon which your membership will renew and a new invoice payment will be automatically made with the credit card you have set under the Payments & Billing tab.

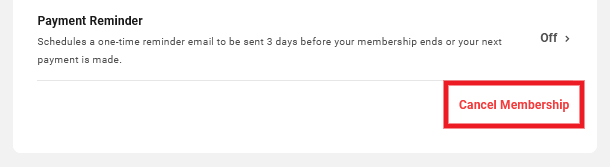
Payment Reminder
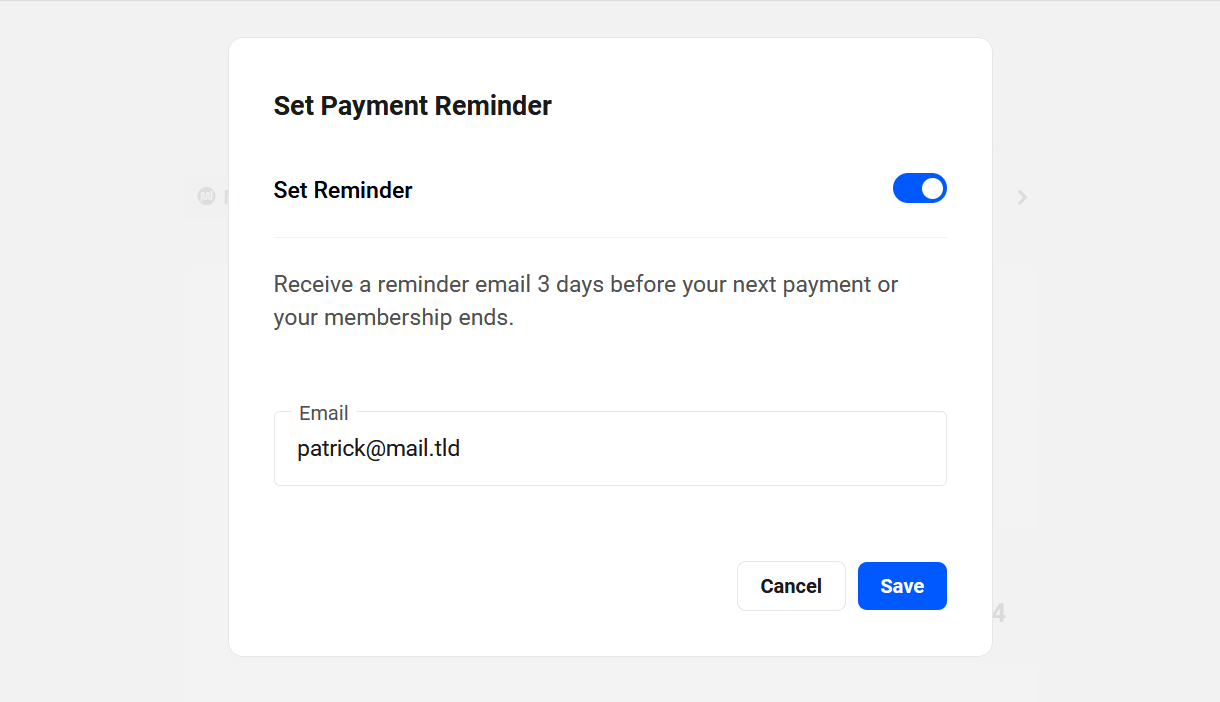
Enable this option to receive a reminder email 3 days before your membership expires or your next payment is scheduled to be made.

Click the Off link to pop open a modal window where you can turn on the reminder and specify the email address where the reminder email should be sent.
Cancel Membership
You can cancel your membership at any time by clicking the Cancel Membership link at the bottom of this screen. A window will open to prompt you to confirm the action.
If you do cancel, you will continue to have access until your current payment period expires. A notice will appear on this screen to remind you of the expiry date. You’ll also see options to Re-Activate your subscription should you so wish.
26.3 Payments & Billing
Copy chapter anchor to clipboardIn the Payments & Billing section, you’ll find everything you need to manage your payments for all your WPMU DEV products & services.

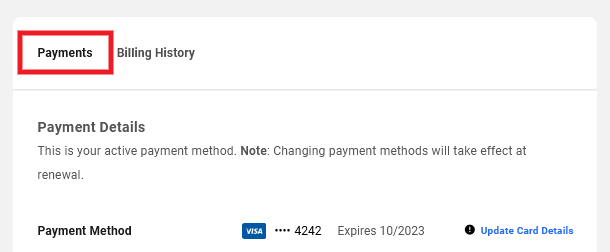
26.3.1 Payments
Link to chapter 3Under the Payments tab, you can view & manage the payment method you have on file with us, view any available credit you may have, as well as preview your next scheduled payments.
Payment Details
This indicates the brand, the last 4 digits and the expiry date of the credit card you currently have on file for all WPMU DEV payments. If you need to change to a different card, click the Update Card Details link in the Payment Method row.
You’ll be redirected to a form on the checkout page where you can enter the details of your new card. Note that clicking the Update button here will not trigger any charges to your card at this time; it will simply update your payment info which will take effect upon your next payment or subscription renewal.
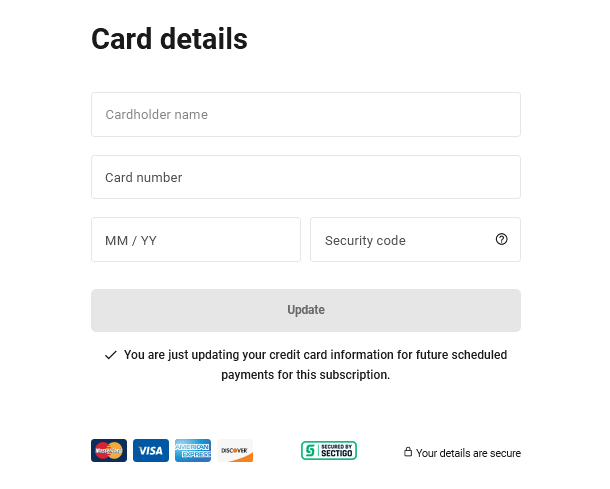
Our default payment gateway is Stripe. The data you enter here is sent securely to Stripe and is stored securely only there. Please see the Stripe Global Privacy Policy for details.
Credit
If you have any available credit in your account, that amount will be displayed here including hosting credits.
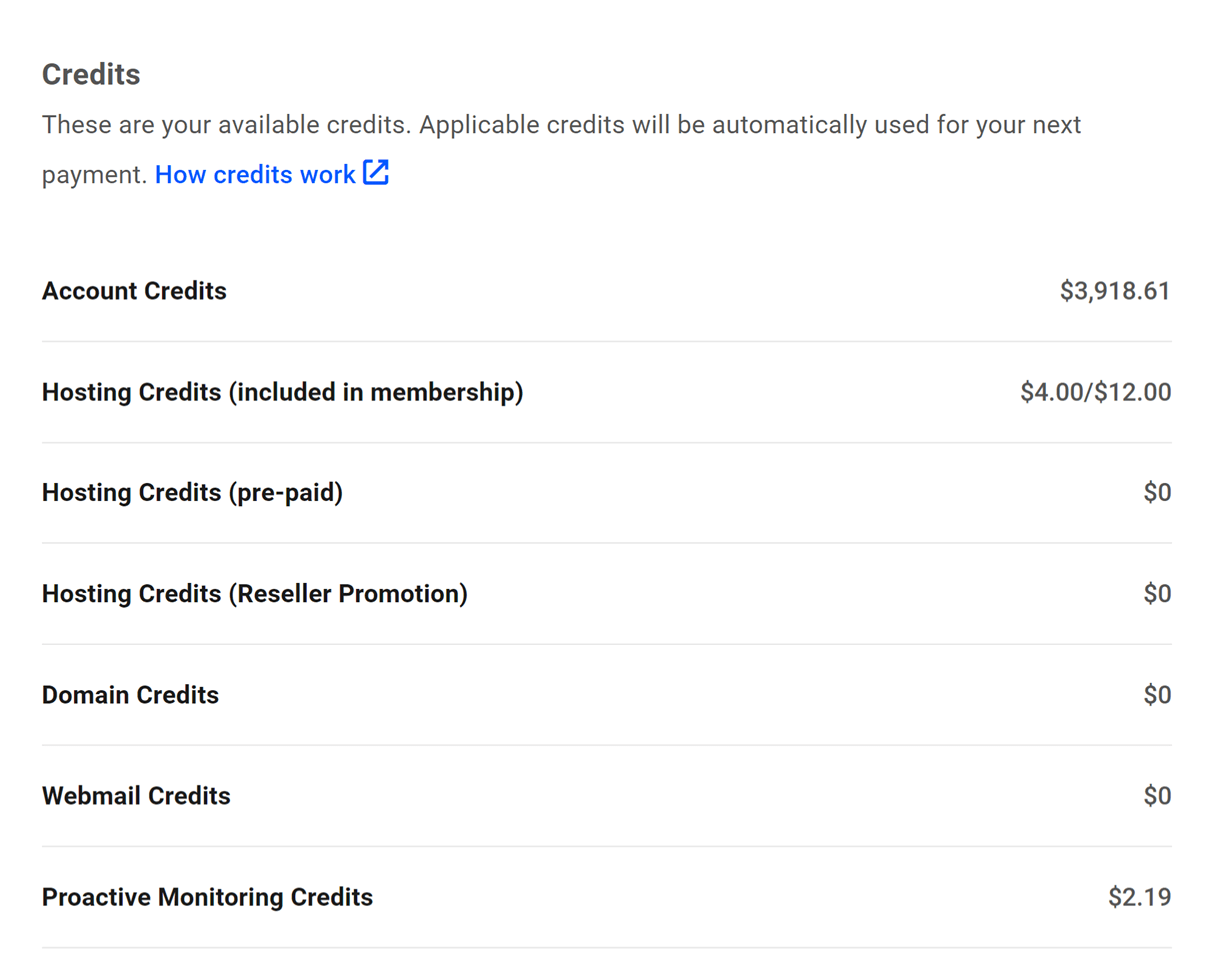
- Account Credits – The membership credits that you may have received as a refund or a prorated adjustment. These credits do not expire and can be used for additional purchases or will be automatically applied on your next scheduled payment, whichever comes first.
- Hosting Credits (included in membership) – This is the amount of monthly hosting credit included with your hosting plan or membership, if any. These credits do not accrue, and are applied automatically to any due monthly hosting payment. Note that hosting credits (included in the membership) can only be used for monthly hosting plans and cannot be used for the payment of any yearly hosting plan.
- Hosting Credits (pre-paid) – Any available hosting credits you may have pre-purchased during any past promotion. These credits do not expire and are applied automatically to any due monthly hosting payment.
- Hosting Credits (Reseller promotion) – This is the amount of Reseller hosting credits you may have received as part of our Reseller promotion, if any. These credits expire after 6 months and are applied automatically to hosting payments for sites created by your clients through our Reseller feature.
- Domain Credits – This is the amount of free domain credits that you earn when you purchase a site with WPMU DEV annual hosting. These credits can be used to purchase a domain in WPMU DEV. These credits do not expire and can be used to purchase a domain anytime in the future.
- Webmail Credits – This is the amount of webmail credits that you earn when you purchase a site with WPMU DEV annual hosting. These credits can be used to purchase a webmail account. These credits do not expire and can be used to purchase a webmail account anytime in the future.
- Proactive Monitoring Credits – This credit type is displayed only if you have any available proactive monitoring credits. These credits can be used to purchase the Proactive Monitoring service for any of your hosted sites. They will expire automatically after the specified period. You can use the credits on both new and existing sites. If you use the credits to purchase and cancel the subscription later, the credits will not be refunded or pro-rated.
Note that these credits can only be used to purchase the Proactive Monitoring service and cannot be used for other add-ons (such as CDN, Storage, Hourly Backups), payments, or Expert services.
For example, if you have $200 in Proactive Monitoring Credits and already have sites hosted with us, you can use the credits to purchase the proactive monitoring service for any number of sites until the credits run out, and your added payment method won’t be used.
If you don’t have enough credits to cover the entire purchase, any available proactive monitoring credits will be applied, and the remaining amount will be billed to your payment method.
Also, if the credits are not used during the purchase of the service, they will be automatically applied to the service renewal in the next billing cycle, unless they expire before the renewal period.
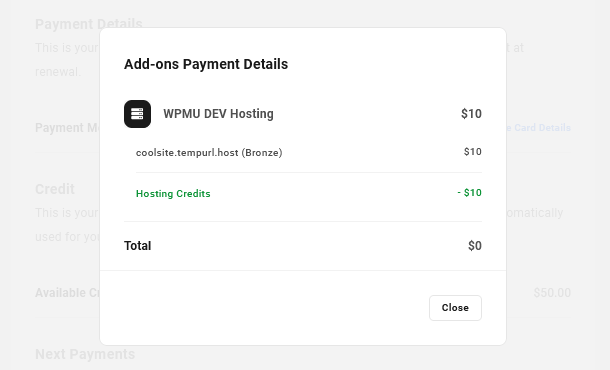
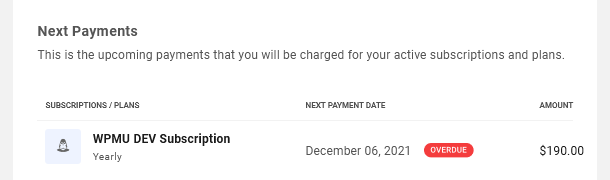
Next Payments
This section will display information about the next upcoming payments for any WPMU DEV products & services you’re subscribed to, including the Subscriptions/Plans, Next Payment Date and the Amount.

Click the View Details link next to any addon to pop open a modal window with all the details about the purchased addon.
If any subscription payment is overdue, you’ll see an Overdue label appear next to the date so you can take necessary action.
26.3.2 Billing History
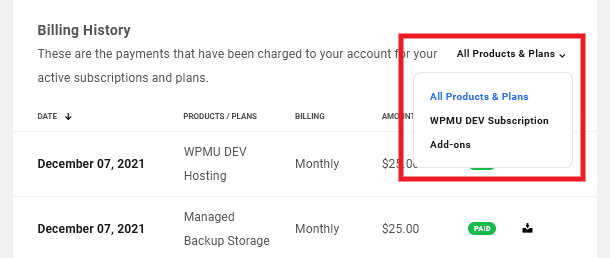
Link to chapter 3Under the Billing History tab, you’ll see all the payments you have made for all your WPMU DEV products & services.
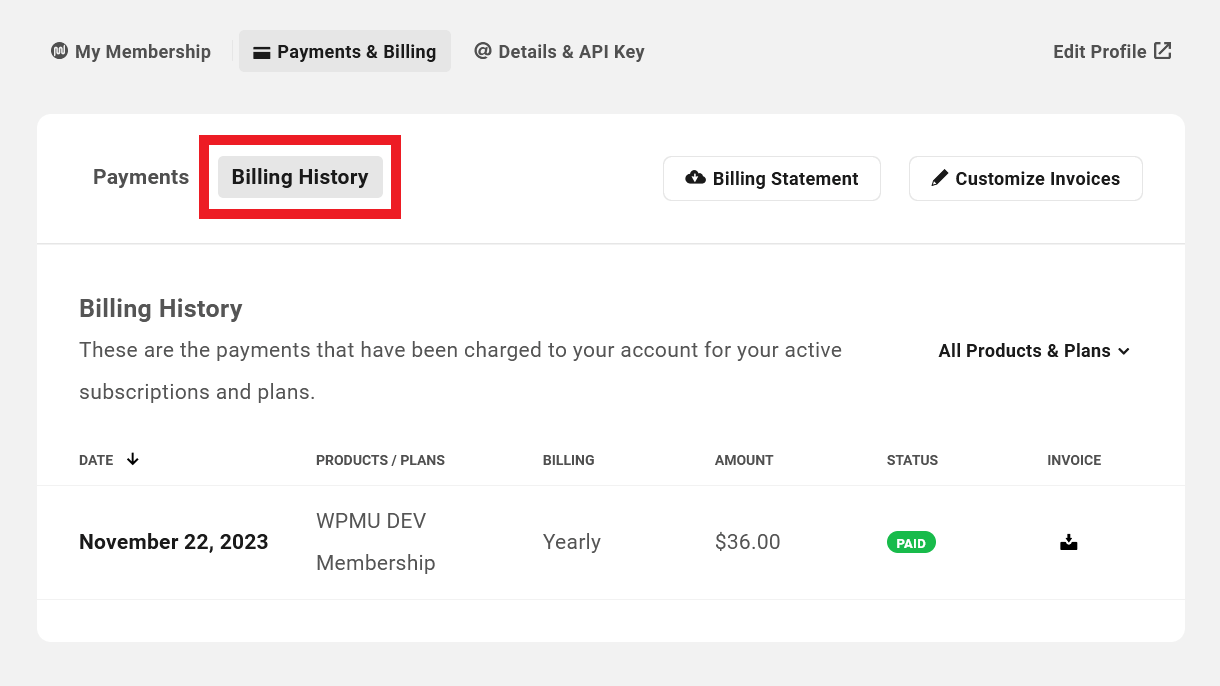
The list displays the following information:
- Date – The date the invoice was paid.
- Products / Plans – The products for which the invoice was generated.
- Billing – This indicates the billing frequency for the product.
- Amount – The net amount of the invoice.
- Status – This defaults to Paid.
- Invoice – Click the icon in any row to download the corresponding invoice as a PDF.
Use the Filter option to list invoices only from your WPMU DEV subscription, only add-on products, or everything.
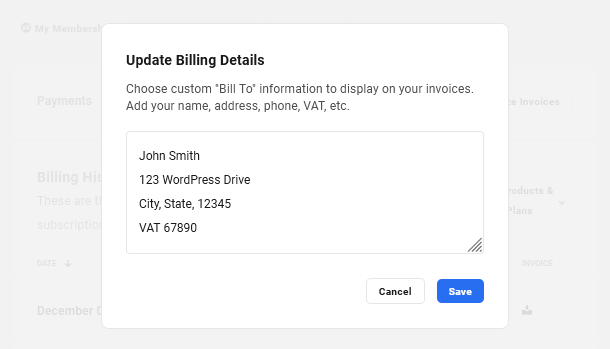
You can customize the information that should be included on all your invoices from WPMU DEV by clicking on the Customize Invoices button.

That will pop open a modal window where you can enter any information you wish to be included.
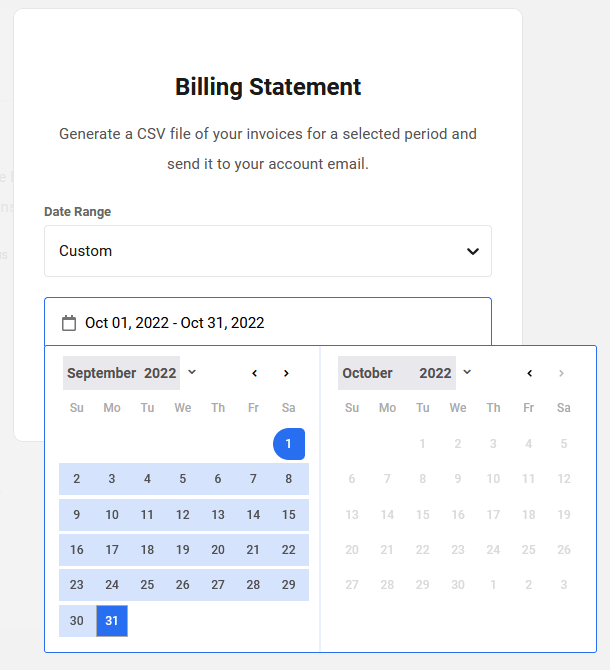
You can also export a summary of your invoices for a specified period as a CSV file.
Click the Billing Statement button.

In the modal window that pops open, you can choose from the pre-defined ranges or manually select the start and end dates on the calendar.
Click the Generate button.
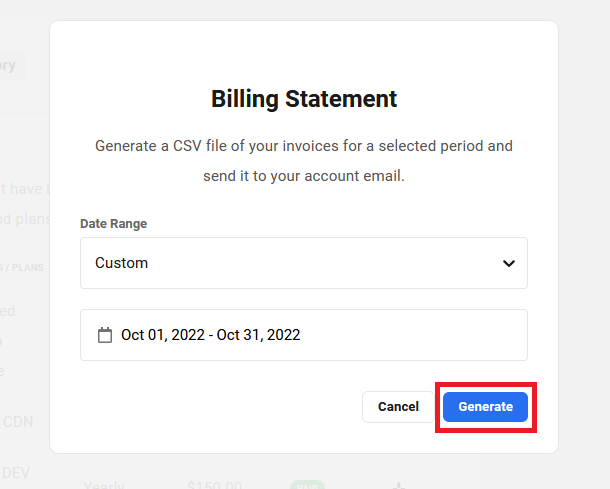
Once the billing statement file is generated, you will receive an email with the CSV file attached. It includes the following information for each invoice:
- Invoice Date
- Invoice Number
- Currency
- Status
- Billing Period
- Subscription (product/plan)
- Subtotal
- Discount (Free Sites)
- Pre-paid Hosting Credits
- Account Balance
- Tax (GST)
- Total
- Amount Paid
- Balance Due
- Payment Date
- Payment Method
- Transaction ID
26.4 Add-Ons
Copy chapter anchor to clipboardThe Add-Ons section is where you’ll find all the available WPMU DEV add-on services that you can purchase, as well as the status for each one in your account.
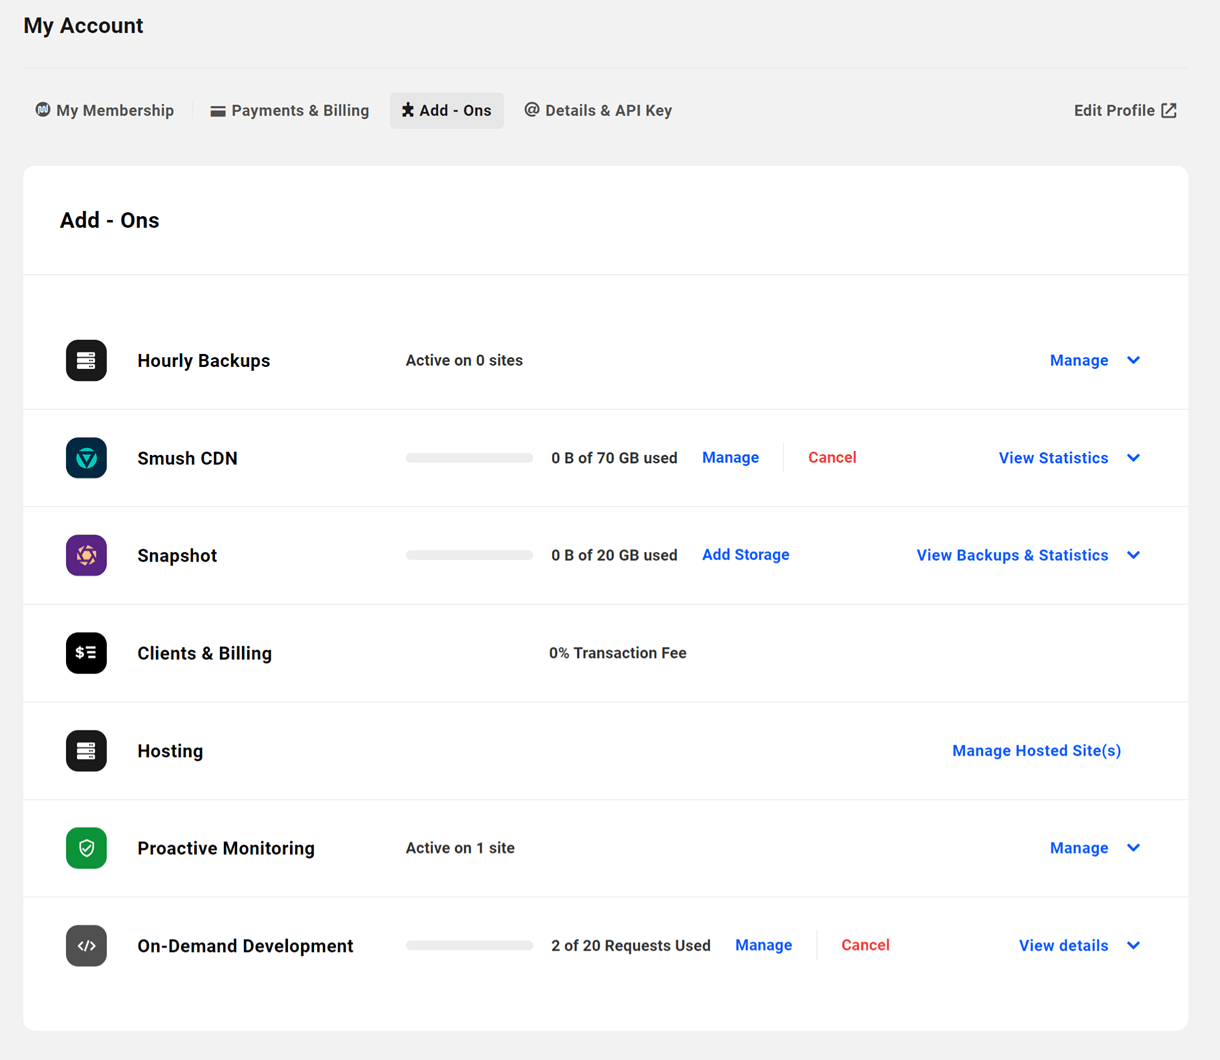
Currently, the available WPMU DEV add-ons include:
- Hourly Backups – You can purchase this add-on for any site hosted by WPMU DEV to provide up to 720 restore points per 30-day period. Ideal for sites with frequent changes like e-commerce stores.
- Smush CDN – You can purchase increased bandwidth plans for the Smush CDN. The Storage column here indicates your current bandwidth plan.
- Snapshot – You can purchase increased storage plans for backups made with the Snapshot plugin. The Storage column here indicates your current storage plan.
- Clients & Billing – This add-on is enabled by default for all members. The applicable transaction fee that applies to your membership is displayed here.
- Hosting – Clicking the Manage Hosting Plan link will redirect you to the Hosting tab in your Hub where you can manage any sites you have hosted with us.
- Proactive Monitoring – You can purchase this add-on for your WPMU DEV hosted sites to allow our expert team to monitor your site(s) for any downtime proactively.
- On-Demand Development – You can purchase this add-on if you need help with any custom CSS or code functionality for your WordPress site.
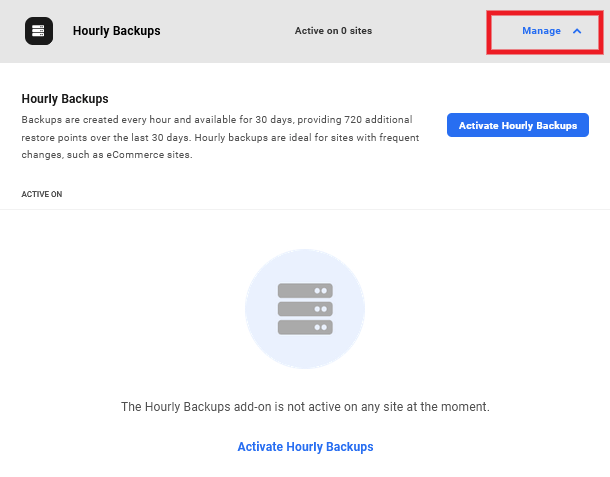
26.4.1 Hourly Backups
Link to chapter 4Hourly Backups is a paid add-on that you can activate on any or all of your WPMU DEV hosted sites. This add-on gets you up to 720 automatic backups & restore points every month, which can be a lifesaver if you’re running an active e-commerce store.
Please note that hourly backups are not available for sites hosted on the Quantum plan. See Quantum Plan Restrictions for details.
Click the Manage link in the Hourly Backups row to expand the list of sites where the add-on is active. If you haven’t yet activated it for any sites, the list will of course be empty.
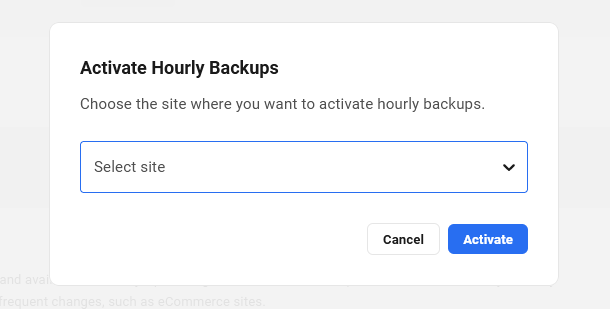
Click the Activate Hourly Backups button or link to pop open a modal window where you can select the site on which to activate the add-on. Note that if you wish to activate this add-on on multiple sites, you’ll need to do it one at a time as there is no bulk activate functionality at this time.
Once you’ve activated the add-on on at least one site, you’ll see them listed in the Active On section.
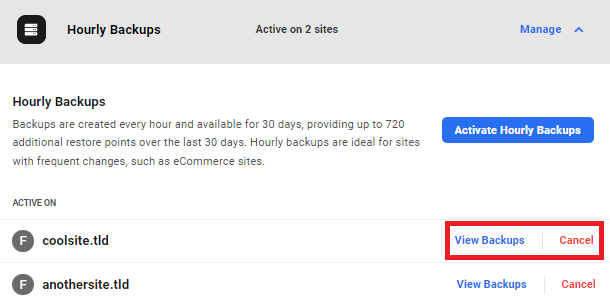
Click the View Backups link for any site in the list to be directed to the Hosting > Backups screen for that site in your Hub.
You can deactivate the add-on at any time for any site by clicking the Cancel link in that site’s row.
Note that if you clone a site where the hourly backups add-on is active, or if you recreate a deleted site where it was active, the add-on will not be automatically activated on the new site.
Missing Some Backups?
Hourly backups are incremental and are stored for 30 days, just like regular daily backups, and a full backup is still made every 15 days.
If a full backup is already running, hourly backups will be skipped until the full backup has completed. So it is possible that you may see less than 24 backups in a day when a full backup has been made.
If an hourly backup is taking longer than one hour to complete for any reason, the next scheduled hourly backup would of course be skipped as only one backup operation can run at any given time on a site.
Hourly backups would also be skipped if the site is experiencing issues and is not responding.
Please don’t hesitate to start a live chat if you have any issues with the hourly backups add-on.
26.4.2 Smush CDN
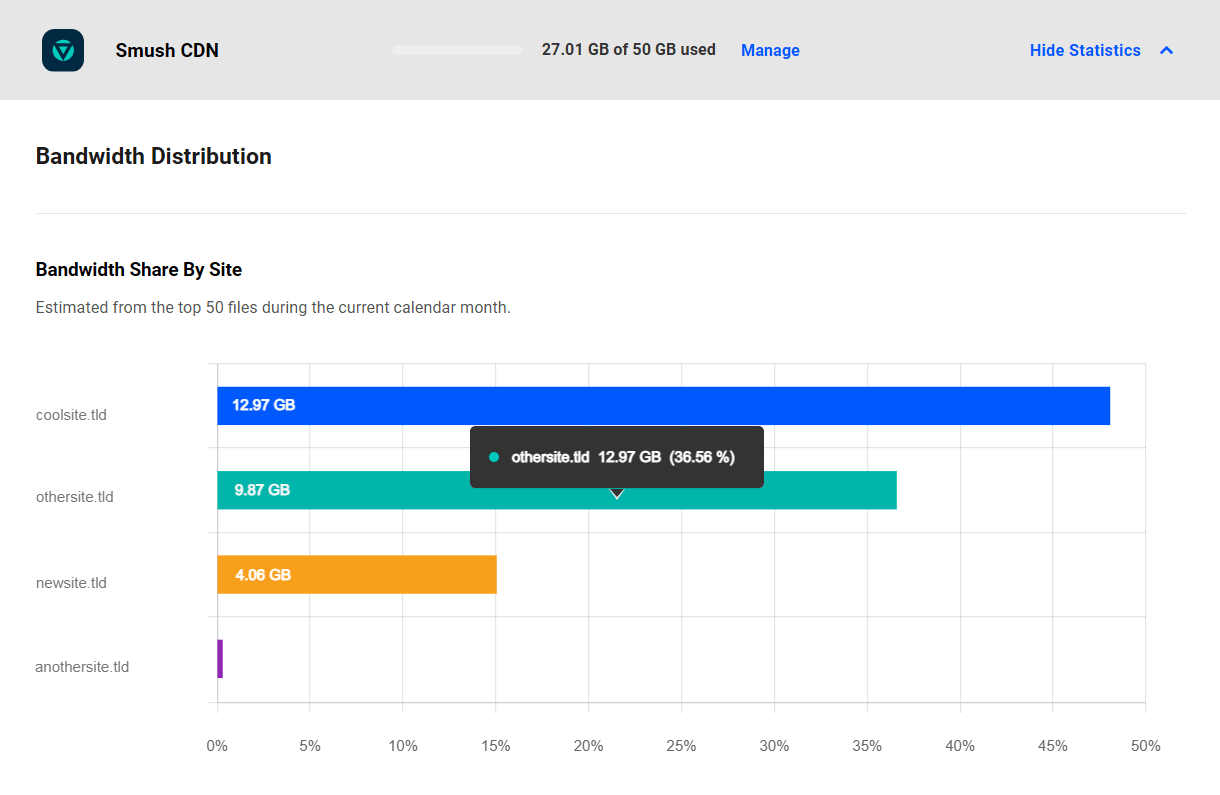
Link to chapter 4Click the View Statistics link on the far-right of the Smush CDN row to toggle open a display of your CDN usage for all your sites during the current calendar month.
You’ll see a site-by-site breakdown to gain insight into which sites are using the most of your available Smush CDN bandwidth.
Note that this breakdown is an estimate of bandwidth use based on the 50 most-requested files across all your sites where Smush CDN is in use.
Purchasing Additional Bandwidth
If your total bandwidth usage for the current calendar month is near or over your allowed limit, you can increase your allotted bandwidth by purchasing an addon plan.
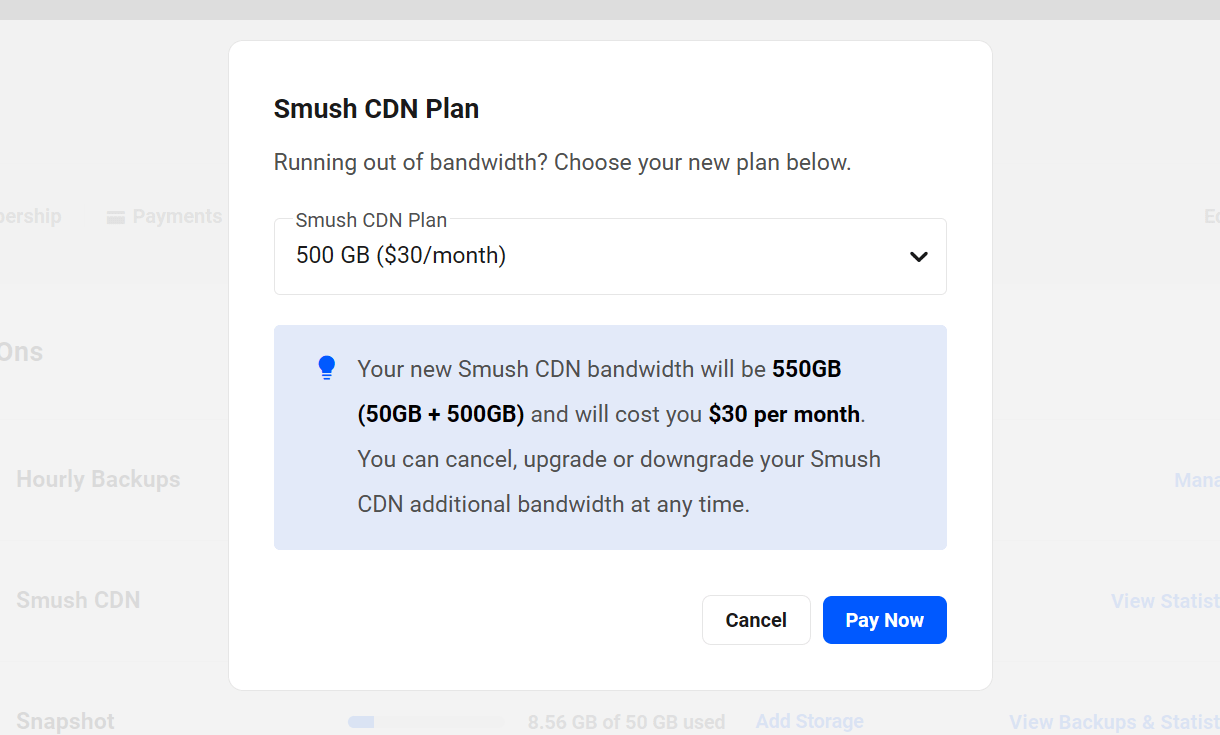
Any plan you purchase will add the paid-for bandwidth to the amount included with your membership. For example, if you are subscribed to our Premium membership, you’d have 50GB bandwidth included. So if you purchase an additional 250GB, that would increase your total available bandwidth to 300GB/month.
Click the Manage link in the Smush CDN row to pop open a modal window where you can select the plan that best meets your growing needs.
You can purchase addon plans from as little as 50GB up to a whopping 10Tb/month.
26.4.3 Snapshot Backups
Link to chapter 4Click the View Backups & Statistics link on the far-right of the Snapshot row to toggle open the statistics for your Snapshot backups.
All Backups
Under the All Backups tab, you’ll see a list of all backups made by the Snapshot plugin for all your sites where it’s active.
Use the filter option to display only backups for Active or Deleted sites, or All Sites.
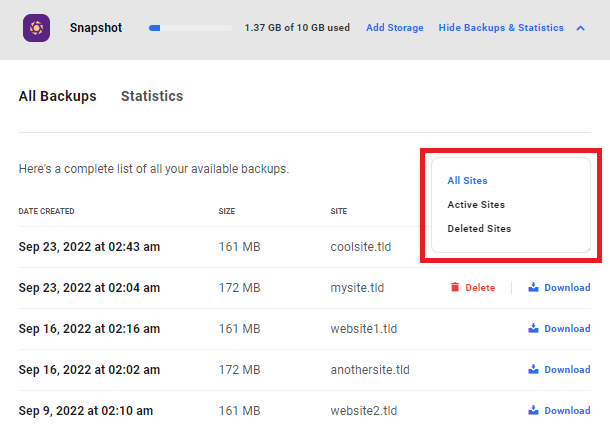
Click the Download link in any backup’s row to download it. Click the Delete link in any backup’s row to delete that backup if needed.
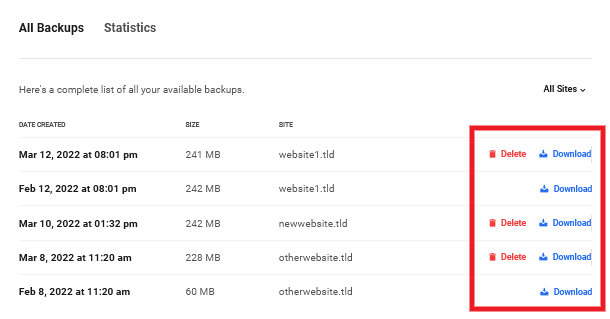
Remember that Snapshot backups are incremental. So for any site, you can only Delete one at a time for any site, starting with the most recent one of that site. See our Snapshot documentation for more info.
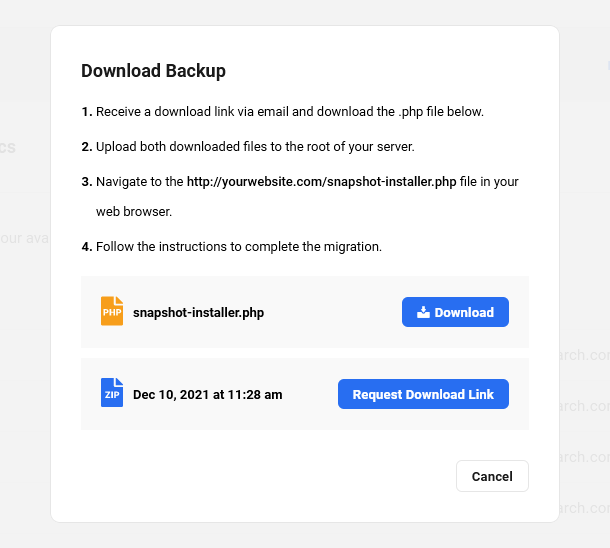
Clicking the Download link will pop open a modal window where you’ll find instructions on how to download the full backup. You can also download the snapshot-installer.php file which is required if you ever need to restore a backup for a site that is inaccessible.
Statistics
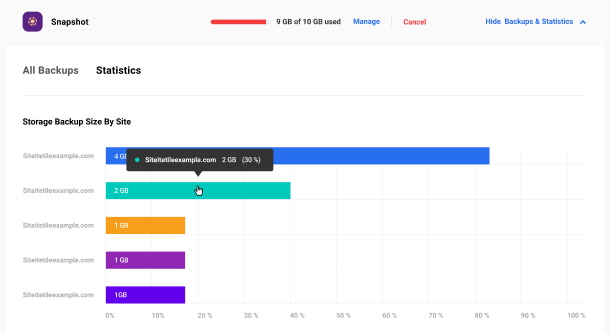
Under the Statistics tab, you’ll find a handy chart indicating the total size of all Snapshot backups for each of your sites, as well as the relative percentage of storage used by each compared to all sites.
Tools
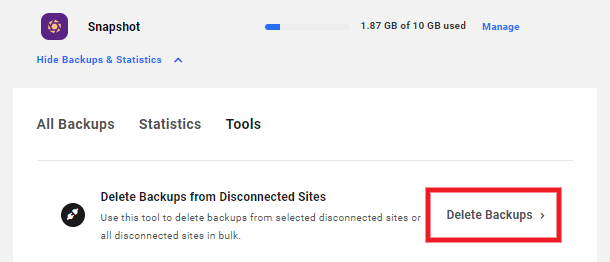
Under the Tools tab, you’ll find an option to delete old backups from sites that you have disconnected from your Hub so you can recover the storage space that may still be used by them.
Click the Delete Backups link to begin.
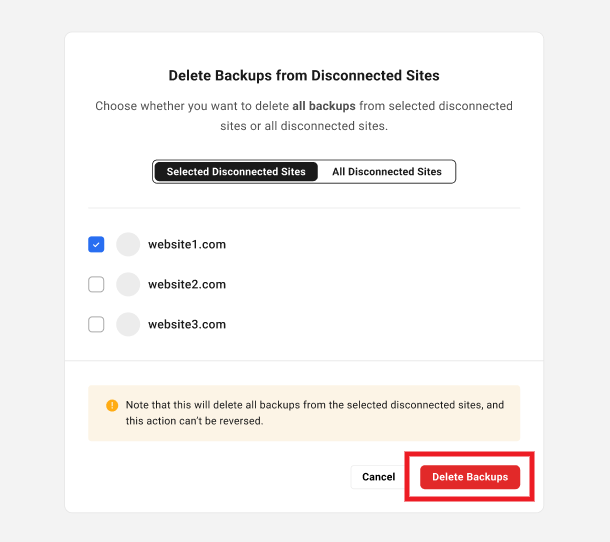
That will pop open a modal window where you’ll be prompted to choose to delete all backups from Selected Disconnected Sites, or delete them from All Disconnected Sites.
Click Delete Backups to finish.
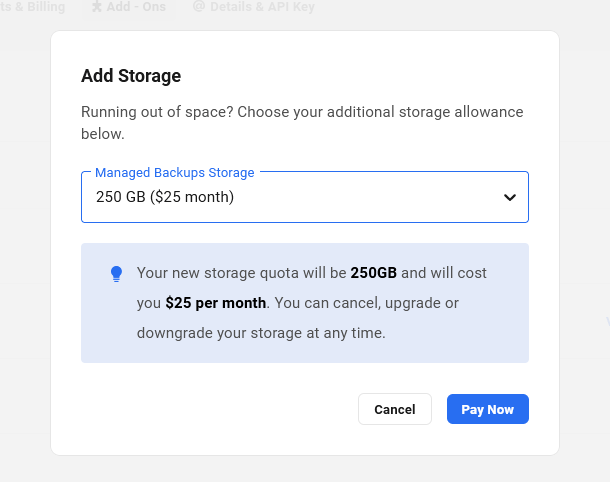
Purchasing Additional Storage
If your total Snapshot backup storage used is near the limit, you can increase your allotted storage by purchasing an addon plan.
Click the Add Storage link in the Snapshot row to pop open a modal window where you can select the plan that best meets your growing needs.
You can purchase addon plans from as little as 100GB up to a whopping 1Tb.
26.4.4 Proactive Monitoring
Link to chapter 4Proactive Monitoring is a paid add-on that you can activate on any site connected to your Hub.
Click the Manage link in the Proactive Monitoring row to view the list of sites where the add-on is active. If you haven’t yet activated it for any sites, the list will be empty.
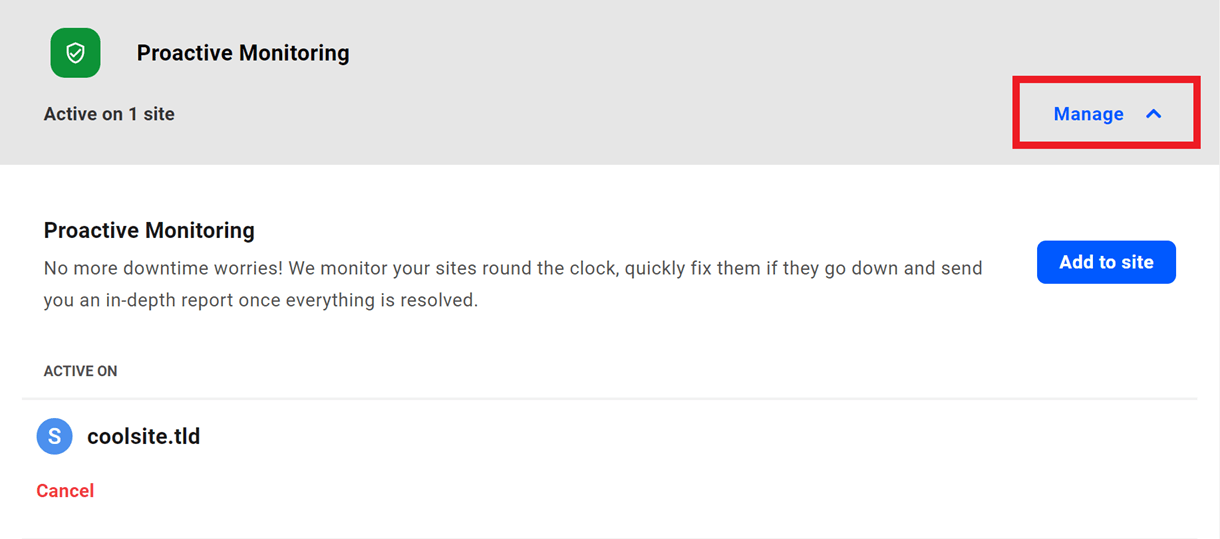
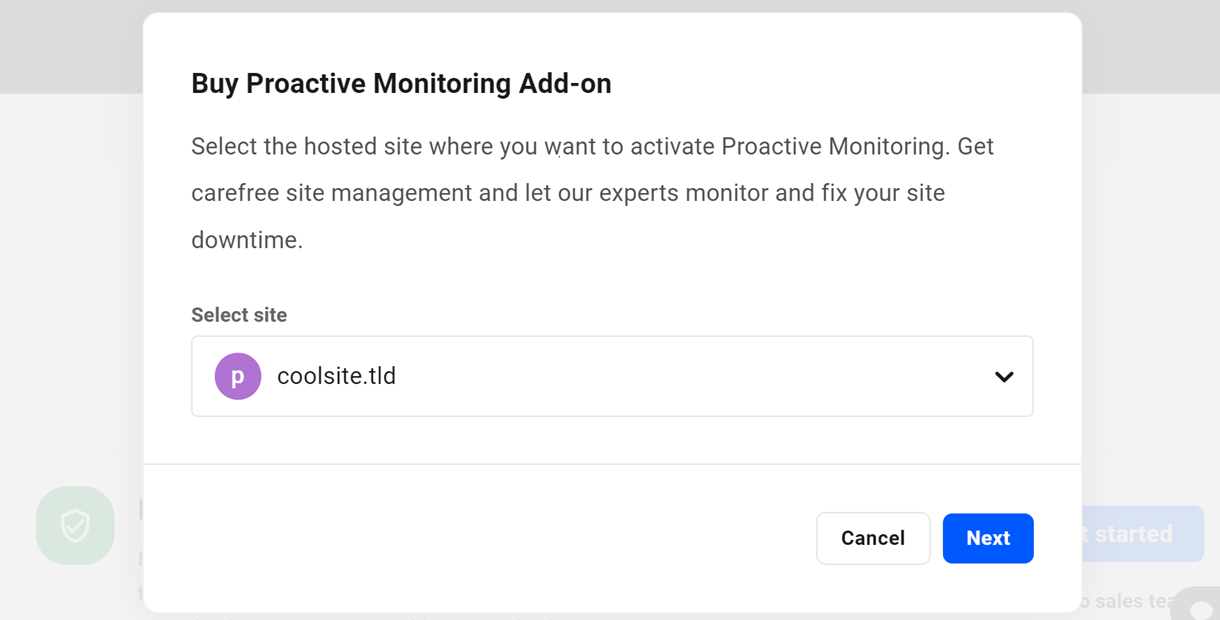
Click the Add to Site button to pop open a modal where you can select the site on which you want to activate the add-on.
Note that if you wish to activate this add-on on multiple sites, you’ll need to do it one at a time as there is no bulk activate functionality at this time.
Once you’ve activated the add-on on at least one site, the site name will be listed in the Active On section.
You can deactivate the add-on at any time for any site by clicking the Cancel link next to the site’s name.
26.4.5 On-Demand Development
Link to chapter 4On-Demand Development is an add-on that you can purchase for any of your sites connected to the Hub if you need any custom code or CSS help from our developers.
Click the Manage link in the On-Demand Development row to upgrade or downgrade your existing plan and select the preferred plan.
Click the View Details link to view the information about all the requests made, with a link to view the forum ticket associated with each request. If you haven’t created any requests yet, you can create new ones here.
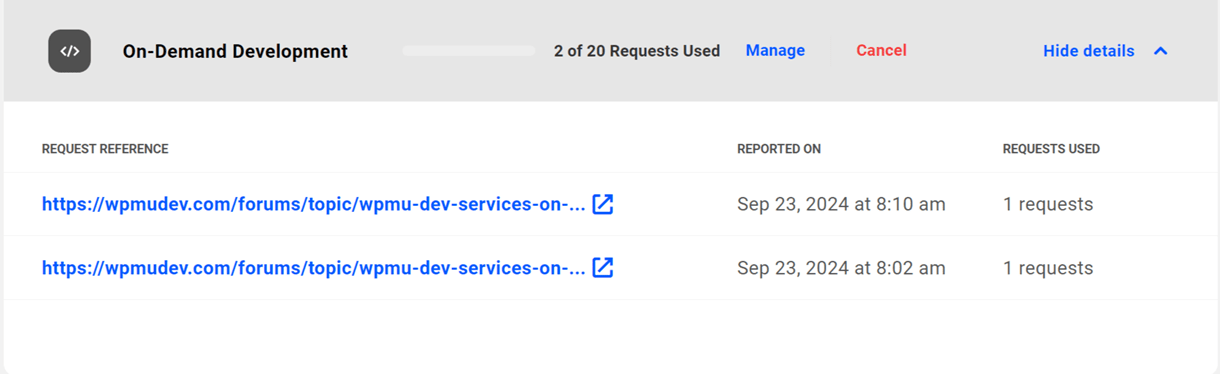
If you wish to cancel the subscription, click Cancel.
26.5 Details & API Key
Copy chapter anchor to clipboardThe Details & API Key section contains information related to your WPMU DEV account.
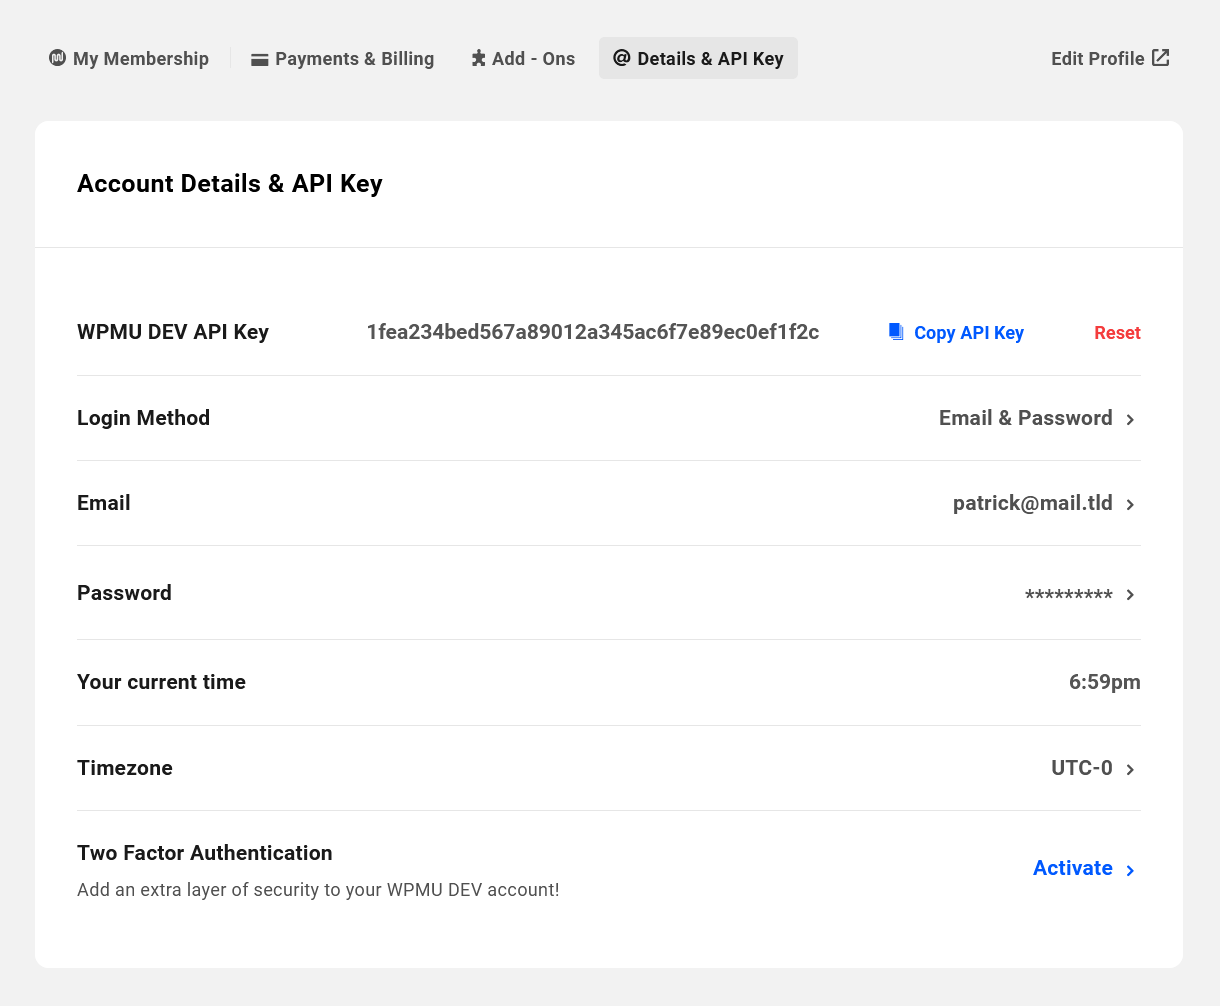
WPMU DEV API Key
This is the unique identifier for your account which is used by our API. Your API Key is what enables the WPMU DEV Dashboard plugin on your sites and your Hub to securely communicate with each other and with our servers.
If you need to copy your API key for any reason, simply click the Copy API Key link.
If you are experiencing issues connecting to WPMU DEV for any services, you may want to consider resetting your key. Click the Reset link to do that.
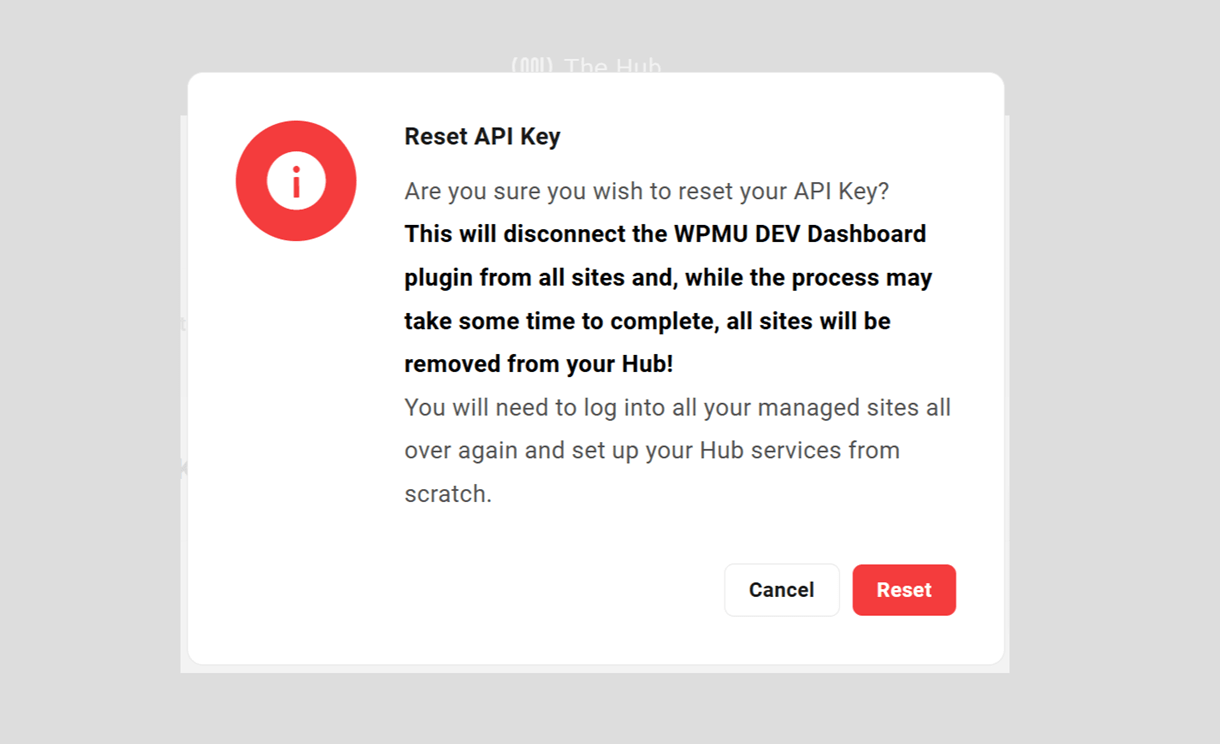
Note that resetting the API key will disconnect all sites from the Hub. However, third-party sites might experience a delay before they are fully disconnected.
Resetting your API key immediately logs you out of the WPMU DEV Dashboard on all your sites. This disconnects all sites from your Hub and reverts all Pro plugins to their free versions. You would need to log back into and re-connect each site individually. Please contact our support team for help before you consider resetting your API key.
Login Method
You can choose to use either your Google Account or Email & Password as your preferred method to log into wpmudev.com, but not both.
If you wish to switch to a different method, click on the current method displayed at the far-right of this row. That will pop open a modal window where you can switch methods.
If you switch to the Google Account method, your current Email & Password method will stop working, and you’ll be redirected to a new window to authenticate your login with Google.

If you switch to the Email & Password method, you will be logged out, and your current Google Account method will stop working. You will receive a link at the email address you provide to set your password.
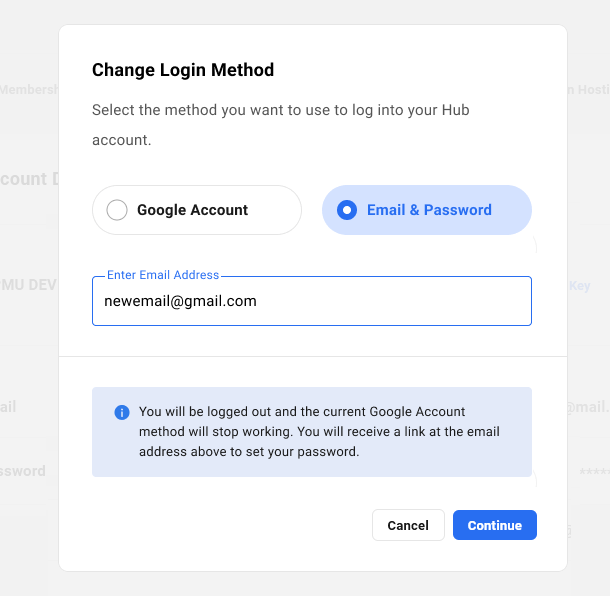
Once you’ve made your selection, click Continue to proceed with the change.
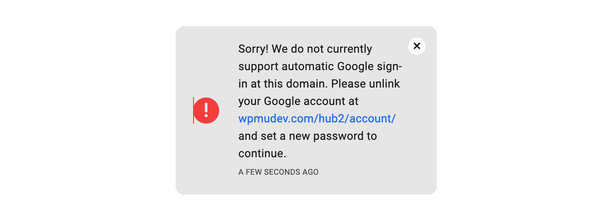
Note that the Google Account method is not supported in the Hub Client plugin. So if you have selected that method here, you will see a reminder to switch to the Email & Password method when logging into your account via the Hub Client.
Having trouble logging in?
The new Login Method selection was implemented in early February 2023 as a security enhancement to prevent account takeovers by malicious actors.
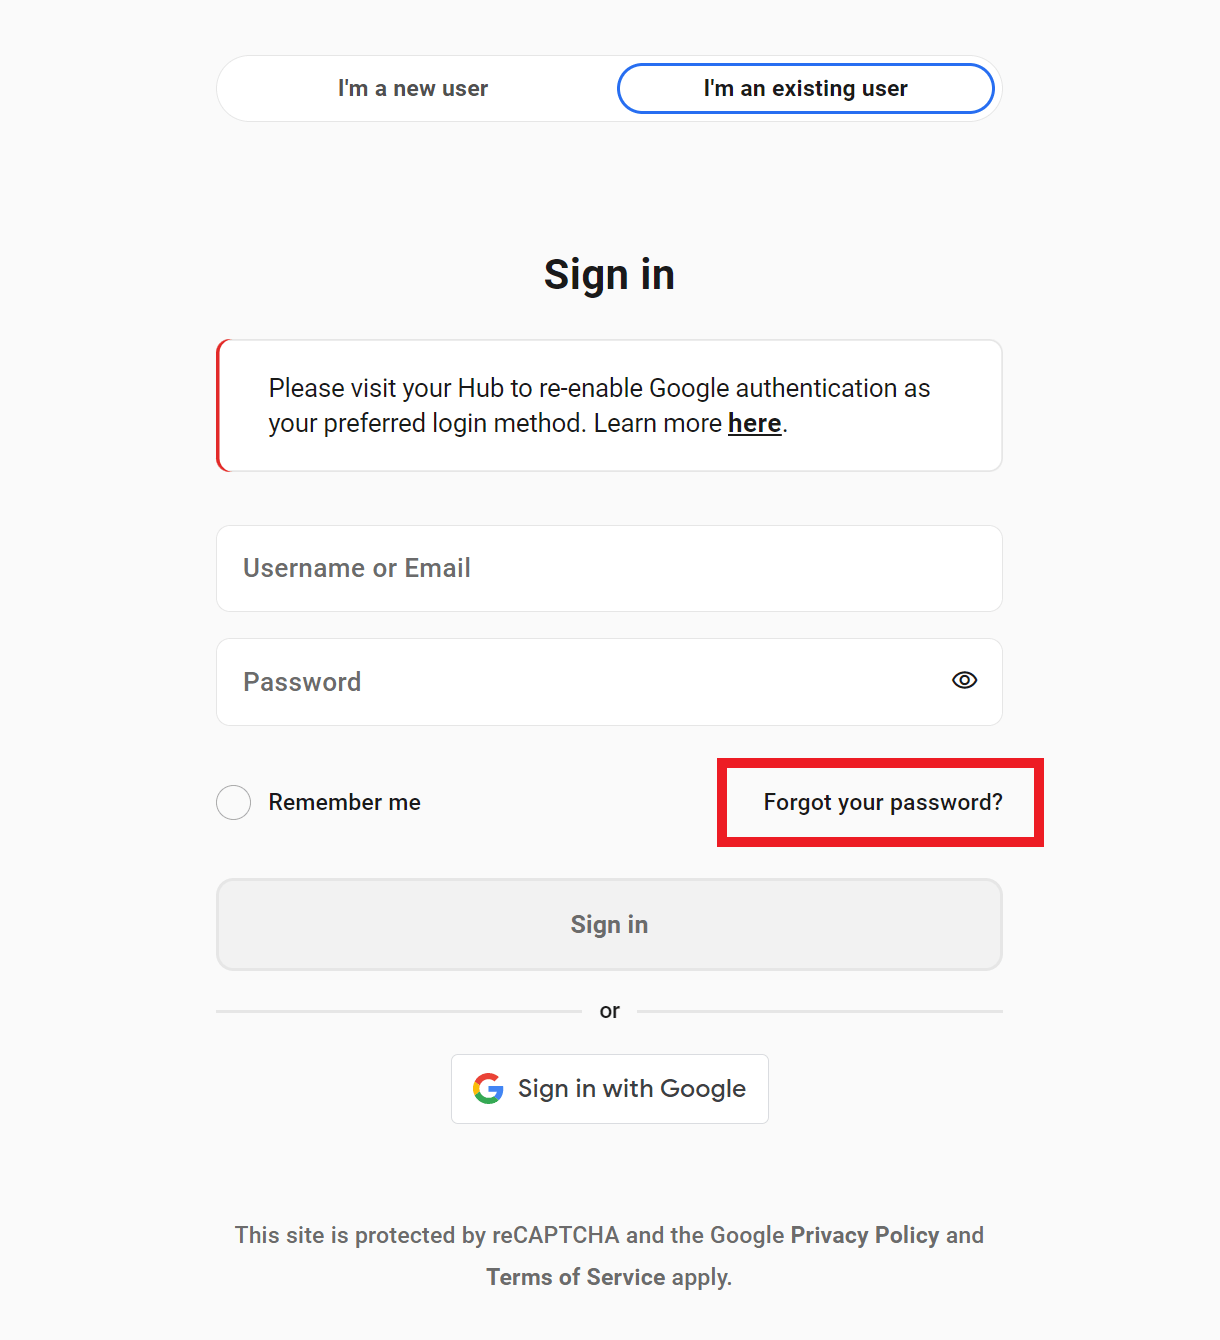
If you are an existing member and were previously using your Google account to authenticate your login to wpmudev.com, you will need re-enable that login method.
Simply log in with your WPMU DEV account email address and password. Then go to My Account in your Hub to set your preferred method.
If you don’t remember your WPMU DEV account password, click the Forgot your password? link in the login form, then enter your WPMU DEV account email address in the field provided and click Reset Password. An email will be sent to you with a link you can click to reset your password. Then log in and select your preferred method as above.
Email Verification
If you have selected to use Email & Password as your login method, we strongly recommend that you also enable Two-Factor Authentication.
If it is not enabled, you will be required to verify your email address every 3 months by entering a one-time security code when you log in.
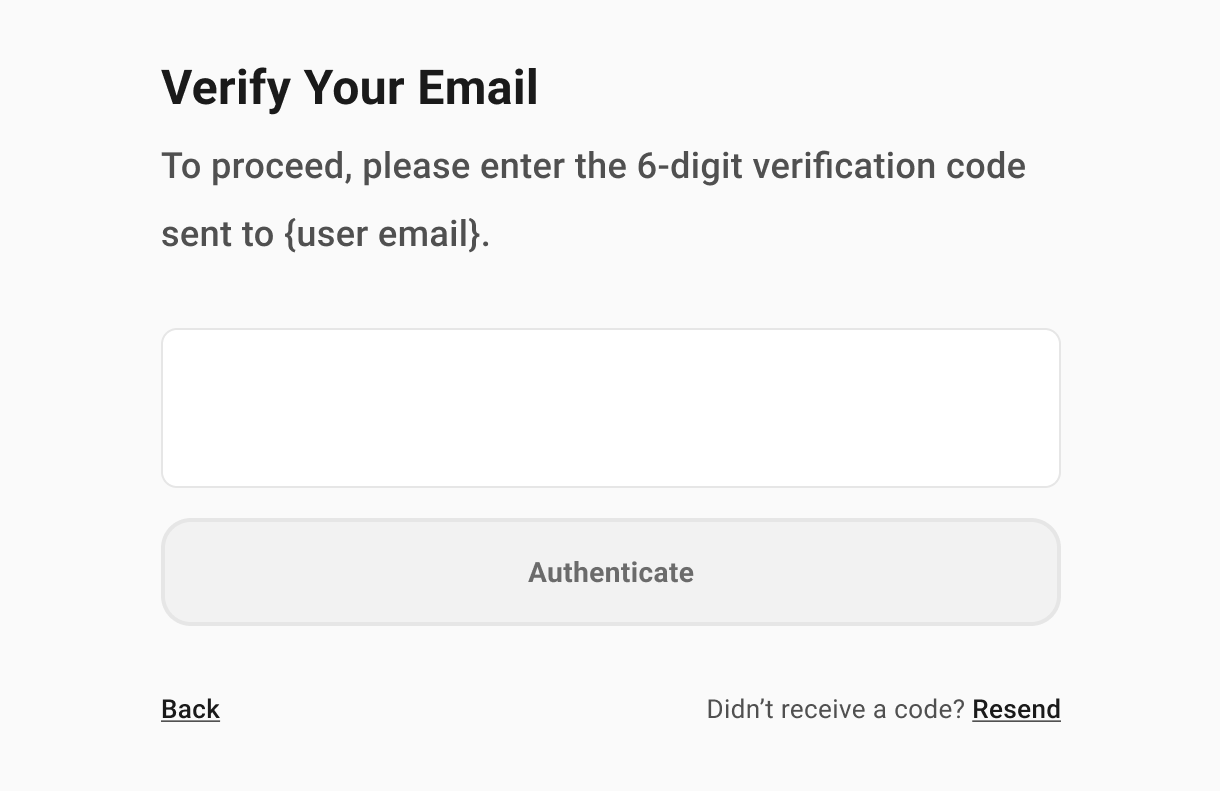
The security code will be emailed to the address you have set in your account, and will be valid for one hour from the time it is sent. If you do not receive the email, you can click the Resend button to send it again.
Once you enable Two-Factor Authentication in your account, you will no longer be prompted to verify your email address.
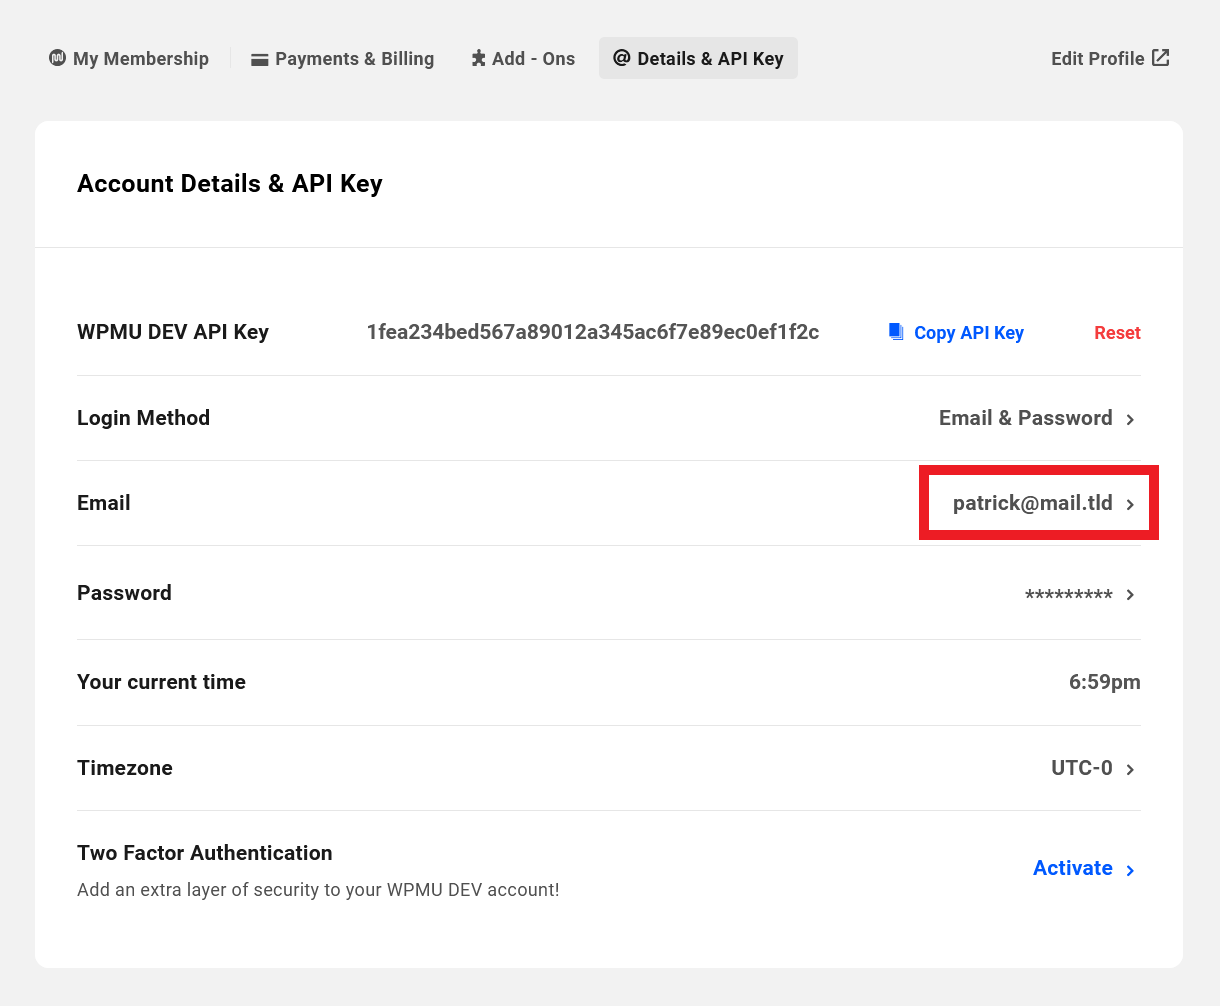
Click the address currently displayed if you need to change your account address.
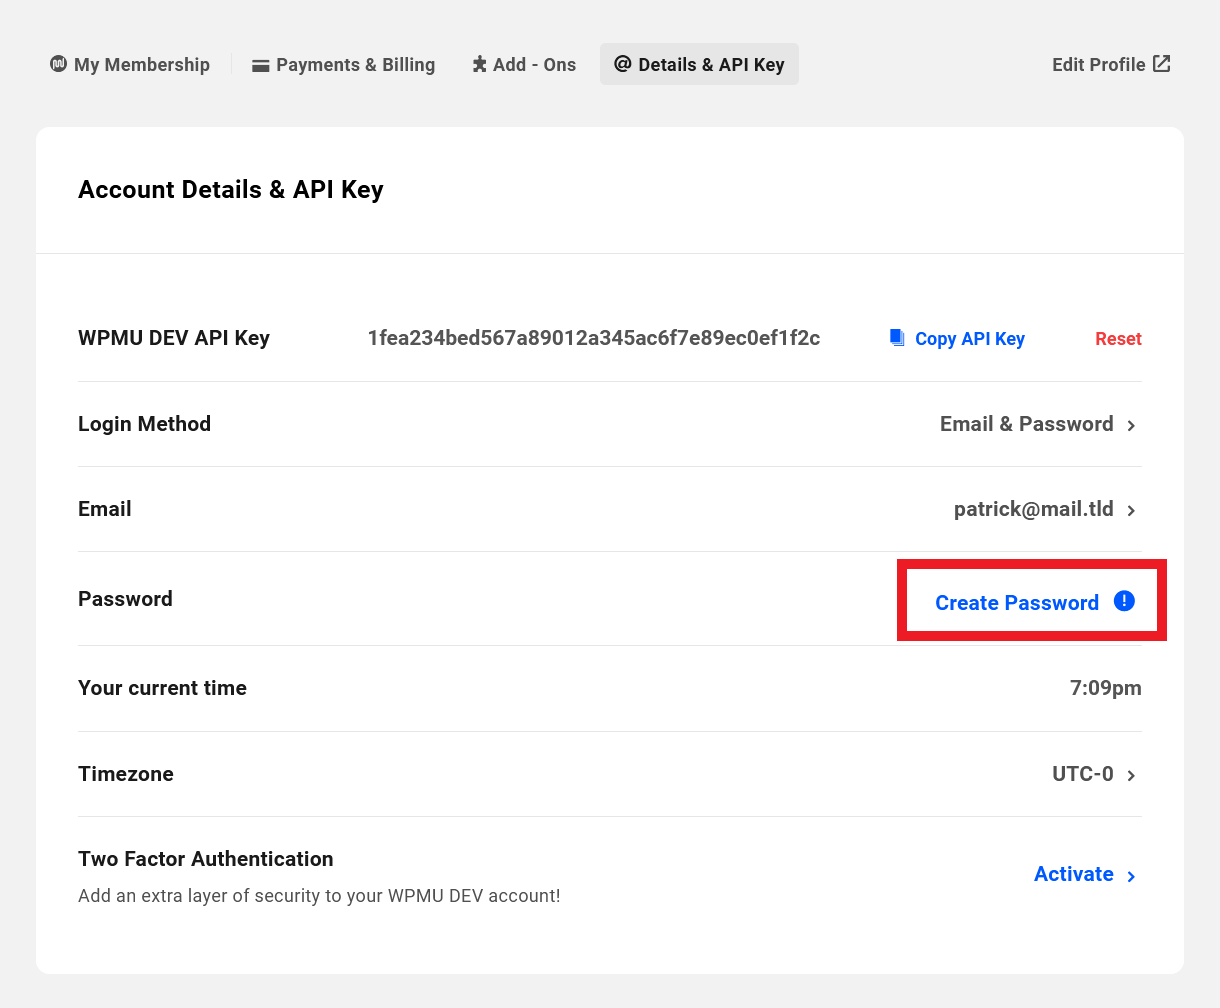
Password
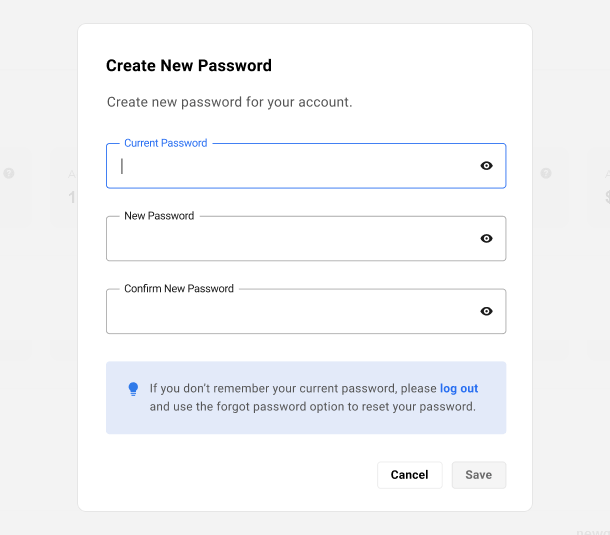
Click the password currently masked if you need to change your account password. Note that if you signed up with a social account like Google, you would not see a password listed here. However, you can click the Create Password link to have an email sent to your inbox so you can create one in case a WPMU DEV account password is required from you to confirm some actions.
If you need to change your password, you must enter your current password to authenticate the action. If you don’t remember that password, you can simply log out and use the Forgot password? option on the login page instead.
Timezone
Click the timezone displayed to adjust your timezone if Your current time displayed on the line above is incorrect.
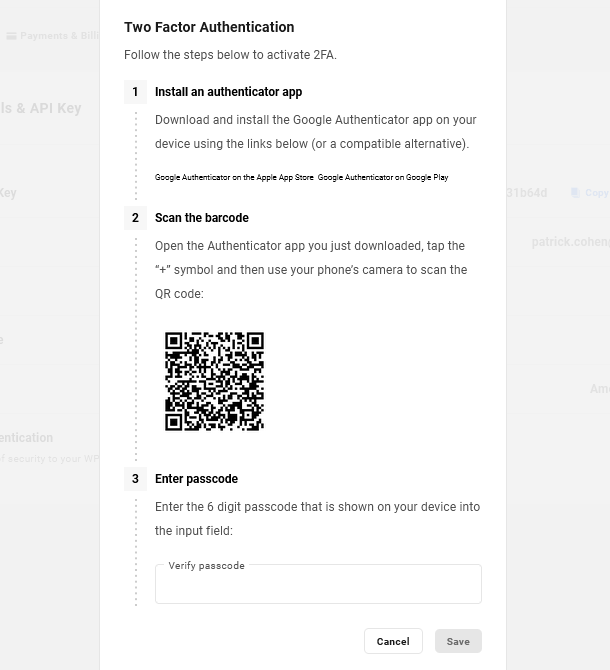
Two Factor Authentication
Click the Activate link to enable 2-factor authentication and add an extra layer of security to your account.
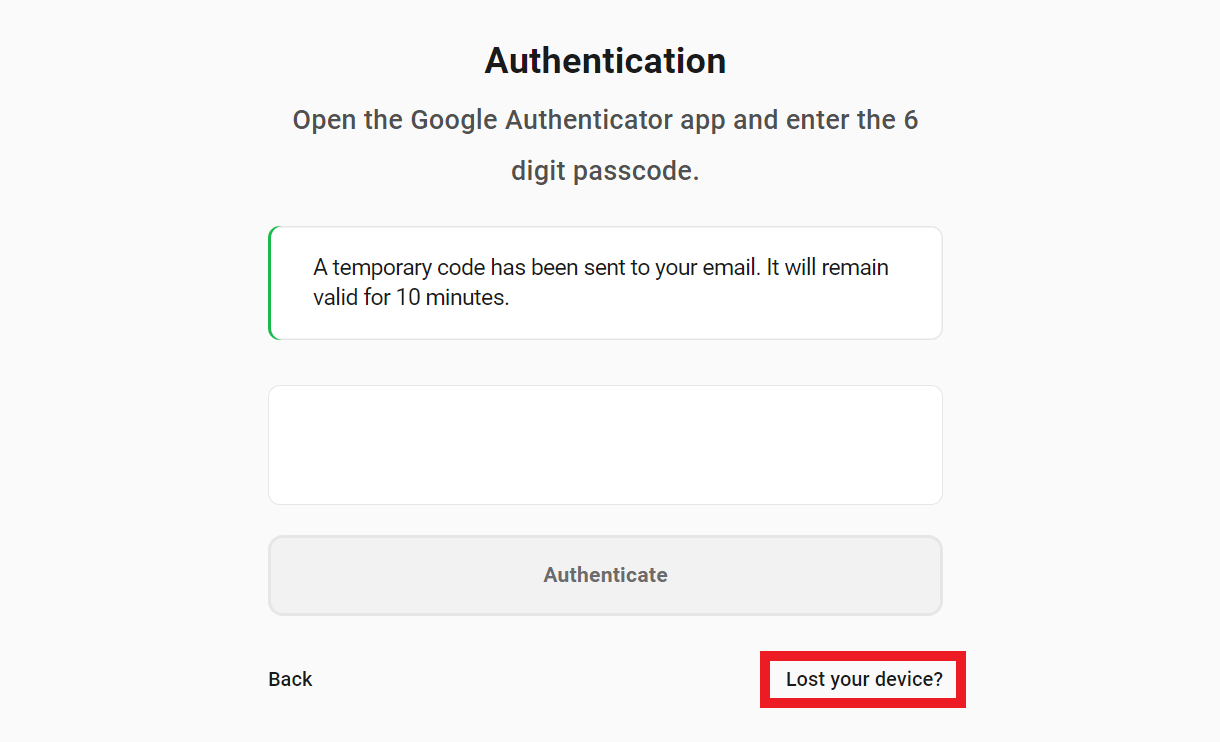
If you ever lose access to the mobile device you used to enable 2-factor authentication, you can click the Lost your device? link when logging in to have a one-time password emailed to you so you can complete the login and set it up on a different device if needed.
26.6 Get Support
Copy chapter anchor to clipboardIf you still have questions or need assistance after reading this document, please don’t hesitate to contact our support superheroes using the available options under the Support tab in your Hub or via the Support tab in your WPMU DEV Dashboard.
