7. Clients & Billing
The Hub Clients & Billing portal enables you to create & sell product and service packages to your clients, and manage all aspects of your billing process with Stripe, right from your Hub or Hub Client plugin installed on your own site. Included for free with your WPMU DEV membership.
Want to generate recurring revenue with automated client billing? How about becoming your own hosting reseller? Check out our blog post on Running Your WordPress Business Like a Pro for more info.
7.1 Getting Started Checklist
Copy chapter anchor to clipboardThis 6-step checklist outlines the basic steps you need to take to get your Clients & Billing portal configured, and get you up & running in no time.
- Connect your Stripe account and choose your billing currency.
- Configure Clients & Billing as per your business needs.
- Create your products with different pricing plans you offer.
- Add clients to Clients & Billing.
- Test your Client Billing & Stripe configuration.
- Create your first invoice for a client.
- Embed your reseller pricing tables on your own site.
Note that this is just a getting started checklist, and there are many more things included in your Clients & Billing portal. If you need more information about any of the Clients & Billing sections/settings, please refer to the corresponding chapters below.
1. Connect your Stripe account with Clients & Billing
When you visit Clients & Billing for the first time, you’ll need to connect your Stripe account to start using it. After connecting your Stripe account, select the billing currency you want to use for billing your clients. See the Connect Your Stripe Account chapter for more info, including some important Stripe Policy details that may apply to you.
2. Configure Clients & Billing as per your business needs.
After the initial setup, the next thing you should do is configure Clients & Billing as per your business requirements.
- Choose a Statement Descriptor that appears on your clients’ credit card statements.
- Set up your business branding (logo and brand color) to personalize the billing experience for your clients.
- Add your business info that should appear to your clients on invoices, billing emails, etc.
The steps mentioned above are just the mandatory steps, but there are many more configurations under the Configure tab. Feel free to explore them all and set up everything else as needed. In addition, you can refer to the docs of other configurations whenever you feel stuck.
3. Create your products with different pricing plans you offer.
Go to the Products & Services tab and create your first product as per your requirements. See the Adding Products chapter below for detailed steps. Note that hosting & domain reseller products are created under the Reseller tab in your Hub, not in Clients & Billing. See our Reseller documentation for details.
4. Add clients to Clients & Billing.
Go to the Clients tab to add your first client to Clients & Billing. Make sure you have the Hub Client plugin set up on one of your sites, and you choose that site as the Primary Hub for a completely white-labeled experience for your clients. See the How to White-Label the Client Experience chapter for details.
5. Test your Client Billing & Stripe configuration.
Once you’ve connected your Stripe account and have added at least one product & pricing plan, it’s a good idea to test your client billing configuration before sending your first invoice to a real client. See the How to Test the Client Experience chapter for details.
6. Create your first invoice for a client.
Now that you have set up your product plans and added a client, click on the + Bill Client button at the top to open the Bill Client modal. Select the client you want to bill, select a website if this invoice is for one of the sites connected to the Hub, add the product plans you wish to bill for, and send the invoice to your client after previewing it. See the Creating Invoices chapter below for more details.
7. Embed your reseller pricing tables on your own site.
If you create hosting & domain reseller products, you’ll want to configure the reseller features in the Hub Client plugin on your own site and embed the pricing tables there so your clients can purchase directly from your brand.
To maintain brand consistency for your WordPress business, please be sure to use the Hub Client plugin installed on your own domain. Then set the Primary Hub for any invited client to that domain. This will ensure your clients never see the WPMU DEV Hub and won’t be confused by unneeded & irrelevant options in its interface. See the How to White-Label the Client Experience chapter for details.
Check out the video below for a guided walkthrough of the Clients & Billing portal.
Please note that the video above shows horizontal navigation elements when viewing a site in your Hub. That has now changed to sidebar-style navigation, but the features & functionality are still the same.
7.2 Connect Your Stripe Account
Copy chapter anchor to clipboardTo get started, click the top-level Clients & Billing item in the main menu of your Hub.
![]()
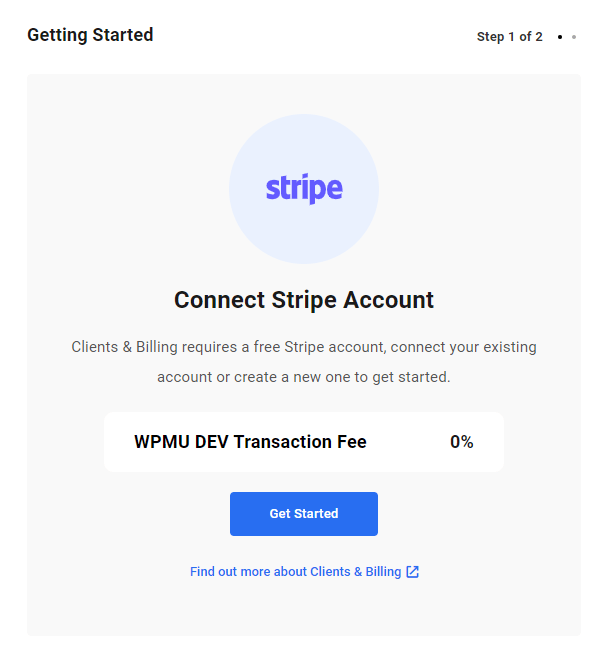
If this is the first time you’re visiting the Clients & Billing section in your Hub, you’ll be prompted to first connect your Stripe account so you can begin accepting payments. Click the Connect with Stripe button in the Getting Started wizard.
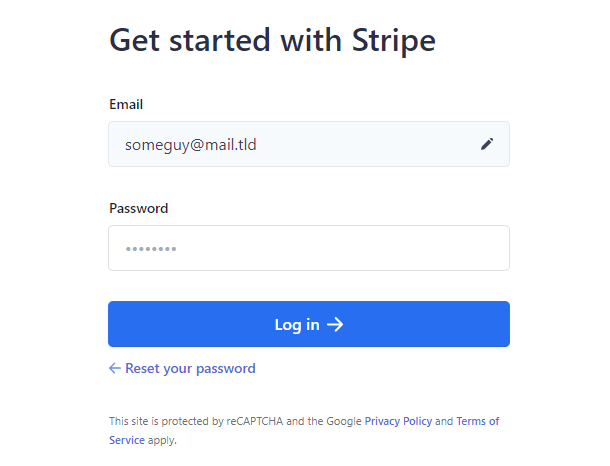
Enter the Email address and password associated with the Stripe account you wish to use and click Log in.
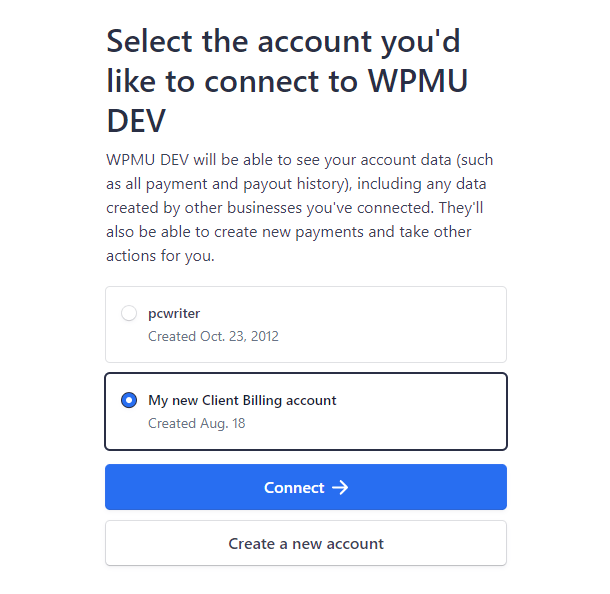
If you have multiple Stripe accounts associated with that same email address, they will be available for selection here. Select the account you wish to connect, and click the Connect button. If you do not see the account you wish to connect here, see the Important Stripe Policy information below.
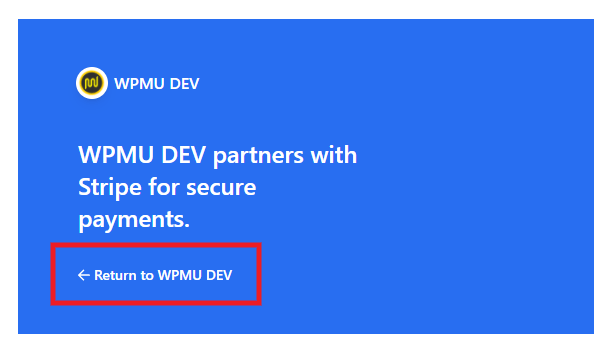
Follow any additional setup steps in the Stripe connect wizard. You can start over at any time by clicking the Return to WPMU DEV link on the left side of the screen.
Once you’re done, you’ll then be redirected back to the Getting Started screen in your Hub where you’ll be prompted to select the currency to use for your Clients & Billing portal.
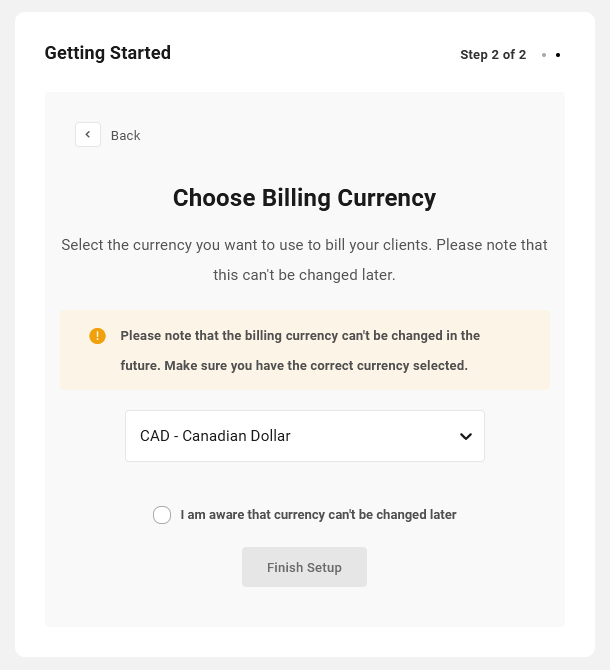
The billing currency you set here cannot be changed once you finish the setup.
Click the Finish Setup button to automatically import the current configuration of your connected Stripe account.
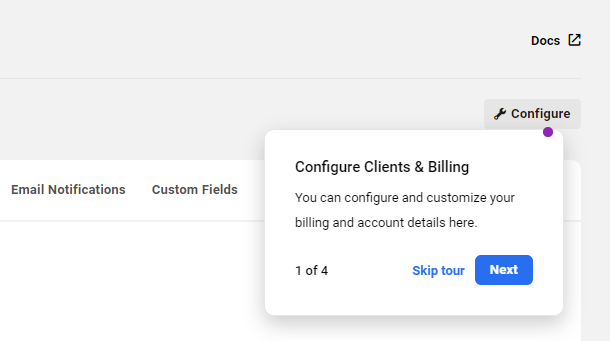
As soon as you have finished with the Getting Started wizard, a short tour will become available to help you to familiarize yourself with the various sections of your Clients & Billing portal.
Disable Stripe Emails
The Clients & Billing portal automatically sends emails to both you and your clients for all important actions. So you’ll want to ensure that all email sending features from Stripe to your customers are disabled in the connected Stripe account. See this Stripe help article for more information.
Important Stripe Policy Information
Stripe has recently changed their policy for platforms (like WPMU DEV Clients & Billing) that connect to a Stripe account: only one Platform can be connected to a Stripe account at any one time.
This means that if your existing Stripe account is already connected to another platform, you will not be able to connect that account to Clients & Billing, and it will not be available to you for selection in the Getting Started wizard steps as above.
So, in this case, you’ll have 3 options:
- Before launching the Getting Started wizard, first revoke access to other applications in your existing Stripe account. It will then appear for selection in the Getting Started wizard and you can connect it to your Clients & Billing portal. See this Stripe document for help if needed.
- Before launching the Getting Started wizard, manually create a new account in your Stripe Dashboard to use with Clients & Billing. That new account will then appear for selection in the Getting Started wizard and you can connect it to your Clients & Billing portal. See this Stripe document for help if needed.
- When you go through the Getting Started wizard and there are no accounts available for connection to this platform, Stripe will prompt you to create a new account. A drawback to creating a new account from within the wizard is that you would not be able to later revoke access to the platform (your Clients & Billing portal) in your Stripe dashboard, as that account would have been created by the platform itself. See this Stripe document for more details if needed.
7.2.1 Disconnecting Your Stripe Account
Link to chapter 2It is not possible to disconnect your Stripe account, or switch to a different one, from within your Clients & Billing portal.
This is because, if you switch to a different Stripe account, the existing clients, subscriptions and invoices in your Clients & Billing portal won’t be present in the new Stripe account, so every action in your Clients & Billing would error out.
For example, if you tried to bill a client from a previously connected Stripe account, it would result in an error because the customer doesn’t exist on the newly connected Stripe account. Or if a different Stripe currency is used later, these clients would not be billable because the Stripe currency of a customer can’t be changed. It would also create issues with old invoices which would be in a different currency.
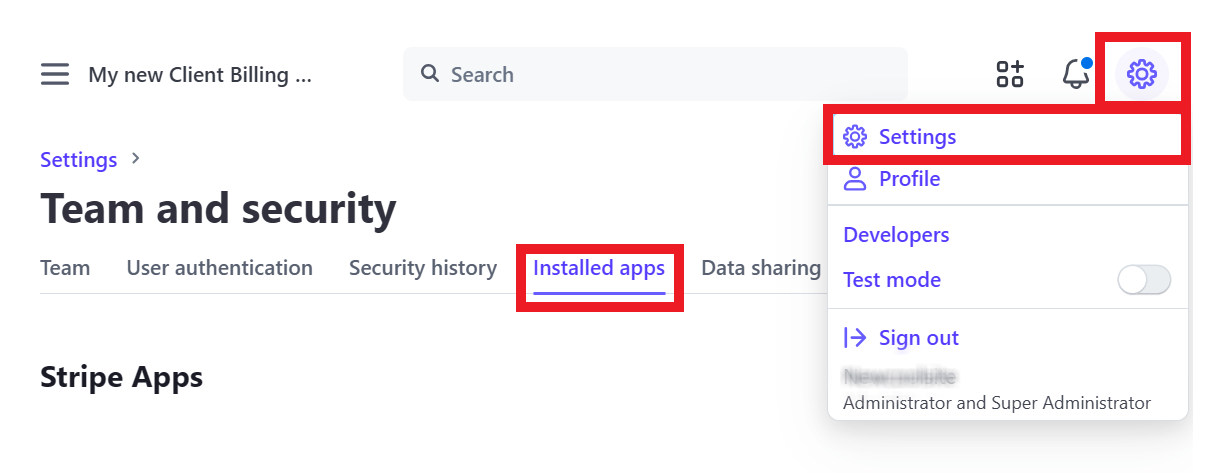
So if you do need to disconnect your Stripe account for any reason, you would need to do that at Stripe. Go to your account Settings screen, click on the Installed Apps tab in the Team and security section, then click the Revoke access button for your app or extension.
Note that simply revoking access from your Stripe account does not delete any data from your Clients & Billing portal. If you later connect the same Stripe account you had previously connected, all your existing client & product data would still be intact in your Clients & Billing portal. However, if you connect a different Stripe account, all your existing client & product data will still be present in your Clients & Billing portal, but would cause errors as explained above.
So if you intend to connect a different Stripe account to your Clients & Billing portal, switch to a different billing currency, or disconnect Stripe altogether, you have 3 options:
1. Reset Clients & Billing when there is no data
Use this option if you don’t have any data yet in your Clients & Billing portal (no clients, products, subscriptions and/or invoices).
- Revoke access in your Stripe account as noted above.
- Then optionally follow the steps above to connect a Stripe account again.
2. Reset Clients & Billing and delete all data from Stripe
Use this option if you wish to start fresh in both your Clients & Billing portal and Stripe account.
- First, delete all clients, products & subscriptions/invoices from your Clients & Billing Portal in your Hub. That will also delete that same data from your Stripe account.
- You can then proceed to revoke access from Stripe, and connect the same or a different account to your Clients & Billing portal.
3. Reset Clients & Billing without deleting any data from Stripe
Use this option if you wish to keep existing customers and subscriptions active in your Stripe account, but remove everything from your Clients & Billing portal.
- First, contact our support superheroes who will be happy to help you reset your Clients & Billing portal in your Hub without affecting anything in your Stripe account.
- You can then proceed to revoke access from Stripe, and connect a different account to your Clients & Billing portal.
In this case, any recurring invoices for subscriptions created in your Clients & Billing portal would continue to be issued from your Stripe account. Our support team will ensure that any applicable WPMU DEV transaction fee is no longer automatically levied from those invoices.
What happens if I revoke access in my Stripe account without resetting Clients & Billing?
If you simply revoke access in your Stripe account while you have active subscriptions created in your Clients & Billing portal, those subscriptions will continue to function at Stripe and will continue to generate recurring invoices.
However, any applicable WPMU DEV transaction fee would also continue to be levied from those invoices. See this Stripe document for more info.
In this case, our support team would not be able to correct that on your behalf. So you would need to use either of the options below to stop the transaction fee from being levied.
- In your Stripe account, cancel the subscriptions that were initially created via your Clients & Billing portal. Then reissue those subscriptions directly from your Stripe account.
- Or use the Stripe API to update all the subscriptions, and either remove
application_fee_percentor set it to0.
7.2.2 Transaction Fees
Link to chapter 2The Clients & Billing portal is completely free to use for all our full members. If you are subscribed to our Plus, Premium, or any legacy full membership, WPMU DEV does not charge any fees whatsoever.
If you are on our Free, Basic or Standard memberships, WPMU DEV charges a flat 2.1% fee on every transaction made through the Clients & Billing portal in your Hub.
The fee is calculated on the transaction total in addition to any fees charged by Stripe, over which we have no control.
As an example, let’s look at a $100 transaction for a member on our Free, Basic or Standard memberships:
If you are not sure which type of WPMU DEV membership you’re subscribed to, you can check if the Clients & Billing fee applies to you in the Add-Ons section of your Account page.
Members on a Plus, Premium or any legacy full membership will see this:
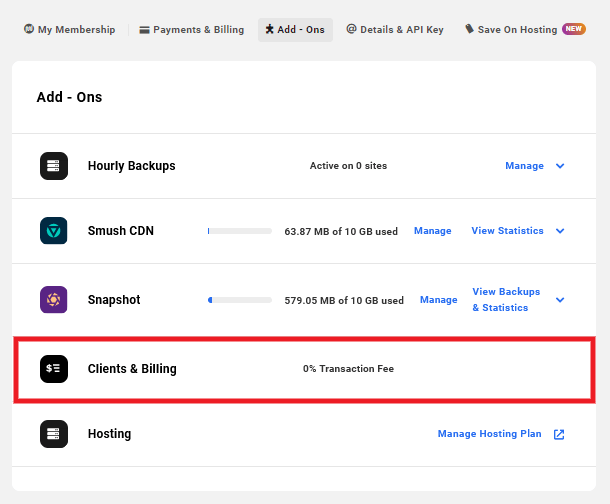
Members on a Free, Basic or Standard membership will see this:

7.3 Configure
Copy chapter anchor to clipboardThe Configure section contains all the tools you need to manage the Stripe account connected to your Hub Clients & Billing, set up your business profile, create invoices and notifications, import products and clients, and more.
7.3.1 Billing Account
Link to chapter 3The top-most part of this configuration screen displays information associated with the Stripe account you’ve Connected in your Hub. This includes the name and email address of the account, as well as the date you connected it. Irrespective of who activates the Clients & Billing, the email displayed here is the email associated with the connected Stripe account.
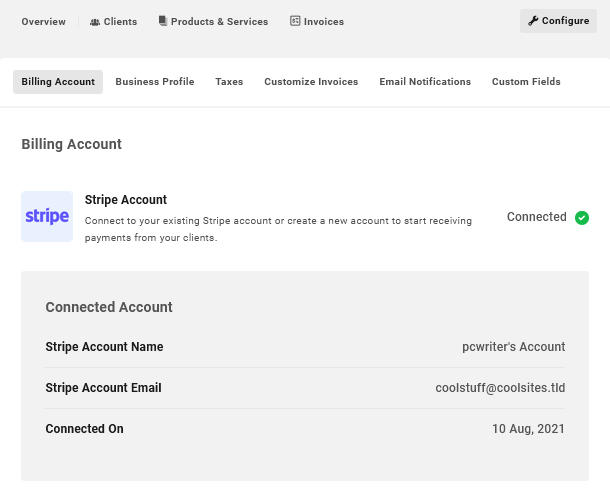
The Payment Preferences section contains a reminder of the billing currency you’ve set for this integration, along with a few configurable options.
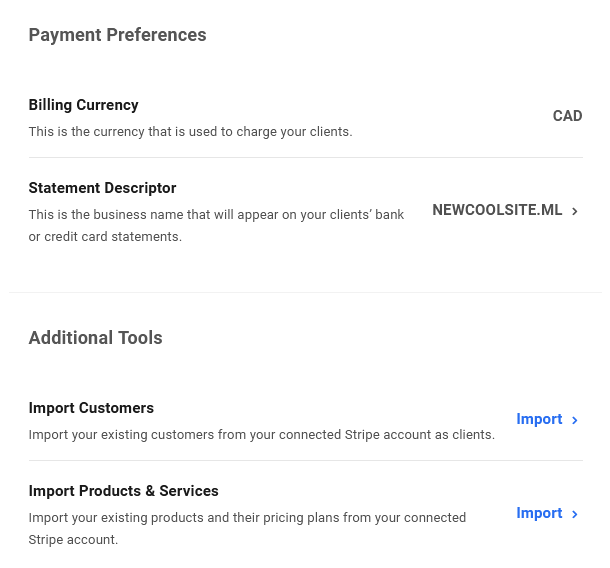
Payment Preferences
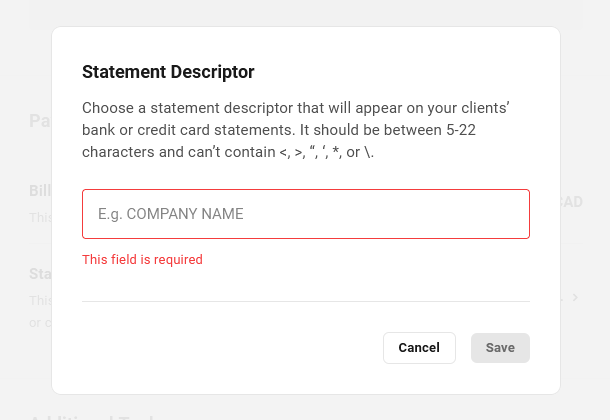
The Statement Descriptor is what appears on your clients’ bank or credit card statements. If you need to modify that, click on the name currently displayed on the far-right of that line. In the modal window that pops open, enter a business name between 5 and 22 characters that you wish to be displayed, and click Save.
Additional Tools
Import Customers
This option enables you to import one or more existing customers from your connected Stripe account.
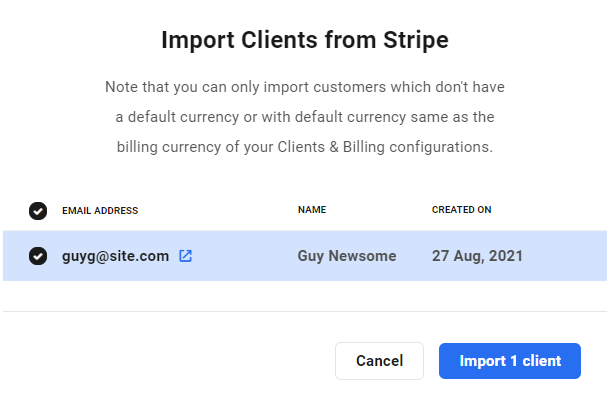
Click the Import link on that line to pop open a modal window where you can select the clients you wish to import.
Select the individual clients you wish to import by checking the box next to their email address. If you wish to import them all, check the box at top-left, just above the Email Address column. Click the Import button to proceed.
The imported clients will now be listed under the Clients tab where you can manage all aspects of each clients’ activity relevant to your Hub business.
Please note that when importing customers from your Stripe account, existing subscriptions will not be imported and cannot work with your Clients & Billing portal. Those subscriptions will of course continue to work as usual in your Stripe account.
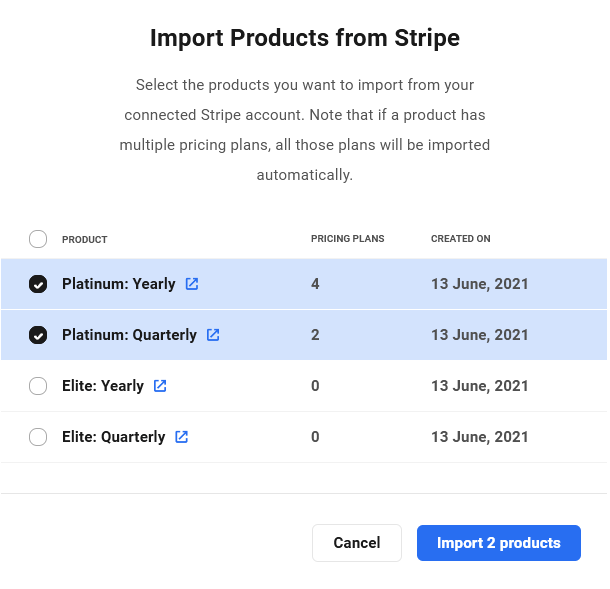
Import Products & Services
Here, you can quickly import any existing product from your connected Stripe account. All pricing plans associated with an imported product will also be imported automatically.
When importing products from your Stripe account, only the pricing plans with the same currency as you set when Connecting Your Stripe Account will be imported. If a product only contains plans in a different currency, the product itself will still be imported, but it will have no associated plans. You can of course create new pricing plans for any product in your Clients & Billing portal. See Adding Products Manually for details.
Click the Import link on that line to pop open a modal window where you can select the products you wish to import.
If you wish to import them all, check the box at top-left, just above the Product column. Click the Import button to proceed.
The imported products will now be listed under the Products & Services tab where you can manage all aspects of each product & their pricing plans for your Hub business.
If you had manually created a pricing plan with a fixed billing cycle in your Clients & Billing portal, then disconnect your Stripe account and reconnect the same account, any such plans that you then import from Stripe will not include your fixed billing cycle. The pricing plan will default to unlimited and will auto-renew until canceled. This is a limitation in the Stripe API and cannot be adjusted in the Hub.
7.3.2 Business Profile
Link to chapter 3Here is where you can manage the business branding that appears in your invoices, emails, and receipts.
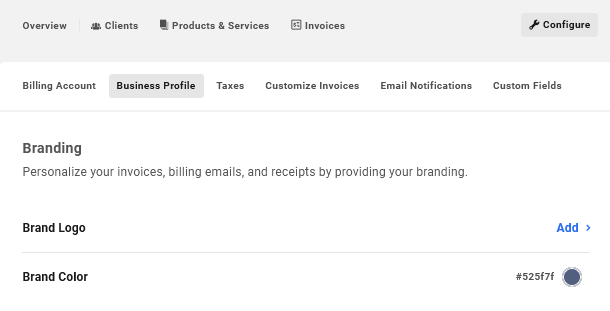
Branding
Brand Logo
Click the Add link to upload the logo you wish to use for your client billing.
This logo will also appear in your clients’ profile menu (at top-right) when they’re logged-in to your Hub here at WPMU DEV. If a client is logged-in to your Hub Client page on your own site, this logo will also appear instead of the WPMU DEV branding in the header.
Note that this setting does not affect the logo set in your Hub Client that is displayed to Team Members; they will continue to see the branding you set in your Hub Client.
Brand Color
Click the current color displayed to change to a color better suited to your brand.
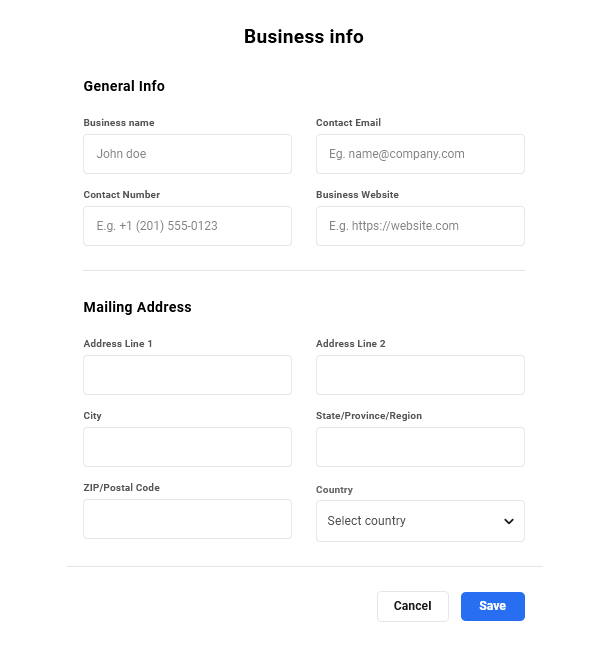
Business Info
The Business Info section on this screen displays your business name, contact email & number, website and mailing address. This information can be used in your clients’ statements, invoices, receipts, etc.
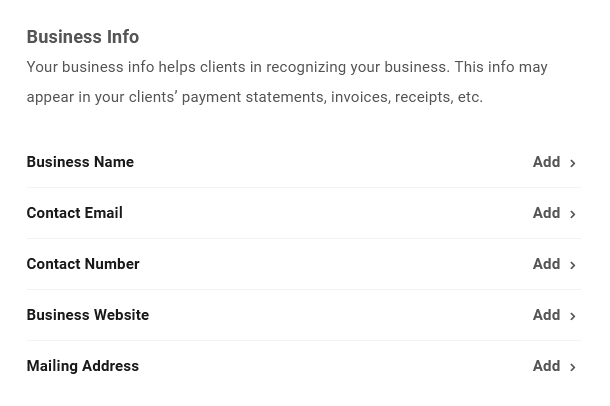
If any of this information is already set up in your Stripe account, it will be imported and automatically displayed here. Click any of the Add links to pop open a modal window where you can edit all the information shown here.
Additional Info (Business Profile)
This section only appears if you have created one or more custom fields for your Business Profile under the Custom Fields tab.
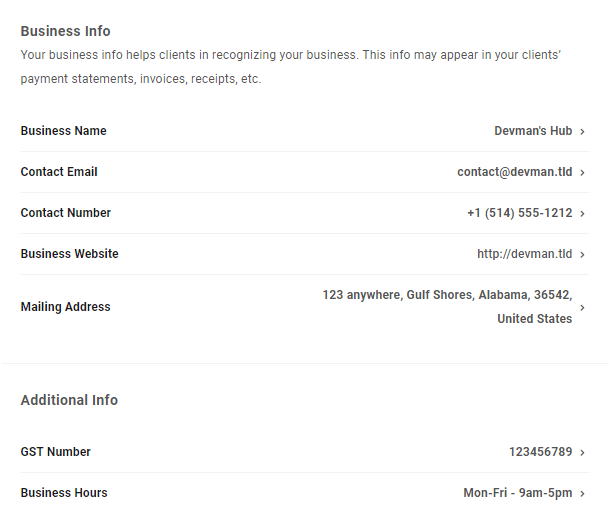
The example image below shows a Business Profile with custom fields created for a local GST tax number and the Working Hours.

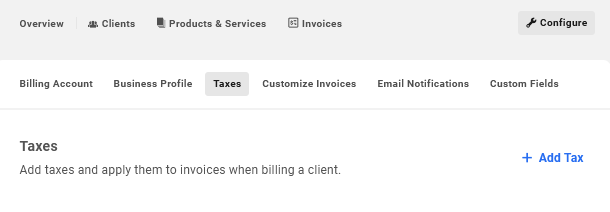
7.3.3 Taxes
Link to chapter 3This section enables you to create any needed tax rates that you can then apply to any invoices when billing your clients.
If you have created any Reseller products and wish to apply taxes to them, you must create the tax rates here first. You can then select them to be added to every Reseller invoice under Reseller > Settings.
Any taxes you create here and apply to an invoice will be applied to the total value of the invoice; it is not possible at this time to create taxes per product or service. A future release of the Clients & Billing portal may include this functionality however.
Click the + Add Tax link to pop open a modal window where you can create the tax rates you need.
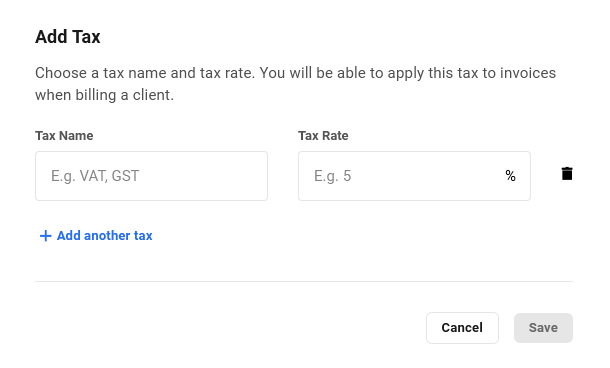
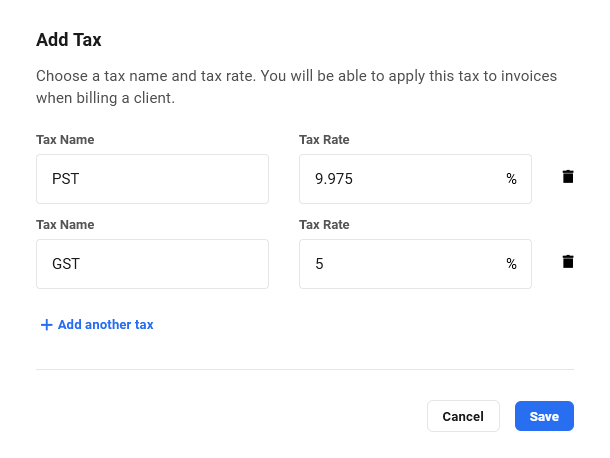
For each tax, enter the Tax Name you want to appear on invoices, as well as the Tax Rate. The Tax Rate must be a percentage value between 0% and 100%, and can contain up to 4 decimal places.
For each additional tax you want to add, click the + Add another tax link. You can add up to 10 taxes at a time. Once you’ve added all the taxes you need, click the Save button.
Your available taxes will then appear in a list under the Taxes tab.
Note that taxes that you’ve already added cannot be edited. If you need to change the name or rate of any existing tax, you would need to delete it first, then add a new one to replace it. To do that, click the ellipsis icon to reveal the management options, then click Delete.

A modal will pop open prompting you to confirm the action. Click the Delete button to proceed.
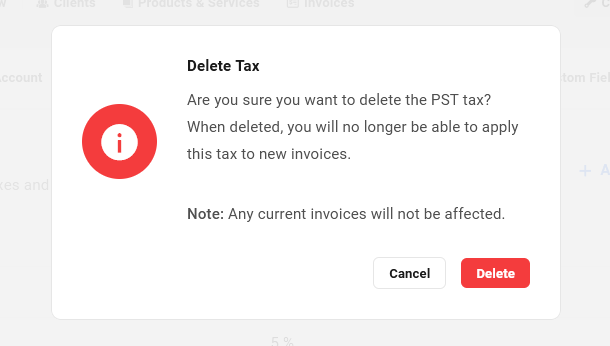
Note that deleting an existing tax simply removes it from your Clients & Billing portal and it will no longer be available to apply to any new invoices. Existing or outstanding unpaid invoices where that tax has been applied will not be affected as the tax will still exist in your Stripe account.
If you need to add more taxes, simply click the + Add Tax link again and proceed as above.
All taxes that you create here will then be available to apply to any invoices you create for your clients. See the Creating Invoices chapter below for more information.
7.3.4 Customize Invoices
Link to chapter 3This section enables you to customize the content that will be included in all your invoices.
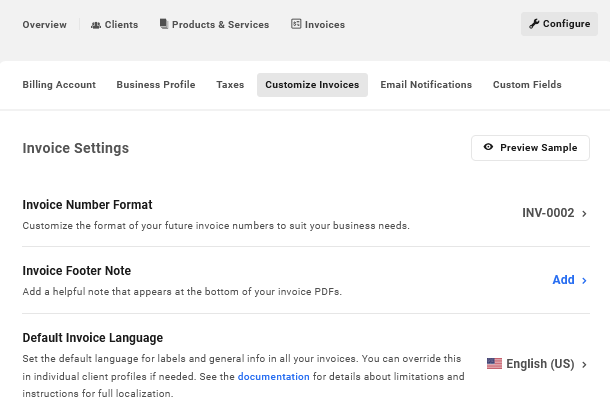
Invoice Settings
Invoice Number Format
Click the current number format displayed on the right to pop open a modal window where you can customize how that should be incremented for your invoices.
Enter an optional Prefix and set what the Next Invoice Number should start at. Each subsequent invoice will be incremented by 1.
Note that the prefix and number you set here can be modified at any time, but that would only affect new invoices. Existing invoices would not be affected by any change here.

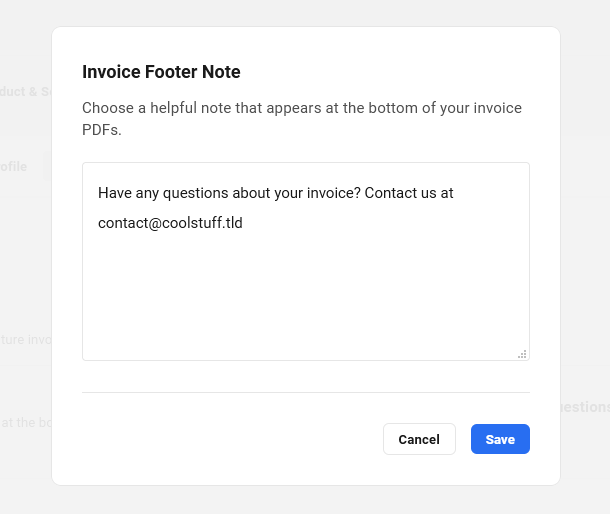
Invoice Footer Note
If you wish to include a custom note at the bottom of every invoice, click the Add link and enter the message you want to display.
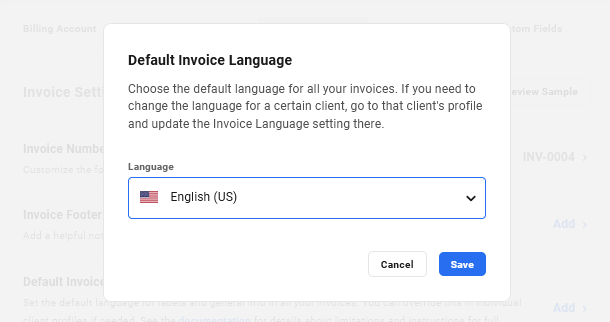
Default Invoice Language
Select the default language that will be used for labels & general information in all your invoices. You can override this setting for individual clients if needed in their Client Profile.
Click the language currently displayed and select the preferred language to be used.
Selecting any language other than English here will only affect the labels and other general information in your invoices. It does not affect the custom information you may have entered in your Business Profile, any Client Profile, any Custom Field or Invoice Footer Notes. If you wish to localize those items in a different language, you would need to edit and translate them in their respective settings.
Note also that this setting does not affect the email language which is English by default. A future update to the Clients & Billing portal will enable you to customize the email language as well.
Invoice Fields
Here, you can select exactly which additional fields you want displayed in all your invoices.
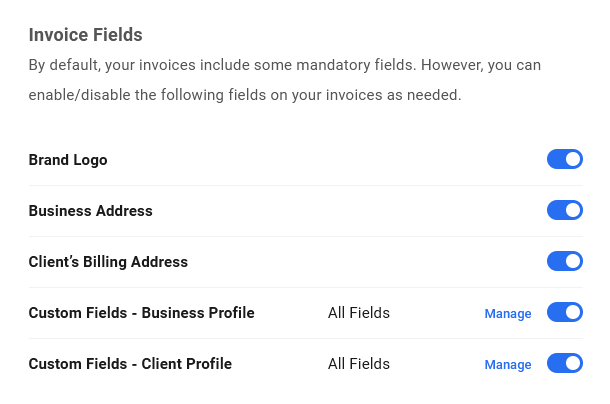
Brand Logo
Toggle this on if you wish to include the logo you uploaded in the Business Profile section.
Business Address
Toggling this one will include the business address you set in the Business Profile section.
Client’s Billing Address
Toggle this on to include the client’s billing address, if that information is available in their client profile.
Custom Fields – Business Profile
Enable this option to include any Business Profile custom fields that you may have created in the Custom Fields section.
Click the Manage link if you want to enable or disable any specific custom fields you have created. These would appear in the business profile section in your invoices.
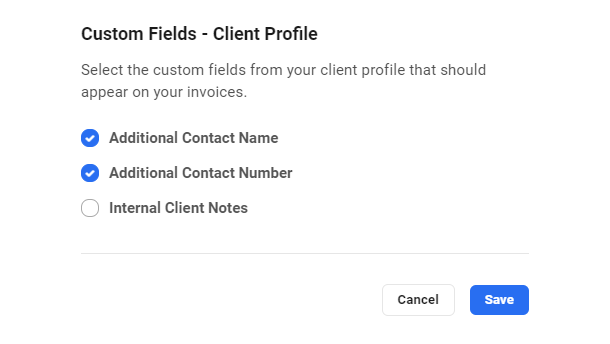
Custom Fields – Client Profile
Enable this option to include any Client Profile custom fields that you may have created in the Custom Fields section.
Click the Manage link if you want to enable or disable any specific custom fields you have created. These would appear in the client profile section in your invoices, if you have entered information in those fields in their client profile.
If you have set any Client Profile custom fields to be hidden from clients, you’ll likely want to be sure they are not included in your invoices if they contain information you don’t want them to see. Click the Manage link to disable any such hidden fields if needed.
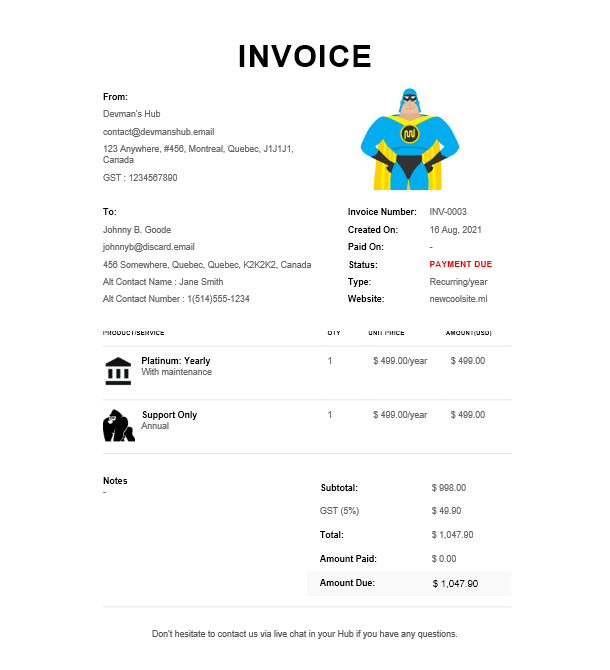
Preview Sample
Click the Preview Sample button at any time to open a new tab with a preview of what your invoices will look like when sent to your clients. Below is an example of what an invoice could look like with all options configured and all fields included.
7.3.5 Email Notifications
Link to chapter 3Options in this section enable you to include or exclude certain information from your billing emails.
See the Email Examples chapter at the end of this document to see examples of all the emails sent by your Clients & Billing portal.
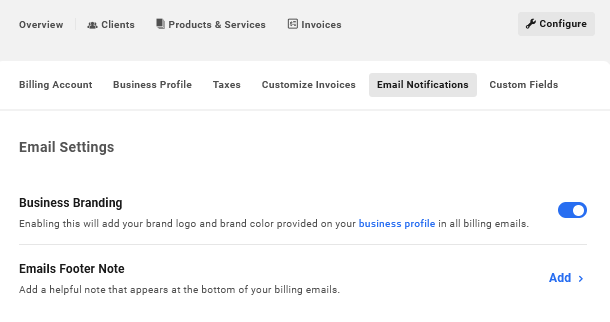
Business Branding
Toggle on this option to include your logo and brand color from your Business Profile in all email notifications.
Emails Footer Note
Click the Add link to include a custom message at the bottom of all emails.
7.3.6 Custom Fields
Link to chapter 3This section enables you to create as many custom fields as you need or want to include in your Business Profile and/or Client Profiles.
Custom field information added in either profile type can be added to your invoices under the Customize Invoices tab.
Custom fields can be created as single or multi-line text fields, depending on the type of information you want to include in them. As both field types are simple text fields, they do not accept HTML. However, the multiline type does respect line-breaks, so you can make lists or paragraphs that way if needed.
Note that once a field is created, it is not possible to switch from single-line text to multi-line text, or vice-versa. So if you need to do that, you would need to first delete the existing field and create a new one to replace it.
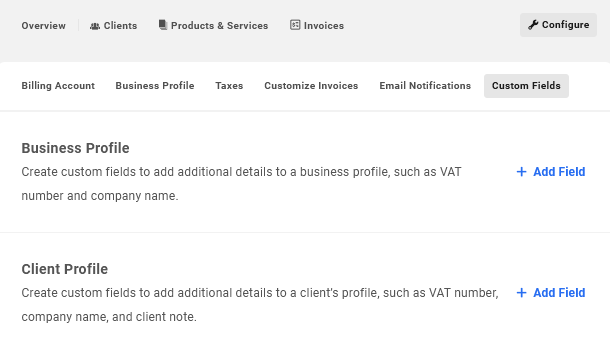
Business Profile
To add a new custom field to your Business Profile, click the + Add Field link on that line to pop open a modal window.

In that modal, enter the Field Name you wish to be displayed for the new field, then select whether the field Type should be a Single or Multiline Text.
Click the + Add Field link for each new field you want to add. Click the trash icon to remove any custom field you don’t need. Click the Save button to save your fields, or click Cancel to exit without saving.
Custom fields you have created for your Business Profile will then be listed under this tab where you can edit the label, or delete them, as needed, by clicking the ellipsis icon and selecting the corresponding option.
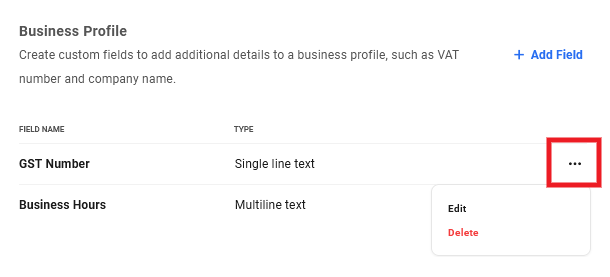
Any Business Profile fields you create here will then be available to you in the Additional Info section of your Business Profile where you can add any needed values to them.
The example image below shows a Business Profile with custom fields created for a local GST tax number and the Business Hours.
Client Profile
To add a new custom field that can be used in Client Profiles, click the + Add Field link on that line to pop open a modal options window.

In that modal, enter the Field Name you wish to be displayed for the new field, then select whether the field Type should be a Single or Multiline Text.
Client Profile custom fields have an additional option where you can select whether the field should be visible to clients under the Billing Info tab in their Hub where they can add or edit the information in the field.
To make a custom field available to your clients to edit, click the eye icon to toggle it on or off. A blue eye icon means it’s visible to clients, a white eye icon with a slash through it means it’s not visible to your clients, and you can use it as an internal note field.
Click the + Add Field link for each new field you want to add. Click the trash icon to remove any custom field you don’t need. Click the Save button to save your fields, or click Cancel to exit without saving.
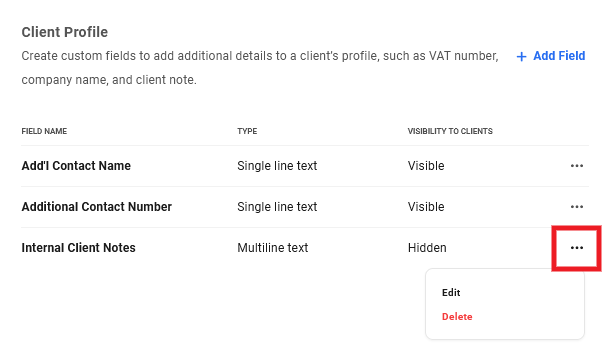
The example image below shows a couple of custom fields that have been made available for clients to edit in their own Billing Info areas, and one that is set to hidden and can be used as an internal note field for your use only.

Custom fields you have created for your Client Profiles will then be listed under this tab where you can edit the label, or delete them, as needed, by clicking the ellipsis icon and selecting the corresponding option.
Any Client Profile fields you create here will then be available in the Additional Info section of every Client Profile where needed values can be added to them.
Any custom fields that you have made available to your clients can be edited by the client under the Billing Info tab in their Hub.
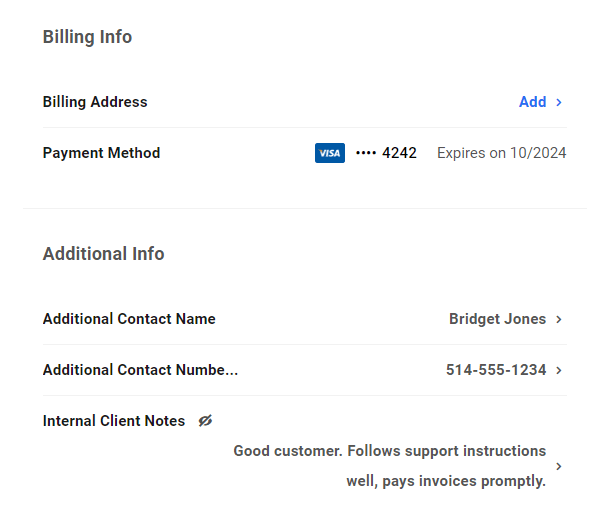
The example image below shows how a Client Profile could look in your Hub with custom fields created for Additional Contact Name and Number that are available for clients to fill in, and an Internal Notes field that is hidden from clients.
When a client views the Additional Info section on their Billing Details page in their Hub, they would only see the custom fields that you have made available to them, as seen in the example image below.
7.4 Overview
Copy chapter anchor to clipboardThe Overview section is where you can see, at a glance, summary information about your billing activities, as well as handy links to the more commonly accessed areas of your Clients & Billing portal.

The Revenue module displays the following information:
- Monthly Recurring Revenue – This is the normalized total monthly revenue from all active subscriptions combined, regardless of their billing periods. In other words, the value of yearly subscriptions would be divided by 12, the value of weekly subscriptions would be multiplied by 4.33, and so on. Then all the monthly equivalent values would be totalled and displayed here. This amount does not include any taxes you may have added to your invoices.
- Active Subscriptions – The total number of active subscriptions for all clients combined.
- Net Billing – The total amount billed for all subscriptions and other products combined, minus any refunds. This amount includes any taxes you may have added to your invoices.
The Clients module displays the following information.
- Total Clients – The total number of your active, inactive and pending clients.
- Average Billing per Client – Your Net Billing divided by the Total Clients. This amount includes any taxes you may have added to your invoices.
- Clients with Active Subscriptions – The total number of clients with active subscriptions.
Click the View All link to be redirected to the main page of the Clients section in your billing portal. Click the Add Client button to pop open the Add Client modal to add a new client to your billing portal.
The Products & Services module displays the following information.
- Total Products/Services – The total number of products & services, including those with no pricing plans attached.
- One Time Plans – The total number of active one-time pricing plans.
- Recurring Plans – The total number of active recurring pricing plans.
Click the View All link to be redirected to the main page of the Products & Services section in your billing portal. Click the Add Product or Service button to pop open the Create Product or Service modal to add a new product to your Clients & Billing portal.
The Configurations module displays the name of the Stripe account you’ve connected to your Clients & Billing portal and its status: a green check mark indicates an active account. Click any of the configuration option names to be redirected to the corresponding configuration screen in your billing portal.
7.5 Clients
Copy chapter anchor to clipboardThe Clients section is where you can manage all activities of all your Hub clients.
If you haven’t already imported clients under the Configure > Billing Account tab, you’ll initially be prompted here to either add clients manually and/or import customers from your Stripe account.
Before clients can access their Billing portal, they must click a link in an invitation email that you send to them, and create their account in your Hub. This means that you can add as many clients as you need or want, get things all set up nicely for them, and send them invitations at a later time if you wish.
For details about inviting and managing individual clients, see the Managing Clients chapter.

7.5.1 Adding Clients
Link to chapter 5Adding Clients Manually
To manually add a new client, click either the + Add New Client button on the initial No Clients screen as shown above, or the + New Client button at top-right of this screen if you already have one or more clients added.

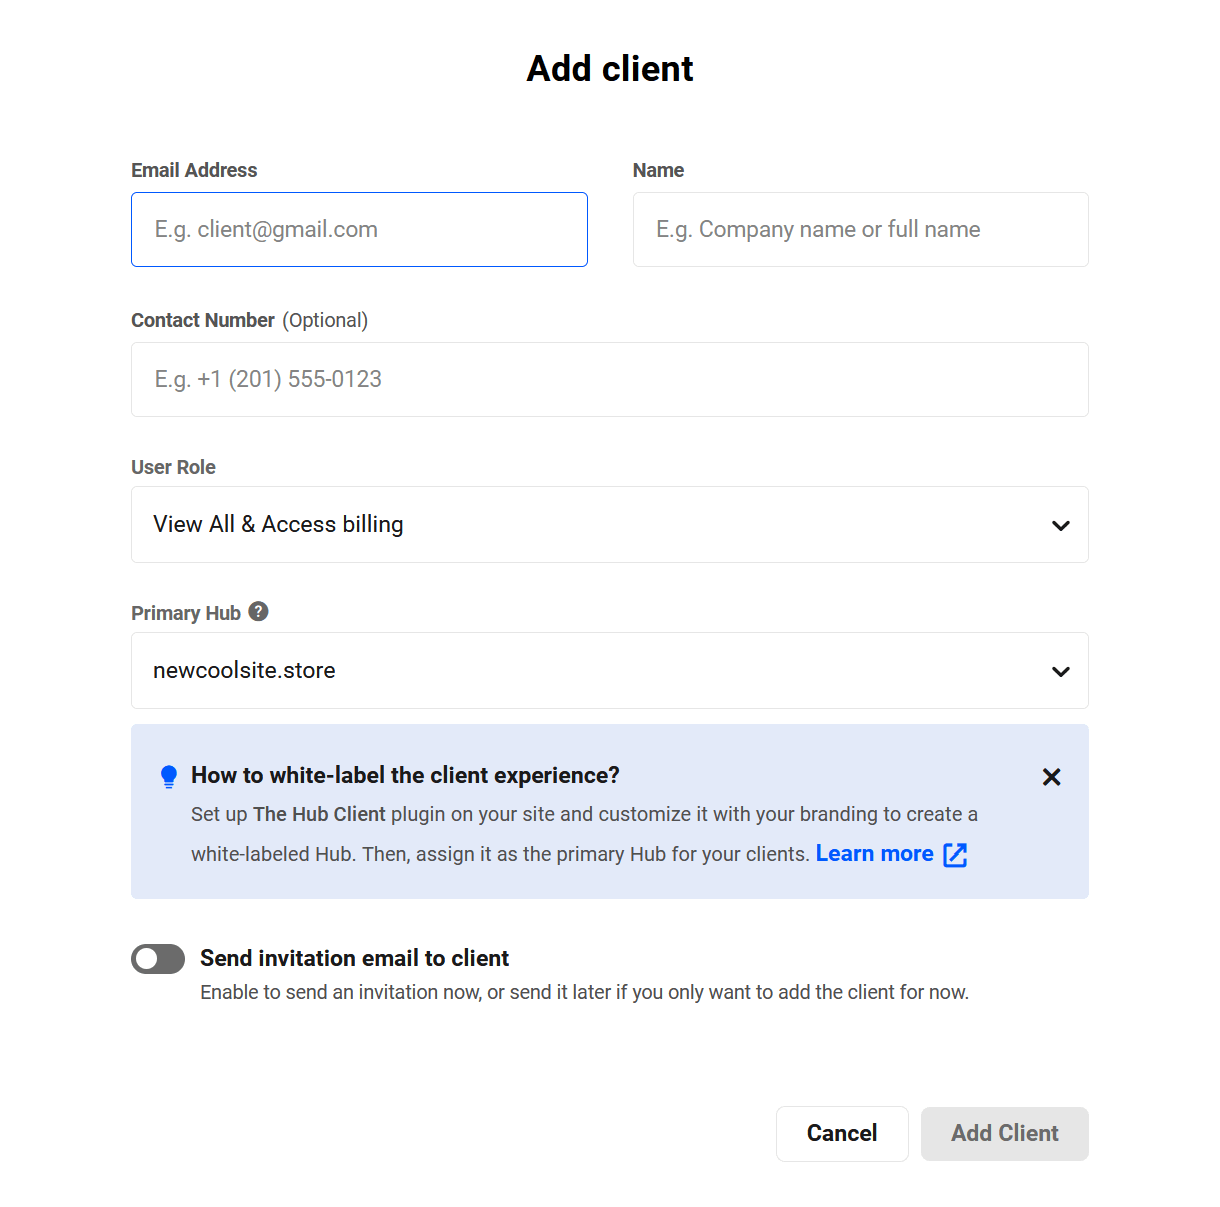
In the modal window that pops up, fill in your client’s Email Address, and optionally their Full Name and Contact Number.
Next, select the Client User Role they should be granted. This determines exactly what areas and features the client has access to in your Hub, and what they are allowed to do in those areas. You can always change the role later in the Client Overview.
If you are using the Hub Client plugin on at least one of your own sites, select the Primary Hub that should be used for all communications with this client. This too can be changed later if needed.
Toggle on the option to Remember my choice as my default Primary Hub if you wish to use the same Primary Hub for all new added clients going forward.
If you are using the Clients & Billing portal in your Hub for your own branded WordPress business and want to maintain your brand consistency, please ensure the Primary Hub set for any invited client is on your own domain using the Hub Client plugin so your clients never see the WPMU DEV Hub. See the How to White-Label the Client Experience chapter for details.
If you wish to immediately send an invitation email to the client containing a confirmation link that they must click to enable their new account, enable the Invite Client toggle. If confirmation from the client is not needed at this time, do not enable that toggle. You can invite the new client at a later time. See Managing Clients below for more on that.
Click the Add button to add your new client.
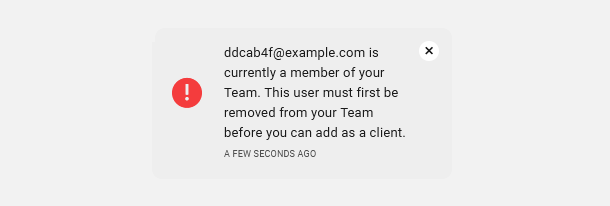
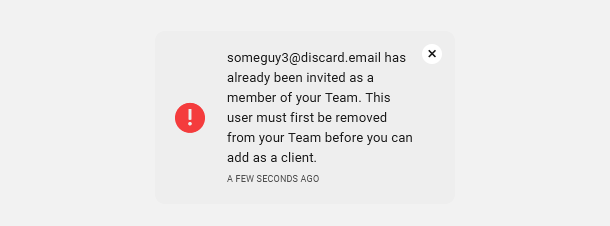
Adding Clients who are Already Team Members
Users you add to your Hub cannot be both clients and Team Members at the same time. So if you have team members that you wish to now add as clients in your Clients & Billing portal, you will need to first remove them from your Team, then add them as clients.
A future release of the Clients & Billing portal will include a migration tool to make this process easier, but for now, this is a manual task, as follows:
- If you have created a custom role for these Team Members, you’ll likely want to first create a role in your Clients & Billing portal with the same or similar access permissions. Or you can use the default Clients & Billing roles if they suit your needs. See the Client Roles chapter below for details.
- Next, remove the user from your team.
- Then add the user as a client in your Clients & Billing portal and give them a new client role.
- A new invitation email will be sent to the client and they will need to confirm that invitation and set a new password as a client. See the The Client Hub Account chapter below for details.
If you do attempt to add a client who is currently an invited or active member of your team, an error message will pop up in your Hub to remind you of this issue.
Importing Customers from Stripe
If you have not yet imported clients from your Stripe account under the Configure > Billing Account tab, click the Import From Stripe button on the initial No Clients screen as shown above.
If you have already added one or more clients to your Hub, and wish to import more from your Stripe account, you will need to do that from the Billing Account tab in the Configure section.
Select the individual clients you wish to import by checking the box next to their email address. If you wish to import them all, check the box at top-left, just above the Email Address column. Click the Import button to proceed.
If you happen to import a customer that you’ve already imported before, no worries, that will not create a duplicate.
Note that you can only import Stripe customers that do not have a default currency set at Stripe, or those whose currency is set to the same one as you selected when you connected your Stripe account (shown in your Billing Account configuration).
Please note that when importing customers from your Stripe account, existing subscriptions will not be imported and cannot work with your Clients & Billing portal. Those subscriptions will of course continue to work as usual in your Stripe account.
When importing customers from your Stripe account, there is no way to set the Primary Hub during that process. So, after importing them, you’ll want to navigate to the Client Overview of each one and ensure you set the correct Primary Hub individually.
7.5.2 Managing Clients
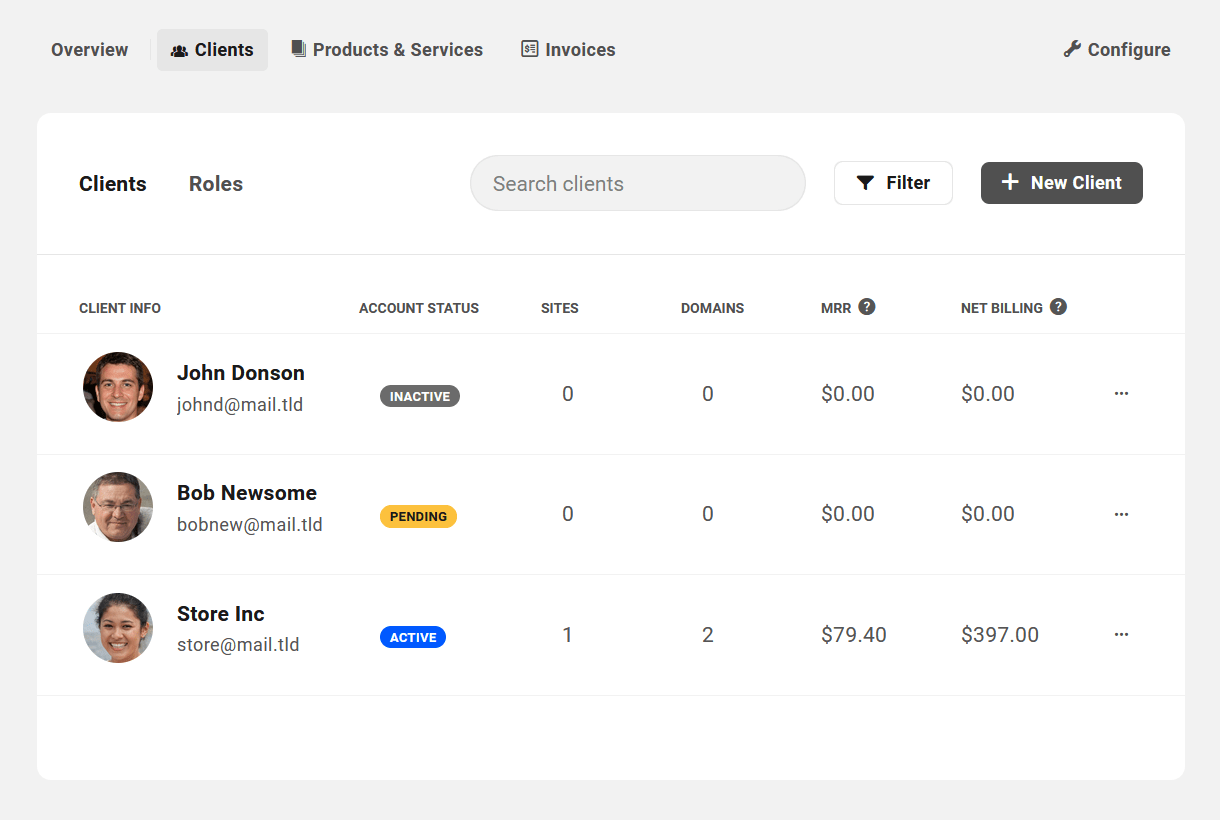
Link to chapter 5Once you’ve added one or more clients to your Hub, you’ll see them all listed under the Clients tab, with summary information for each one.
- Client Info – This column displays the client’s email address, as well as their name and Hub account Gravatar if available.
- Account Status – Indicates whether the client has accepted the email invitation or not (Active or Pending), or if the invitation email has not yet been sent (Inactive).
- Sites – Displays the total number of sites managed by this client.
- Domains – Displays the total number of domains managed by this client.
- MRR (Monthly Recurring Revenue) – The average monthly revenue for all subscriptions of this client. This amount does not include any taxes you may have added to your invoices.
- Net Billing – The total amount billed to date to this client. This amount includes any taxes you may have added to your invoices.
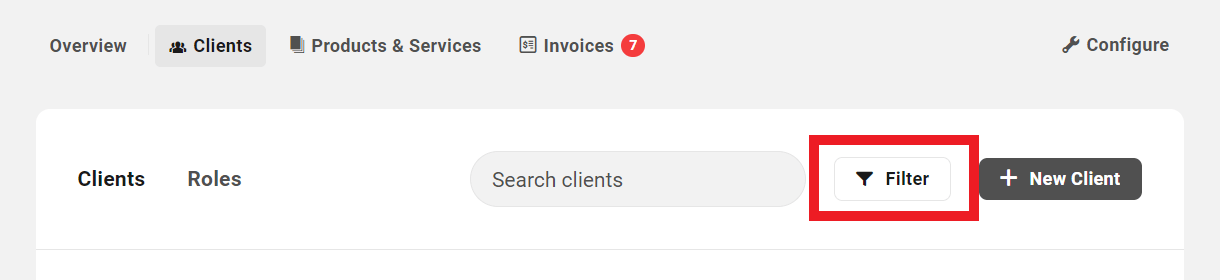
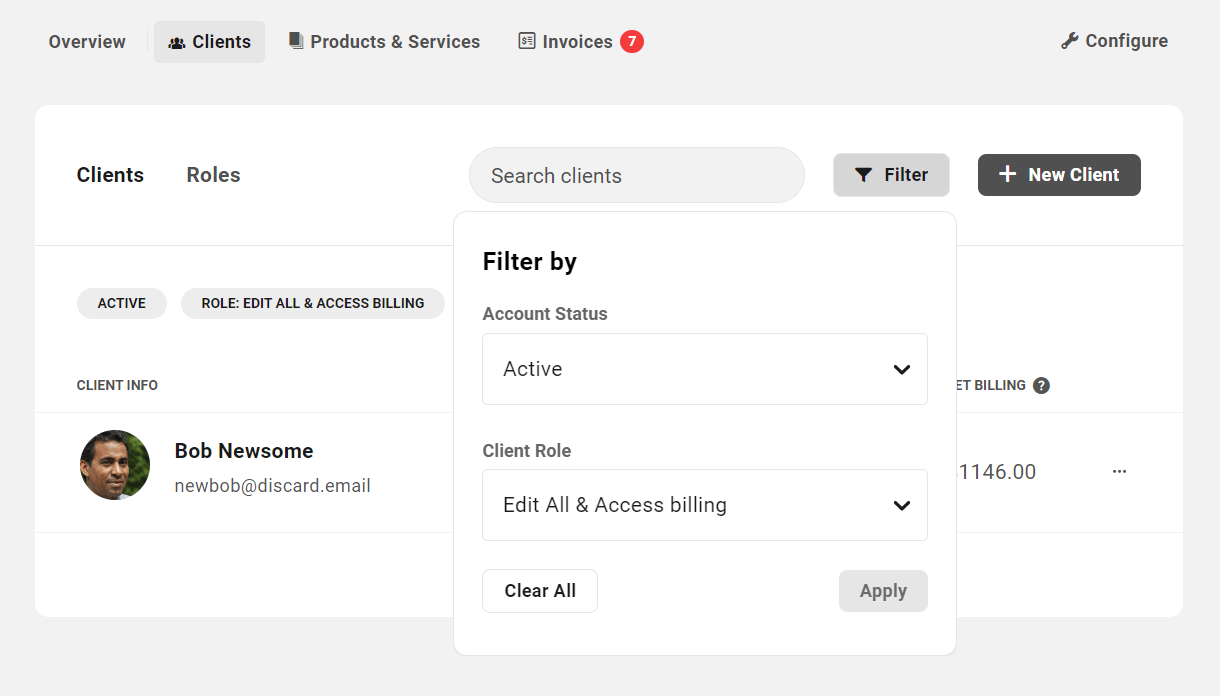
Click the Filter button to filter the list by Account Status and/or Client Role.
Select your desired filters from the dropdown menus and click Apply.
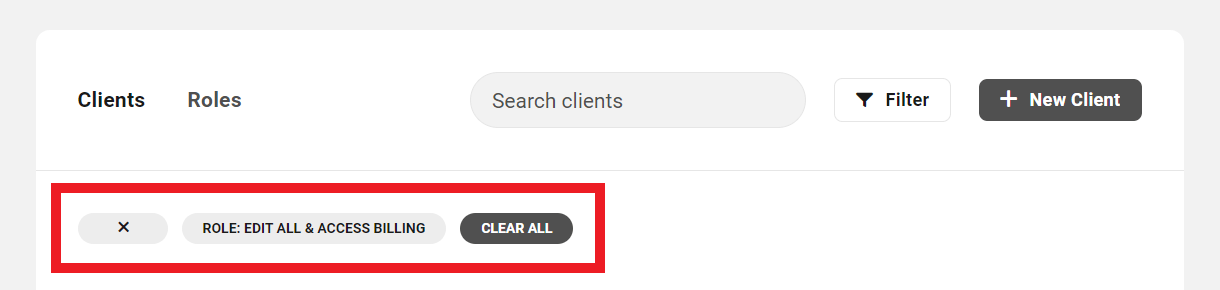
Hover your mouse over any active filter and click the X icon to remove it, or click the Clear All button to remove all active filters.
Click the ellipsis icon at the far right of any client to reveal management options for that client.
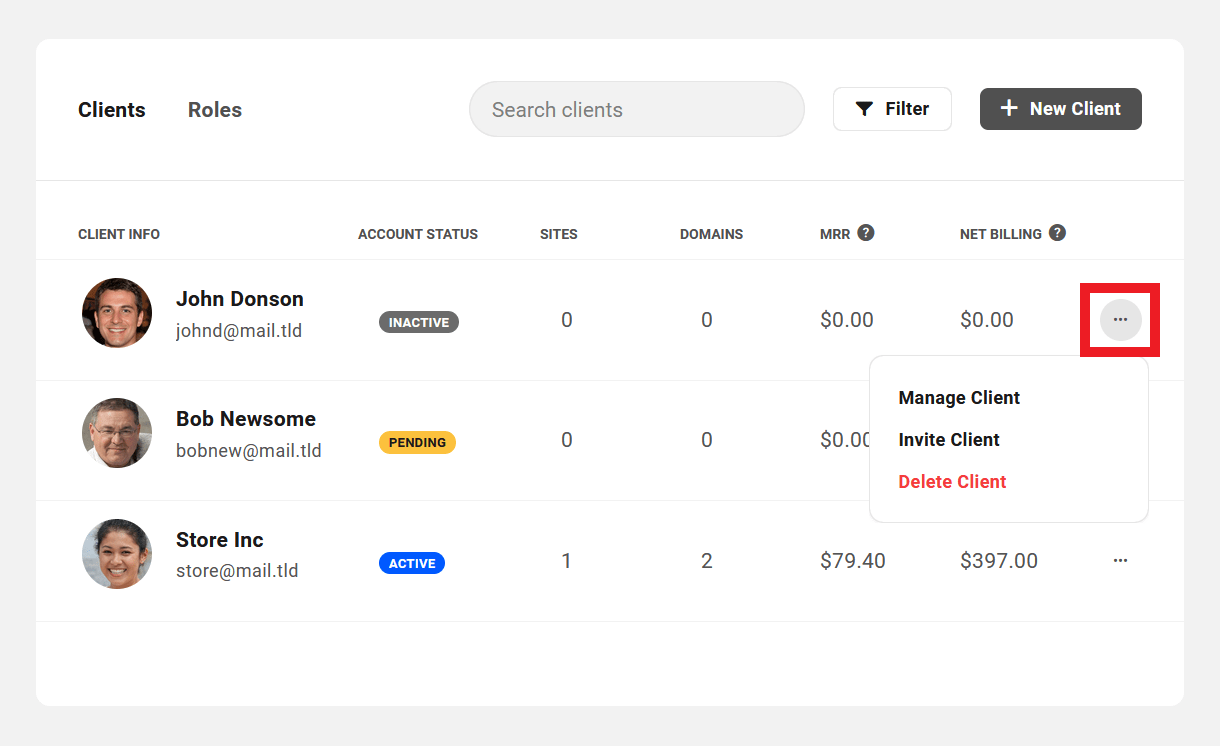
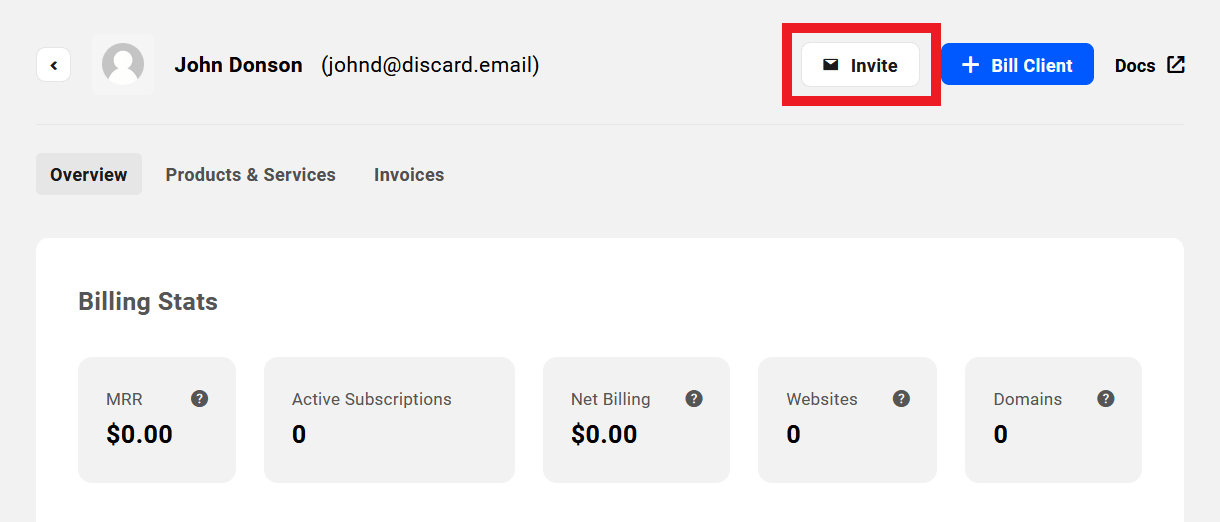
For clients whose status is Inactive or Pending, you can also send the client an invitation by clicking the Invite button that appears at the top-right of the individual client’s profile screen in your Clients & Billing portal.
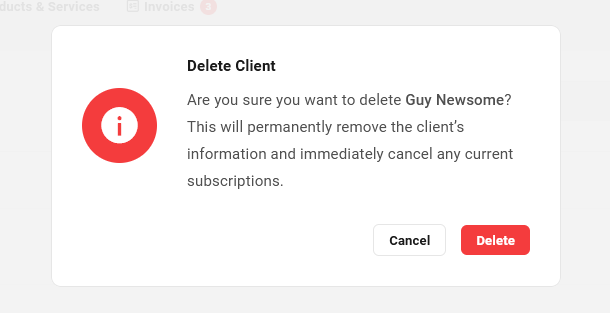
Note that if you select the Delete Client option as above, a modal window will pop open prompting you to confirm the action to help prevent accidental deletion. Note that this action will also delete the same data from your Stripe account
Client Overview
Clicking on the Manage Client option for any client on the Clients screen, or clicking anywhere on the client’s row, will direct you to the Overview screen in the details area for that client. This is where you can view and manage all aspects of the client’s account and subscriptions.
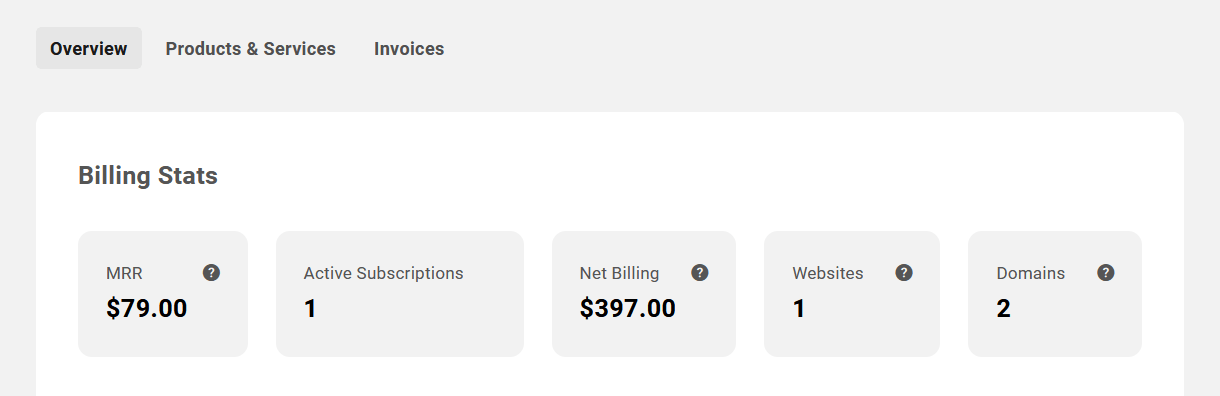
Billing Stats
At the top of the Overview screen, you’ll find a summary of this client’s statistics. Hover your mouse over any tooltip there for a short explanation of what each means if needed.
- MRR (Monthly Recurring Revenue) – The normalized monthly revenue for all subscriptions of this client. This amount does not include any taxes you may have added to your invoices.
- Active Subscriptions – The total number of active subscriptions for this client.
- Net Billing – The total revenue to date from this client, minus any refunds issued. This amount includes any taxes you may have added to your invoices.
- Websites – The total number of sites managed by this client.
- Domains – The total number of sites managed by this client.
Client Details
Directly beneath the stats section, you’ll find the Client Details section.
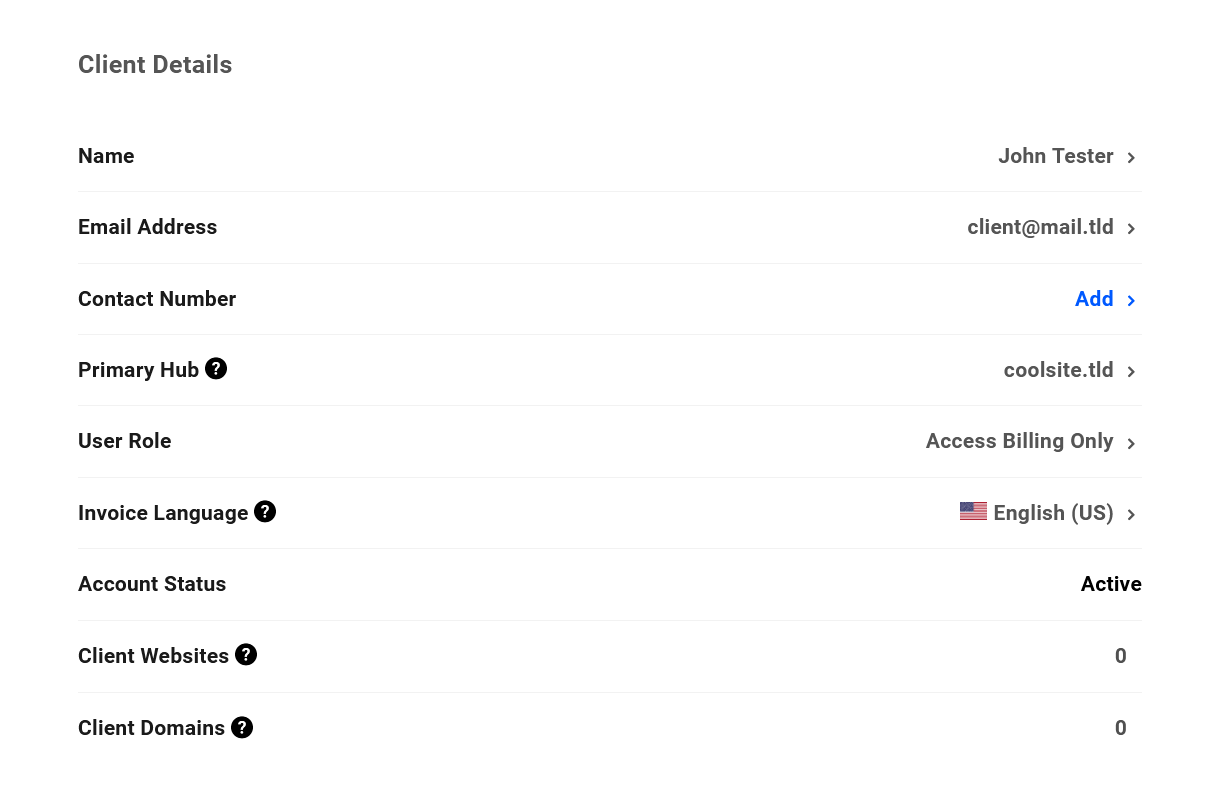
Click on the data displayed in any row to pop open a form where you can update the client’s Name, Contact Number, User Role, Primary Hub and Invoice Language.

Only the client can edit their Email Address in their Hub account once their account has been activated. This can only be done in their Hub profile; see The Client Hub Account for details. You can of course edit anything in a client account that is in Pending or Inactive status, including the email address.
If, for any reason, an active client cannot access their Hub account to make this change, you can edit the email address for them in your Stripe account. That will immediately update the info in their Hub account.
The Client User Role you assign determines exactly what areas & features the client has access to in your Hub, and what they are allowed to do in those areas. You can change the client user role if needed at any time.
If you have followed our recommendation and are using the Hub Client plugin on at least one of your own sites, you can adjust the Primary Hub that will be used for all communications with this client.
The Invoice Language option enables you to set a different language for individual clients and override the default that you have set in the Customize Invoices settings.
The Account Status indicates whether the client’s account is currently Active, Inactive or Pending as described above.
Client Websites indicates how many websites are associated with the client, associated either manually by you, or when the client purchases a hosting Reseller product from you.
Client Domains indicates how many registered domains are associated with the client, associated either manually by you, or when the client purchases a domain Reseller product from you.
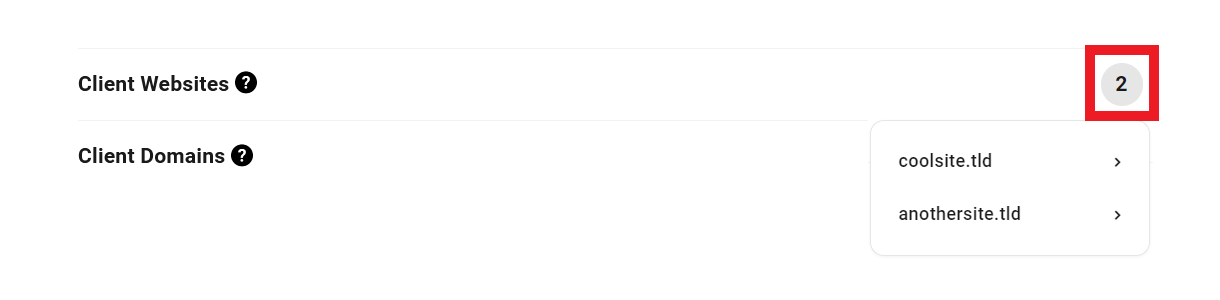
If there are any websites or domains associated with the client, hovering over the number displayed in the row will reveal a tooltip listing those sites or domains. Clicking on any site or domain name in the tooltip will redirect you to the corresponding billing screen for that client site or domain.
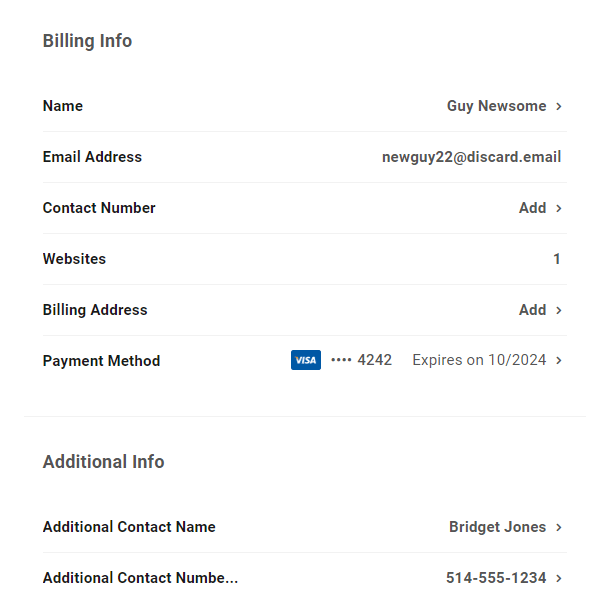
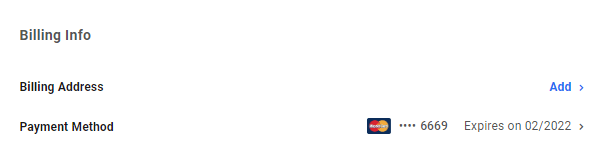
Billing Info
The next section displays the Billing Info associated with this client, which includes the client’s Billing Address and Payment Method.
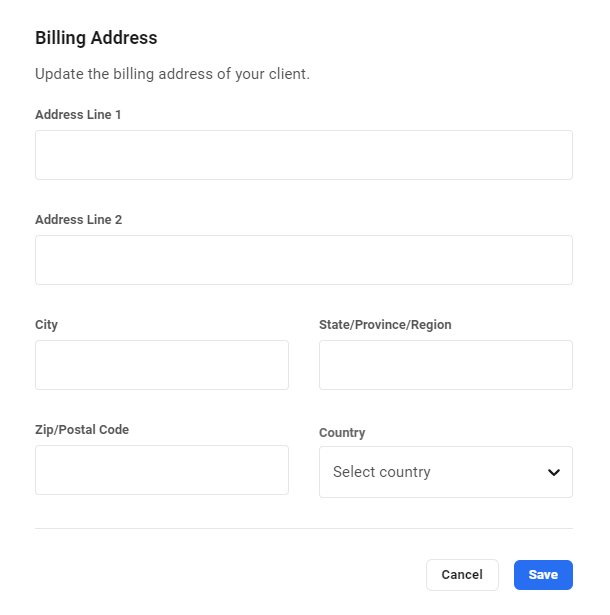
Click the Add link or the existing data in the Billing Address row to pop open a modal window where you can add or edit the client’s billing address if needed.
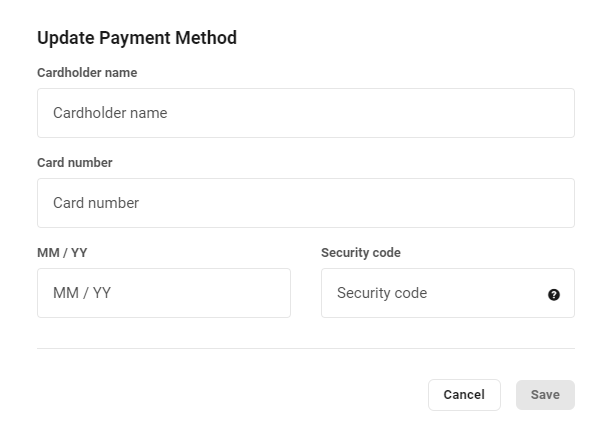
Click the Add link or the existing data in the Payment Method row to pop open a modal window where you can add or edit the client’s payment method if needed.
Note that when adding or updating the Payment Method, the credit card data is sent securely to Stripe and is not stored on WPMU DEV servers. See our Privacy Policy for more info.
Additional Info (Client Profile)
This section only appears if you have created one or more custom fields for your Client Profiles under the Custom Fields tab. Client custom fields can be made visible to clients in their own Hub accounts, or set to hidden so only you can see them.
The example image below shows a Client Profile with custom fields created for Additional Contact Name and Number that are available for clients to fill in, and an Internal Notes field that is hidden from clients.

Client Products & Services
Under the Products & Services tab for a client, you’ll find all the information related to products and services that you have invoiced to that client.
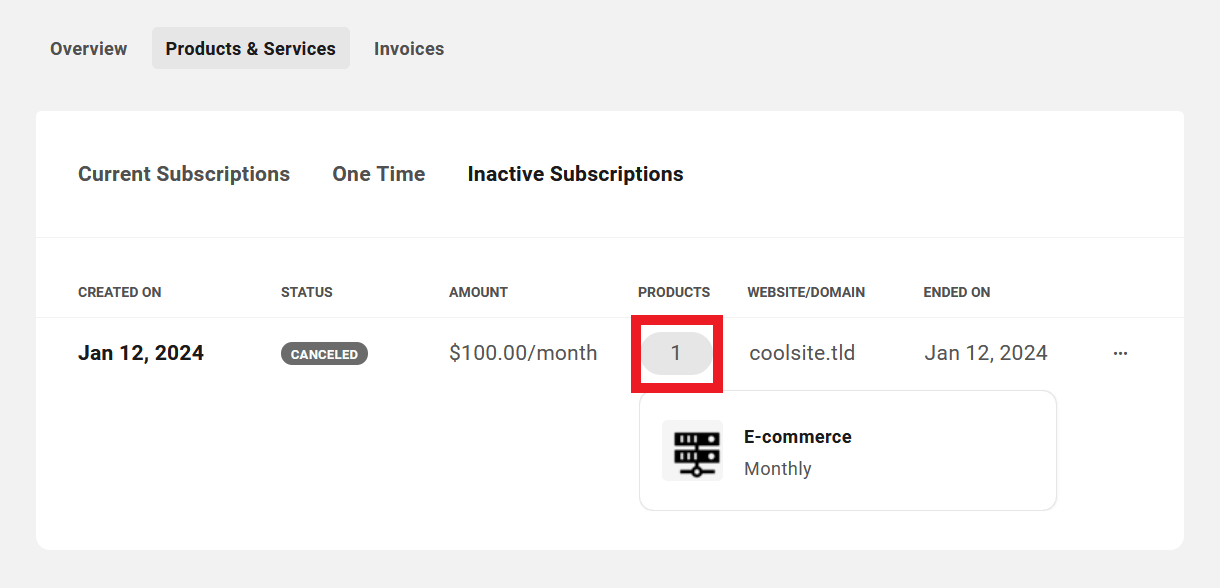
Current Subscriptions
Products under the Current Subscriptions tab are the client’s active subscriptions with recurring billing.
- Created On – This is the date the client first subscribed to this product or service.
- Status – The status here will be either Active, or Pending if the associated subscription invoice has not yet been paid.
- Amount – The amount billed per billing period, including any added taxes.
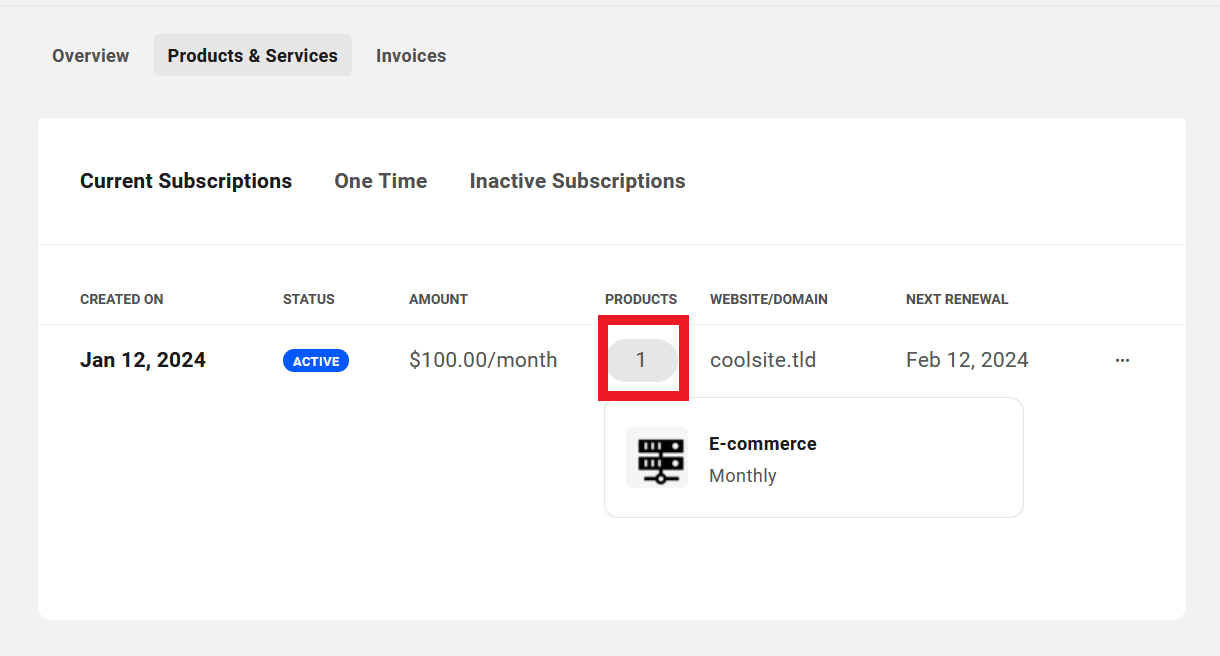
- Products – This number indicates how many products are included in the subscription.
- Website/Domain – If there is a website or domain associated with this subscription, its URL will appear here.
- Next Renewal – When the next scheduled subscription payment is due.
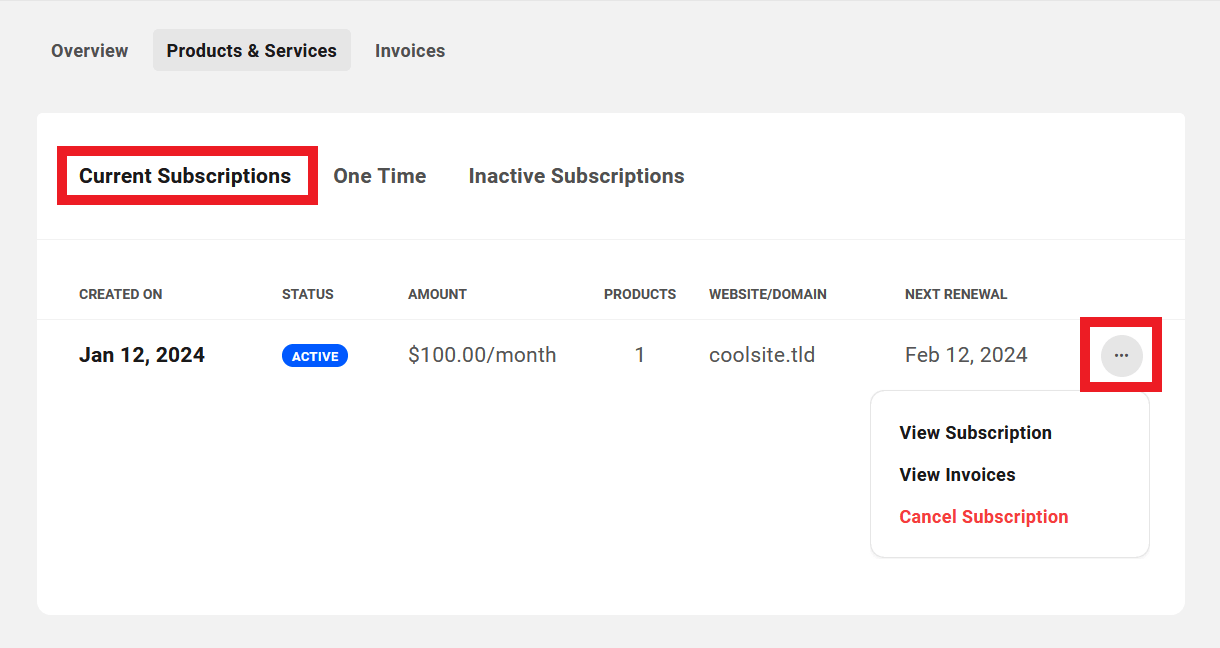
Click on the ellipsis icon at the far right of any row to reveal management options for that client subscription.
- View Subscription – Click to view all details of that client’s subscription in a modal window. See View Subscription below for details.
- View Invoices – Click to be directed to the main Invoices area where the list will be filtered automatically to show only invoices associated with this subscription.
- Cancel Subscription – Click to cancel the current active subscription.
If you had associated a website with a subscription invoice, and then cancelled the subscription here, that website would still be visible and accessible to the client in their Hub account. If you wish to cancel the subscription and also revoke access to that website in their Hub account, see the Client Info section in the Managing Site Billing chapter below.
You can also hover your mouse over the number in the Products column to reveal a tooltip listing all products contained in that subscription.
One Time
Products listed under the One Time tab are any single payment products the client has purchased from you.
- Product/Plan – The name of the one-time billed product.
- Status – This indicates the invoice status of the product. See Managing Invoices below for more information about invoice status.
- Website/Domain – The website or domain this product is attached to, if any.
- Amount – The amount billed for the product.
- Billed On – The date the invoice was created
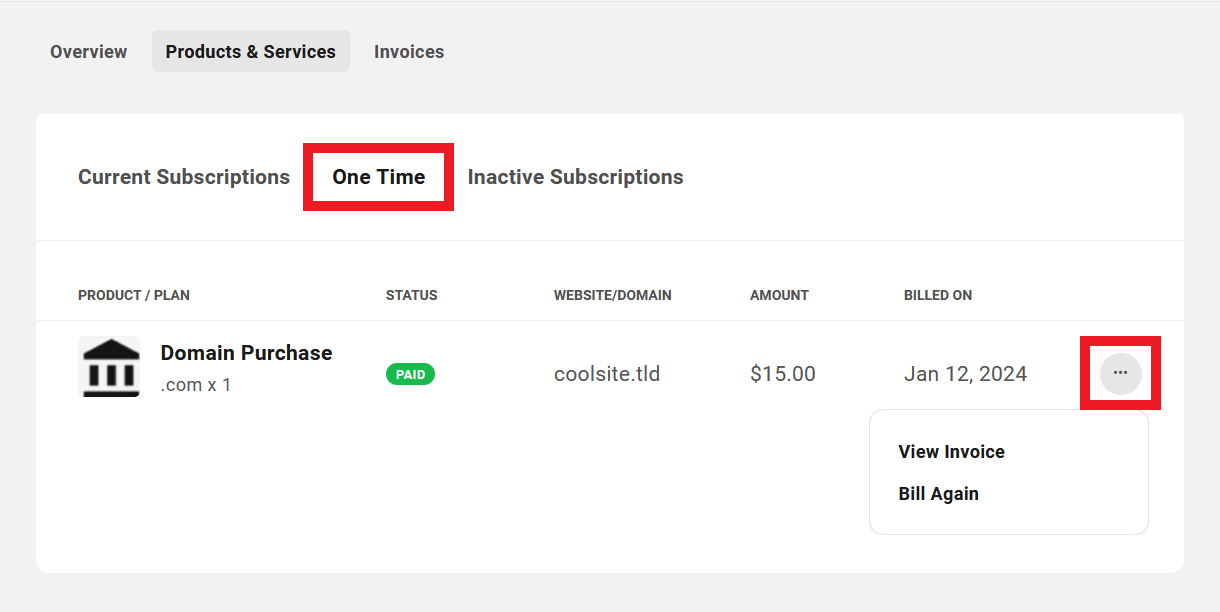
Click on the ellipsis icon at the far right of any row to reveal management options for that one-off product.
- View Invoice – Click to be directed to the main Invoices area where the list will be filtered automatically to show only the invoice associated with this product.
- Bill Again – Click this option to automatically bill the client again for the same one-time product. Note that if the one-time invoice is for a Domain Reseller product, and the invoice has been paid, this option will not be available.
Inactive Subscriptions
Products under the Inactive Subscriptions tab are the client’s subscriptions that have been cancelled or have expired.
- Created On – This is the date the client subscribed to this product or service.
- Status – This indicates whether the subscription was Cancelled or has Expired.
- Amount – The amount billed per billing period, including any added taxes.
- Products – This number indicates how many products were included in the subscription.
- Website/Domain – If there was a website or domain associated with this subscription, it will appear here.
- Ended On – The date on which the subscription expired or was cancelled.

Click on the ellipsis icon at the far right of any row to reveal management options for that client subscription.
- View Subscription – Click to view all details of that client’s subscription in a modal window. See View Subscription below for details.
- View Invoices – Click to be directed to the main Invoices area where the list will be filtered automatically to show only invoices associated with this subscription.
- Reactivate Subscription – Click to reactivate the same subscription for this client. Note that reactivating an inactive subscription sends a new invoice to the client and creates a new subscription that is activated the moment the invoice is paid.
You can also hover your mouse over the number in the Products column to reveal a tooltip listing all products contained in that subscription.
View Subscription
When you click on any Active or Inactive subscription’s row, or the View Subscription option under the ellipsis icon in any subscription’s row, a modal will pop open where you can view all the subscription details.
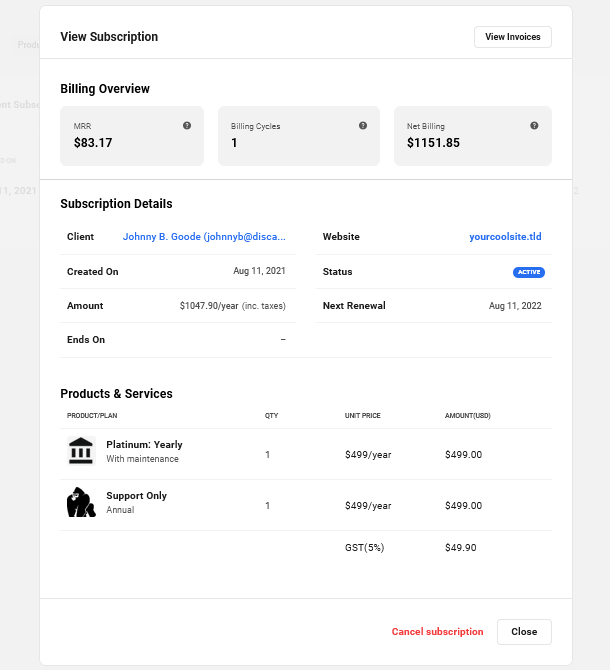
Billing Overview
This section of the subscription view presents the following information:
- MRR (Monthly Recurring Revenue) – The normalized monthly revenue for the subscription. For example, if the subscription is an annual one, this would indicate 1/12th of the annual amount. This amount does not include any taxes you may have added to your invoices.
- Billing Cycles – This indicates the current billing cycle. For example, if this displays 5, it means that this subscription has completed 4 billing cycles, and the 5th billing cycle is ongoing.
- Net Billing – The total revenue to date from this subscription, minus any refunds that you may have issued. This amount includes any taxes you may have added to your invoices.
Subscription Details
This section of the subscription view lists the following information:
- Client – Displays the client’s name and email address.
- Website – The website the subscription is attached to, if any.
- Created On – The date the first invoice for the subscription was paid and the subscription was activated.
- Status – The current status of the subscription: Active, Inactive, Pending, Expired or Canceled.
- Amount – The amount billed per billing period, including any added taxes.
- Next Renewal – The date of the next scheduled payment due for the subscription.
- Ends On – The date the subscription will end if there is a set number of billing cycles.
Products & Services
This section displays the products included in the subscription, with the following details:
- Product/Plan – The name of the product and associated pricing plan.
- Quantity – How many units of the product/plan in the subscription.
- Unit Price – The unit price of each product/plan, including any added taxes.
- Amount – The amount invoiced for the product, including any added taxes.
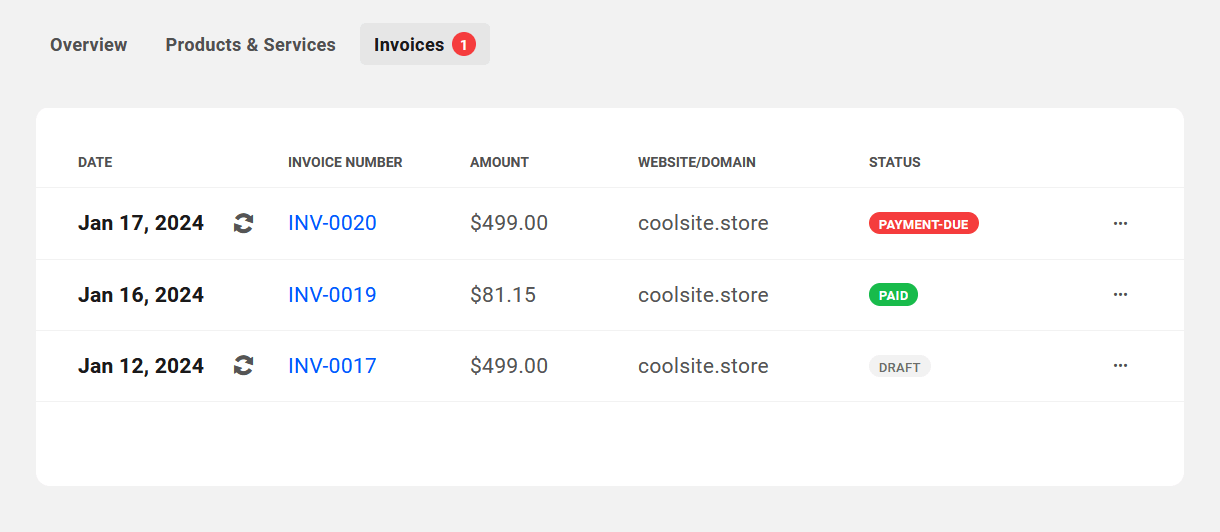
Client Invoices
Under the Invoices tab for a selected client, you’ll find the list of all invoices associated with that client. The data displayed here for each invoice of an individual client is identical to the data displayed for all invoices in the main Invoices section.
- Date – The date the invoice was created.
- Invoice Number – The invoice number including your custom prefix.
- Amount – The total amount of the invoice, including any added taxes.
- Client – The email address of the client whose invoices you are viewing.
- Website/Domain – If there is a website or domain associated with the invoice, it will be shown here.
- Status – This will indicate one of the following for each invoice: Payment Due, Paid, Failed, Refunded, Draft or Void.
Click on any invoice to be directed to the Invoices section where the selected invoice details will be displayed.
Click on the ellipsis icon to the far right of any displayed invoice to reveal management options for that invoice. The options will differ depending on the invoice status.
A red icon next to the Invoices tab in the header indicates the number of outstanding unpaid invoices for that client.
For more information about invoice details, invoice status and management options available for each status, see the Invoices chapter below.
7.5.3 Client Roles
Link to chapter 5The Roles sub-section is where you can create and manage the user roles that you assign to your clients. The user role you assign to each client is what determines exactly what areas & features of your Hub the client can access.
There are several system roles that cannot be edited. The View All & Access Billing role is assigned by default to all new clients, but you can change the default role if needed by hovering your mouse over the one you want and clicking the Make Default link.

Here is a brief description of each of the system roles and the access each gives to your clients. See the Default System Roles chapter in the Team & Client Roles Customization document for a full breakdown of all capabilities included in the default roles.
- View All & Access Billing – Granting this system role to the client gives them access to everything related to any site they’ve been added to in your Hub, but they can only view the data displayed; they cannot edit or take action on anything. They do however have full management access to their own billing area to view and pay invoices, etc.
- Edit All & Access Billing – Granting this system role to the client gives them access to everything related to any site they’ve been added to in your Hub, and they can edit and take action on anything they have access to. They also have full management access to their own billing area to view and pay invoices, etc.
- Access Billing Only – Granting this system role to the client gives them full management access to their own billing area to view and pay invoices, etc, but they have no access to anything else in your Hub.
- View All & Access Billing (Reseller) – Granting this system role to the client gives them the same access capabilities as the View All & Access Billing role above, plus they have access to purchase your Reseller products. Use with your Reseller clients.
- Edit All & Access Billing (Reseller) – Granting this system role to the client gives them the same access capabilities as the Edit All & Access Billing role above, plus they have access to purchase your Reseller products. Use with your Reseller clients.
Creating Custom Client Roles
If none of the system roles meet your requirements and you need more fine-grained control over what your clients can access in your Hub, you can create one or more custom roles with exactly the access permissions you want them to have. To do that, click the + Create New Role link at the top-right of this screen.

On the next screen, you’ll give your custom role a Name, and you’ll see several Hub areas & features that you can enable, and for which you can customize access in your custom client role.

By default, all Hub areas & features you see here are set to Hidden, which means your custom client role does not grant any access to that area or feature. To enable and fine-tune any that you wish to add, click the toggle next to the Hidden label to enable it. Then click the View & Edit link that appears there to customize the access if needed.
- View & Edit – Selecting this option means the client will be able to view and edit anything this feature grants them access to in your Hub.
- View Only – Selecting this option means the client will only be able to view whatever this feature grants them access to.
- Custom – Selecting this option enables you to fine-tune exactly what the client can view or edit.
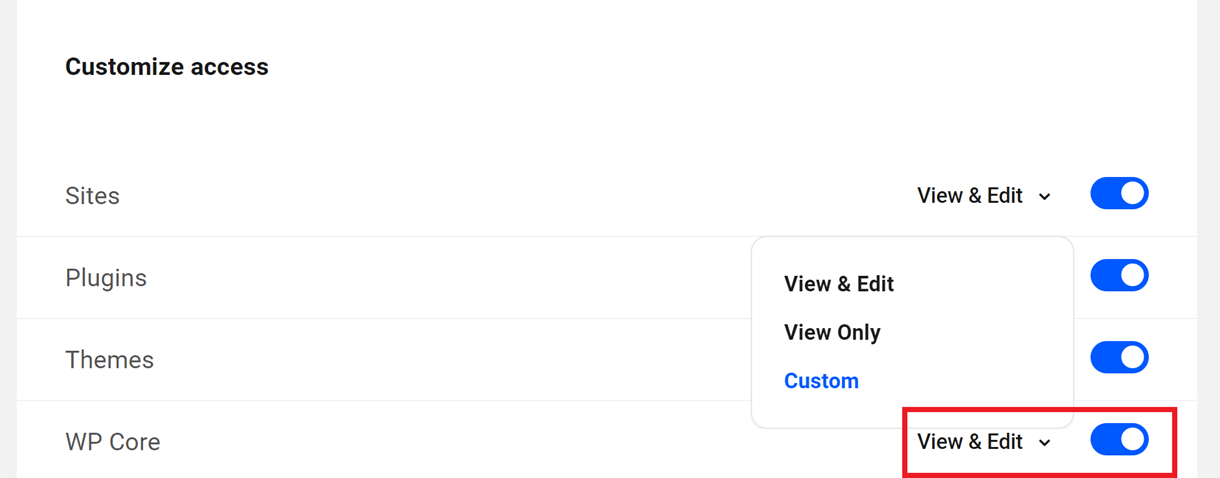
If you select the Custom option, a modal window will pop open where you can enable only the specific elements you want for this feature. For example, if you select Custom for the WP Core feature, you’ll see the following capabilities can be enabled/disabled for clients to whom you grant this custom role.
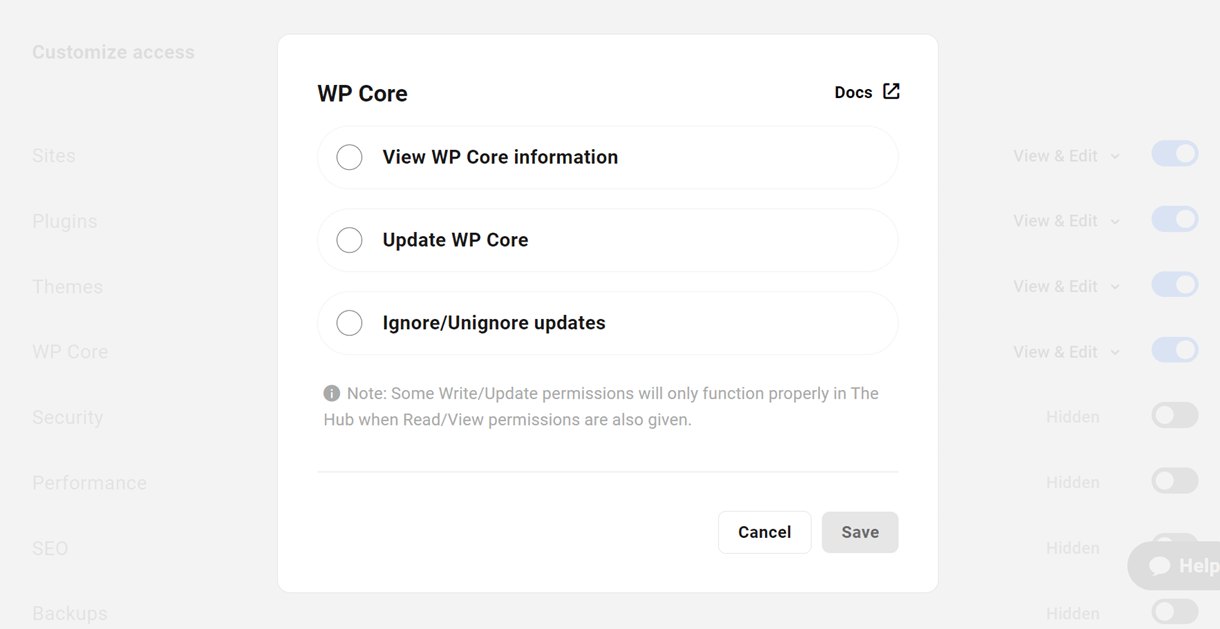
For more information on how to fine-tune every feature in your custom client role, see our Team & Client Role Customization documentation.
About Reseller Roles
This section has moved. Please see About Reseller Roles in our Team & Client Role Customization document.
7.6 Products & Services
Copy chapter anchor to clipboardThe Products & Services section is where you can manage all the products & services that you offer to your Hub clients.
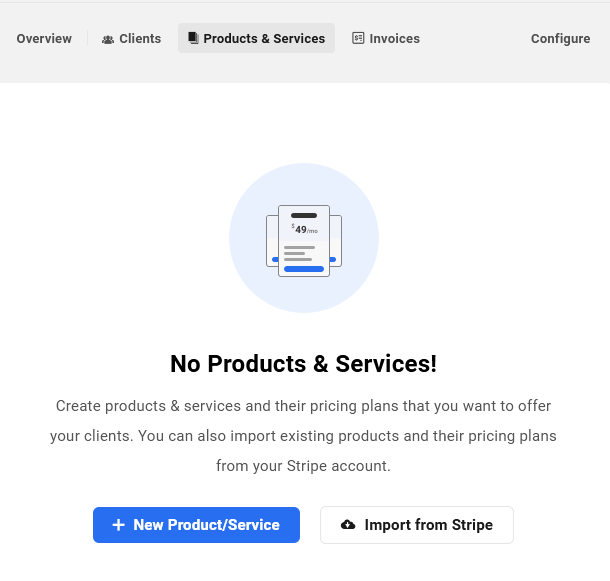
If you haven’t already imported any products or services under the Configure > Billing Account tab, you’ll initially be prompted here to either manually add your first product or import some from your Stripe account. Click either link below to jump to the corresponding section in this chapter.
For details about managing or editing individual products, see the Managing Products & Services chapter below.
For details about adding WPMU DEV hosting and/or domain reseller products, see the Hosting Reseller and Domain Reseller chapters in our Reseller documentation.
7.6.1 Adding Products
Link to chapter 6Adding Products Manually
To manually add a new product or service, click either the + New Product/Service button on the initial No Products screen as shown above, or the + New Product button at top-right of your Products & Services screen if you already have one or more added.

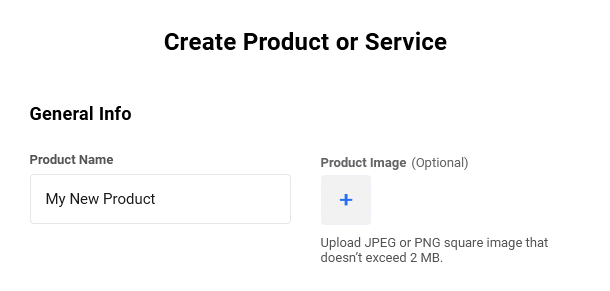
In the modal window that pops open, the first thing you’ll want to do is give your product a Name and optionally upload a Product Image.
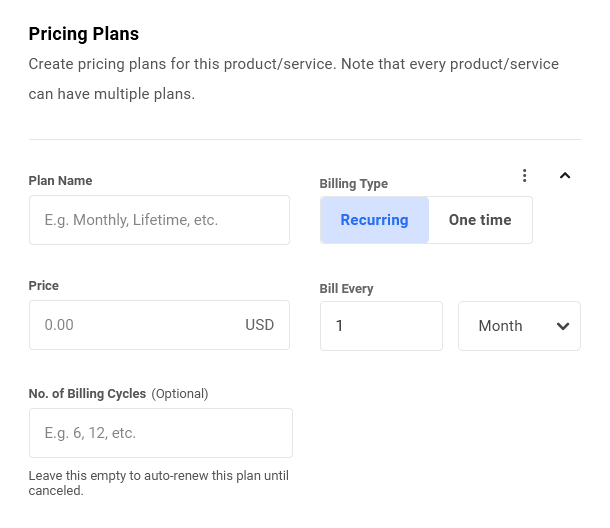
In the next section of the modal, you’ll want to create at least one pricing plan to associate with the product. For each pricing plan you add to your product, you’ll provide the following information.
- Plan Name – This is the name of the pricing plan to differentiate it from other plans in the same product.
- Billing Type – Select whether this plan should be billed on a recurring basis or one-time only.
- Price – The price for each billing period if recurring, or the price for the one-time bill.
- Bill Every (appears only if you select Recurring as the Billing Type) – Set the billing interval if this is a recurring plan. This can be any number of days, weeks, months or years up to a maximum of 3 years total (1095 days, 156 weeks, 36 months or 3 years). For example, you may wish to bill the client on a recurring basis every 3 months, or perhaps only every 2 years.
- No. of Billing Cycles (appears only if you select Recurring as the Billing Type) – This is the number of times the client would be billed for a recurring plan before the subscription expires. Leave this field blank if you want the subscription to auto-renew until canceled.
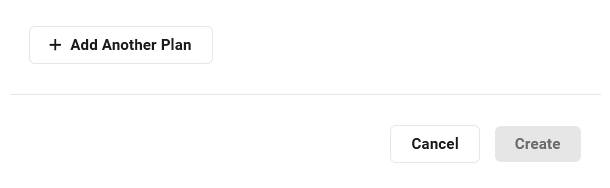
If you wish to add another pricing plan to the product, click the + Add Another Plan button. That will pop open another instance of the form as above. Fill in the fields for the new plan as above. Remember to click Create at the bottom once you’ve finished adding your plans.
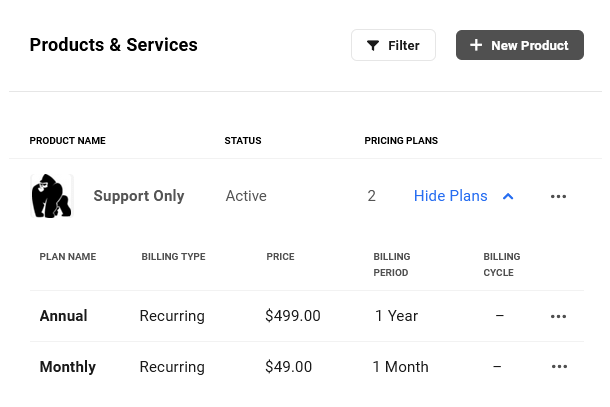
In our example below, we’ve created a product named Support Only with 2 recurring pricing plans; one monthly and one yearly.
Adding WPMU DEV add-ons and services
To sell WPMU DEV add-ons or services to your clients, manually create a new product and associate a pricing plan for the add-on or service you wish to offer.
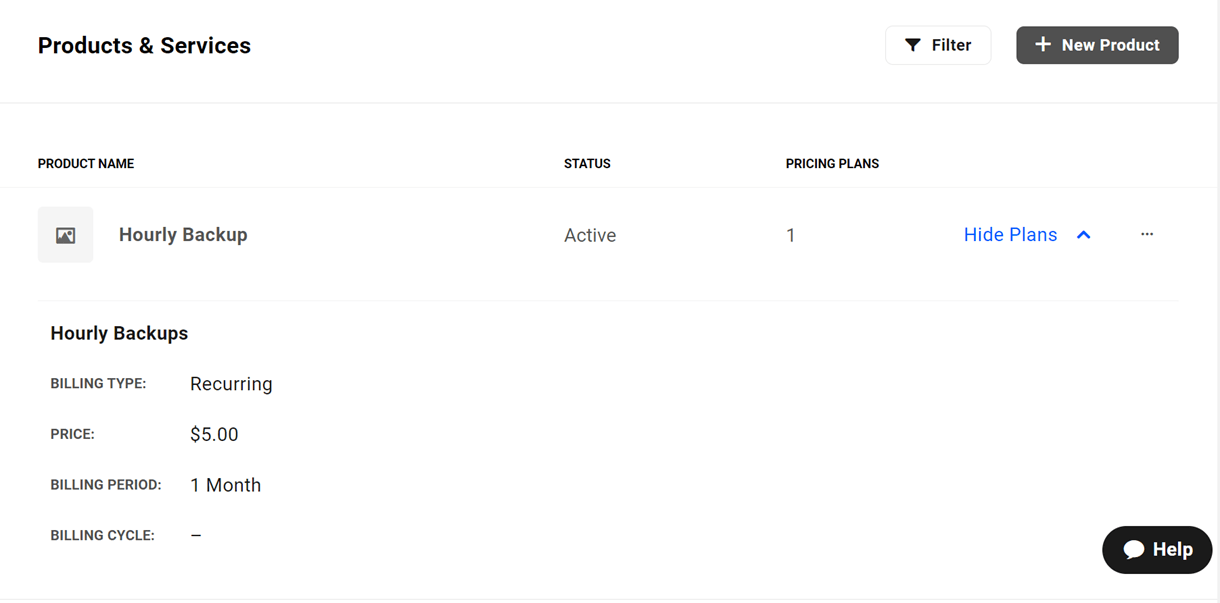
For example, if you wish to offer an hourly backup add-on to your clients, create a new product and set the price. Once the client makes the purchase, you can manually activate the hourly backup service for their site via the Hub.
Importing Products from Stripe
If you have not yet imported products from your Stripe account under the Configure > Billing Account tab, click the Import From Stripe button on the initial No Products screen as shown above.
If you have already added one or more products to your Hub, and wish to import more from your Stripe account, you will need to do that from the Billing Account tab in the Configure section.
When importing products from your Stripe account, only the pricing plans with the same currency as you set when Connecting Your Stripe Account will be imported. If a product only contains plans in a different currency, the product itself will still be imported, but it will have no associated plans. You can of course create new pricing plans for any product in your Clients & Billing portal. See Adding Products Manually for details.
Select the individual products you wish to import by checking the box next to their Product name. If you wish to import them all, check the box at top-left, just above the Product column. Click the Import button to proceed.
The selected products will then be imported, along with all the pricing plans attached to them, and added to your list of Products & Services.
7.6.2 Managing Products & Services
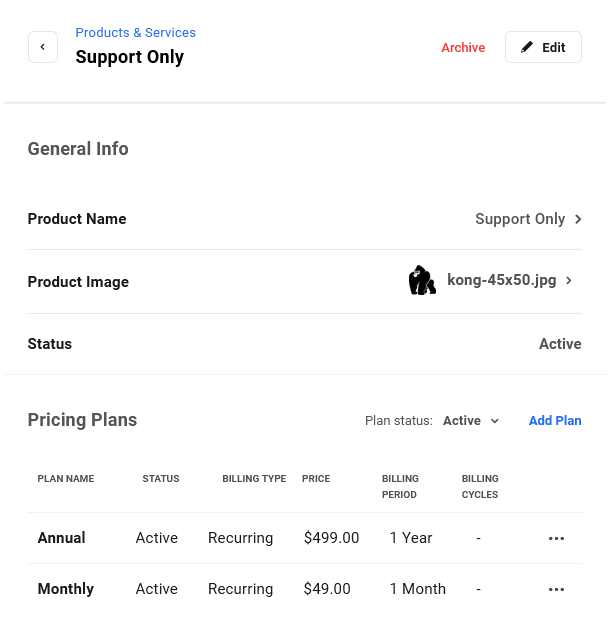
Link to chapter 6Once you have at least one product created, you’ll see it listed on the Products & Services screen, where its Status and the number of Pricing Plans associated with it will be displayed. Click the ellipsis icon to pop open the management options.
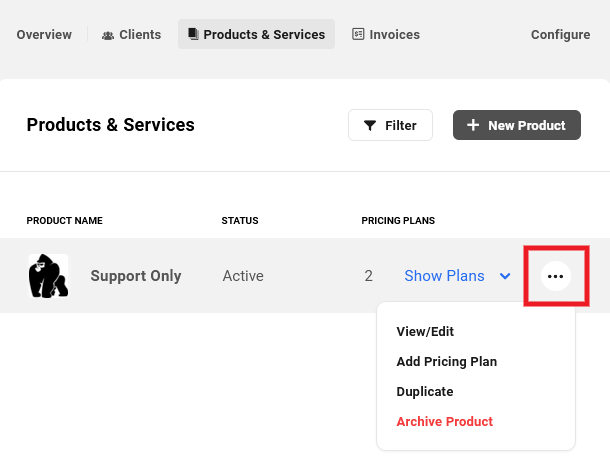
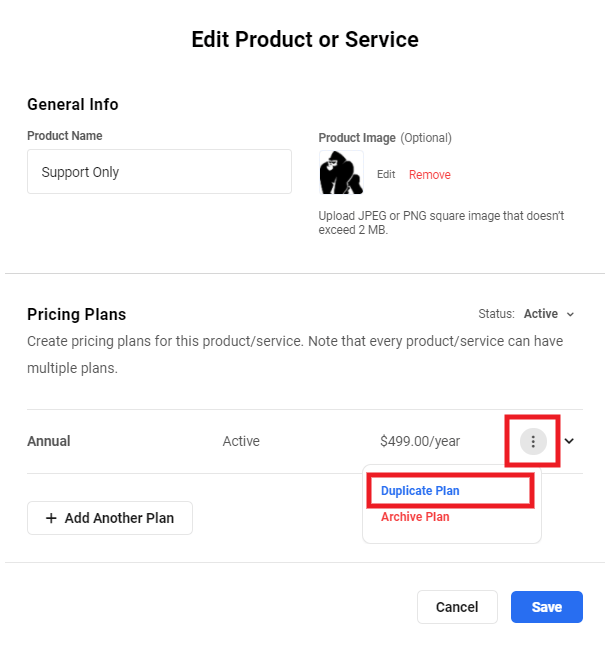
- View/Edit – Click this to pop open a modal where you can edit the info associated with your product. See also Editing a Pricing Plan below.
- Add Pricing Plan – Select this option if you want to add another pricing plan to the product.
- Duplicate – Click this option to create an exact duplicate of the product that you can edit afterwards.
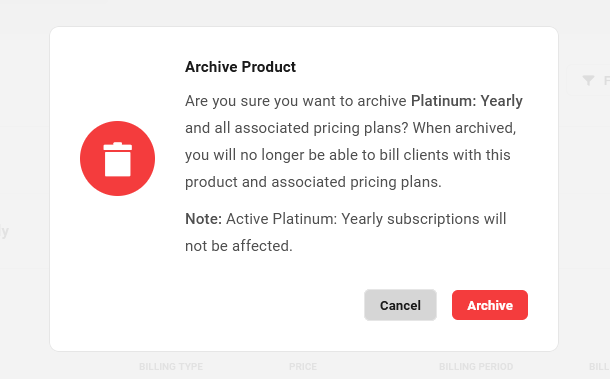
- Archive Product – Select this option if you ever need to deactivate a product so it is no longer available for your billing. Note that archiving a product does not affect any existing client subscriptions, it just makes it unavailable for selection when billing a client.
Click the Show Plans link to expand the product and view details about the pricing plans associated with that product. When viewing the plans, you’ll again see an ellipsis icon in each one which, when clicked, will reveal management options for that pricing plan.
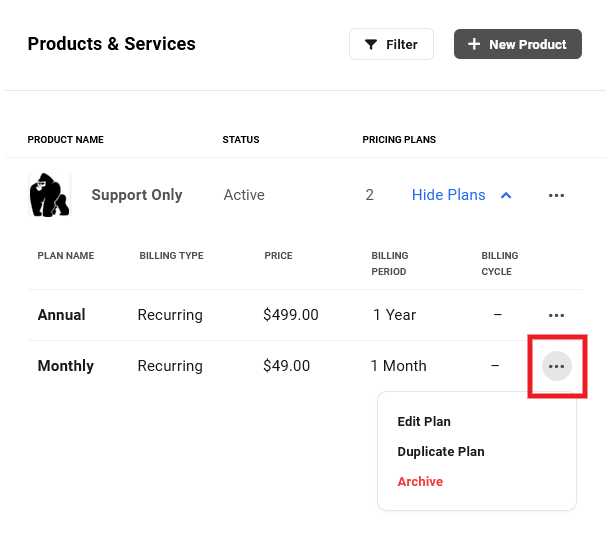
- Edit Plan – Select this option to edit settings related to the plan. See also Editing a Pricing Plan below.
- Duplicate Plan – Select this to create an exact duplicate of the plan that you can edit afterwards.
- Archive – Select this option to deactivate the pricing plan. Note that archiving a pricing plan does not affect any existing client subscriptions, it just makes it unavailable for selection when billing a client.
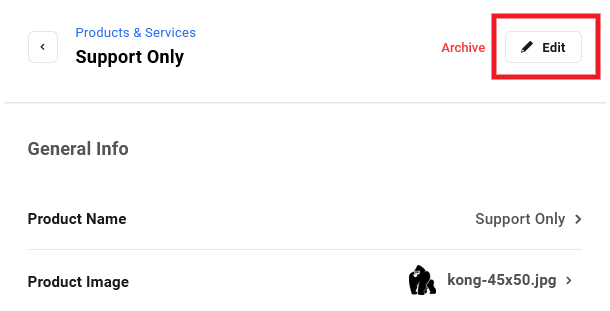
When you select the Edit Plan option, you’ll have access to all settings of the product and the plans associated with it. Click the Edit button on that screen, or any of the options displayed there, to pop open a modal where you can adjust things as needed.
When you click the Archive option for a product or a pricing plan, a confirmation message will pop up prompting you to confirm the action, with a reminder that existing subscriptions will not be affected.
Editing a Pricing Plan
When editing a product or a pricing plan, you can only change the name & image of a product, or the name of a plan. No other options can be changed once created. This is a limitation of the Stripe API and this behavior cannot be modified.
So if you do need to change other settings in an existing pricing plan, like the price or billing frequency, you’d need to first duplicate the plan, then edit the duplicate before saving it.
To get that done, click the Edit button on the product to pop open the product editor where all associated plans are displayed.
Then select the Duplicate option under the ellipsis icon of the plan you want to edit. That will create an exact copy of the plan that you can edit before hitting the button to Save the updated product.
Once you’ve updated the duplicate plan and saved your product, you can archive the original plan if needed so it can no longer be used to bill your clients.
Remember that archiving a plan does not affect existing subscriptions on that plan. So this method can be used to increase the price of a plan when needed, while grandfathering existing customers on their original pricing plan.
Deleting a Pricing Plan
It’s important to note that it is not possible to delete a pricing plan from the Hub; you can only archive existing plans so they can’t be used when invoicing clients, as noted above.
However, you can delete a pricing plan in your Stripe account, as long as the plan has not yet been used in a transaction. If it has, then it can only be archived there as well.
7.7 Invoices
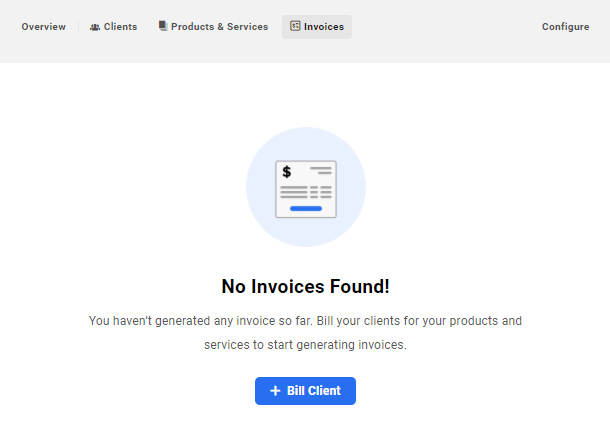
Copy chapter anchor to clipboardThe Invoices section is where you can view and manage all invoices for all clients. If you have not yet created any invoices, you’ll see the initial No Invoices Found screen, with a + Bill Client button at the bottom to create your first invoice. See the Creating Invoices chapter below for more details.
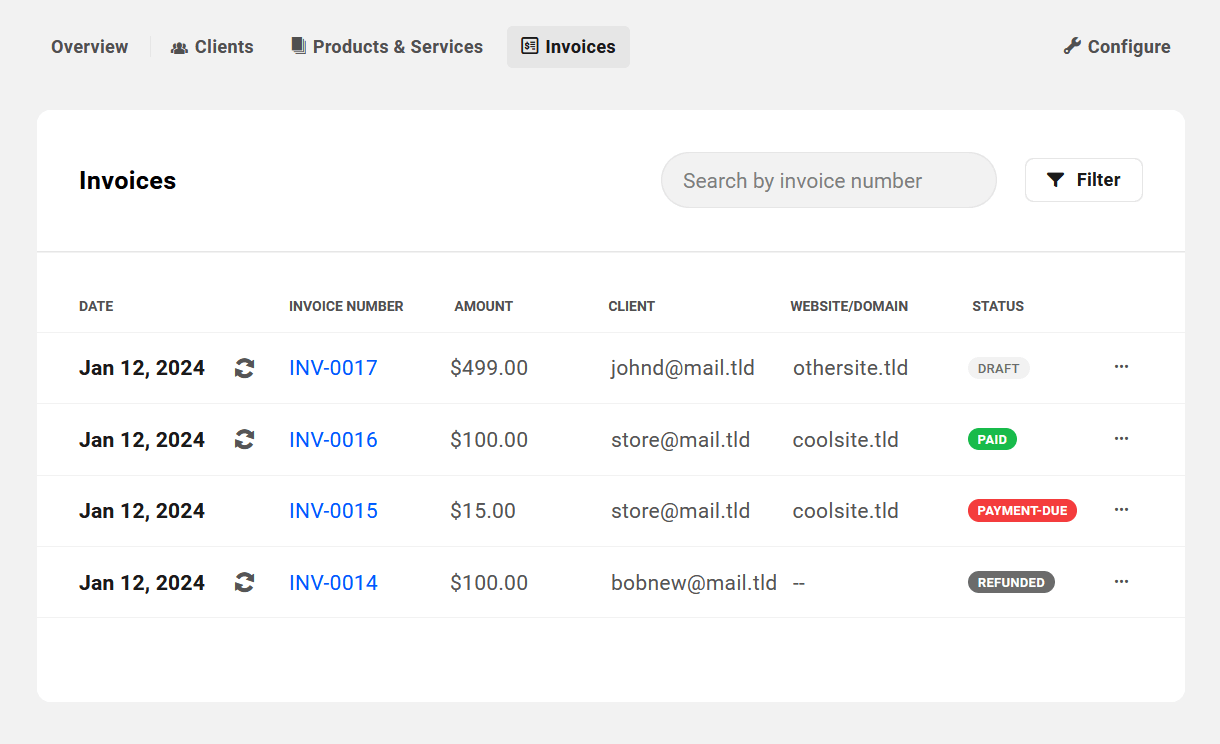
Once you have at least one invoice created, this screen will be populated with a list of all your invoices, and will display summary information in columns as follows:
- Date – The date the invoice was created.
- Recurring icon – This icon, when present, indicates that the invoice has been created by a subscription and is recurring.
- Invoice Number – The invoice number including your custom prefix.
- Amount – The total amount of the invoice, including any added taxes.
- Client – The email address of the client whose invoices you are viewing.
- Website/Domain – If there is a website or domain associated with the invoice, its URL or TLD will be shown here.
- Status – This will indicate one of the following for each invoice: Payment Due, Paid, Failed, Refunded, Draft or Void. See the Invoice Status Options section below for more info.
Use the searchbox at the top to search the list by invoice number. Or click on the Filter button to filter the list by any of the following criteria.
- Created On – Use to filter by the date invoices were created.
- Invoice Status – Filter by Payment Due, Paid, Failed, Refunded, Void or Draft.
- Client – Filter to only display invoices for a selected client.
- Website – Filter to only display invoices for a selected website.
- Domain – Filter to only display invoices for a selected domain.
- Product/Plan – Filter to only display invoices for a specific product or plan.
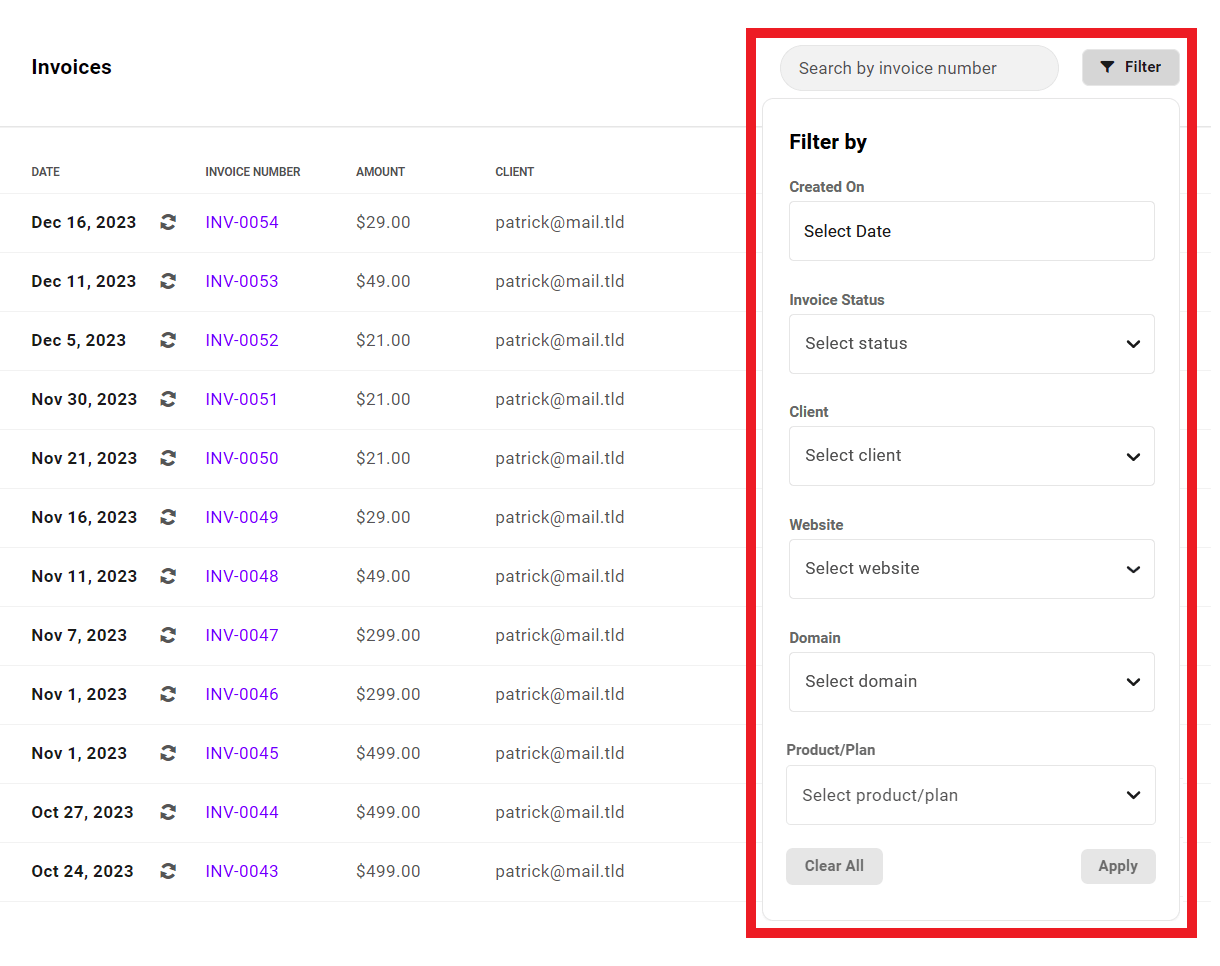
Hover your mouse over any filter and click the [X] to remove it, or click the Clear All button to remove all filters and revert the list to displaying all invoices.

Some countries, like Spain & Portugal, require the use of authorized invoicing software that communicates with and shares records with local tax authorities. You can still use Clients & Billing to manage invoicing and payments from clients in this case. Simply make it clear, perhaps in an invoice footer note, that while the client can make their payment by clicking the Pay button in the invoice emailed to them from C&B, that invoice is pro-forma only to simplify the payment process for them, and they would receive their offical tax invoice from the other platform.
7.7.1 Creating Invoices
Link to chapter 7Once you have added at least one client to your Hub, either manually or by importing customers from your connected Stripe account, you’ll see a + Bill Client button available at the top-right of every page in the Clients & Billing section of your Hub.
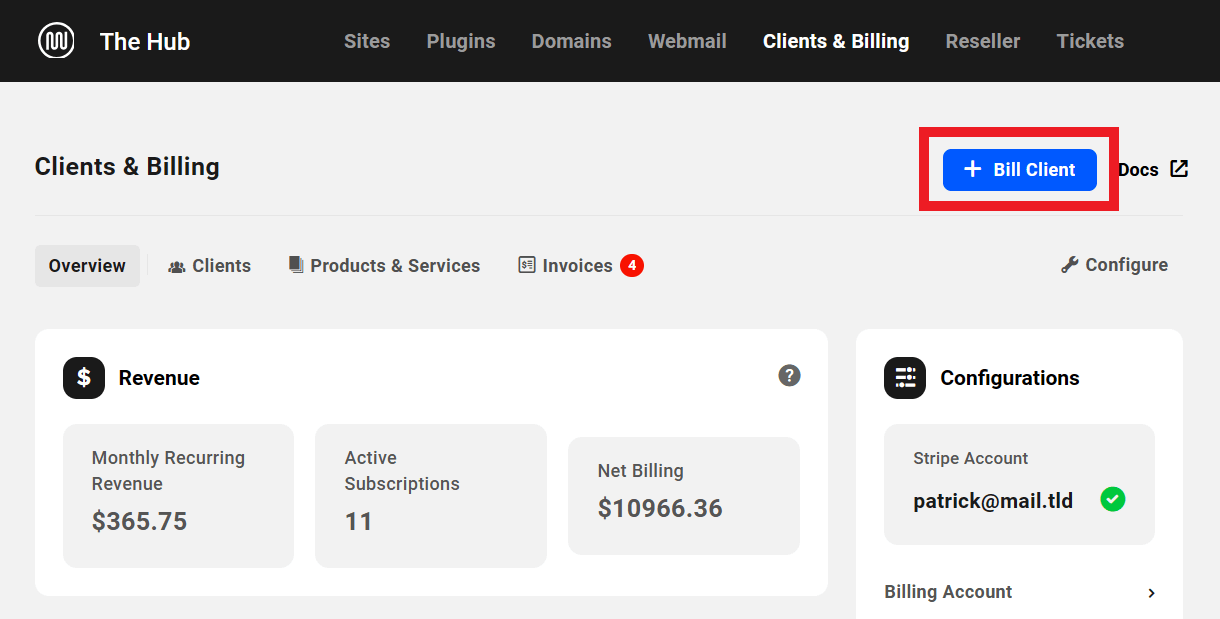
Click the + Bill Client button to pop open a modal window to create a client invoice.
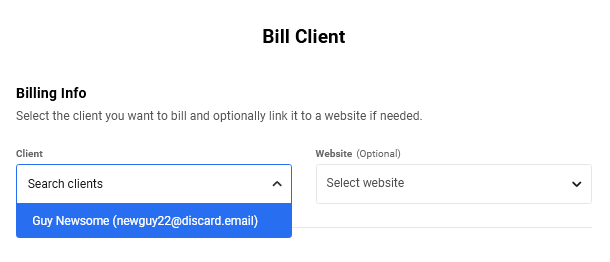
You’ll first be prompted to select the Client you want to bill, and optionally associate the invoice with a Website that is connected to your Hub.
If your lists of clients or websites are long, start typing the name in the search field to dynamically search for the ones you want.
Note that if you click the + Bill Client button while viewing any page in a specific client’s profile, the Client field will be automatically filled in with that client’s name.
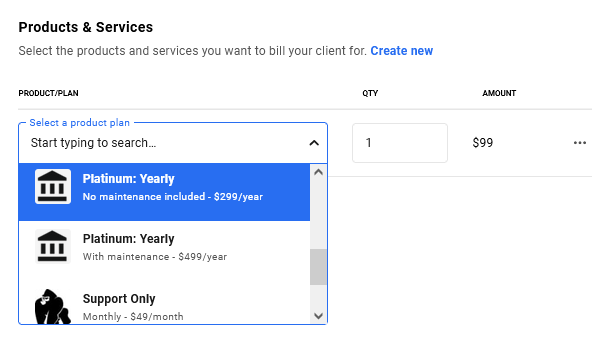
Then select a Product/Plan that you want to bill the client for. Here again, if your list of products is long, just start typing the product name in the search field to narrow it down to the one you want. Then adjust the Quantity if you want to bill the client for more than one unit of the selected product.
If you wish to add another Product/Plan to the same invoice, click the + Add Another Plan button, and select as above.
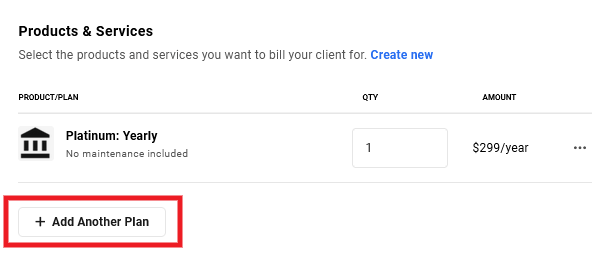
Note that you can add as many products or services to the same invoice as you wish, but they all must have the same billing interval and the same number of billing cycles. If you need to invoice a client for several products with different recurring billing intervals or cycles, you would need to create separate invoices for each billing interval or cycle.
However, you can include one-time billed products on the same invoice as products with recurring billing. The one-time product will only appear on that one invoice; all subsequent invoices will only include the recurring products.
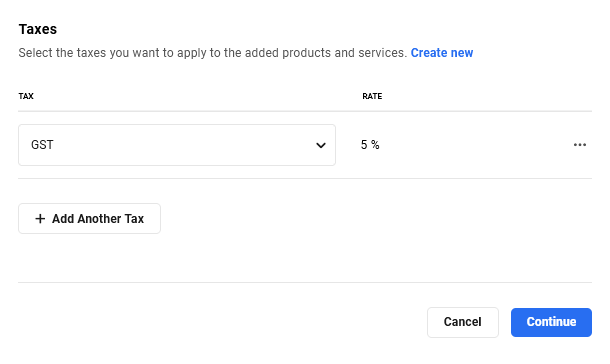
In the last section of this modal window, you can choose to add any needed taxes to the invoice if you have created any tax rates under the Configure > Taxes tab. Simply click the Tax dropdown and select the tax rate you wish to add to the invoice.
Click the + Add Another Tax for any additional tax rates you need to add to the invoice. You can add up to a maximum of 5 separate taxes to any one invoice.
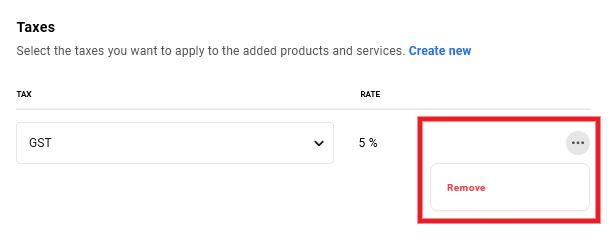
To change an added tax to a different one, first click the ellipsis icon and select Remove. Then select a new one from the dropdown.
If a tax you need for this invoice is not available in your list, click the Create New link to pop open a modal where you create the new tax rate needed. Note that this action would close the existing invoice modal and you’d need to start over where the new tax rate would then be available for selection.
Any taxes you add to an invoice will be applied to the total value of the invoice; it is not possible at this time to add taxes per product or service. A future release of the Clients & Billing portal may include this functionality however.
Once you’re done adding your products & optional taxes to your invoice, click the Continue button at the bottom to move on to the next step.
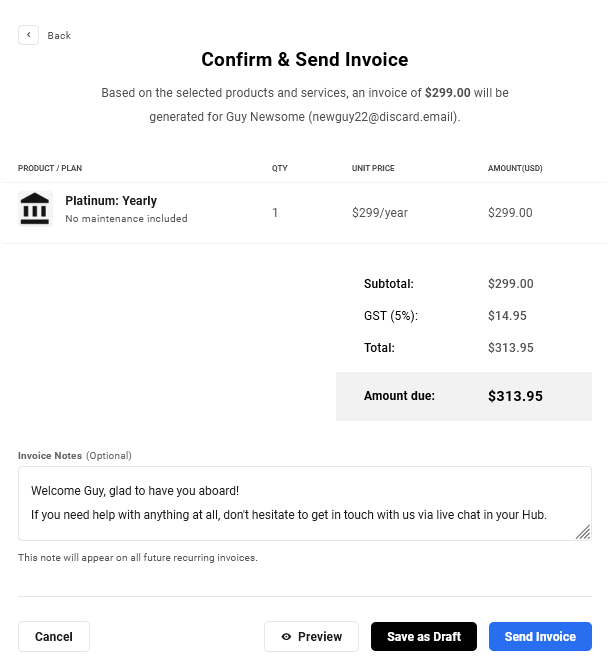
On this screen, you can double-check that the products/services you’re billing the client for are correct, that you’ve added any needed taxes, and optionally add a personalized Invoice Note that will appear in the footer of the invoice sent to the client.
If you need to make any changes, click the Back button at the top-left to go back to the previous step.
Click the Preview button to open a preview of the invoice in a new tab. To send the invoice right away, click the Send Invoice button. To cancel the invoice without saving or sending anything, click the Cancel button.
Click the Save as Draft button to save the invoice so you can edit or send it at a later time. You’ll find the Edit option when you click the ellipsis icon at the far right of its row. See Managing Invoices below for more information on available management options for draft and other invoice status.
7.7.2 Managing Invoices
Link to chapter 7To make it easy to distinguish between the various states of your invoices, the status of each one is displayed in a color-coded badge at the far right of its row.
- Paid invoices have a green badge.
- Draft invoices have a light grey badge.
- Payment Due and Failed invoices have a red badge.
- Refunded and Void invoices have a dark grey badge.
You’ll see these same badges appear both here in the main Invoices section, and under the Invoices tab for each individual client.
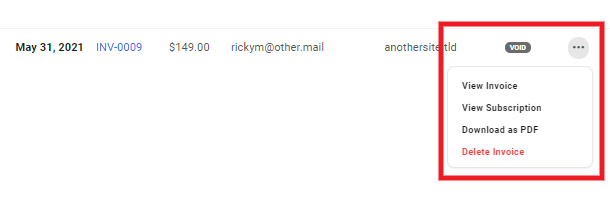
Each invoice has a distinct set of management options depending on its status. Its options can be accessed by clicking the ellipsis icon at the far right of its row.
Invoice Status Options
Paid
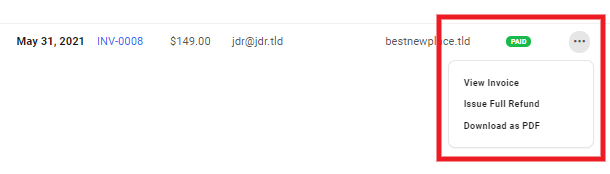
An invoice with a Paid status has the following management options available.
- View Invoice – Select this option to view the corresponding invoice details. See Viewing Invoice Details below for more info.
- Issue Full Refund – This option will trigger a full refund of the invoice value to the Payment Method the client has on file with you. See Additional Status Notes below.
- Download as PDF – Click this option to download the invoice as a PDF.
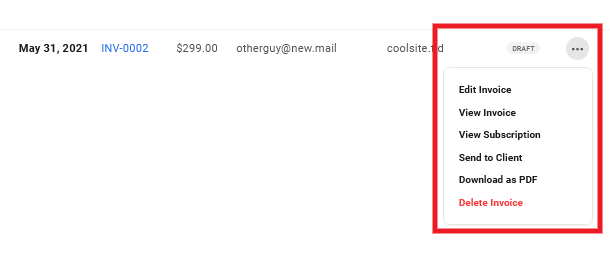
Draft
An invoice with a Draft status has the following management options available.
- Edit Invoice – Click this option if you need to edit anything in your draft before sending it to the client.
- View Invoice – Select this option to view the corresponding invoice details. See Viewing Invoice Details below for more info.
- View Subscription – Only appears if the invoice is for a product with recurring billing. Click to view details of the associated subscription.
- Send To Client – Click this option to send the invoice to the client. The status will then change to Payment Due until the client has Paid the invoice, or Failed if there is an issue with the payment.
- Download as PDF – Click this option to download the invoice as a PDF.
- Delete Invoice – Click to delete this draft invoice.
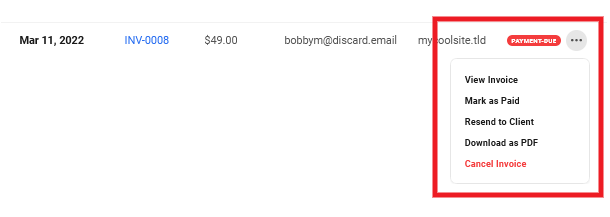
Payment Due
An invoice with a Payment Due status has the following management options available.
- View Invoice – Select this option to view the corresponding invoice details. See Viewing Invoice Details below for more info.
- Mark as Paid – Select this option to change the status to Paid. See Additional Status Notes below.
- Resend To Client – Click this option to send the invoice again to the client. The status will then change to Payment Due until the client has Paid the invoice, or Failed if there is an issue with the payment.
- Download as PDF – Click this option to download the invoice as a PDF.
- Cancel Invoice – Select this option to cancel the invoice and mark it Void. Note that if you cancel the 1st unpaid invoice of a subscription, that will also cancel the subscription.
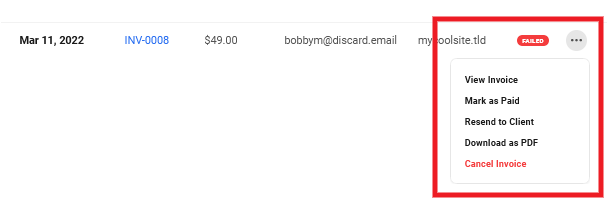
Failed
An invoice with a Failed status has the following management options available.
- View Invoice – Select this option to view the corresponding invoice details. See Viewing Invoice Details below for more info.
- Mark as Paid – Select this option to change the status to Paid. See Additional Status Notes below.
- Resend To Client – Click this option to send the invoice again to the client. The status will then change to Payment Due until the client has Paid the invoice, or Failed if there is an issue with the payment.
- Download as PDF – Click this option to download the invoice as a PDF.
- Cancel Invoice – Select this option to cancel the invoice and mark it Void. Note that if you cancel any failed invoice of a subscription, you will also have the option to cancel the subscription when prompted to confirm this action.
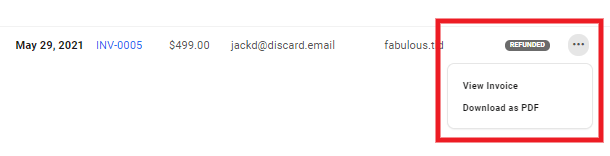
Refunded
An invoice with a Refunded status has the following management options available.
- View Invoice – Select this option to view the corresponding invoice details. See Viewing Invoice Details below for more info.
- Download as PDF – Click this option to download the invoice as a PDF.
Void
This status only appears if you have canceled an invoice, or if any payment due/failed invoices linked to a subscription have been voided in your Stripe account. An invoice with a Void status has the following management options available.
- View Invoice – Select this option to view the corresponding invoice details. See Viewing Invoice Details below for more info.
- View Subscription – If there is a subscription associated with this invoice, click to view the subscription details.
- Download as PDF – Click this option to download the invoice as a PDF.
- Delete Invoice – Select this option to delete the invoice.
Additional Status Notes
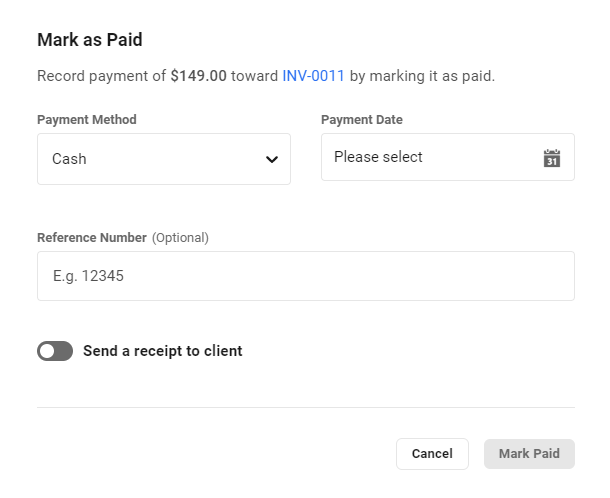
Mark as Paid
This action should only be used if the client pays the invoice with any method other than the Payment Method they have on file with you, if any.
Selecting this option will open a modal window where you’ll be prompted to select the paid Date, as well as either Cash, Check, Bank Transfer, or Other as the Payment Method. Note that only full payments are supported at this time; a future release of the Clients & Billing portal may include support for partial payments.
If you are back-dating a payment for the first invoice of a subscription to force it to start on a selected date, you can only select a date that is within the billing cycle of that subscription. For example, if the subscription is set to be invoiced on a weekly basis, you can only select a date that is within the last 7 days. The Next Renewal date for the next invoice in the billing cycle will be automatically adjusted according to the date you select here.
You can also optionally enter a Reference Number if needed and Send a receipt to the client.
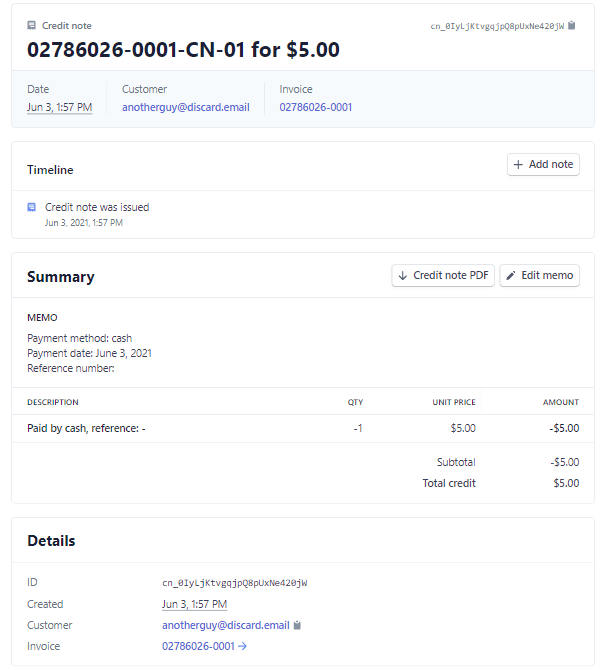
When you manually mark a subscription invoice Paid, a credit note for the value of the invoice is added in your Stripe account and immediately deducted to begin the subscription. Below is an example of what you might see in your Stripe account for a credit note issued on a $5.00 invoice that the client paid in cash, and that you had marked as Paid in your Hub.
If there is no Payment Method set for the client when the next payment comes due, the subscription will be suspended and the invoice for that next payment will be marked Payment Due. Once a Payment Method is added and the client pays the invoice, the subscription will reactivate.
Note that once an invoice has been manually marked as paid, the only options available for it in your Hub will be to View or Download the invoice. It is not possible to issue a refund for such an invoice via Stripe.
Issue Full Refund
When you select to Issue a Full Refund to a client on a Paid invoice, the full amount of the invoice is credited to the credit card the client had as their Payment Method when they made the payment.
If the card in their Payment Method is changed after having paid an invoice, or that card has expired, and you then issue a full refund for that invoice, the client’s card issuer should direct the refund to their new card or send it directly to their bank account.
If neither of those options are available, the bank will return the money to your Stripe account and Stripe will contact you via email for further action.
For more information about how refunds are handled at Stripe, please see their Refunds documentation.
Once a Full Refund has been issued for an invoice, the only options available for it in your Hub will be to View or Download the invoice.
Note that only full refunds are supported at this time; a future release of the Clients & Billing portal may include support for partial and prorated refunds. In the meantime, if you need to issue a partial refund to a client, you can do that directly in your Stripe account. Locate the payment you need in the Transactions section, and click the Refund button at top-right of the screen.
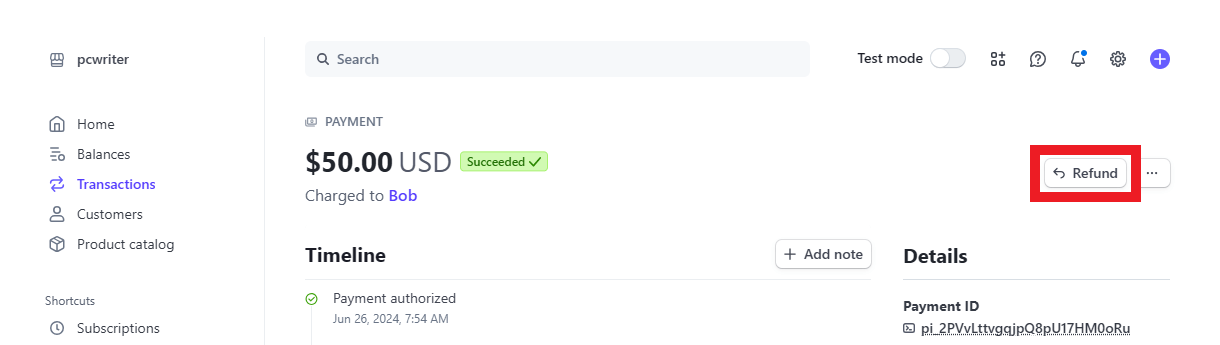
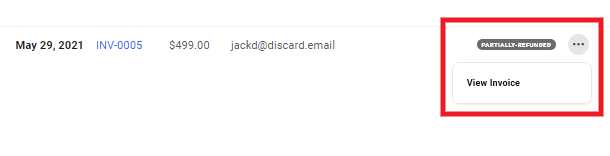
Once the partial refund has been issued in your Stripe account, the corresponding invoice in your Hub will have a Partially Refunded label. The only option available for a partially refunded invoice in your Hub will be to View the invoice.
7.7.3 Viewing Invoice Details
Link to chapter 7To view the details of any invoice, either from the main Invoices screen in your Clients & Billing portal, or from the Invoices screen in any client profile, simply click on it to pop it open, or select View Invoice from the management options under the ellipsis icon in that invoice’s row.
You’ll see the invoice details are presented in three distinct sections: Overview, Products & Services and Payment Information.
The Overview section of an invoice contains the following details:
- Invoice Number – This is the invoice number with the custom prefix you set up in the Customize Invoices configuration step.
- Created On – The date the invoice was created.
- Client – The name and email address of the client the invoice was sent to.
- Website/Domain – Displays the website or domain the invoice is attached to, if any.
- Status – This displays the status of the invoice as seen in Managing Invoices above.
- Paid On / Refunded On – Depending on the invoice status, this would display the date the corresponding status was attributed.
- Type – This indicates whether the invoice is for a recurring subscription or a one-time billed product.
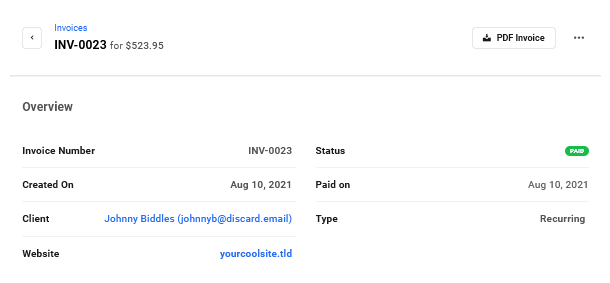
The Products & Services section of the invoice displays the following information:
- Product/Plan – This will display the Product/Plan(s) that was/were billed to the client, the Quantity of each, the Unit Price of each, and the total Amount for each product/plan included in the invoice.
- Notes – Here you’ll see any personalized notes you may have added in the last step of creating the invoice.
- Subtotal – If you have included taxes in your invoice, this will indicate the total of all products, excluding those taxes.
- Taxes – If you have included taxes in your invoice, they will be listed here.
- Total – The total of all products/plans and taxes included in the invoice.
- Amount Paid – This will indicate the full amount of the invoice if its status is Paid or Refunded. It would indicate 0 if any other status. Note that only full payments are supported at this time; a future release of the Clients & Billing portal may include support for partial payments.
- Amount Due – This will indicate 0 if the status of the invoice is Paid or Refunded. It will indicate the full amount of the invoice if any other status.
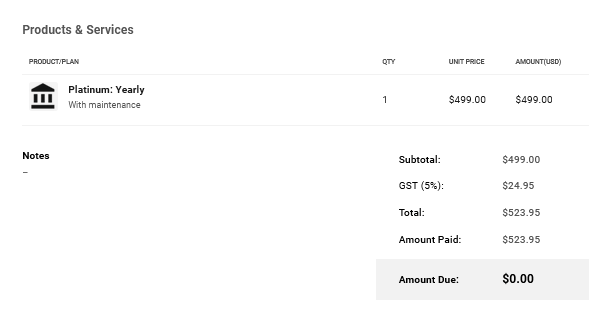
Finally, the Payment Information section, which only appears if there has been a payment made, contains the following information:
- Payment Date – The date the payment was made. In the case of an invoice that has been manually marked as Paid, this would be the date selected when that action was taken.
- Transaction ID / Reference Number – If the invoice was paid with a credit card via Stripe, this would indicate the Stripe Transaction ID, and links directly to that payment in your Stripe account. If the invoice was manually marked as Paid, this would indicate your custom reference number, if you added one.
- Payment Method – If paid via Stripe, this indicates the type of credit card used along with the last 4 digits of that card. If paid manually, this indicates the payment method you selected when the invoice was marked as Paid.
- Payment Amount – Indicates the amount paid.
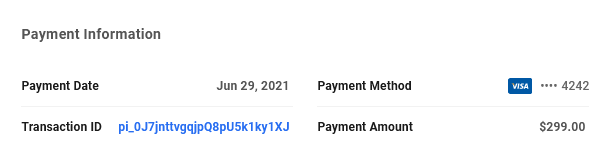
7.8 Site Billing
Copy chapter anchor to clipboardWhile viewing any site in your Hub, you can easily access and manage all of the Clients & Billing activities that are specifically related to that site. Click Client Billing in the sidebar navigation to get started.
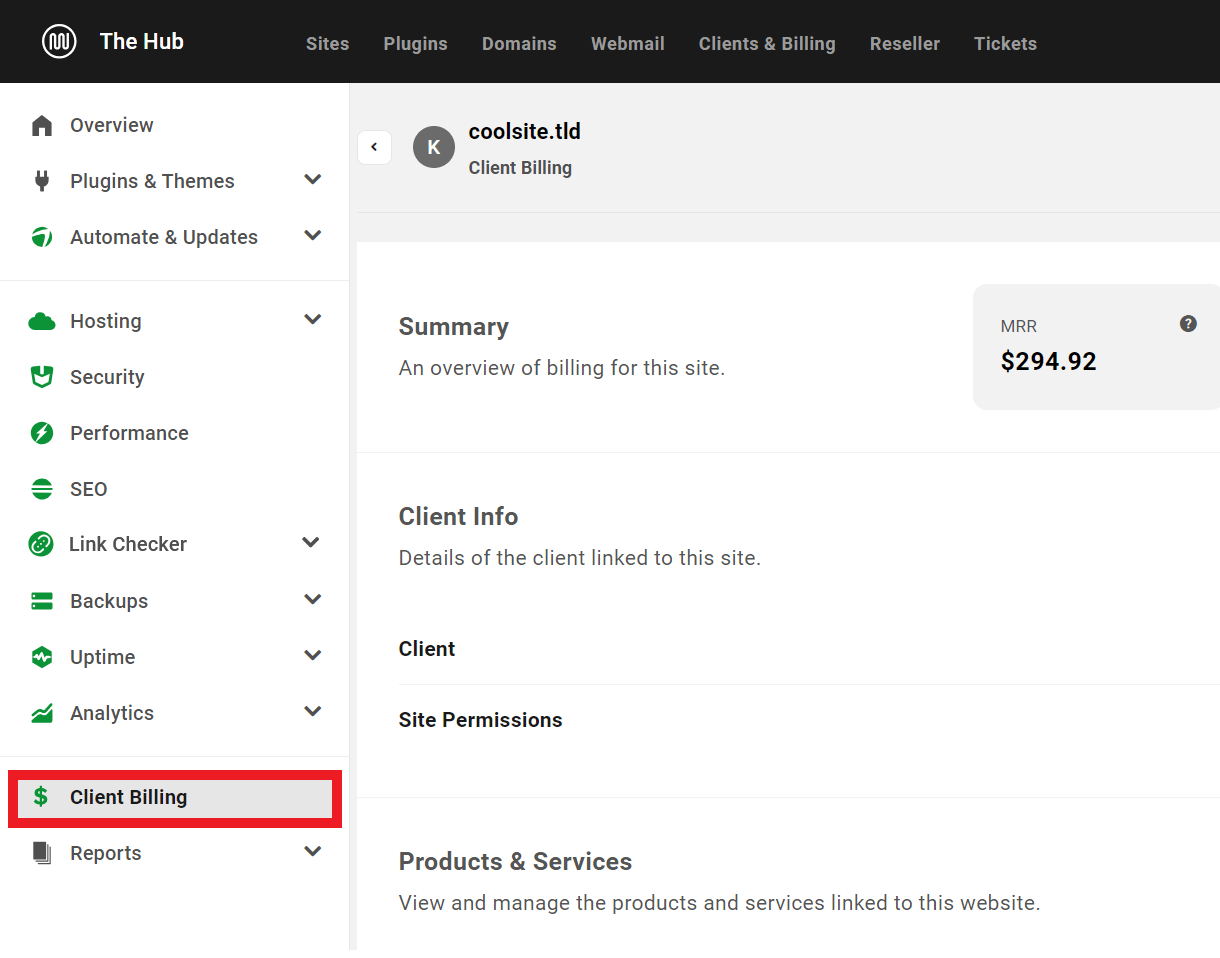
7.8.1 Billing a Client
Link to chapter 8Add a Client
If there is no billing activity yet associated with the site you’re viewing, you’ll first be prompted to add a client to the site so you can begin billing for products & services.

Select an existing client using the Select client dropdown, or click the Create new link to add a new client.
Note that if you click the Create new link, you’ll be taken to the Clients screen in the main Clients & Billing portal where you can create a new client. If you want to import an existing client from your Stripe account instead, you can do that from the Configure section. Once you’ve added the new client, come back to this Client Billing screen in your selected site to continue the setup.
See the Adding Clients chapter above for more information on options for adding clients.
Once you’ve selected the client you want to add to this site, click the Add Client button. The screen will refresh and you’ll see the client you just added in the Client Info section. You can then start billing that client for products attached to this site.

Once there is a client attached to a site, you’ll also find a handy module added to the site’s Overview screen with summary information about that site’s billing activity. See the Client Billing chapter in our Managing a Website in Hub 2.0 document for more information about this widget.
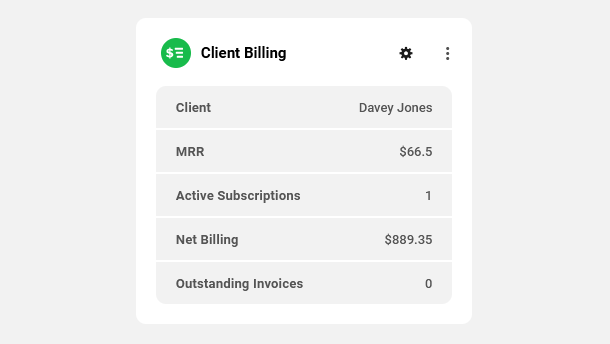
Bill Client
To create an invoice for this site, click the + Bill Client button at the top-right. That will pop open a Bill Client modal where the invoice creation process will be just the same as when creating an invoice from the main Clients & Billing portal, with two exceptions: the Website field will be pre-populated with the current site and cannot be changed, and the Client field will be pre-populated with the client you added to this site. If you need to change the client attached to the site, see the Client Info section in Managing Site Billing below.

Once you’ve selected the client and added the products/services, and optionally any taxes that you want to bill for this site, click the Continue button. You’ll see a confirmation screen that is identical to what you see when you manually create an invoice in the main Clients & Billing area.
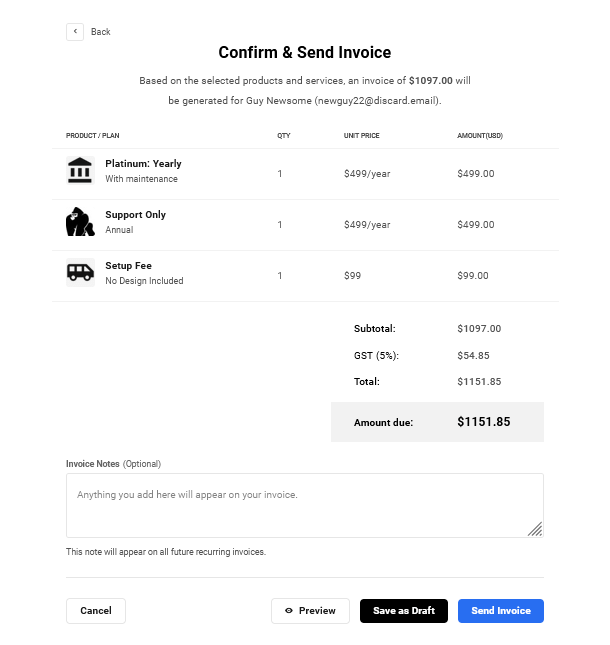
Add a custom message if needed in the Invoice Notes field that will appear on all recurring invoices.
Then either send the invoice to the client right away by clicking the Send Invoice button, or click the Save as Draft button to do that later. Click the Preview button to open a preview of the invoice in a new tab.
If you need to adjust anything before saving or sending, click the Back button at the top. If you prefer to not proceed at all at this time, you can also click the Cancel button at the bottom-left.
If you choose to bill the client now and click the Send Invoice button, the screen will refresh and you’ll see the site Billing details with all the information you added to your first client invoice for that site.
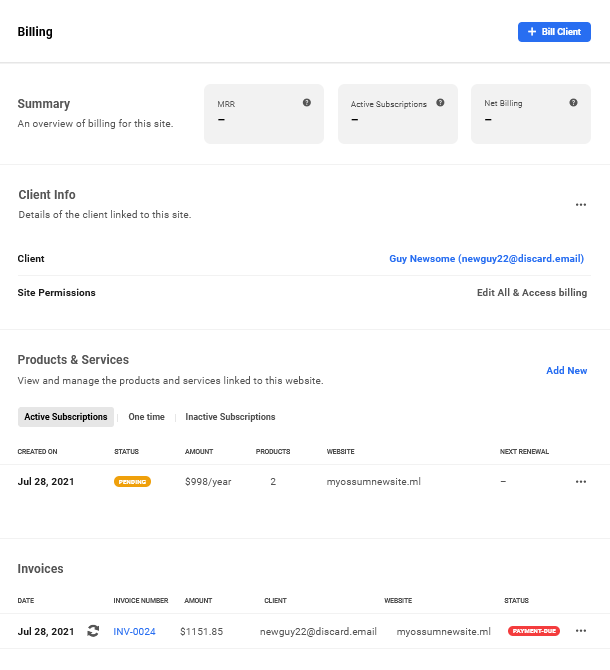
The Summary section at the top would be empty for now as the client has not yet paid the invoice. Once that is done, you’ll see that populate with relevant data. Similarly, any Active Subscriptions would appear with a Pending status until the invoice is paid.
Proceed to the Managing Site Billing chapter below for more information on managing Client Billing for a site.
7.8.2 Managing Site Billing
Link to chapter 8Once you have billed a client for products/services for a site, you’ll see all the relevant information displayed in the Client Billing area for that site.
The image above illustrates what you might see immediately after sending your first invoice to a client for a site. You’ll notice that Active Subscriptions are listed with a Pending status, and Invoices have a Payment Due status.
If you need to add more products/services to this site, you can create a new invoice at any time by clicking the + Bill Client button at the top-right.
Summary
If the client has not yet paid any invoices for this site, as in our example above, the Summary section at the top will be empty. Once at least one invoice has been paid, that section will populate with the following information:
- MRR (Monthly Recurring Revenue) – The normalized monthly revenue for all subscriptions of this client that are attached to this site. This amount does not include any taxes you may have added to your invoices.
- Active Subscriptions – The total number of active recurring subscriptions attached to this site. This number does not include one-time billed products.
- Net Billing – The total amount billed to date to this client for all products/services (subscriptions and one-time billed products) relevant to this site, minus any refunds that you may have issued. This amount includes any taxes you may have added to your invoices.

Client Info
This section displays information relevant to the client attached to the site.
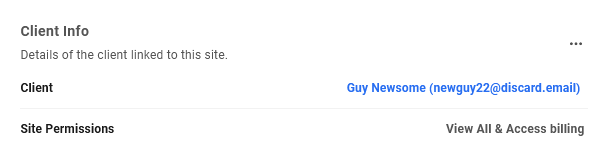
- Client – Click the client email address displayed to be redirected to the client’s profile in the main Clients & Billing area of your Hub.
- Site Permissions – This displays the permissions the client currently has for this site.
Click the ellipsis icon at the far-right of the Client Info row to view additional client management options.

- View Client – Clicking this option will redirect you to the client’s profile in the main Clients & Billing area of your Hub.
- Remove Client – Clicking this will remove the client from the website, and all active subscriptions for the site will be automatically cancelled.
If you click the Remove Client option, a modal will pop up prompting you to confirm the action to help prevent accidental deletion & cancellation of active subscriptions.
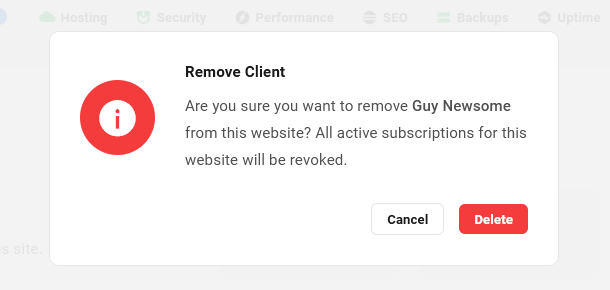
Note that if you ever need to change the client attached to any site, you would need to first remove the existing client (which would cancel any existing active subscriptions), then add the new client. Once the new client is added, billing that client for a recurring product would create a brand-new subscription. It is not possible to transfer an existing subscription from one client to another.
Products & Services
This section lists all the products and services that are attached to the site. The layout here is similar to what you see in the Products & Services section of the client’s profile in the main Clients & Billing area of your Hub. The product display is divided under three distinct tabs:
- Active Subscriptions – This displays the currently active recurring subscriptions attached to the site.
- One Time – This displays the products/services attached to the site that were billed on a one-time basis.
- Inactive Subscriptions – This displays the recurring subscriptions attached to the site that have expired or were cancelled.
Active Subscriptions
For each product listed under the Active Subscriptions tab, you’ll see the following information:
- Created On – This is the date the client subscribed to this product or service.
- Status – The status here will be either Active, or Pending if the associated subscription invoice has not yet been paid.
- Amount – The amount billed per billing period, including any added taxes.
- Products – This number indicates how many products are included in the subscription.
- Website – The website associated with this subscription (the site you’re viewing).
- Next Renewal – When the next scheduled subscription payment is due.
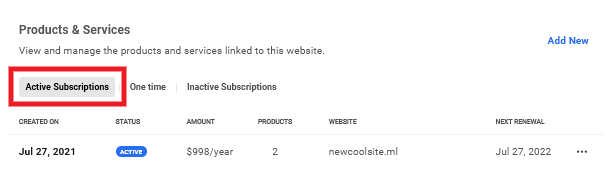
Hover your mouse over the number in the Products column to quickly see which products are included in the subscription.
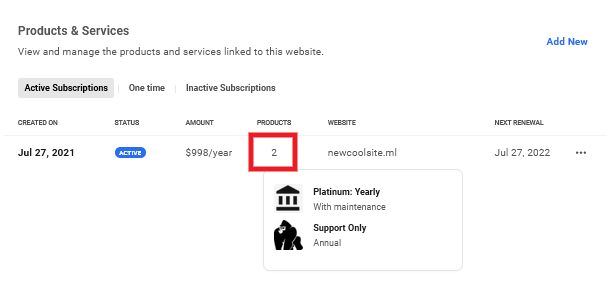
Click the ellipsis icon at the far-right to reveal additional management options for the subscription.
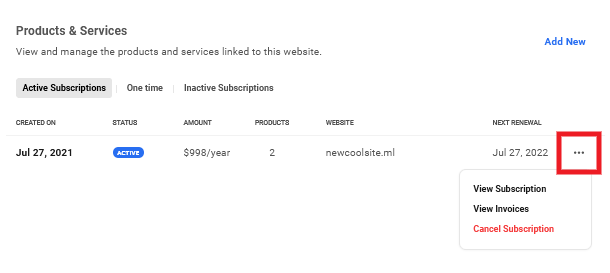
- View Subscription – Click this option to pop open a modal to view the subscription details. You can also click anywhere in the subscription row to open the same modal. The subscription details view here is identical to when viewing subscription details in a Client Profile.
- View Invoices – Click this option to be redirected to the Invoices section of the main Clients & Billing area in your Hub, where the display will be automatically filtered to show only the invoices associated with this subscription.
- Cancel Subscription – Click this option to cancel the subscription.
One Time
For each product listed under the One Time tab, you’ll see the following information:
- Product/Plan – The name of the one-time billed product.
- Status – This indicates the invoice status of the product. See Managing Invoices above for more information about invoice status.
- Site – The website this product is attached to, if any.
- Amount – The amount billed for the product in your Stripe currency.
- Billed On – The date the invoice was created.
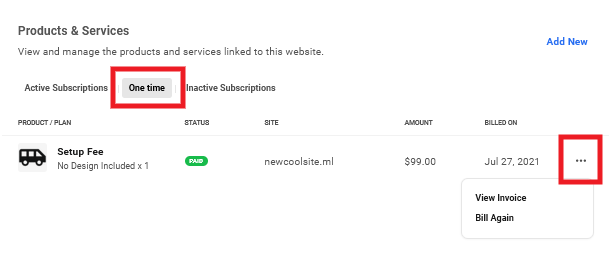
Click on the ellipsis icon at the far right of any row to reveal management options for that one-off product.
- View Invoice – Click to be directed to the main Invoices area where the list will be filtered automatically to show only the invoice associated with this product.
- Bill Again – Click this option to automatically bill the client again for the same one-time product.
Inactive Subscriptions
Products under the Inactive Subscriptions tab are the website subscriptions that have been cancelled or have expired.
- Created On – This is the date the client subscribed to this product or service.
- Status – This indicates whether the subscription was Cancelled or has Expired.
- Amount – The amount billed per billing period, including any added taxes.
- Website – The website associated with this subscription (the site you’re viewing).
- Products – This number indicates how many products were included in the subscription.
- Ended On – The date on which the subscription expired or was cancelled.
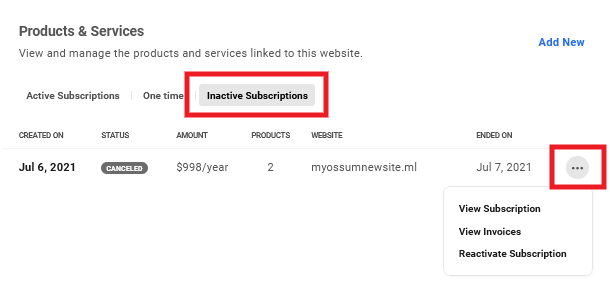
Click on the ellipsis icon at the far right of any row to reveal management options for that client subscription.
- View Subscription – Click this option to pop open a modal to view the subscription details. You can also click anywhere in the subscription row to open the same modal. The subscription details view here is identical to when viewing subscription details in a Client Profile.
- View Invoices – Click to be directed to the main Invoices area where the list will be filtered automatically to show only invoices associated with this subscription.
- Reactivate Subscription – Click to reactivate the same subscription for this client. Note that reactivating an inactive subscription sends a new invoice to the client and creates a new subscription that is activated the moment the invoice is paid.
You can also hover your mouse over the number in the Products column to reveal a tooltip listing all products contained in that subscription.
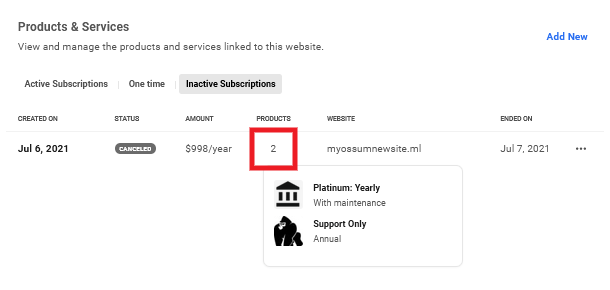
7.8.3 Billing in Site Reports
Link to chapter 8If there is client billing activity associated with a site in your Hub, you can include that information in any Summary or Detailed report generated in your Hub, and send the reports to yourself and/or your clients.
Note that the Reports feature is only accessible to you or your clients from the WPMU DEV Hub; it cannot be accessed from a custom domain using the Hub Client plugin.
So if you or your clients wish to generate reports for any site, that must be done from the WPMU DEV Hub. Please see the Client’s Hub Profile in the WPMU DEV Hub below for additional details.
Below are examples of how the site billing information could look in your site reports. For more information on creating reports and including Site Billing information in them, please see our Reports documentation.
Client Billing in a Summary Report

Client Billing in a Detailed Report
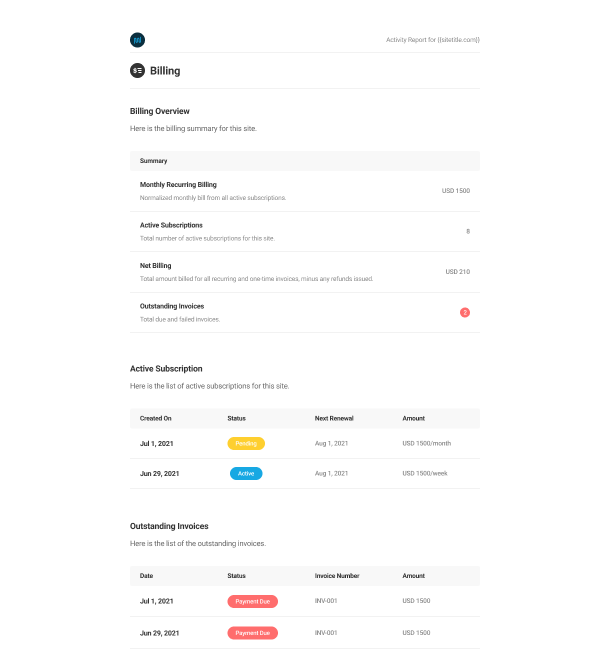
7.9 The Client Experience
Copy chapter anchor to clipboardThis chapter deals exclusively with the client’s billing experience in their Hub. It does not cover any additional access or edit capabilities that you may have granted to your clients via Client Roles. See the Client Roles chapter above and our Team & Client Role Customization documentation for more information on those features.
For the purposes of illustration in this chapter, we will assume the view of a client to whom the View All & Access Billing system role has been granted. This role enables the client to access and manage their billing activities in the main Billing area in their Hub, as well as in the Billing area of any sites they have been added to.
7.9.1 The Client Hub Account
Link to chapter 9When you invite a new client, they will receive an email that contains a button they must click to confirm the invitation.
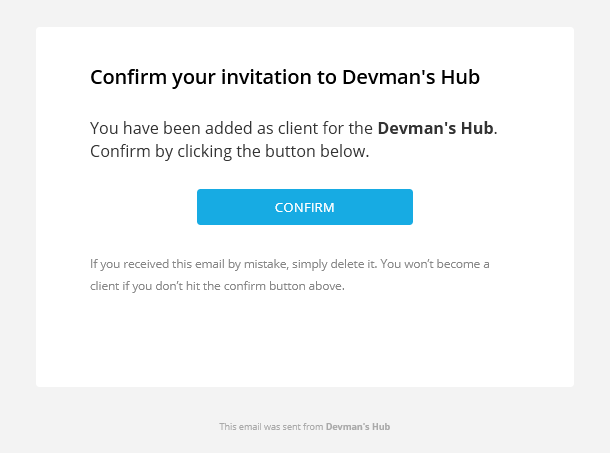
If the client already has an existing Hub account with you, clicking that button will direct them to the login page of whichever Hub instance they were invited from. If they do not already have an account with you, they would land on the account creation page of that Hub instance
To maintain brand consistency for your WordPress business, please be sure to use the Hub Client plugin installed on your own domain. Then set the Primary Hub for any invited client to that domain. This will ensure your clients never see the WPMU DEV Hub and won’t be confused by unneeded & irrelevant options in its interface. See the How to White-Label the Client Experience chapter for details.
On the account creation page, their email address would be pre-populated in the form and they would need only enter their desired password. Then click the Sign up button to create their client account.
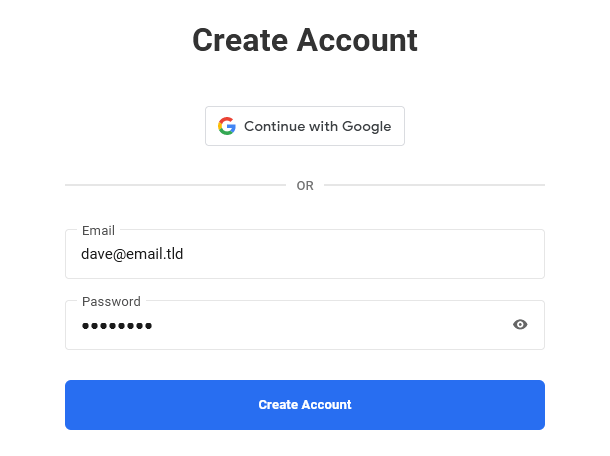
The option to Sign in with Google is currently only available when invited from your WPMU DEV Hub. It is coming soon to the Hub Client plugin as well. Note that if the client wishes to use their Google account to sign up, the Google email address must be the same as the address the client invite was sent to.
Once their client account is created, they can log into any instance of the Hub you may have with the same credentials, if that Hub URL is known to them of course.
Client’s Hub Profile on Your Own Domain
If the client logs into the Hub Client plugin installed on your own domain, they will only see white-labeled links in their profile menu.
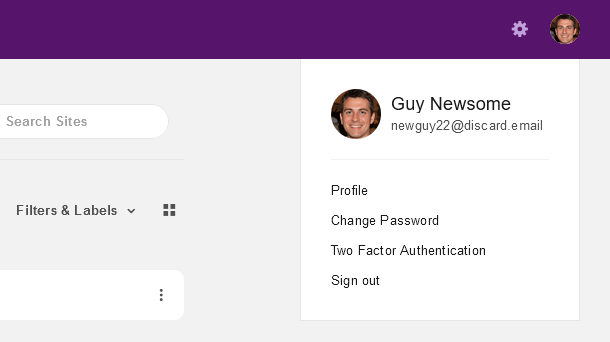
Profile
Clicking the Profile link in their profile menu will pop open a modal where they can edit the following profile information:
- Name
- Last Name
- Display Name
- Email Address
Note that if a client edits the email address in their profile, that will also update their address in their billing profile, as both Hub account and Clients & Billing profile are synced. See Billing Info below for more.
If they wish to have an avatar displayed in their Hub profile, they would need only have an account at Gravatar.com where the image will be pulled in automatically. That same profile image would also appear for the client in your main Clients & Billing area.
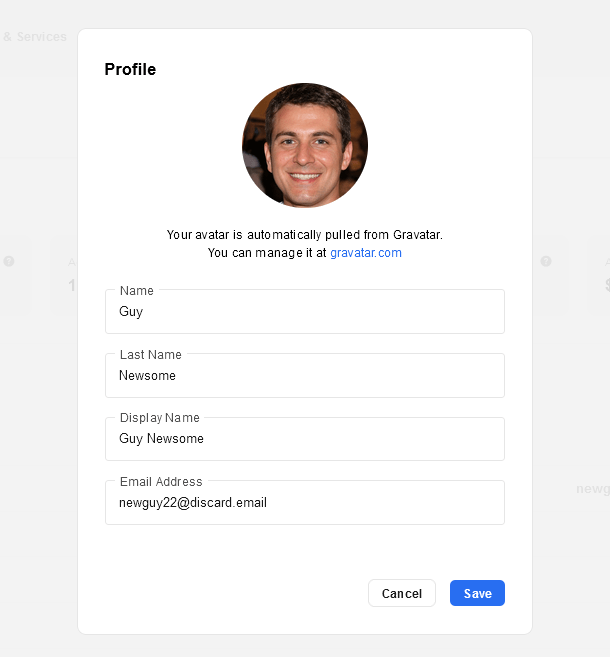
Change Password
Clicking the Change Password link will pop open a modal where they can change their Hub password if needed. This would affect their login to any instance of your Hub, including here at WPMU DEV.
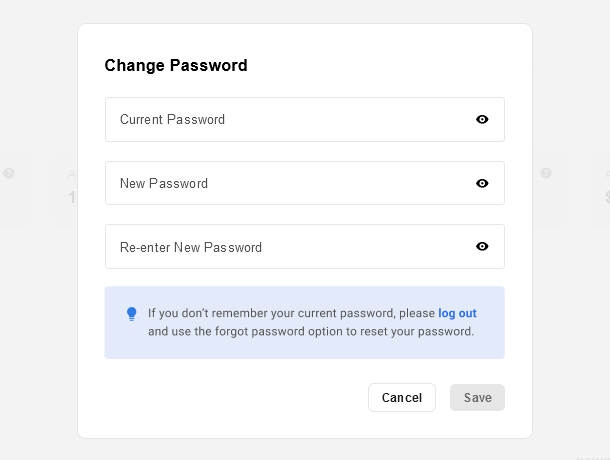
The client must enter their current password in order to reset it to a new one. If they don’t remember that password, they can simply log out and use the Forgot password? option on the login page instead.
Two-Factor Authentication
Clicking the Two-Factor Authentication link will pop open a modal where they can enable the additional login security offered by two-factor authentication in their Hub account.
They would need to first download the authenticator app to their smartphone, from either the Apple App Store (for iPhones, iPads, etc) or from Google Play (for Android devices). Once installed, they would scan the QR code in that modal using their phone’s camera, enter the passcode that would display in the app on their phone, then click the Verify button.
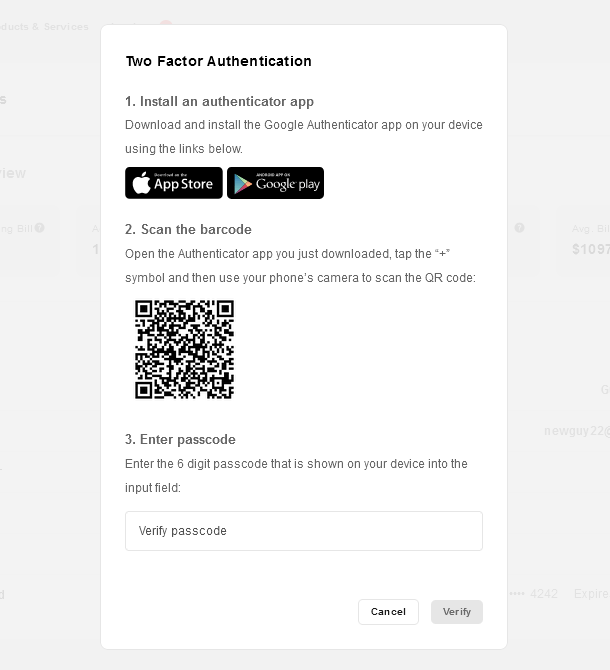
Once enabled, they would be prompted to get the 6-digit 2FA passcode from their phone and enter it in addition to their username and password every time they log into your Hub.
If they ever lose their phone, or don’t have access to it when they’re logging into your Hub, they can always click the Lost your device? link to have a one-time passcode sent to their Hub account email address.
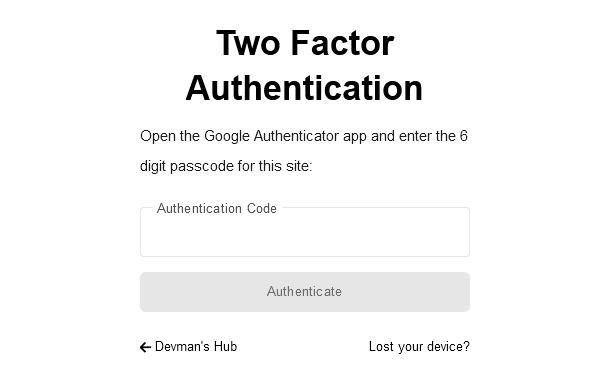
Client’s Hub Profile in the WPMU DEV Hub
If the client ever logs into your Hub here at WPMU DEV, the profile links they see will include links to WPMU DEV pages, just like you see in your own WPMU DEV Hub.
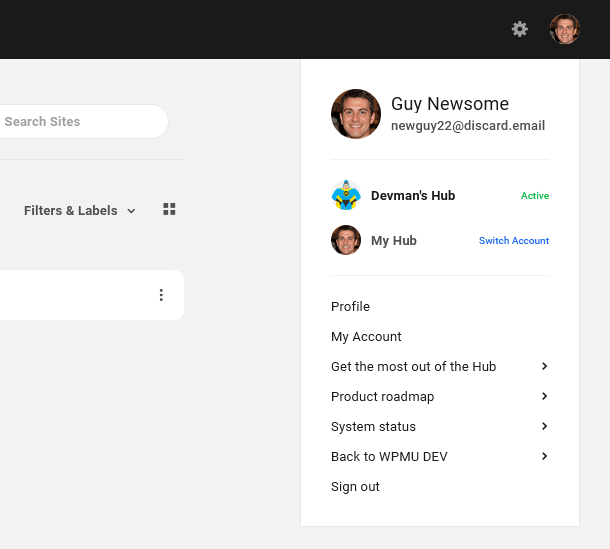
The profile menu also includes the Team Switcher which enables the client to switch to their own free WPMU DEV Hub account.
It is unlikely that you’d want your clients to login here, so we must stress again the importance of using the Hub Client plugin installed on your own domain to ensure your brand consistency.
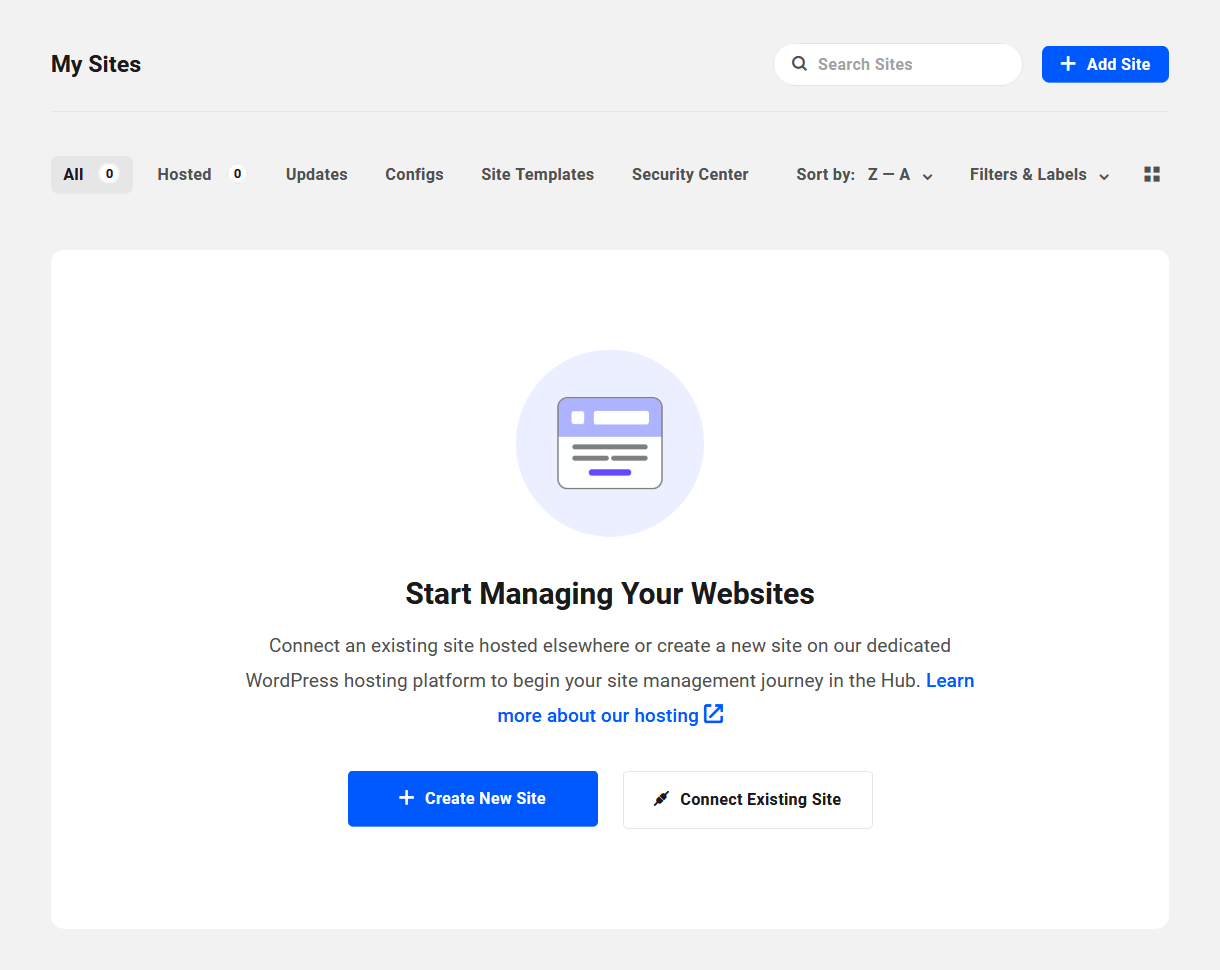
7.9.2 The Client Main Billing Area
Link to chapter 9When logged into their Hub account, your clients are greeted with a billing overview that is quite similar to what you see on the Client Overview screen as Hub owner when viewing a client’s profile.
If they have just logged-in for the first time and have not yet added any Billing Info or paid any invoices, the overview they see will of course not yet display any information.
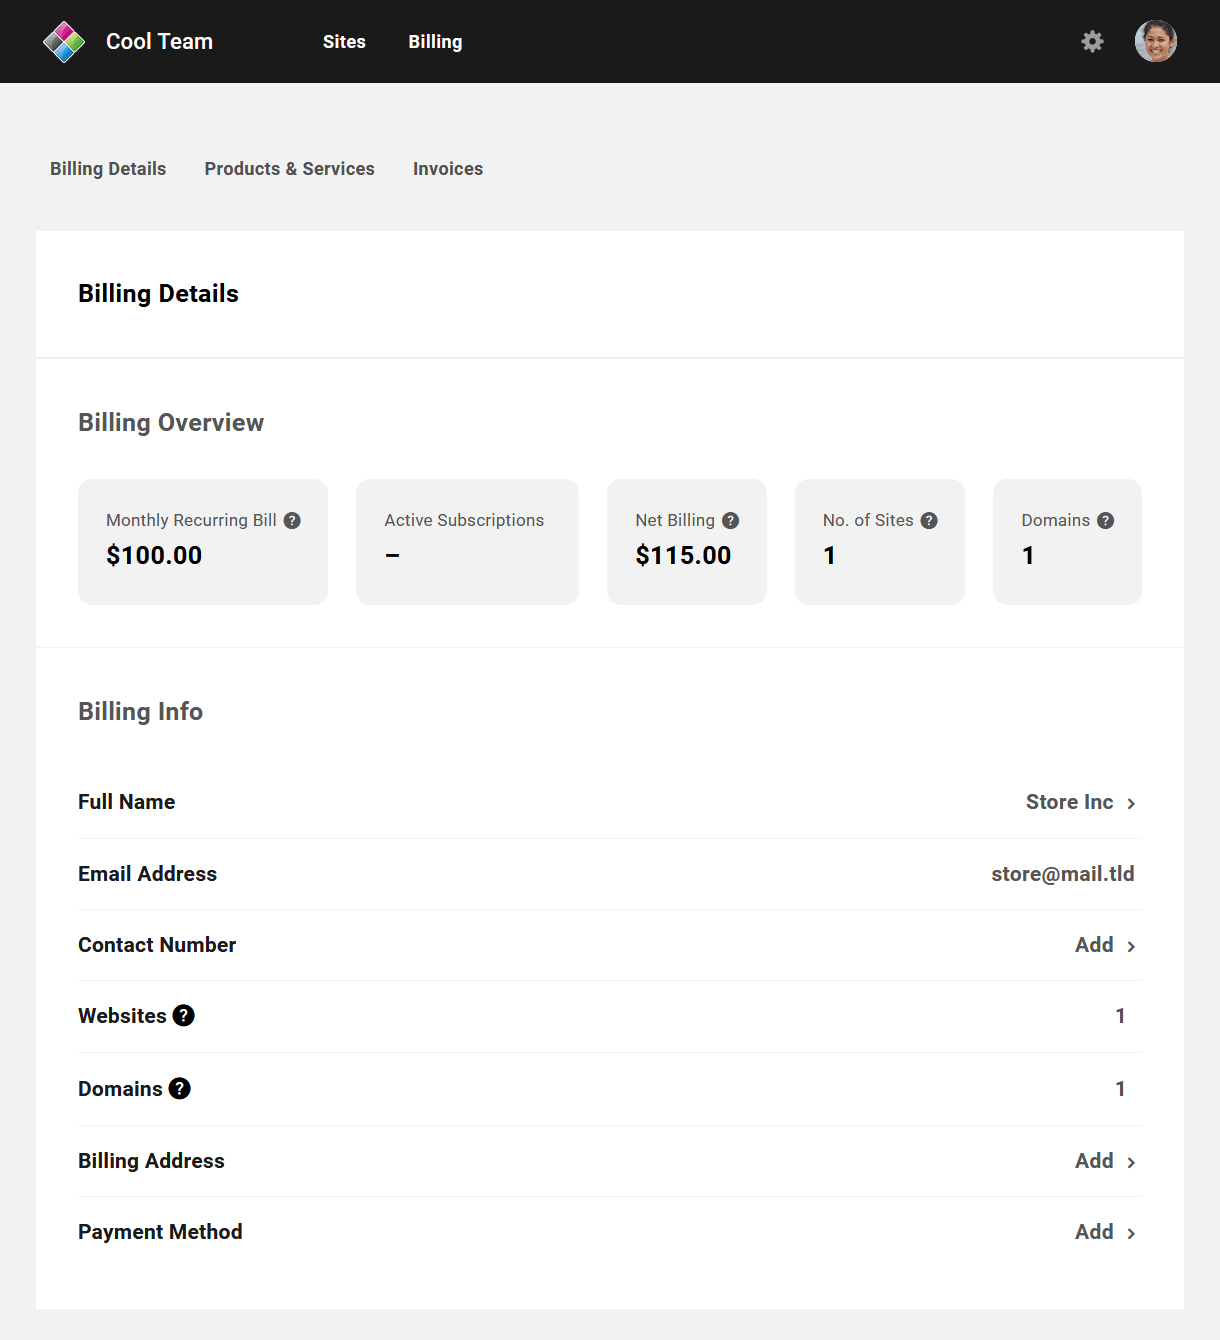
Note the main navigation menu at the top of their screen. For the client role we are viewing in our example here, the only Hub areas accessible to the client are their Sites (if any) and Billing, along with their profile links at the far-right.
Billing Details
Billing Overview
At the top of the Billing Details screen, your clients will find an overview of all of their billing activity that will be populated with data once at least one invoice has been paid. Tooltips there reveal short explanations of what each metric means if needed.
- Monthly Recurring Bill – The normalized monthly billing for all active subscriptions of this client. This amount includes any taxes you may have added to your invoices.
- Active Subscriptions – The total number of active subscriptions for this client.
- Net Billing – The total billed to date to this client, minus any refunds issued. This amount includes any taxes you may have added to your invoices.
- No. of Sites – The total number of sites managed by this client.
- Domains – The total number of domains managed by this client.
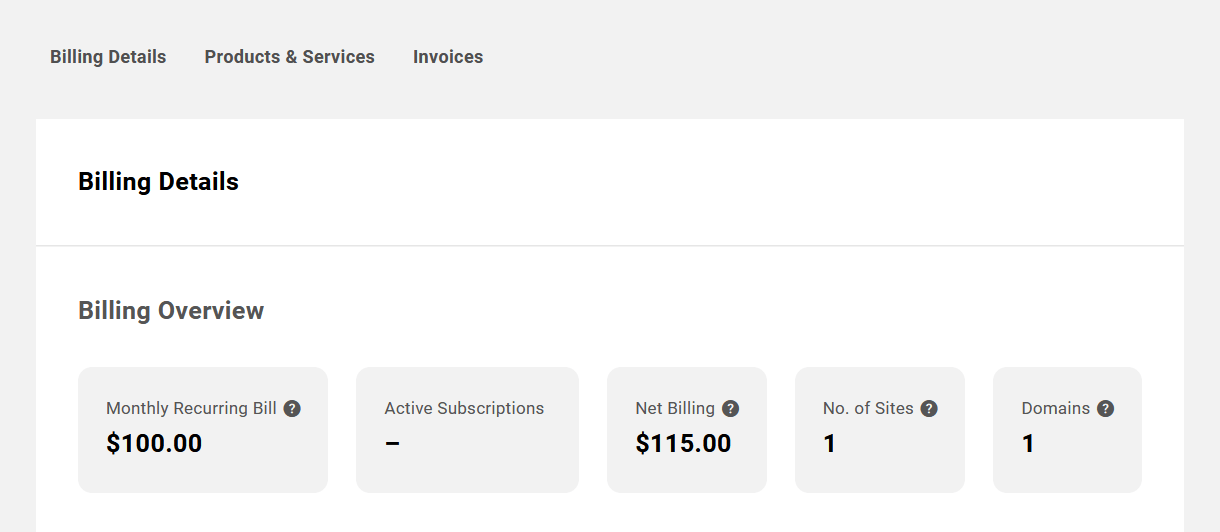
Billing Info
Directly beneath the overview section, they’ll find their Billing Info.
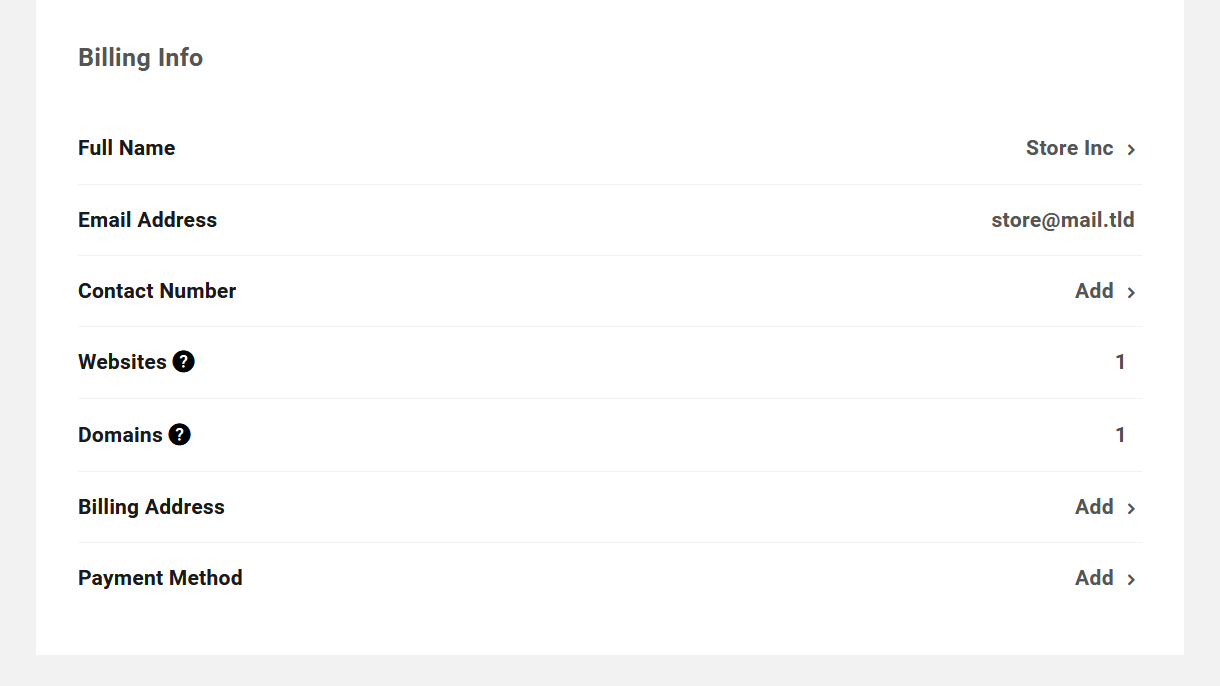
Here, the client can edit or update their Name, Contact Number, Billing Address and Payment Method as needed simply by clicking on the Add link or the existing data displayed in any row. That will pop open a modal window with the corresponding form fields to update their information.
If the client wishes to update the email address associated with their billing account, that must be done in the Hub profile, as both Clients & Billing and Hub accounts are synced. See The Client Hub Account for details.
Note that when adding or updating the Payment Method, the credit card data is sent securely to Stripe and is not stored on WPMU DEV servers. See our Privacy Policy for more info.
Additional Info (Client)
If you have created one or more custom fields in the Custom Fields section and have made them available to clients to edit, they will see those fields here.
The example image below shows Client Profile custom fields that have been created for Additional Contact Name and Number that have been made available for clients to edit.
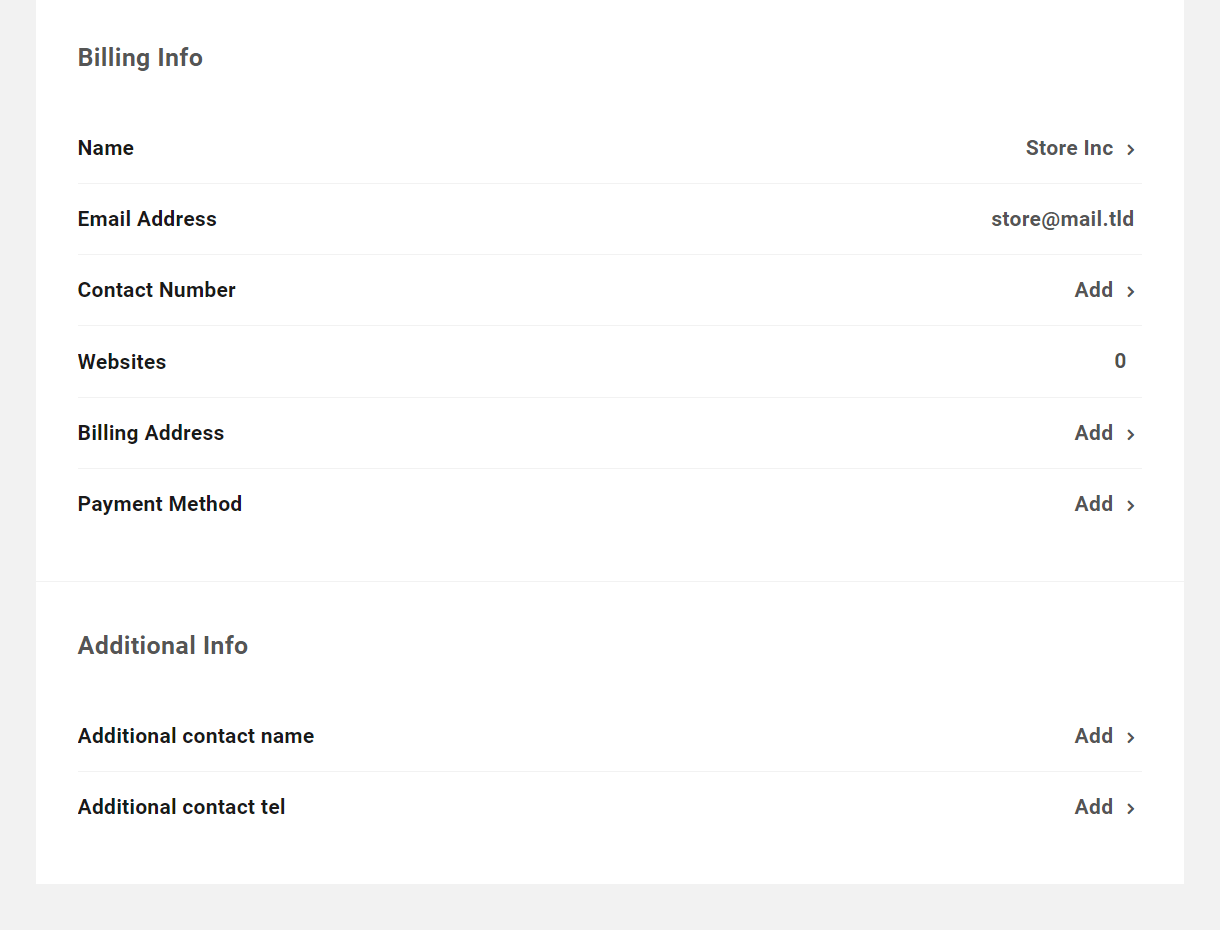
Products & Services
Under the Products & Services tab, the client will find all the information related to their subscriptions and products purchased from you. The layout here is similar to what you see in the Products & Services section of the client’s profile in the main Clients & Billing area of your Hub.
Current Subscriptions
Products under the Current Subscriptions tab are the client’s active subscriptions with recurring billing.
- Created On – This is the date the client paid the first invoice for this product or service and the subscription was activated
- Status – The status here will be either Active, or Pending if the associated subscription invoice has not yet been paid.
- Amount – The amount billed per billing period, including any added taxes.
- Products – This number indicates how many products are included in the subscription.
- Website/Domain – If there is a website or domain associated with this subscription, its URL or TLD will appear here.
- Next Renewal – When the next scheduled subscription payment is due.
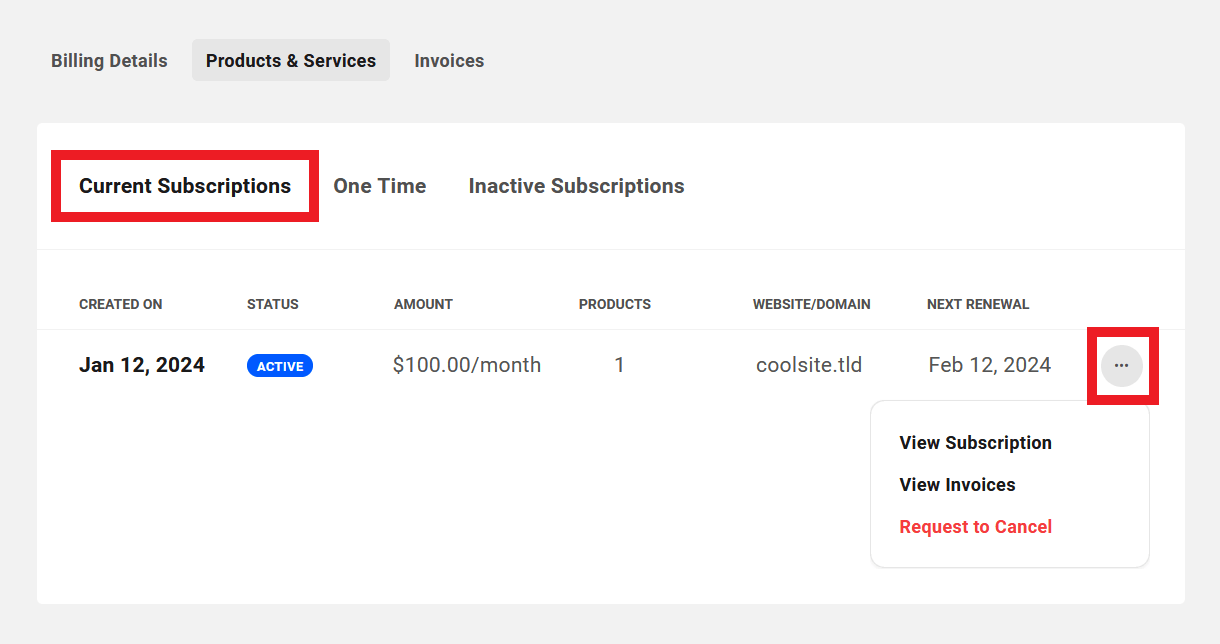
The client can click on the ellipsis icon at the far right of any row to reveal management options for that subscription.
- View Subscription – When clicked, this will pop open a modal window where all details of the subscription can be viewed. See below for details.
- View Invoices – Clicking this will redirect the client to their Invoices area.
- Request to Cancel – If the client clicks this option, a cancellation request email will be sent to you that includes a link to that specific subscription in your Clients & Billing area so you can take action on the request.
If you had associated a website with a subscription, and then cancel the subscription in the client Overview, that website would still be visible and accessible to the client in their Hub account. If you wish to cancel the subscription and also revoke access to that website in their Hub account, see the Client Info section in the Managing Site Billing chapter.
The client can also hover their mouse over the number in the Products column to reveal a tooltip listing all products contained in that subscription.
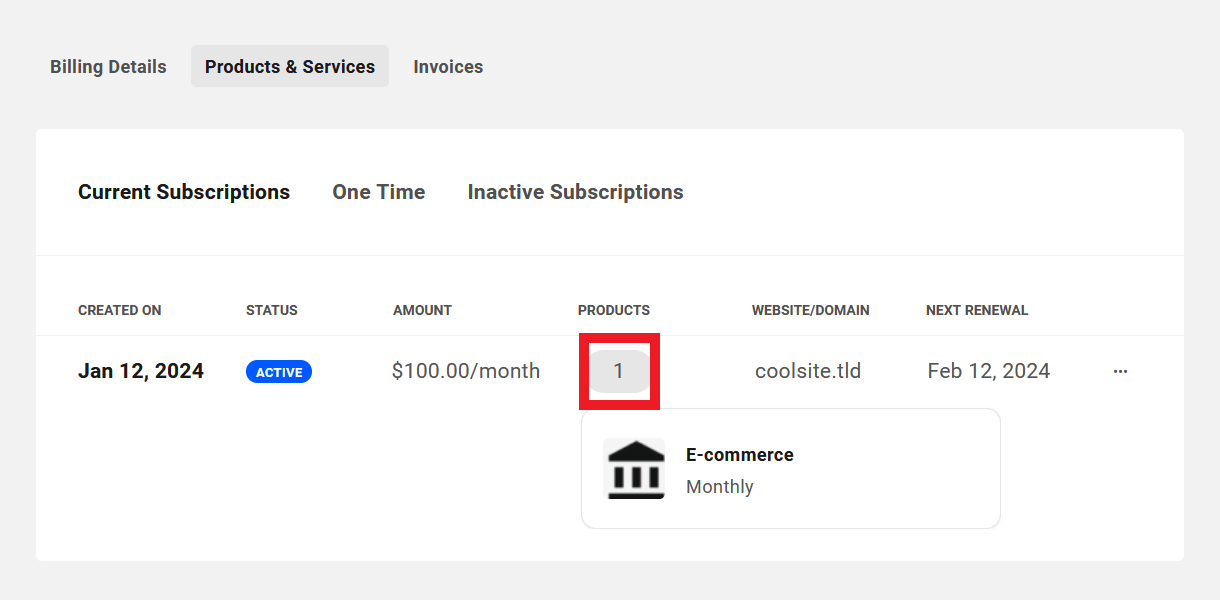
One Time
Products listed under the One Time tab are any single payment products the client has purchased from you.
- Product/Plan – The name of the one-time billed product.
- Status – This indicates the invoice status of the product. See Managing Invoices for more information about invoice status.
- Website/Domain – The website or domain this product is attached to, if any.
- Amount – The amount billed for the product in your Stripe currency.
- Billed On – The date the invoice was created.
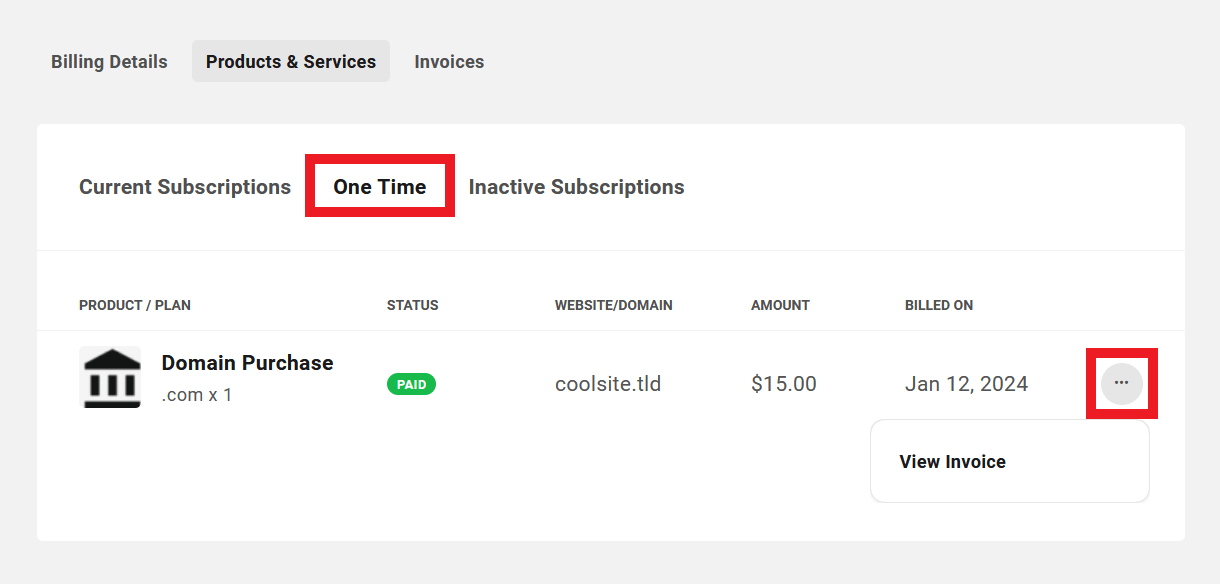
The client can click on the ellipsis icon at the far right of any row to reveal management options for that one-off product.
- View Invoice – Clicking this will redirect the client to their Invoices area where the list will be filtered automatically to show only the invoice associated with this product.
Inactive Subscriptions
Products under the Inactive Subscriptions tab are the client’s subscriptions that have been cancelled or have expired.
- Created On – This is the date the client subscribed to this product or service.
- Status – This indicates whether the subscription was Cancelled or has Expired.
- Amount – The amount billed per billing period, including any added taxes.
- Products – This number indicates how many products were included in the subscription.
- Website/Domain – If there was a website or domain associated with this subscription, its URL or TLD will appear here.
- Ended On – The date on which the subscription expired or was cancelled.
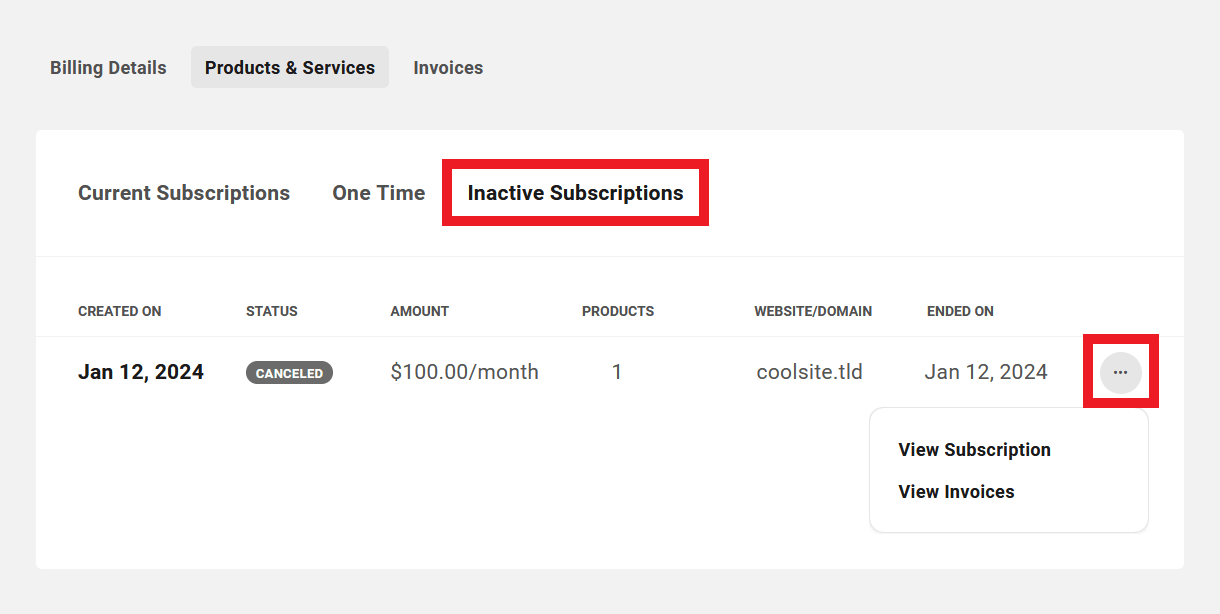
The client can click on the ellipsis icon at the far right of any row to reveal management options for that subscription.
- View Subscription – When clicked, this will pop open a modal window where all details of the subscription can be viewed. See below for details.
- View Invoices – Clicking this will redirect the client to their Invoices area.
The client can also hover their mouse over the number in the Products column to reveal a tooltip listing all products contained in that subscription.
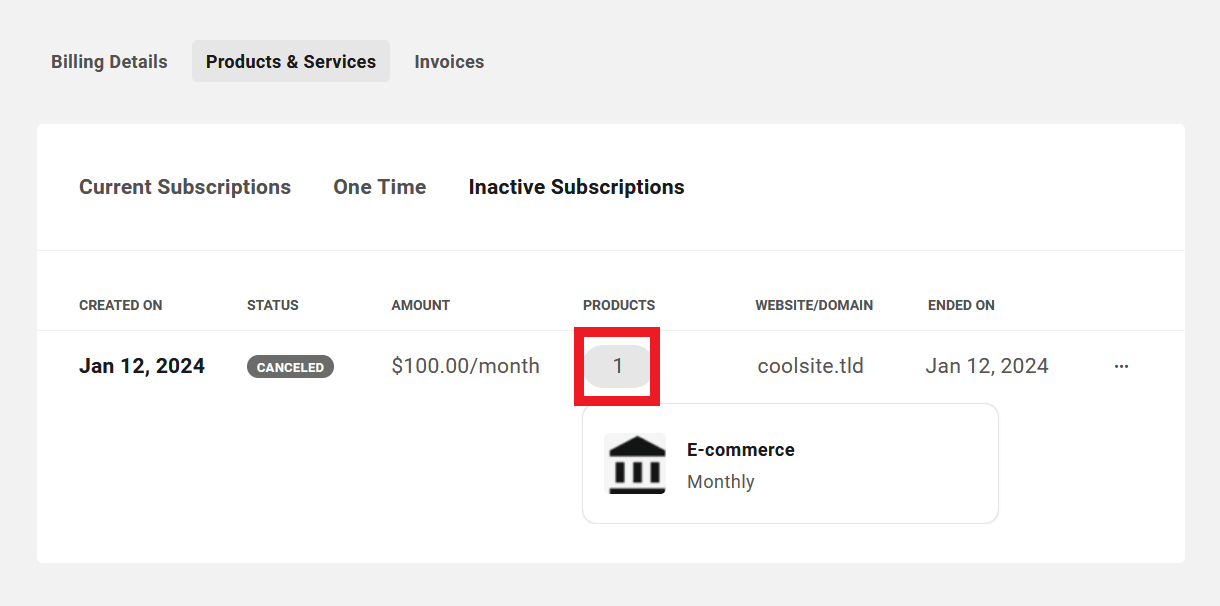
View Subscription
When a client clicks on any Active or Inactive subscription’s row, or the View Subscription option under the ellipsis icon in any subscription’s row, a modal will pop open where they can view all the subscription details.
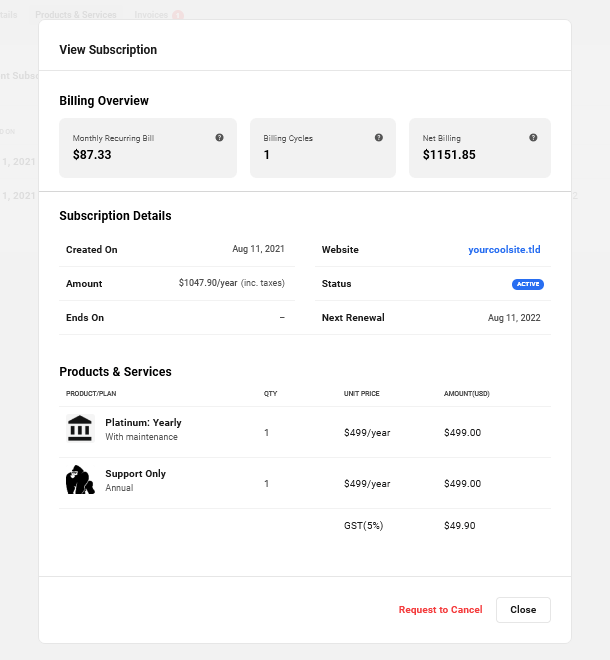
Billing Overview
This section presents the following information:
- Monthly Recurring Bill – This is the normalized monthly cost of the subscription. For example, if the subscription is an annual one, this would indicate 1/12th of the annual amount. This amount includes any taxes you may have added to your invoices.
- Billing Cycles – This indicates the current billing cycle. For example, if this displays 5, it means that this subscription has completed 4 billing cycles, and the 5th billing cycle is ongoing.
- Net Billing – The total amount billed to date from this subscription, minus any refunds that you may have issued to the client. This amount includes any taxes you may have added to your invoices.
Subscription Details
This section lists the following information:
- Created On – The date the first invoice for the subscription was paid and the subscription was activated.
- Website – The website the subscription is attached to, if any.
- Amount – The amount billed per billing period, including any added taxes.
- Status – The current status of the subscription: Active, Inactive, Pending, Expired or Cancelled.
- Ends On – The date the subscription will end if there is a set number of billing cycles.
- Next Renewal – The date of the next scheduled payment due for the subscription.
Products & Services
This section displays the products included in the subscription, with the following details:
- Product/Plan – The name of the product and associated pricing plan.
- Quantity – How many units of the product/plan in the subscription.
- Unit Price – The unit price of each product/plan, and any added taxes.
- Amount – The total amount invoiced for the product, including any added taxes.
Invoices
Under the Invoices tab, a client can view and manage all their invoices, including those that have been issued for any of their sites. See also The Client’s Site Billing Area chapter below.
If the client has not yet received any invoices, they’ll see the initial No Invoices Found screen.
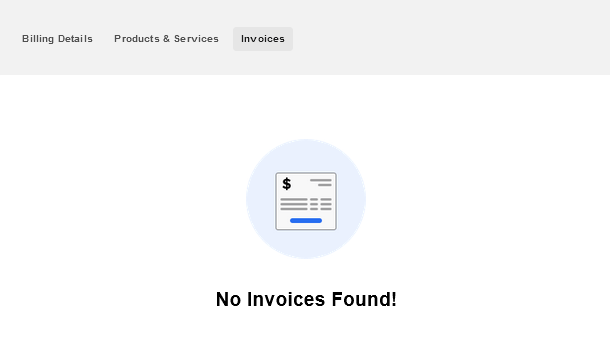
Once the client has received at least one invoice, this screen will be populated with a list of all their invoices, and will display summary information in columns as follows:
- Date – The date the invoice was created.
- Recurring icon – This icon, when present, indicates that the invoice has been created by a subscription and is recurring.
- Invoice Number – The invoice number including your custom prefix.
- Amount – The total amount of the invoice, including any added taxes.
- Website/Domain – If there is a website or domain associated with the invoice, its URL or TLD will be shown here.
- Status – This will indicate one of the following for each invoice: Payment Due, Paid, Failed, Refunded or Void. See the Invoice Status section above for more info.
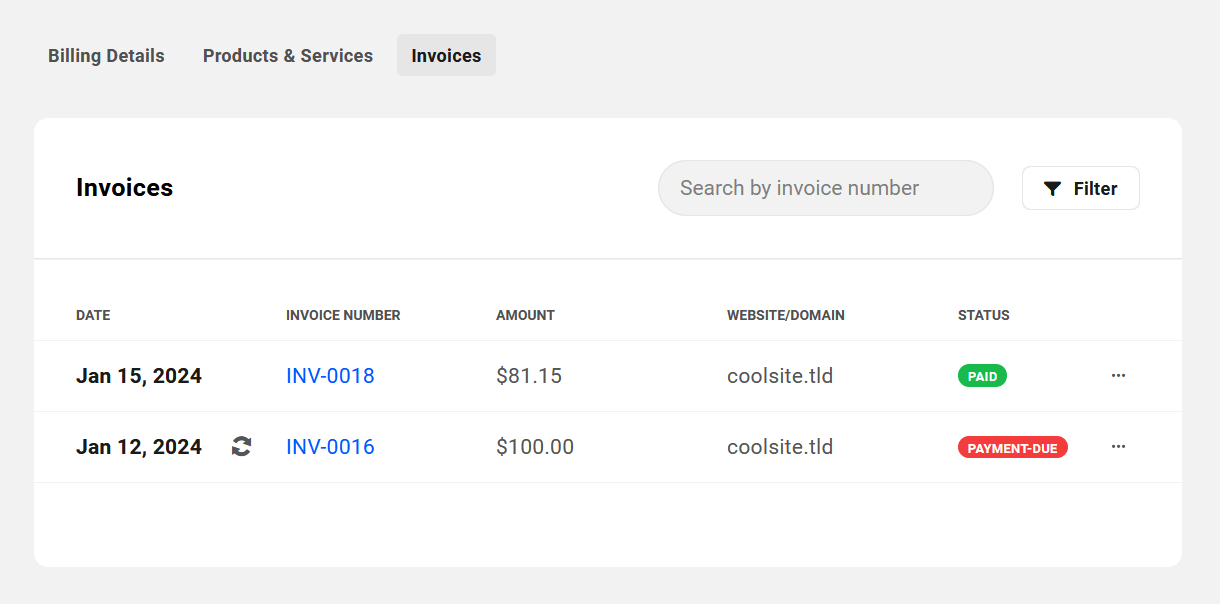
A red icon next to the Invoices tab in the header indicates the number of outstanding unpaid invoices for that client.
Clients can reveal available management options for any invoice by clicking on the ellipsis icon at the far right of any invoice’s row.
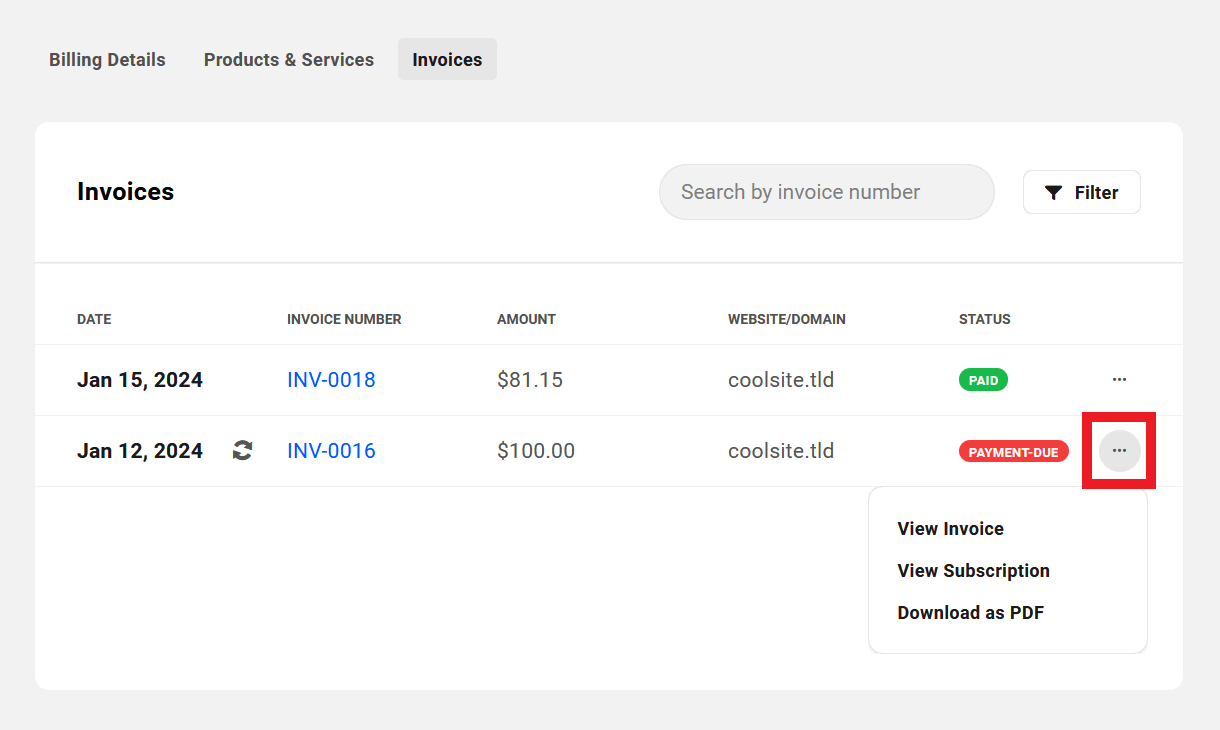
The management options available to clients for any invoice will vary according to the invoice status, as follows:
- Payment Due – View Invoice, View Subscription, Pay Invoice, Download as PDF
- Paid – View Invoice, View Subscription, Download as PDF
- Failed – Pay Invoice, Download as PDF
- Refunded – Download as PDF
- Void – Download as PDF
See also Invoice Status Options above for more information.
Clients can use the searchbox at the top to search the list by invoice number. Or they can click on the Filter button to filter the list by any of the following criteria.
- Created On – Use to filter by the date invoices were created.
- Invoice Status – Filter by Payment Due, Paid, Failed, Refunded or Void
- Website – Filter to only display invoices for a selected website.
- Domain – Filter to only display invoices for a selected domain.
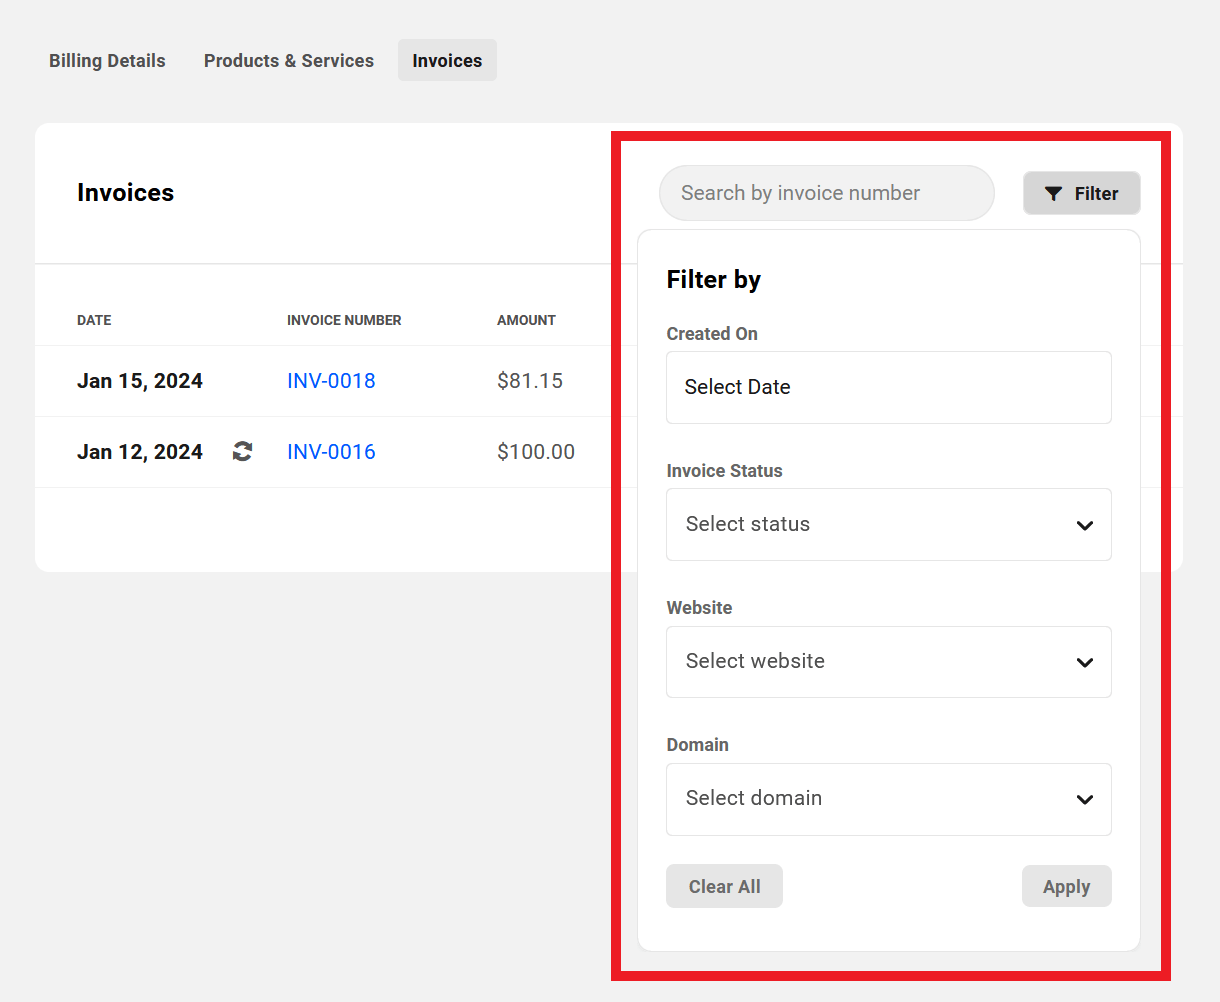
Clients can hover their mouse over any enabled filter and click the [X] to remove it, or click the Clear All button to remove all filters and revert the list to displaying all their invoices.
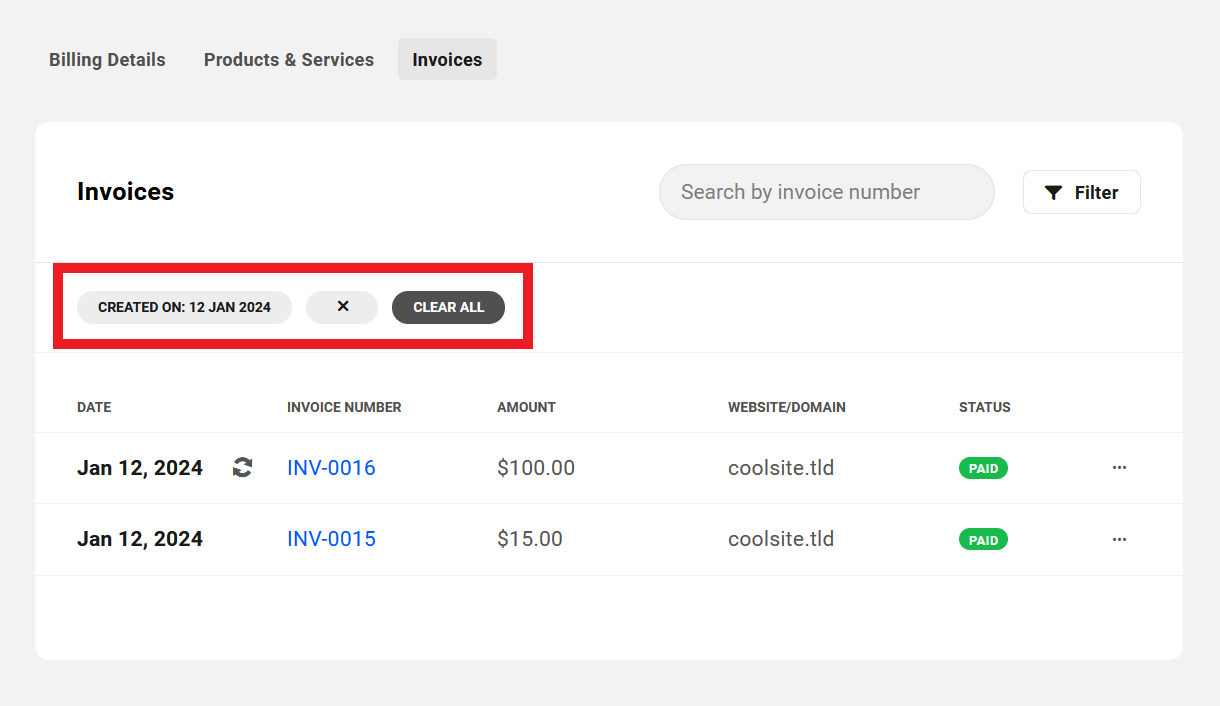
Viewing Invoices
The client can click on any invoice, or the View Invoice option under the ellipsis icon, to view the invoice details.
Depending on the invoice status, the information included in the invoice will vary. For example, an unpaid invoice will include a Make Payment button they can click to go straight to the payment page, and a paid invoice will include the payment details.
The Summary section at the top of every invoice will include the Invoice Number, the date it was Created On, the Website or Domain (if associated with a site or domain in the Hub), the invoice Status, and the Type (One-Time or Recurring subscription). Paid invoices will also include the Paid On date.
Example invoice with a Payment Due status:
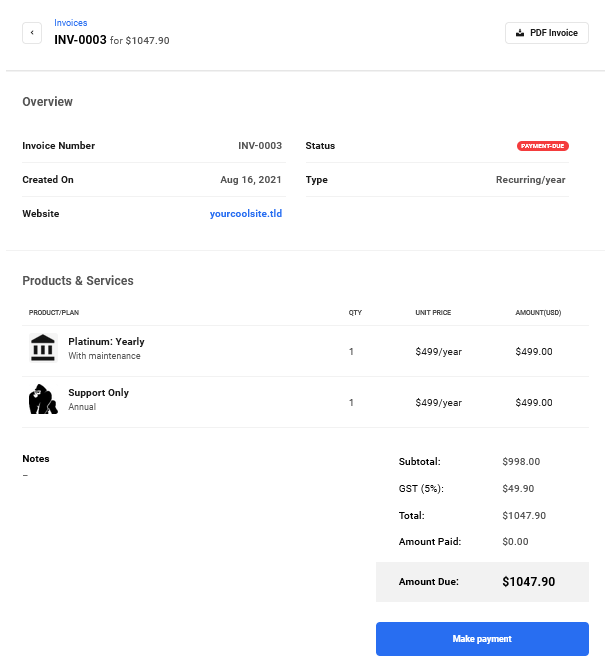
Example Paid invoice:
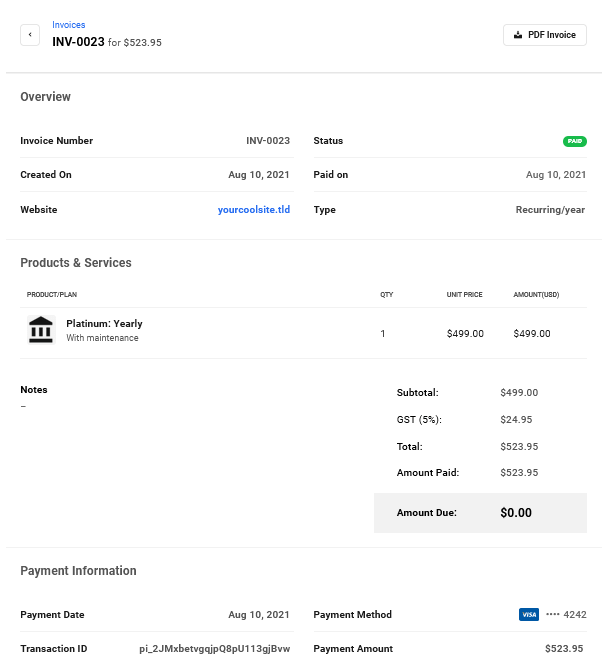
7.9.3 The Client Site Billing Area
Link to chapter 9While viewing any of their sites in their Hub, your clients can easily access and manage all of the billing activities that are specifically related to that site. The layout & information presented in the billing area for a site is nearly identical to what the client sees in their main Billing area
Clients need only click the Billing link in the sidebar menu of any site they’re viewing to get started.
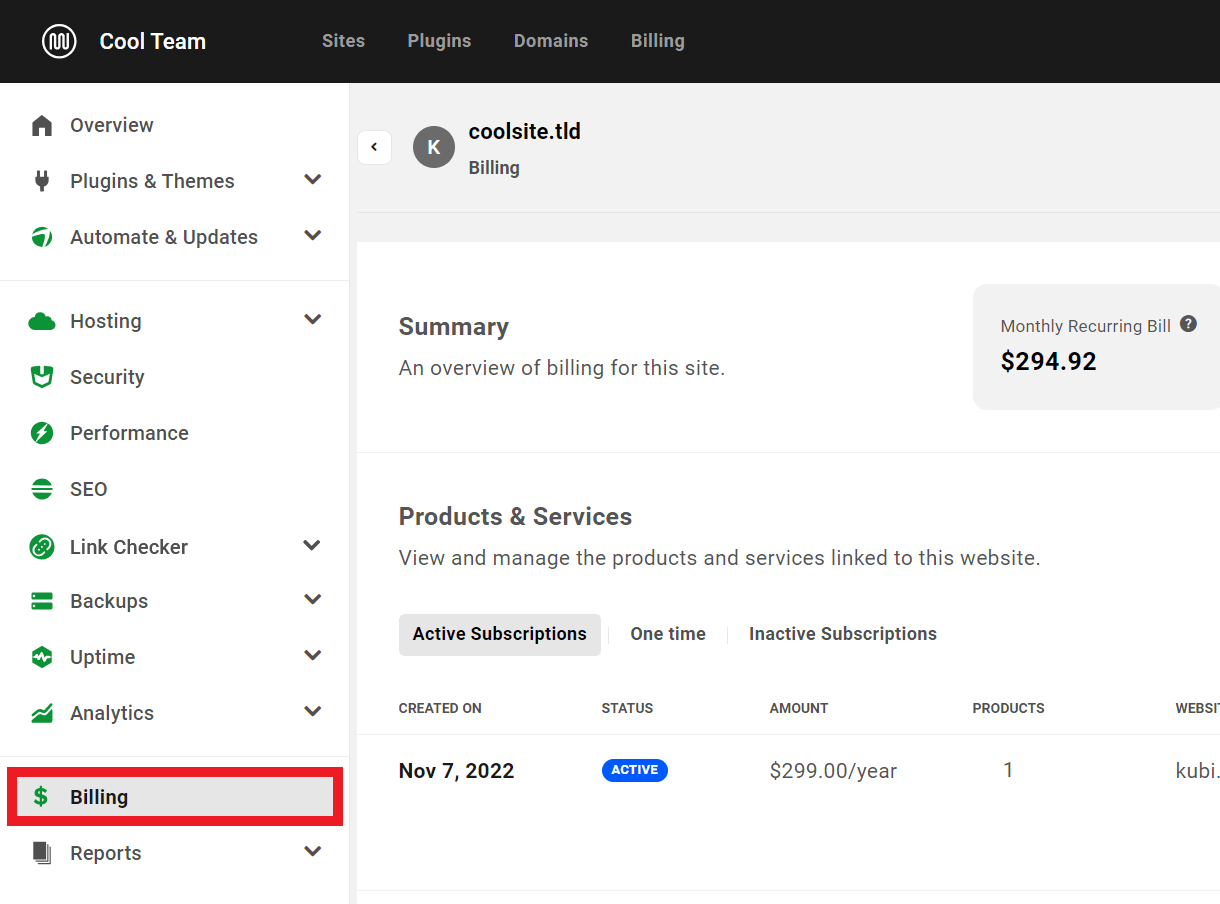
If you have added a client to a website but have not yet sent any invoice to the client, their site billing area will be devoid of any information.
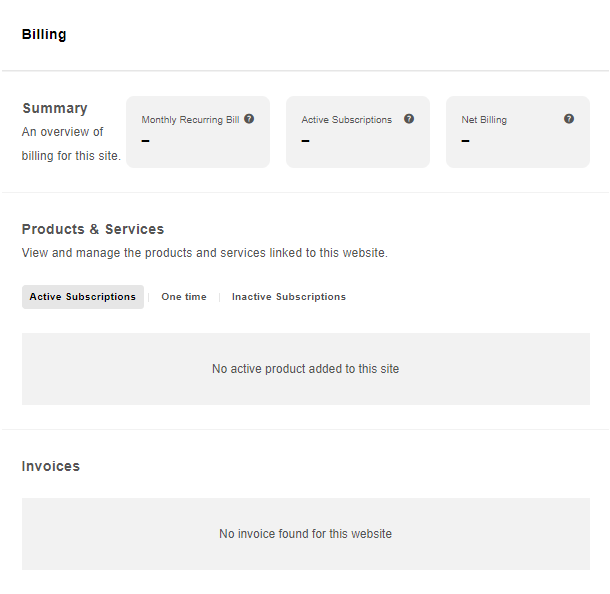
Once you have billed a client for products/services for a site, the client will see relevant information displayed in their Billing area for that site.
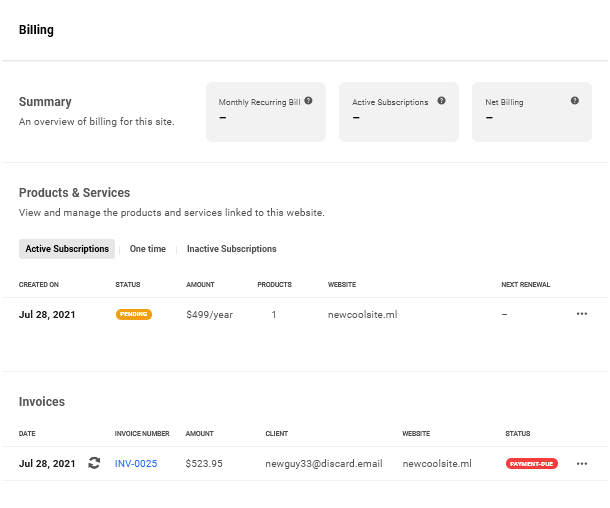
The image above illustrates what a client might see immediately after you have sent a first subscription invoice for a site. You’ll notice that the Active Subscription is listed with a Pending status, and the Invoice has a Payment Due status.
The Summary section at the top would have no data yet as the invoice is not yet paid. The client can click the ellipsis icon to reveal a link that will direct them to the corresponding invoice in their main Billing area. See the Paying Invoices chapter below for details about that process.

As soon as at least one site-related invoice has been paid, data will appear immediately in the Summary section, and the status in the Products & Services and Invoices sections will update to Active and Paid, respectively
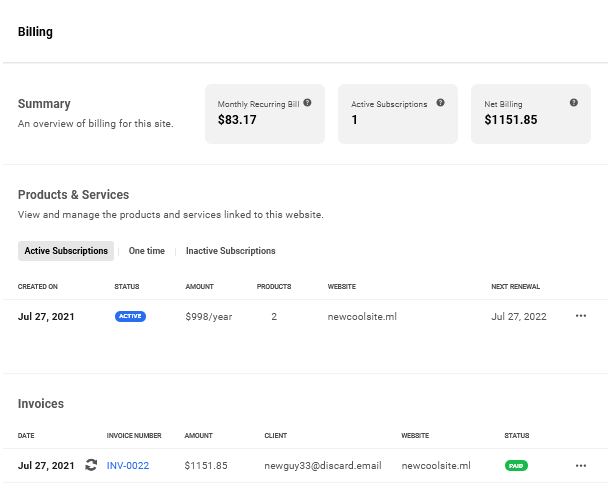
The Summary section will contain the following information specific to the site:
- Monthly Recurring Bill – The normalized monthly amount due for all active subscriptions of this site. This amount includes any taxes you may have added to your invoices.
- Active Subscriptions – The total number of active subscriptions for this site.
- Net Billing – The total billed to date for this site, including subscriptions and one-time products, minus any refunds issued. This amount includes any taxes you may have added to your invoices.
Information and options under the One Time and Inactive Subscriptions tabs here similarly pertain only to the site being viewed in the client’s Hub.
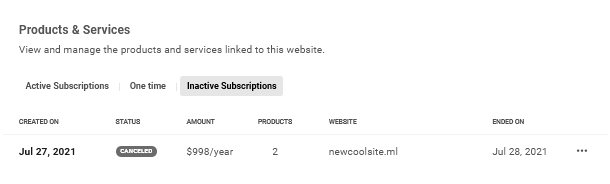
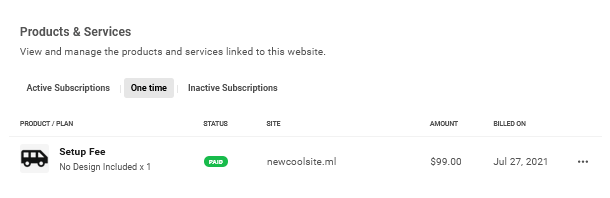
For more information about the client’s billing experience in their Hub, see the Invoices section in The Client Main Billing Area chapter above.
7.9.4 Paying Invoices
Link to chapter 9When you create and send an invoice to a client, the email they receive will be branded with your Business Profile logo and color, along with a handy button they can click to pay the invoice right away.
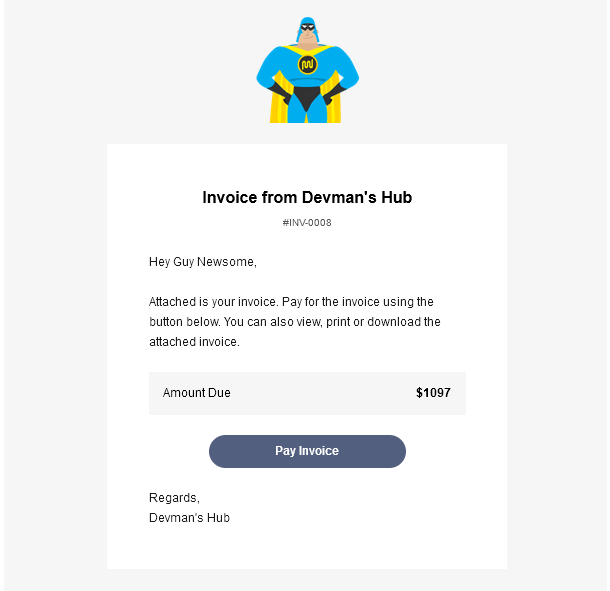
When a client clicks a Pay Invoice button in an email, they will be taken to the payment page in the Primary Hub you have assigned to that client. If they click a Pay Invoice link in the Invoices section of their Billing area in their Hub, they will be taken to the payment page in the Hub they are currently logged into.
On that payment page, they can review the products & services included in the invoice and make their payment. The page they land on is divided into two sections, as follows:
The section on the left contains details of all the Products & Services included in the invoice, the Subtotal of all those products, any Taxes you may have added to the invoice, the total Amount Due, and the Make Payment button:
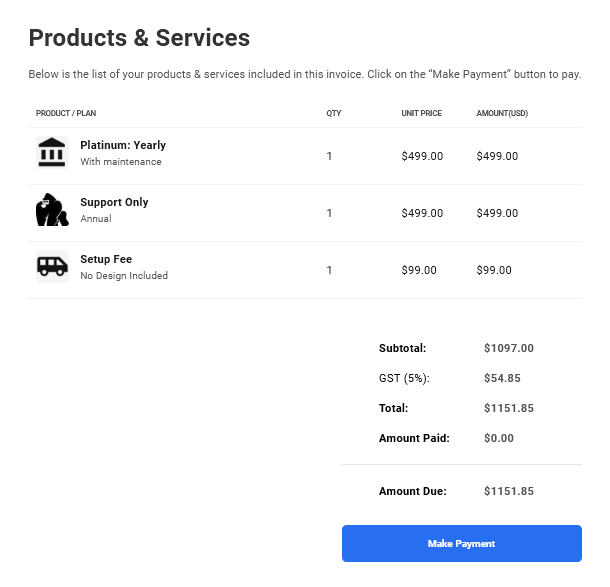
The section on the right contains a Billing Summary where the Invoice Number links back to that same invoice in the client’s Billing area. If the invoice is attached to a website, that site will also be listed there. The invoice Type will indicate whether the invoice is for a One-Time billed product, or if it is for a Recurring subscription (if recurring, the billing cycle will be indicated as well).

Clicking the Make Payment button on the left side of the screen will take the client to the 2nd step on that same screen. If they have not yet added a Payment Method under the Billing Details tab of their Billing area, they will be prompted to enter their credit card details here. Doing that will automatically update their Payment Method.
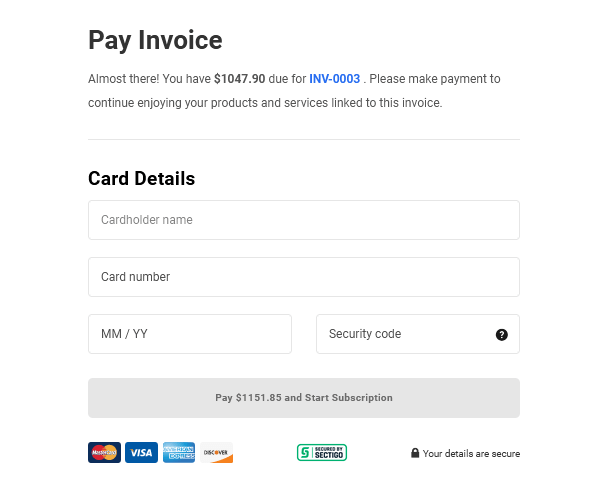
If they had already added a Payment Method prior to paying the invoice, this screen would display that info with an option to Change the payment method if they wish.
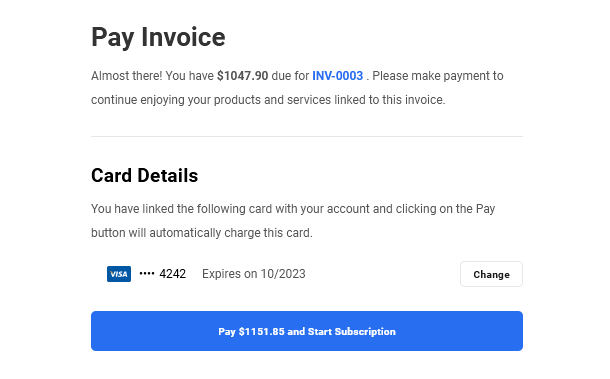
Clicking the Change button would bring up the payment form as seen above where they can enter new card details.
Their card will be charged for the full amount of the invoice when they click the Pay button on that screen. Note that if the invoice contains recurring products, this button will indicate that paying will start a subscription. If the invoice only contains one-time billed products, the button will have a simple Pay label instead.

Once paid, the screen will then refresh and they will be redirected to that specific invoice in the Invoices section of their Billing area in their Hub.
The invoice status will be updated to Paid, and all information relevant to the invoice as well as products & services included in it will be displayed there.
The client can download a PDF copy of any paid invoice by clicking the button at the top-right of the invoice. If there is a website attached to the invoice, clicking the site link will direct them to their site in a new tab.
Stripe credit
Client invoices can also be paid via “Stripe credit”.
Stripe credit adds a virtual currency to your client’s balance and that balance will decrease on the client’s next invoice, which can be handy in many situations (especially when performing tests during Stripe Live mode).
In order to add Stripe credit to your client:
- Go to Stripe Dashboard.
- Open your desired client.
- Go to “Credit Balance” section and just add your desired amount with “Adjust balance” action.

7.9.5 How to White-Label the Client Experience
Link to chapter 9When selling your services to your clients, and billing them for those services, you’ll want to ensure that your brand is represented throughout the whole process. This chapter provides guidance on how to fully white-label the Client Billing experience for your clients so they never see the WPMU DEV brand.
Step 1 – Brand the Hub
The very first thing you want to do is install and configure the Hub Client plugin on your own site at your own domain so whatever your clients see when they login is your brand, not ours.
The Hub Client enables you to have an exact duplicate of the Hub, on any site page you like, branded with your brand colors & logo, your own custom menu, even your own live chat support instance if needed.
You can install it on either a single site instance of WordPress, or on any one site in a multisite. You can even install the Hub Client on multiple single sites, and brand each instance differently if you have multiple product or service brands.
Once installed and activated, follow the setup steps detailed in the Hub Client plugin documentation if needed to help you get things configured.
Step 2 – Brand Your Emails
Next, you’ll want to ensure all email communications are branded with your own domain as well, not WPMU DEV or some generic domain.
By default, emails sent from the Hub Client will send from your domain where that plugin is installed, for example: [email protected]
However, if the site where you’ve installed the Hub Client is hosted by WPMU DEV, emails will send from our default noreply address: [email protected]
Neither of those options look very professional for your business communications. So you’ll want to install and configure an SMTP plugin where you can specify your own domain address to be used as the sender email. For example: [email protected]
You can use any SMTP plugin you prefer, but we recommend our very own Branda plugin as it comes fully equipped with a host of additional white-labeling features.
Once installed and activated on the same site where you installed the Hub Client plugin, go to Branda > Emails in your site admin and activate the SMTP module. Then follow the setup steps detailed in the Branda plugin documentation if needed to help you get things configured.
Step 3 – Invite Your Clients from Your Branded Hub
Now that you have your own branded instance of the Hub set up on your own domain, and SMTP configured to ensure emails send from that domain, the last thing to do is to ensure that you do not invite clients from the Hub on the WPMU DEV site.
When adding a new client to your Clients & Billing portal, or when editing an existing one, you want to be sure that the Primary Hub set for that client is your site where you have installed the Hub Client plugin. Then be sure to invite the client from that site, not from the WPMU DEV site.
They will receive the invitation email from the email address you set in the SMTP module in Branda. The confirmation and login link in that email will point them to your Hub on your site.
All future billing emails will come from your SMTP email address, and all billing activity for the client will occur on your branded Hub site.
7.9.6 How to Test the Client Experience
Link to chapter 9Once you’ve connected your Stripe account and have added at least one product & pricing plan, it’s a good idea to test your client billing configuration before sending your first invoice to a real client.
You can use Stripe credit to perform live transactions with a test client to ensure everything is set up correctly, so you don’t need to tie up any actual money to test things. You will need a valid credit card though.
Step 1 – Create a Test Client
First, create a client in Clients & Billing. You can use any name & email address you like for your test client, as long as you have access to it. It can be a personal email address or a disposable one from a service like tempr.email for example.
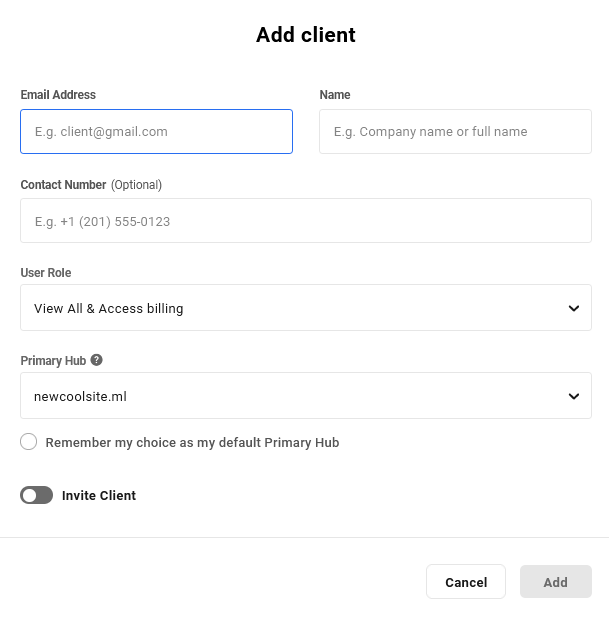
If you followed our recommendations and are using the Hub Client plugin on your own domain, select that domain as the client’s Primary Hub.
Be sure to toggle on the option to Invite Client so the invitation email is sent to the address you used to create the client.
Once the invitation email is received at the test client’s email address, either click the Confirm button or copy and paste the link in your browser’s address bar to create the client account. Be sure you’re not already logged into the Primary Hub in the same browser.
This will also create the customer in your Stripe account.
Step 2 – Add Stripe Credit
Log into your Stripe account and be sure you are viewing live data for the same account you connected to Clients & Billing. Then, under the Customers tab, click on the client you just created.
Scroll down to the Customer invoice balance section and click Adjust Balance.
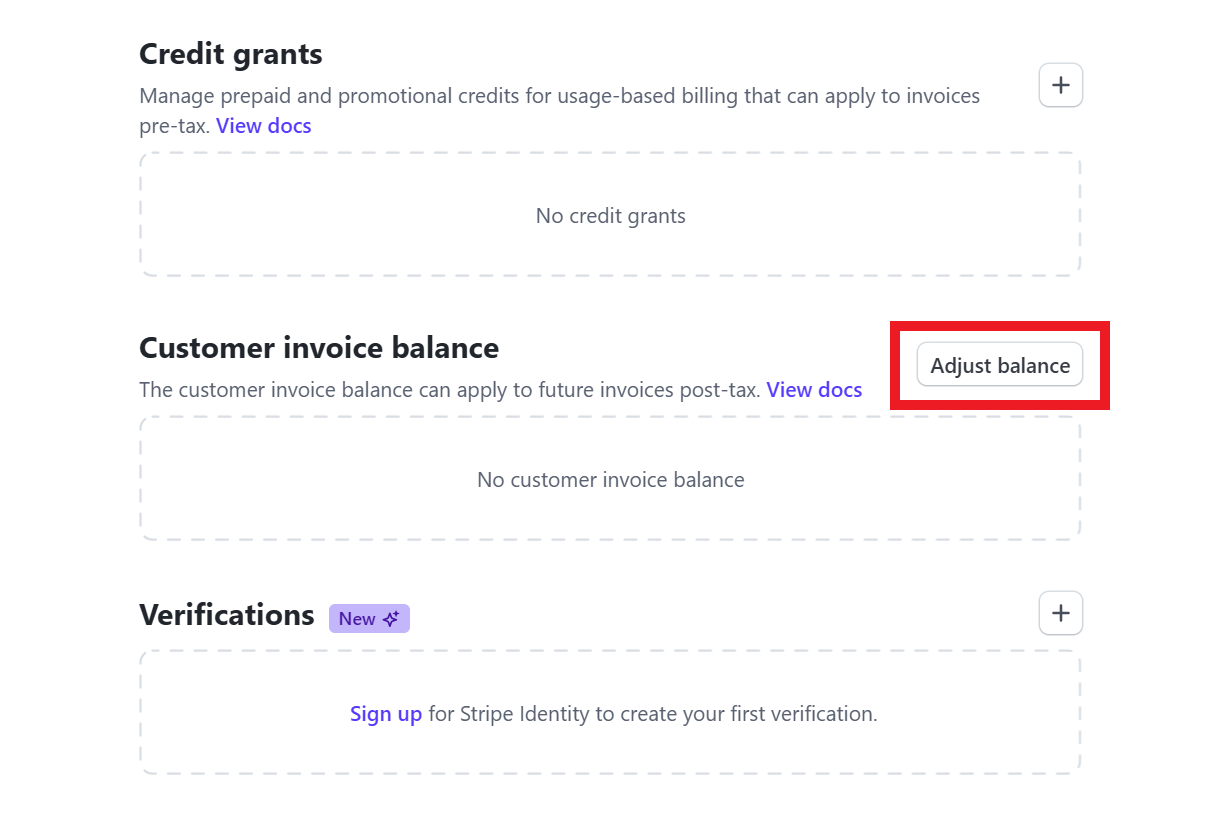
Add any amount of credit you wish to that customer and click the Apply to credit balance button.
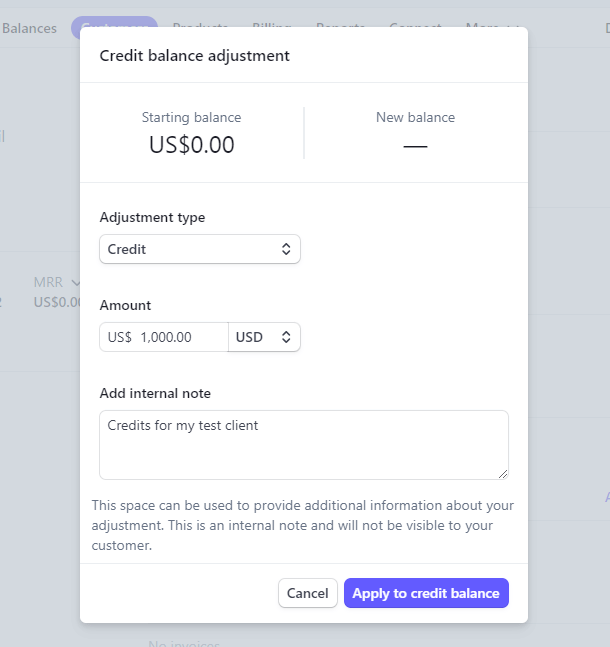
You’ll then see the new credit balance for your test client. This amount will be applied to any invoice paid by that client.
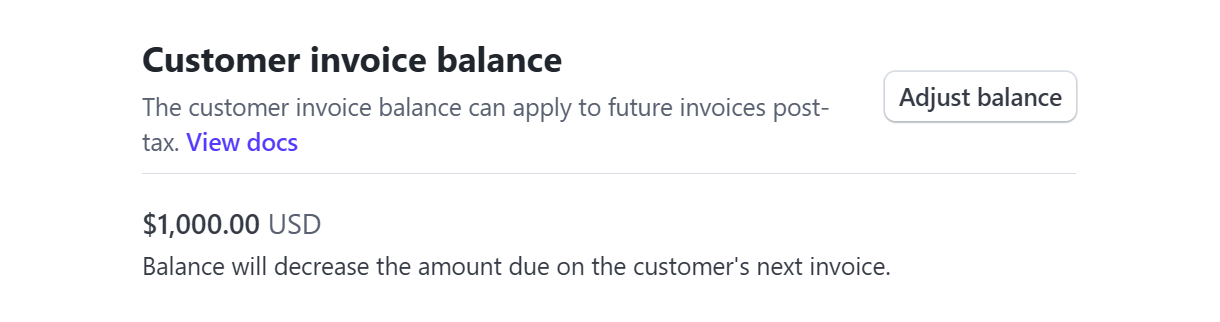
Step 3 – Create and Pay an Invoice
Now log into your Hub as you, and create an invoice for your test client.
Then log back into your Hub as the test client, go to the Invoices tab in the client’s Billing area, and click the Pay Invoice button for the one you just created.
Go through the payment process and add your credit card info as though you were actually making the payment. But don’t worry, as noted at the beginning of this chapter, no charge will be made to your card. The Stripe credit you added to the client will be automatically used to pay the invoice once you click the Pay button.
You will then see the invoice status change to Paid and, if the invoice you created was for a recurring product, you’ll see the new subscription in the Current Subscriptions section of the client’s billing area.
Step 4 – Confirm Credit Used at Stripe
Now if you go back to the customer’s page in your Stripe account, you’ll see the credit card info you added for the client in the Payment Methods section.
But you’ll also see that the Customer invoice balance has decreased by the amount of the invoice you just paid. Click the View Details button that now appears there to see additional details about the customer’s credit balance.
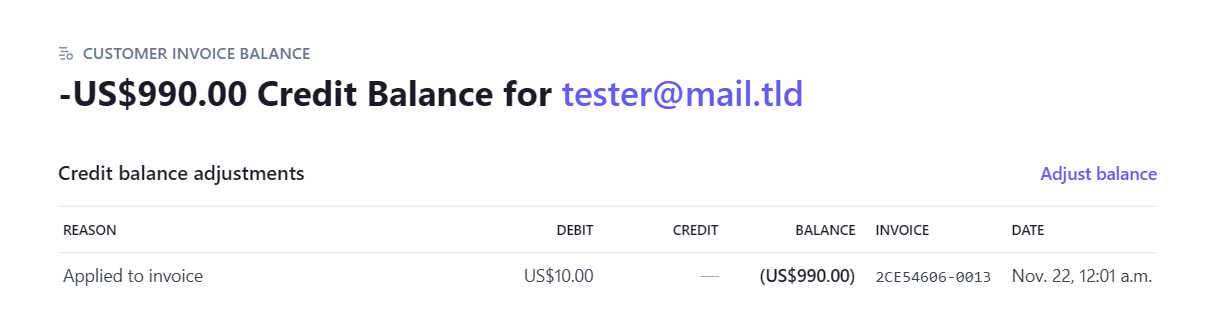
7.10 Email Examples
Copy chapter anchor to clipboardThis chapter provides examples of all the Clients & Billing emails sent to both you and your clients, and which actions trigger them.
All emails sent to you will be branded with the WPMU DEV logo and colors so you know where they come from.
Emails sent to your clients will be branded with the Brand Logo and Brand Color you set in the Business Profile section of your Clients & Billing portal. And if you have set a custom Emails Footer Note in the Email Notifications section, that would appear in the footer of all client emails as seen in the examples below.
In all emails sent, the placeholders shown in these examples will be replaced by actual data, as follows:
- INV-00048 – This number at the top of certain email examples below would be the actual invoice number following the Invoice Number Format you have set in the Customize Invoices section of your Clients & Billing portal.
- {{Client Name}} – The full name of the client to whom the email is sent.
- {{First Name}} – Your first name as it appears in your WPMU DEV account.
- {{Business Name}} – The Business Name you have set in the Business Profile section of your Clients & Billing portal.
7.10.1 Emails Sent to You
Link to chapter 10All Clients & Billing email communications, including new client acceptance, invoice payment confirmations, etc., will be sent to the Hub owner’s email address.
Payment Received
This email is sent to you when a client pays an invoice, and contains the following information:
- Amount Received – The full invoice amount paid by the client, including any taxes you may have added in the invoice.
- Payment Method – This would indicate the last 4 digits of the credit card used by the client to pay the invoice. If you had manually marked the invoice as paid, the payment method you had selected then would be indicated here.
- Reference No – If the client paid with their credit card, this would be the Stripe transaction number and clicking it would redirect you to the specific paid invoice in your Stripe account. If the invoice was paid manually, this would indicate your custom reference number if you added one.
- View Invoice – Click this button at the bottom of the email to be directed to the specific invoice in the Clients & Billing portal of your Hub.
A PDF copy of the paid invoice is also included with this email as an attachment.
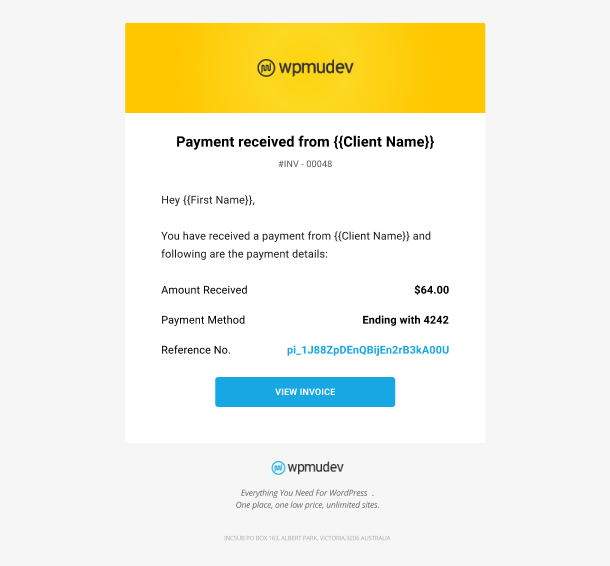
Payment Failed
This email is sent to you when a client’s invoice payment fails for any reason (usually insufficient funds or an expired card), and contains the following information:
- Amount Due – The full amount of the invoice due from the client, including any taxes you may have added in the invoice.
- Payment Method – This would indicate the last 4 digits of the credit card used by the client to attempt to pay the invoice.
- View Invoice – Click this button at the bottom of the email to be directed to the specific invoice in the Clients & Billing portal of your Hub.
A PDF copy of the failed invoice is also included with this email as an attachment.
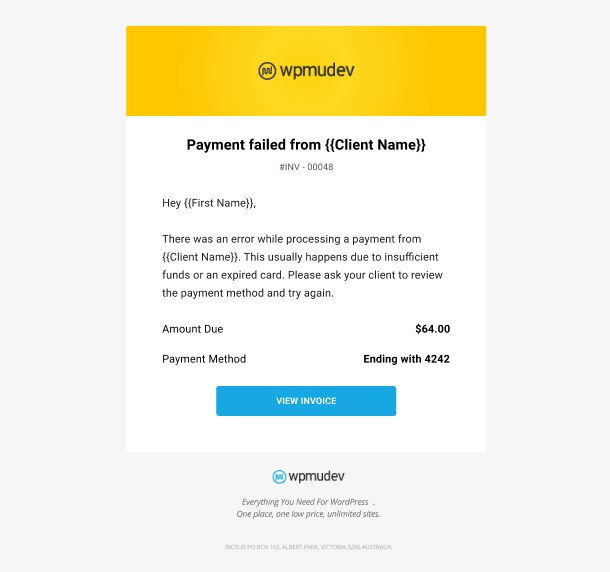
Payment Refunded
This email is sent to you when you refund a client’s payment, using either the Issue Full Refund option available in your Clients & Billing portal or by issuing a full/partial refund directly in your Stripe account, and contains the following information:
- Amount Refunded – The full/partial amount of the invoice payment you refunded to the client.
- Refunded To – This would indicate the last 4 digits of the credit card used by the client to pay the invoice, and to which the amount was refunded
- View Invoice – Click this button at the bottom of the email to be directed to the specific invoice in the Clients & Billing portal of your Hub.
A PDF copy of the refunded invoice payment is also included with this email as an attachment.
Subscription Started
This email is sent to you when a client pays an invoice for a recurring product and the subscription starts, and contains the following information:
- Created On – The date of the subscription start, which corresponds to the date the first subscription invoice was paid.
- Client – The full name of the client who paid the subscription invoice.
- Website – If there is a website associated with the subscription, it’s URL will appear here.
- Subscription Amount – The full amount of the recurring subscription payment, including any taxes that you may have added in the invoice.
- Products – The number of recurring product plans included in the subscription.
- View Subscription – Click this button at the bottom of the email to be directed to the specific client subscription in the Clients & Billing portal of your Hub.
Request to Cancel Subscription
This email is sent to you when a client clicks a Request to Cancel link for any subscription, and contains the following information:
- Created On – The date of the subscription start, which corresponds to the date the first subscription invoice was paid.
- Client – The full name of the client who paid the subscription invoice.
- Website – If there is a website associated with the subscription, it’s URL will appear here.
- Subscription Amount – The full amount of the recurring subscription, including any taxes that you may have included in the invoice.
- Products – The number of recurring product plans included in the subscription.
- View Subscription – Click this button at the bottom of the email to be directed to the specific subscription in the Clients & Billing portal of your Hub where you can take the necessary action.
Subscription Ended
This email is sent to you when a client’s subscription expires or is canceled, and contains the following information:
- Created On – The date of the subscription start, which corresponds to the date the first subscription invoice was paid.
- Client – The full name of the client who paid the subscription invoice.
- Website – If there is a website associated with the subscription, it’s URL will appear here.
- Subscription Amount – The full amount of the recurring subscription, excluding any taxes that you may have included in the invoice.
- Products – The number of recurring product plans included in the subscription.
- Net Amount Billed – The total amount billed for the subscription since it started, including any taxes or refunds issued.
- View Subscription – Click this button at the bottom of the email to be directed to the specific subscription in the Clients & Billing portal of your Hub.
7.10.2 Emails Sent to Your Clients
Link to chapter 10Client Invitation
This email is sent to the client when you click an Invite Client link or Invite button in the Clients section of your Clients & Billing portal, and contains the following information:
- Confirm Invitation – Clicking this button will direct the client to the account creation page of the Primary Hub you have assigned to that client. See the How to White-Label the Client Experience chapter for details.
Invoice Sent
This email is sent to the client when you send or resend an invoice, or reactivate an expired or canceled subscription (which automatically triggers a new invoice), and contains the following information:
- Amount Due – The full amount of the invoice, including any taxes you may have included in the invoice.
- Products – The number of products included in the invoice.
- Type – This will indicate One Time if the invoice contains only one-time billed products, or Recurring/{{billing-cycle}} if the invoice is for a recurring subscription.
- Pay Invoice – Clicking this button will direct the client to the payment screen of the Primary Hub you have assigned to that client. See the How to White-Label the Client Experience chapter for details.
A PDF copy of the invoice is also included with this email as an attachment.
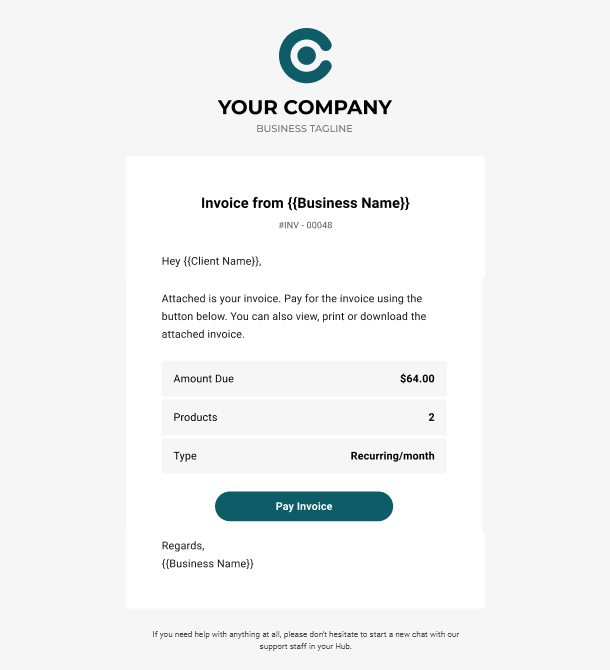
Payment Receipt
This email is sent to the client when they pay an invoice, and contains the following information:
- Amount Paid – The full amount of the invoice paid by the client.
- Payment Method – This would indicate the last 4 digits of the credit card used to pay the invoice. If you had marked the invoice as paid with any other method, that would be indicated here.
- Reference No – If the client paid the invoice with their credit card, this would be the Stripe transaction number. If the invoice was paid manually, this would indicate your custom reference number if you added one.
- View Invoice – Clicking this button would direct the client to that specific invoice in their Hub.
A PDF copy of the paid invoice is also included with this email as an attachment.
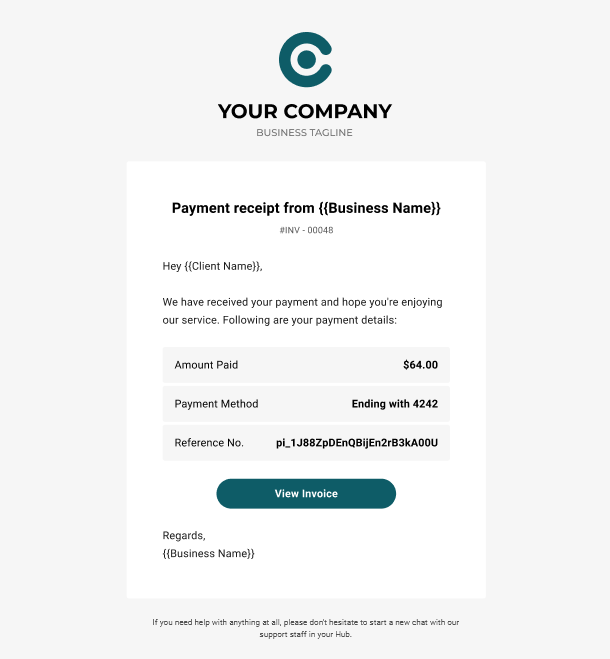
Payment Failed
This email is sent to the client when their invoice payment fails for any reason (usually insufficient funds or an expired card), and contains the following information:
- Amount Due – The full amount of the invoice due from the client, including any taxes you may have included in the invoice.
- Payment Method – This would indicate the last 4 digits of the credit card used to pay the invoice.
- View Failed Invoice – Clicking this button would direct the client to the specific invoice in their Hub.
A PDF copy of the failed invoice payment is also included with this email as an attachment.
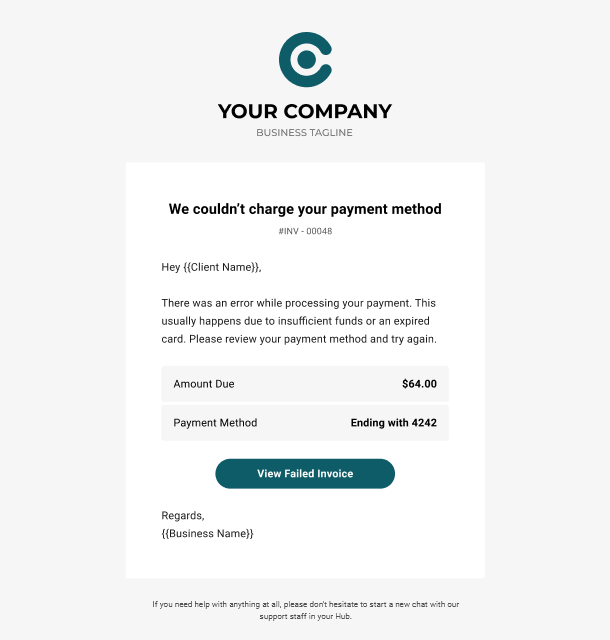
Payment Refunded
This email is sent to the client when you issue a full or partial refund, and contains the following information:
- Amount Refunded – The full/partial amount of the invoice payment you refunded to the client.
- Refunded To – This would indicate the last 4 digits of the credit card used by the client to pay the invoice, and to which the amount was refunded
- View Refunded Invoice – Clicking this button would direct the client to the specific invoice in their Hub.
A PDF copy of the refunded invoice payment is also included with this email as an attachment.
Subscription Started
This email is sent to the client when they pay an invoice for a recurring product and the subscription starts, and contains the following information:
- Created On – The date of the subscription start, which corresponds to the date the first subscription invoice was paid.
- Website – If there is a website associated with the subscription, it’s URL will appear here.
- Subscription Amount – The full amount of the recurring subscription payment, including any taxes that you may have included in the invoice.
- Products – The number of recurring product plans included in the subscription.
- View Subscription – Clicking this button at the bottom of the email will direct the client to the specific subscription in their Hub.
Subscription Ended
This email is sent to the client when their subscription expires or has been canceled by you after they had sent a cancelation request, and contains the following information:
- Created On – The date the subscription started, which corresponds to the date the first subscription invoice was paid.
- Website – If there was a website associated with the subscription, it’s URL will appear here.
- Subscription Amount – The full amount of the recurring subscription, including any taxes that you may have included in the invoice.
- Products – The number of recurring product plans included in the subscription.
- Net Amount Paid – The total amount paid by the client for the subscription since it started, including any taxes or refunds issued.
- View Subscription – Clicking this button at the bottom of the email will direct the client to the specific subscription in their Hub.
Subscription Reactivated
This email is sent to the client when they pay an invoice for an expired or canceled subscription that you have reactivated, and contains the following information:
- Created On – The date the reactivated subscription started, which corresponds to the date the first reactivated subscription invoice was paid.
- Website – If there is a website associated with the subscription, it’s URL will appear here.
- Subscription Amount – The full amount of the recurring subscription, including any taxes that you may have included in the invoice.
- Products – The number of recurring product plans included in the subscription.
- View Subscription – Clicking this button at the bottom of the email will direct the client to the specific subscription in their Hub.
Subscription Updated
This email is sent to the client if you update their subscription in your Stripe account, and contains the following information:
- Created On – The date the subscription started, which corresponds to the date the first subscription invoice was paid.
- Website – If there is a website associated with the subscription, it’s URL will appear here.
- Subscription Amount – The full amount of the recurring subscription, including any taxes that you may have included in the invoice.
- Products – The number of recurring product plans included in the subscription.
- View Subscription – Clicking this button at the bottom of the email will direct the client to the specific updated subscription in their Hub.
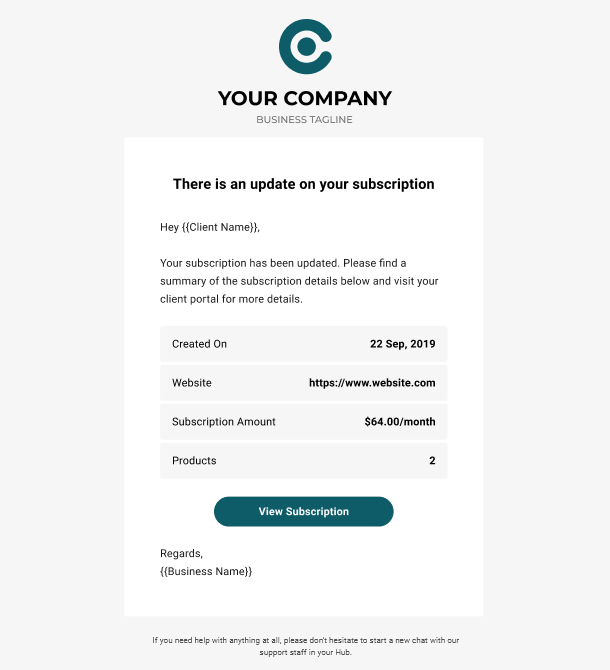
Payment Method Expires Soon
This email is sent to the client one month before the expiry date of the credit card they have set as their payment method, and contains the following information:
- Payment Method – This would indicate the last 4 digits of the credit card the client has set in the Billing Overview section of their Hub.
- Update Payment Method – Clicking this button would direct the client to the Billing Overview section in their Hub where they can update their Payment Method.
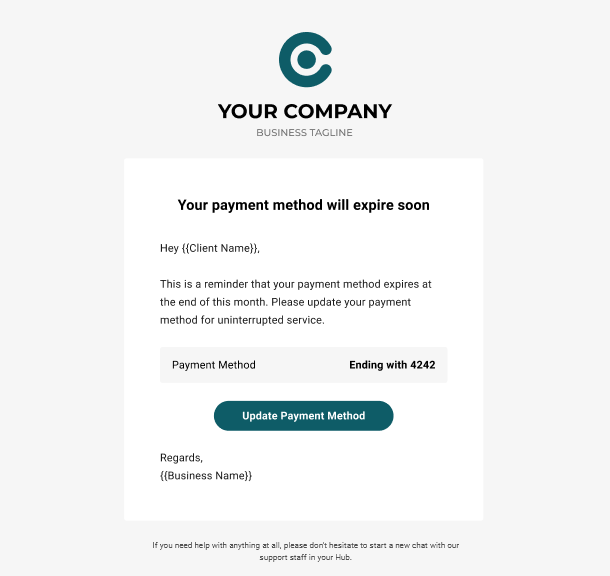
Payment Method Expired
This email is sent to the client when the credit card they have set as their payment method has expired, and contains the following information:
- Payment Method – This would indicate the last 4 digits of the credit card the client has set in the Billing Overview section of their Hub.
- Update Payment Method – Clicking this button would direct the client to the Billing Overview section in their Hub where they can update their Payment Method.
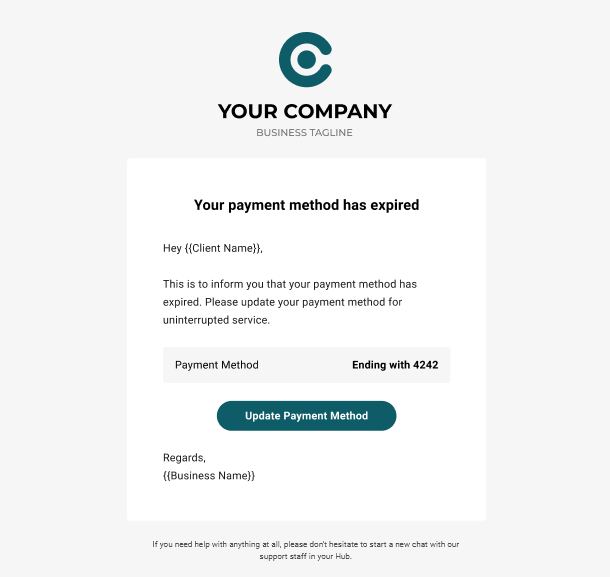
7.11 Integrating With 3rd-Party Apps
Copy chapter anchor to clipboardThis chapter provides examples of integrating your Clients & Billing portal with 3rd-party apps & platforms. It is an ongoing project and will be updated as new opportunities or member requests arise.
7.11.1 Using Stripe Webhooks
Link to chapter 11Depending on the automation you need to create, you may want to use the webhook method to send data from Stripe.
Log into your Stripe account and navigate to https://dashboard.stripe.com/webhooks
Click on Add endpoint, and enter the Endpoint URL provided by your 3rd-party application.
To send data to that URL when a client pays an invoice, click on the Select Events button. Then scroll down to the Invoices section and select that event from the list. To add more or change to a different event, click the Change Events link.
Click the Add endpoint button when you’re done.
From then on, any time a client pays an invoice, the corresponding client data will be sent via webhook to your 3rd-party application.
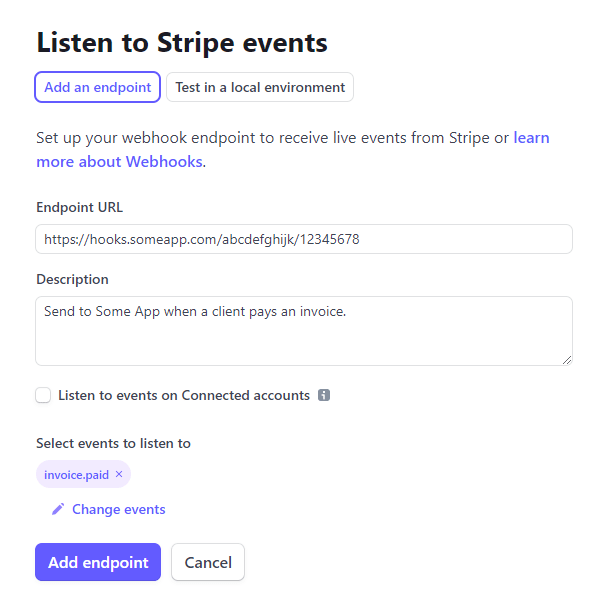
7.11.2 Using Zapier Zaps
Link to chapter 11If you’d like to use Zapier for your integration but don’t need or want to use the webhook method, you can create zaps to communicate with many 3rd-party apps and send your Stripe data to them automatically.
For example, you could simply add or update a contact in your Mailchimp list when a client pays an invoice.
Log into your Zapier account, navigate to https://zapier.com/app/zaps and click on + Create Zap.

In the next step, select Stripe as your Trigger. Then select New Payment as the trigger Event and click the Continue button.
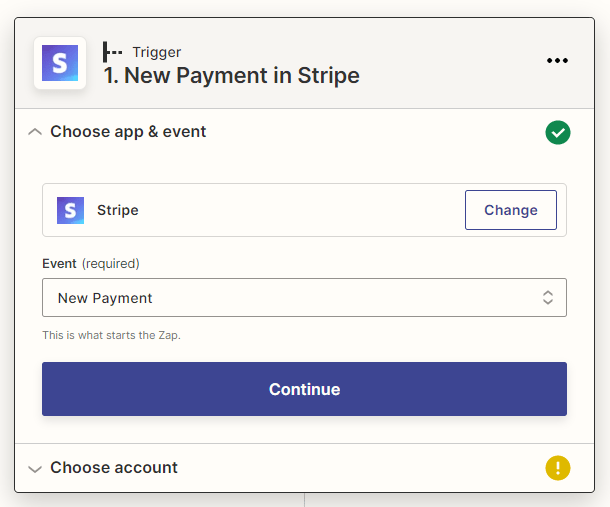
A popup window will open and prompt to enter your live & secret Stripe API key to connect your account to Zapier.
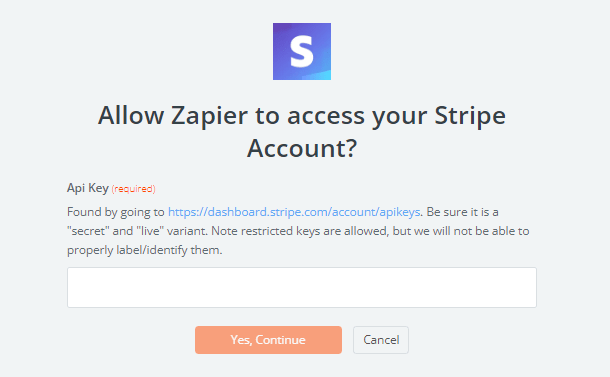
In the Choose account step, be sure to select the same account that you have connected to Clients & Billing in your Hub.
In the Set up trigger step, choose whether you want to include failed payments or not. Click the Continue button when you’re done.
In the Test trigger step, you may need to first create an invoice in your Clients & Billing portal and manually Mark As Paid so your zap has some data to find and test. Click the Continue button.
In the next step, select Mailchimp as your Action. Then select Add/Update Subscriber as the Event and click the Continue button.
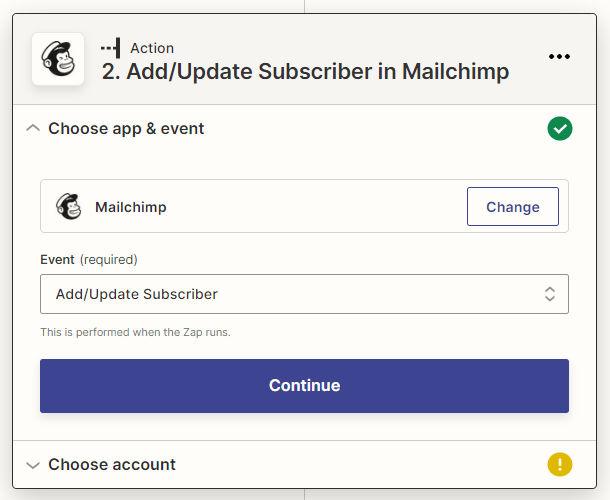
You’ll then be prompted to Choose the account you wish to connect and to Set up the action.
In the Set up action step, select the Mailchimp Audience you wish to update with this action, and select the Subscriber email data that corresponds to the client email address found earlier in the Test trigger step.
Configure any other options as needed in that step and click the Continue button at the bottom when you’re done.
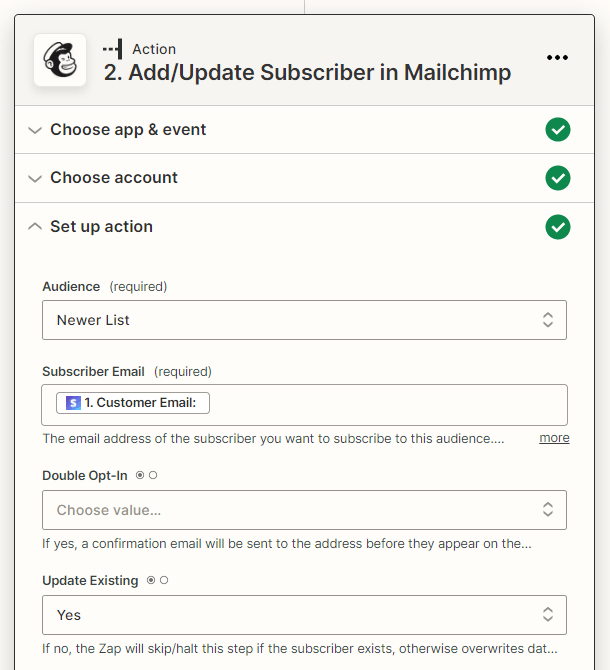
Finally, click the Test action button and you should see a new contact added to your select Mailchimp Audience.
Click Publish Zap when you’re done to make it live.
From then on, any time a client pays an invoice, the client will be added or updated in your Mailchimp Audience.
7.12 Get Support
Copy chapter anchor to clipboardIf you still have questions or need assistance after reading this document, please don’t hesitate to contact our support superheroes using the available options under the Support tab in your Hub or via the Support tab in your WPMU DEV Dashboard.
