12. Snapshot
This document explains each of the Snapshot Pro features and provides instructions on how to create and store backups of your website and quickly restore it.
Snapshot requires PHP 7.4.33 or greater. See WPMU DEV Minimum Requirements for details.
If you haven’t installed Snapshot Pro yet, visit the Snapshot Pro product page to download or to get a quick overview of the many available features. If you are a WPMU DEV member, use one-click installation to install Snapshot Pro directly to any connected site.
Upon activation or when certain features are configured, this plugin may add cookies to the user’s browser, store personal information in your database, or integrate with 3rd-party applications. You may need to disclose this information to your site visitors. For details, see Our Plugins in our privacy policy documentation.
If your site is hosted with WPMU DEV, nightly backups are created for you automatically. See our Hosting Backups guide for a thorough explanation of the backup system in place for sites we host.
12.1 Getting Started
Copy chapter anchor to clipboardSnapshot Pro’s backups are incremental and support both scheduled and manual backups from the Hub, for both sites hosted with WPMU DEV and on third-party hosting.
Snapshot Pro uses the WPMU DEV API to create a secure connection for backup and restore. The API is connected by installing the WPMU DEV Dashboard plugin and connecting your WPMU DEV account. To learn more about the WPMU DEV Dashboard plugin and connecting your site to the WPMU DEV API, visit the WPMU DEV Dashboard documentation.
Wanting to really take advantage of everything that Snapshot v4 has to offer? Check out our blog on how to Get the Most from Your Site Backups for all the inside tips and tricks.
Get started by installing and connecting the WPMU DEV dashboard plugin and the latest version of Snapshot. This will add a new menu item to your WordPress dashboard. Go to the Snapshot menu item to configure your Backups.
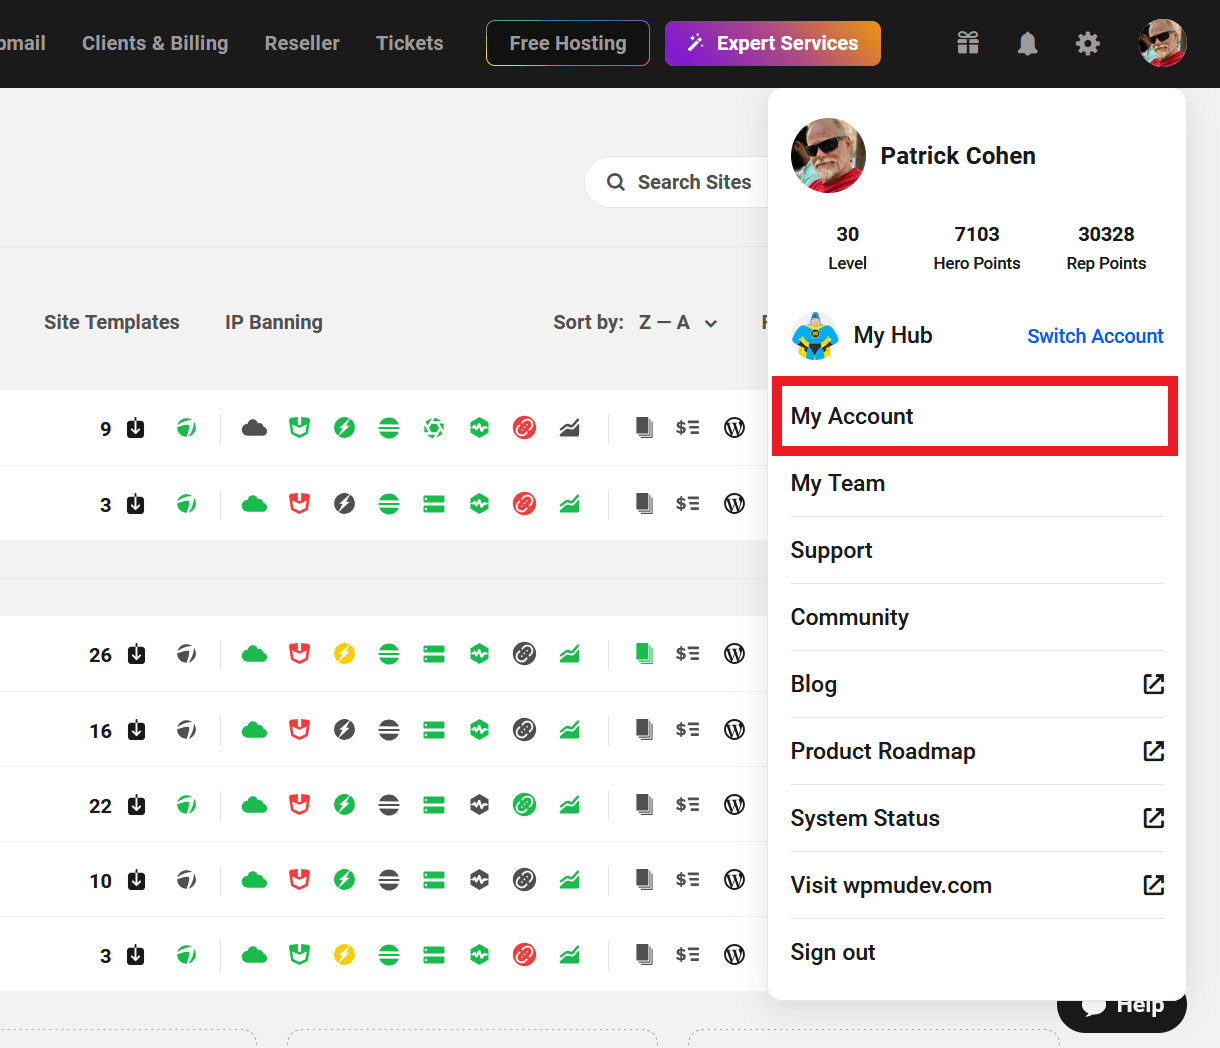
Note: If you would like to see a visual representation of how much space your backups occupy for each site, you can view this on the My Account page of your Hub.
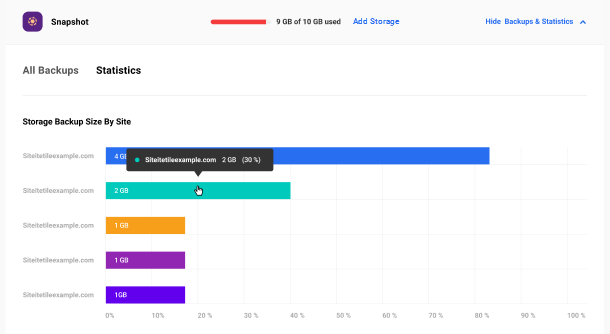
Click on Statistics under the Add-Ons tab, and you’ll find a handy chart showing the percentage of the storage distribution of Snapshot backups for all your sites. Hover over each segment to reveal the size of the backups taken up by that site.
Every WPMU DEV membership includes a default storage allotment as follows, and upgrade plans for increased storage are available in that Addons section.
- Free – 1Gb – Note that upgrade packages are not available on this plan at this time.
- Basic – 5Gb
- Standard – 10Gb
- Plus – 20Gb
- Premium – 50Gb
12.1.1 Setup Wizard
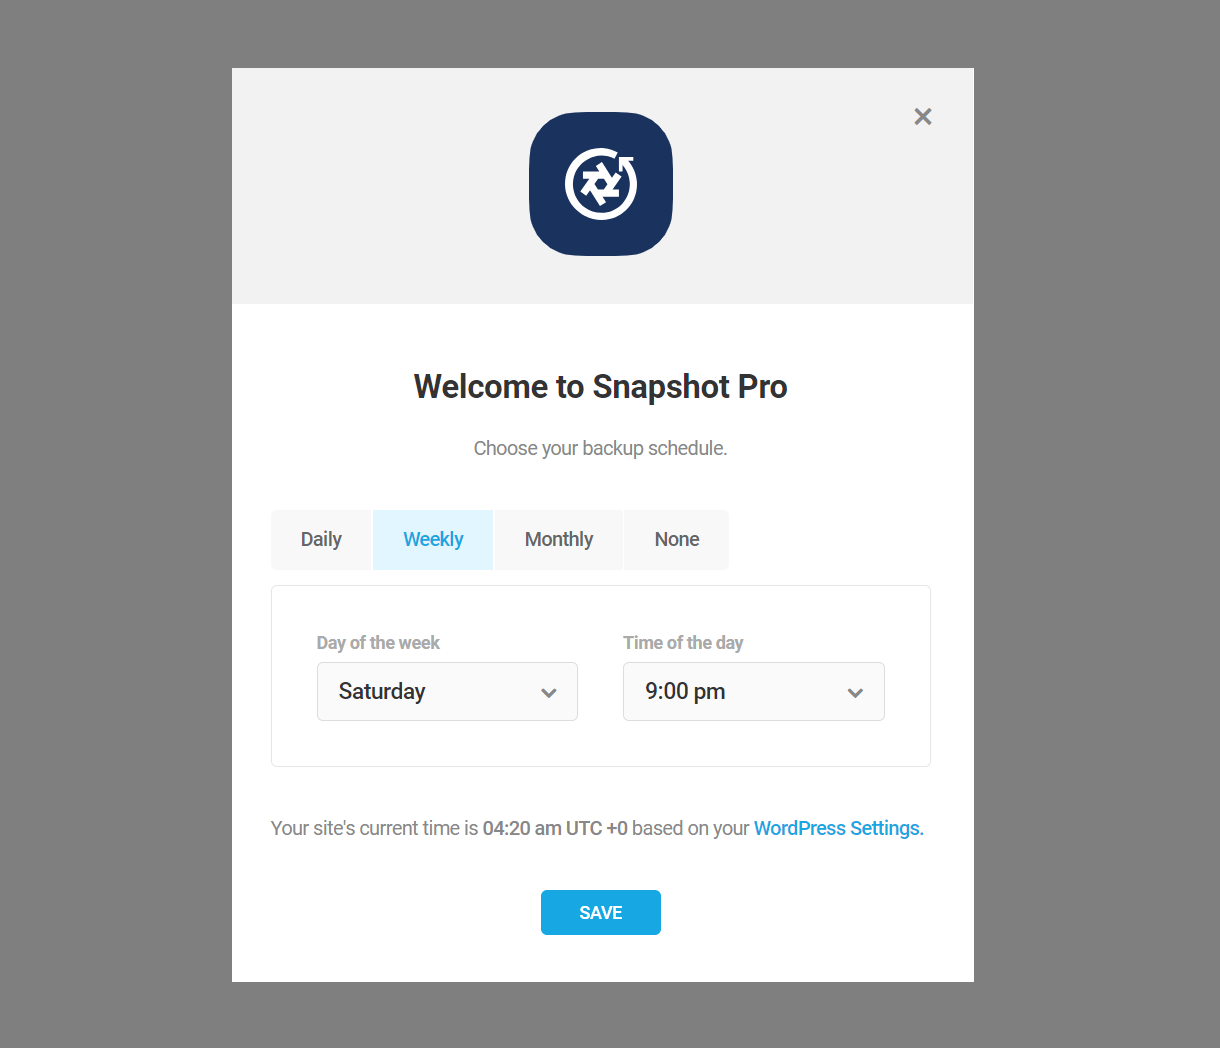
Link to chapter 1The Setup Wizard will open the first time you click into Snapshot, and you’ll be prompted to set up a “Daily”, “Weekly”, or “Monthly” backup schedule. Choose the day, day of the week/month, and time you want backups to be scheduled. You can also choose “None” and create a schedule later if you prefer. See the Backups section for more.
Please note that stand-alone hosting plans are limited to scheduling monthly backups only.
If you do not want to schedule a backup at this point, you can also just click the “X” icon in the upper right corner to close the wizard and continue to the Snapshot Dashboard.
Click Save to schedule your managed backups. When saved, the wizard will close with a notification at the top of your screen about when your first backup will run.

You’ll also find your schedule displayed at the top of the Snapshot Backups screen where you can edit it if needed.
The first time backups can take some time to complete since the first backup is a full site backup. Subsequent backups will be much faster as they are incremental backups. Apart from scheduled backups, you can also run backup manually. For more information, see the Backups section below.
12.2 Dashboard
Copy chapter anchor to clipboardThe Snapshot Pro Dashboard provides an overview of your scheduled backups, what third-party destinations are linked, and when your last backup was run. The dashboard has three modules:
This chapter provides information about what is available in the Snapshot Dashboard section.
Whether you’re new to Snapshot or you’re a veteran, it’s worth knowing that we are dedicated to constantly improving Snapshot in every way possible. And some of the newer feature additions are ones that you don’t want to miss out on – like incremental backups and third-party storage options. For more information on these key features, check out Snapshot v4 Introduces New Incremental Backups and Third-Party Storage.
12.2.1 Overview
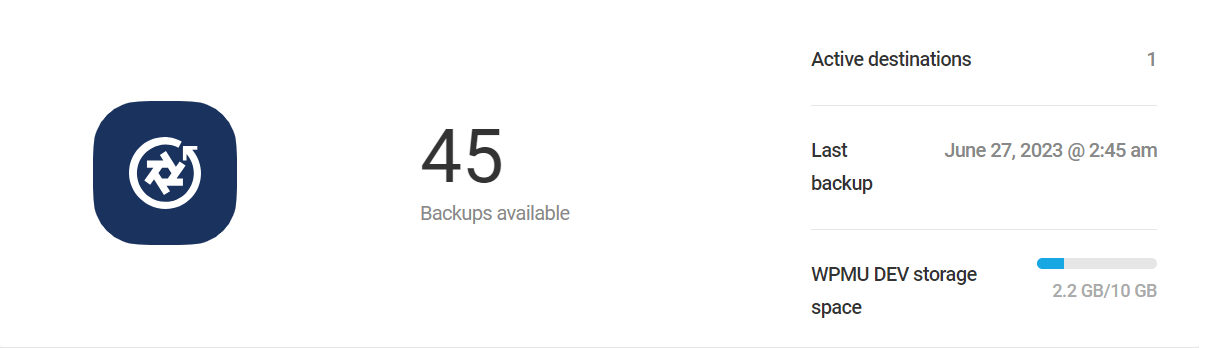
Link to chapter 2The Overview section is a quick way to see what settings and destinations are set up and active with your Snapshot backups. Available information in the Overview section includes:
- Backups Available – Number of backups currently being stored in your cloud storage
- Available Destinations – The number of connected backup locations. A full explanation of what destinations are and how to configure them can be found under the Destinations section of this guide.
- Last Backup – Lists the date and time of your most recent successful backup
- WPMU DEV Storage Space – Available WPMU DEV Storage Space included with your plan and how much storage has been used. Every WPMU DEV membership plan includes a default storage allotment, and upgrade plans for increased storage are available in the Addons section of your Account page. If you are running both Snapshot version 3 and version 4, this includes the total storage used across both versions.
12.2.2 Backups Overview
Link to chapter 2The Backup overview module is a quick way to see information about your latest backups. For more information about configuring Backups, visit the Backups chapter. The Backup Overview module shows:
- Title – This is the date of a scheduled backup or the title you entered for an on-demand backup
- Destination – Tells what storage solution is being used
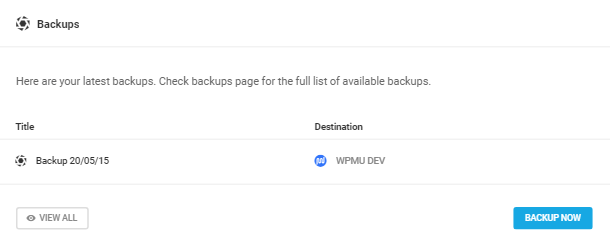
Clicking the “View All” button redirects you to the Backups section where you can get more detailed information about all available backups.
Click the “Backup Now” button to trigger an on-demand once-off backup. In the Creating Backup modal that pops open, you will add a title or a note about the backup to help make your backup easier to identify. For more information about creating Backups, visit the Backups chapter.
12.2.3 Hosting Backups Overview
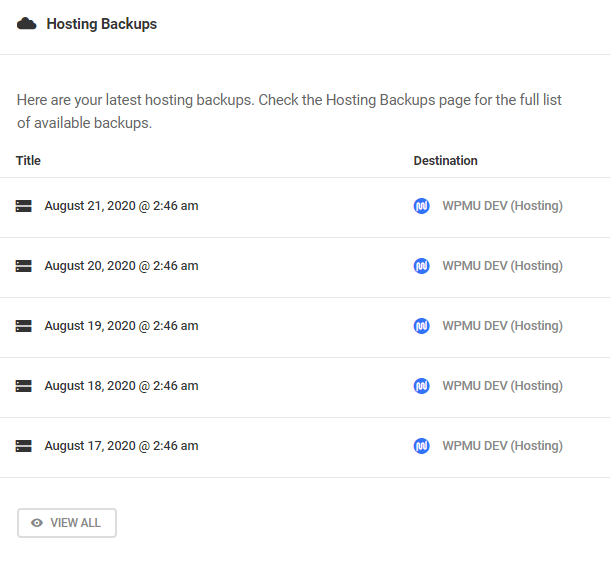
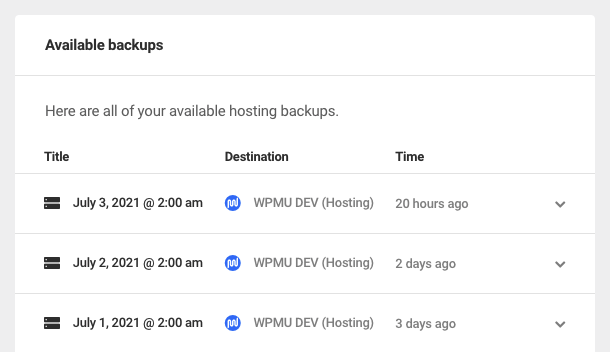
Link to chapter 2The Hosting Backups widget gives you a brief overview of your latest hosting backups with the date, time and destination of each backup. Click the View All button to jump to the Hosting Backups tab to access and manage all of your hosting backups.
12.2.4 Destinations Overview
Link to chapter 2The Destinations Overview module lists all your connected cloud storage accounts where backups can be stored.
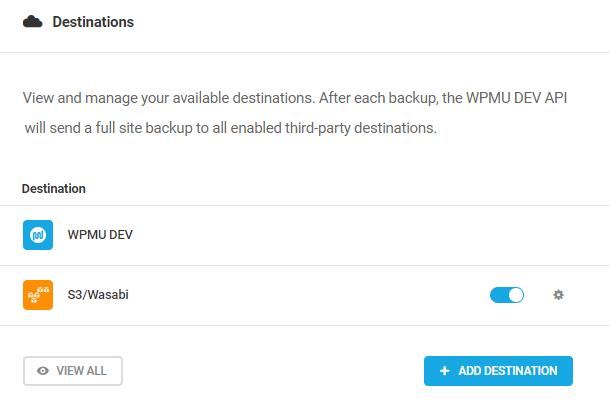
Click the View All or Add Destination button to open the Destinations tab where you will be able to connect other destinations and get more information about your connected accounts. You can also click the toggle of any third-party destinations to activate/deactivate them or click the gear icon to configure them.
Learn more about Destinations and configuration options in the Destinations chapter.
12.3 Backups
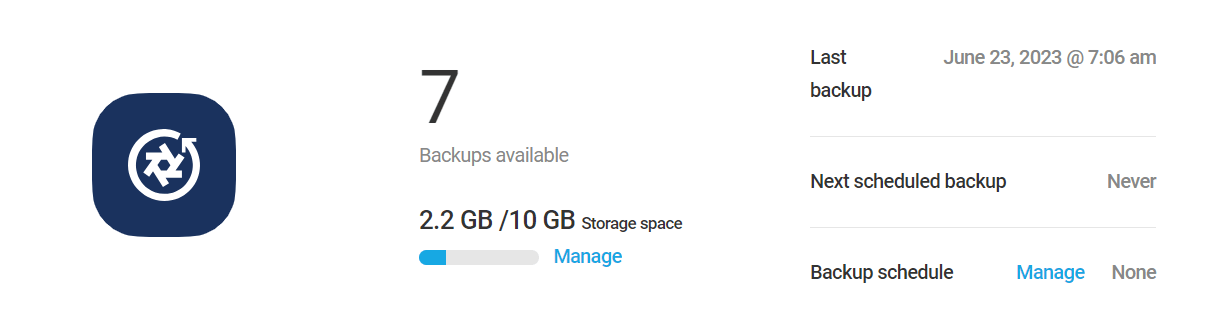
Copy chapter anchor to clipboardThe Backups screen has everything you need to view, manage, configure, run, restore, delete, and download Snapshot backups. At the top of the screen is an overview showing the following information:
- Backups available – Number of backups currently being stored in your cloud storage.
- Storage space – The amount used and total amount of available WPMU DEV Storage Space included with your plan.
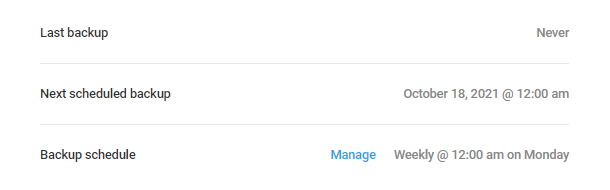
- Last backup –The date and time of your most recent successful backup
- Next scheduled backup – The date and time of next scheduled backup. If no schedule has been set, this will indicate Never.
- Backup schedule – The current backup schedule. If no schedule has been set, this will indicate None.
12.3.1 Backups Tab
Link to chapter 3There are numerous things you can do in the Backups tab. Here’s a list linked to the corresponding sections describing each task in this doc below:
- Create a manual backup
- Create a backup schedule
- View available backups
- Delete a backup
- View logs of a backup
- Export a backup
Please see the Restoring Backups chapter below for details on how to restore your Snapshot backups.
Create a Manual Backup
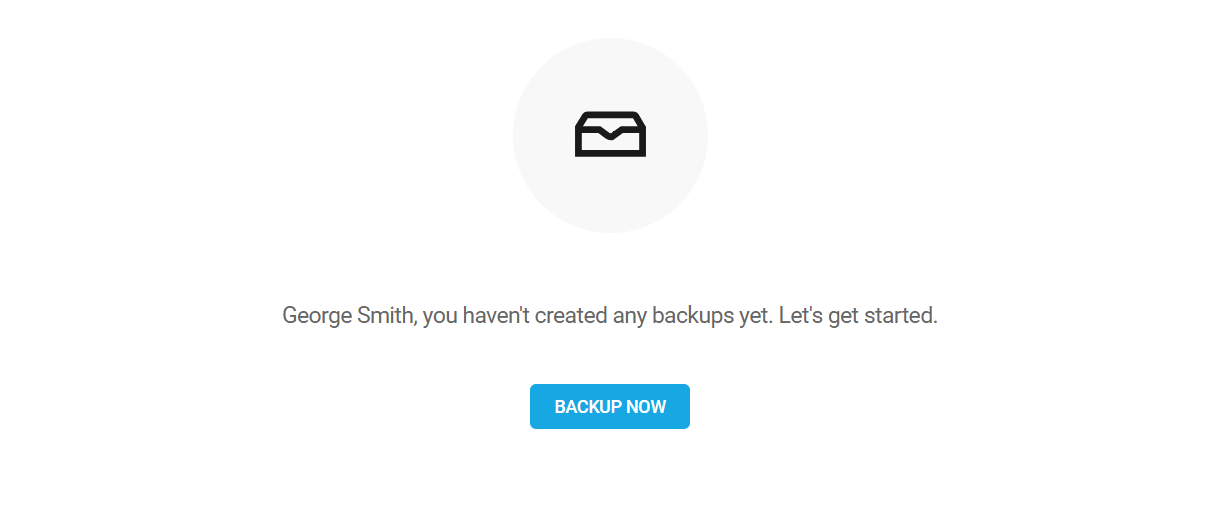
The first time you visit the Backups tab, you’ll be greeted with a prompt to run a backup now if you haven’t already. Click the Backup Now button to get started. This first backup will be the base backup and is a full backup of your site. Any following backups will be incremental, regardless of whether they are manual or scheduled.
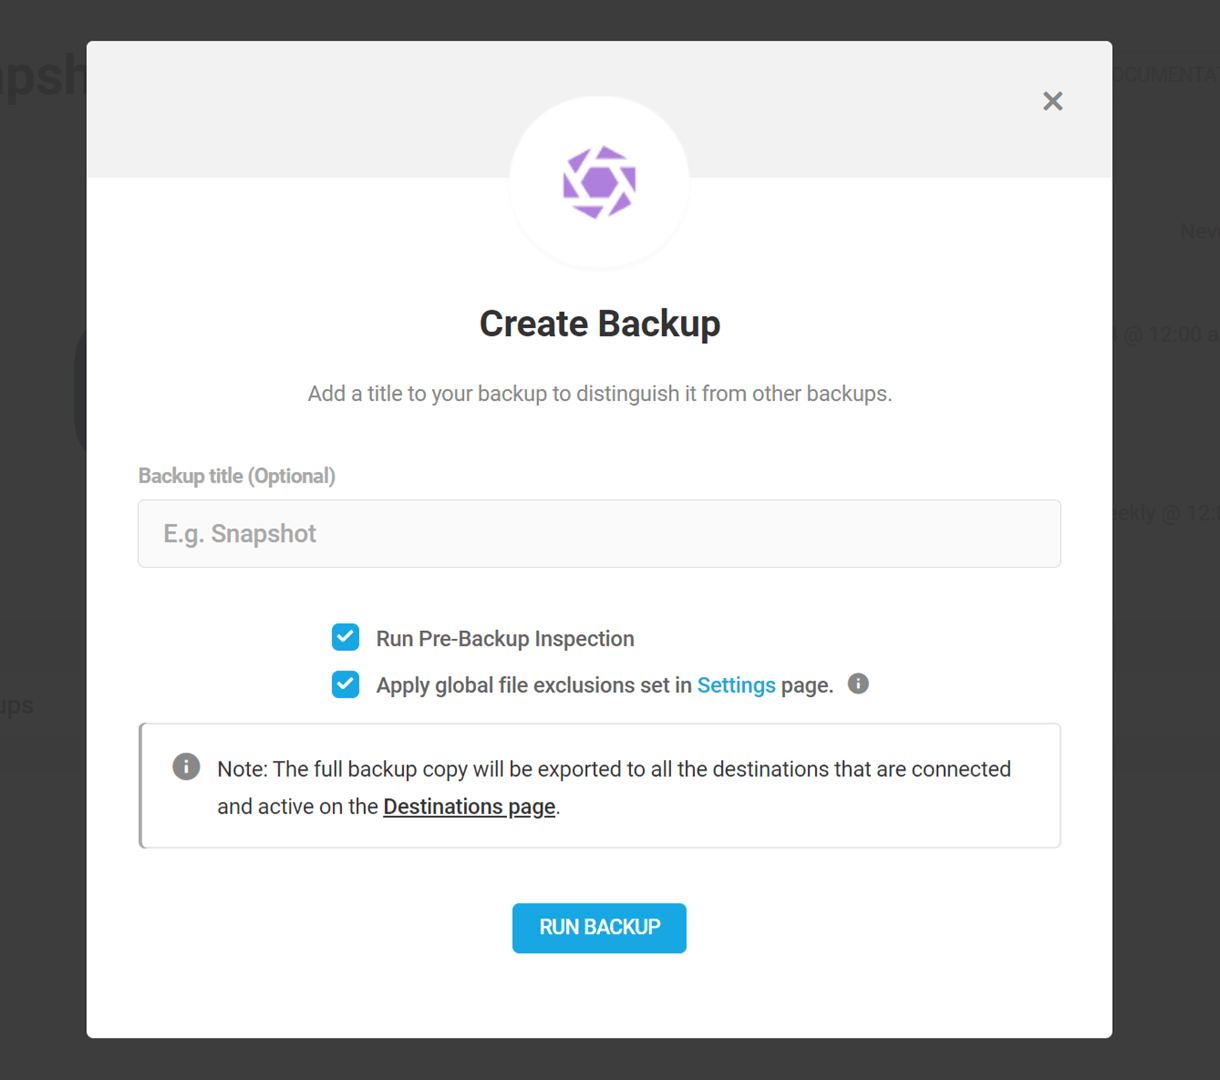
Optionally enter a title for your manual backup, and apply global file exclusions if needed. Click Run Backup to initiate the backup.
Note that the options to Run Pre-Backup Inspection and Apply global file exclusions set in Settings page are checked by default. You can adjust those exclusions if needed under Settings
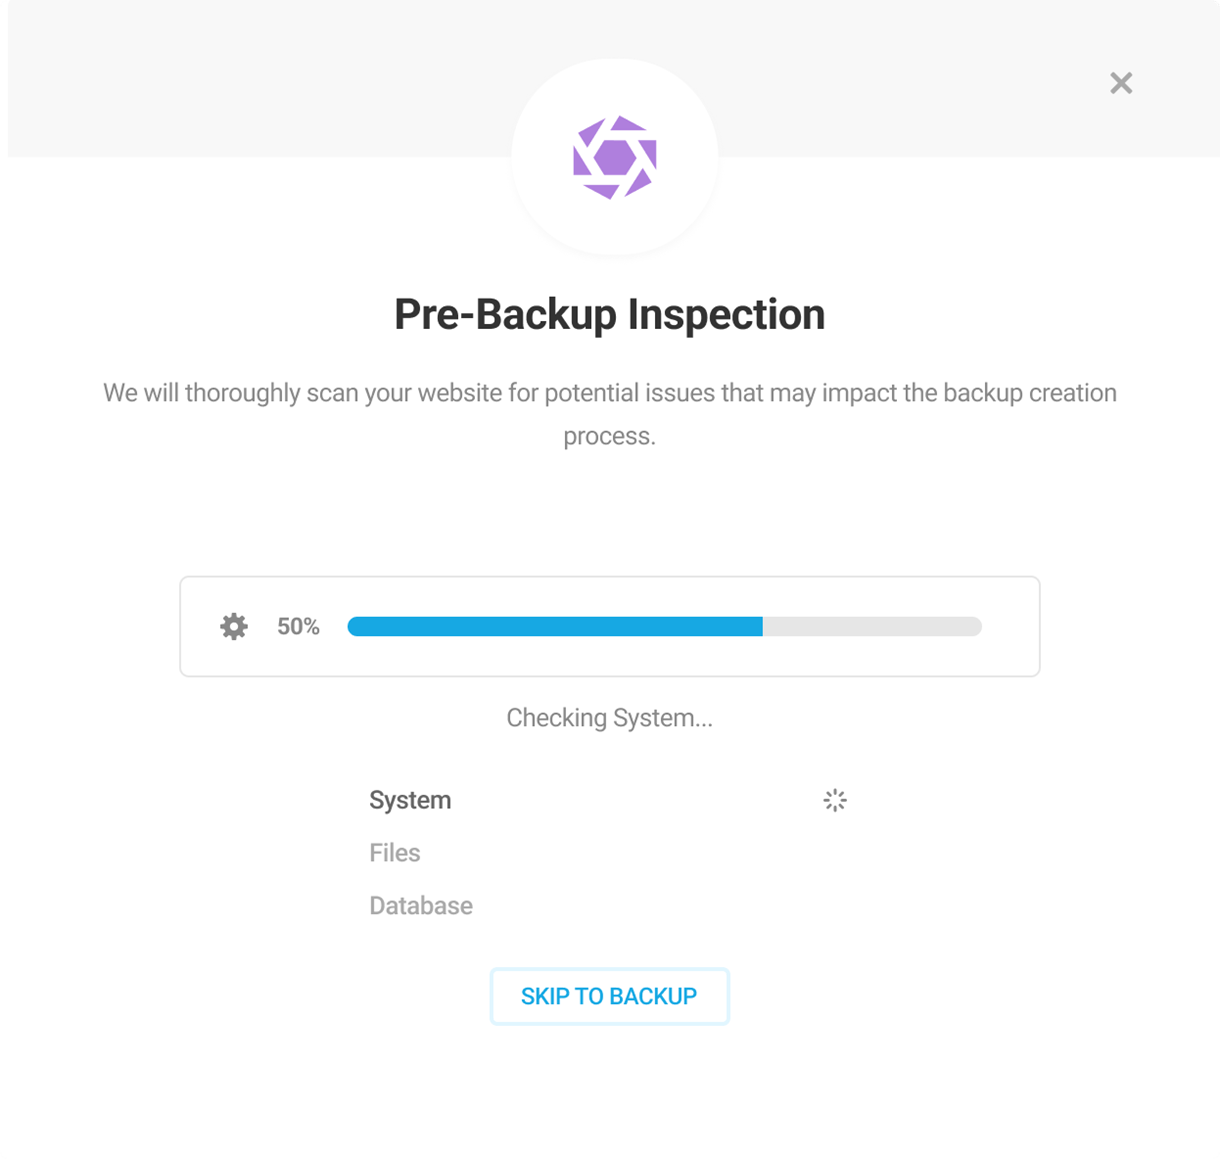
If the Pre-backup inspection option is enabled, your site will be scanned completely before initiating a backup process to check for any potential issues that might affect the backup creation. Click Skip to Backup to skip all the intermediate steps and start backup creation.
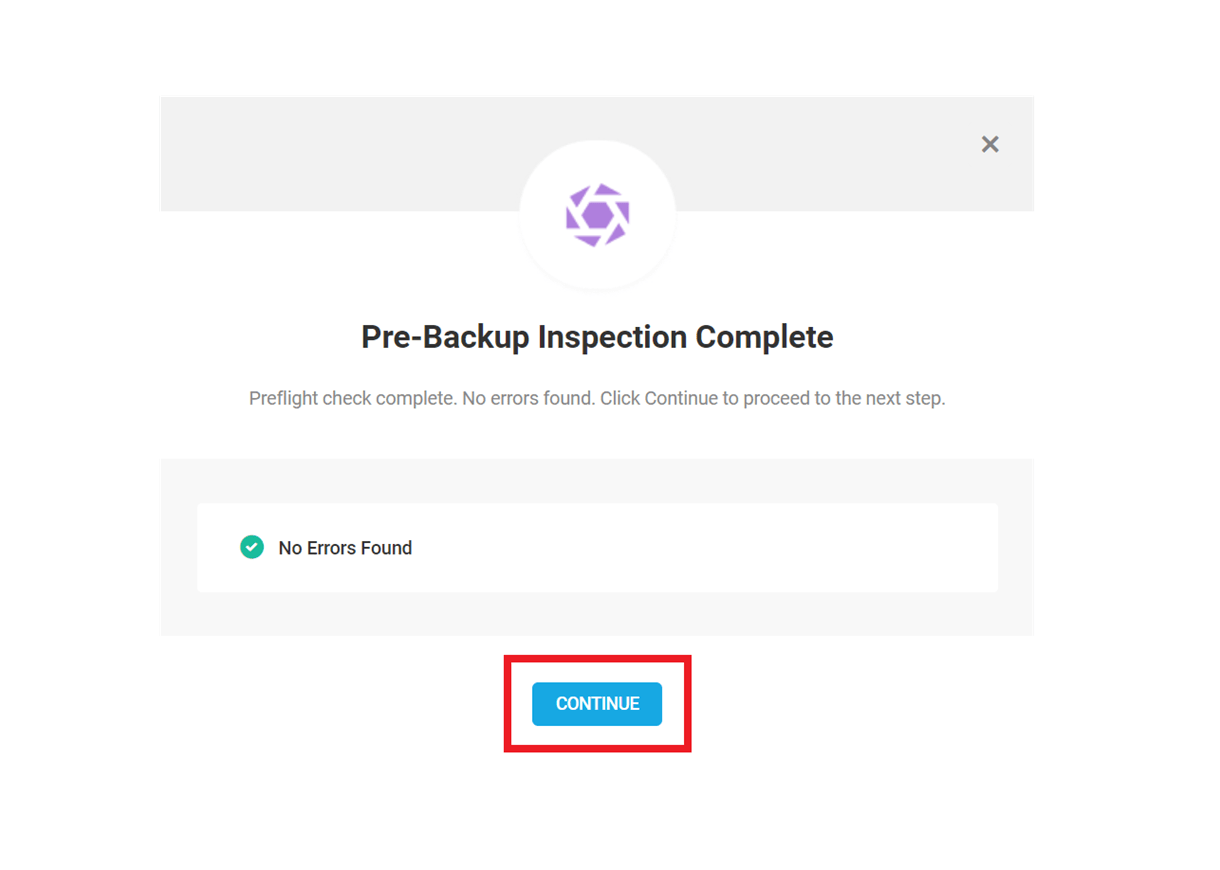
If no errors are found in the pre-backup inspection, click Continue to proceed with the backup creation process.
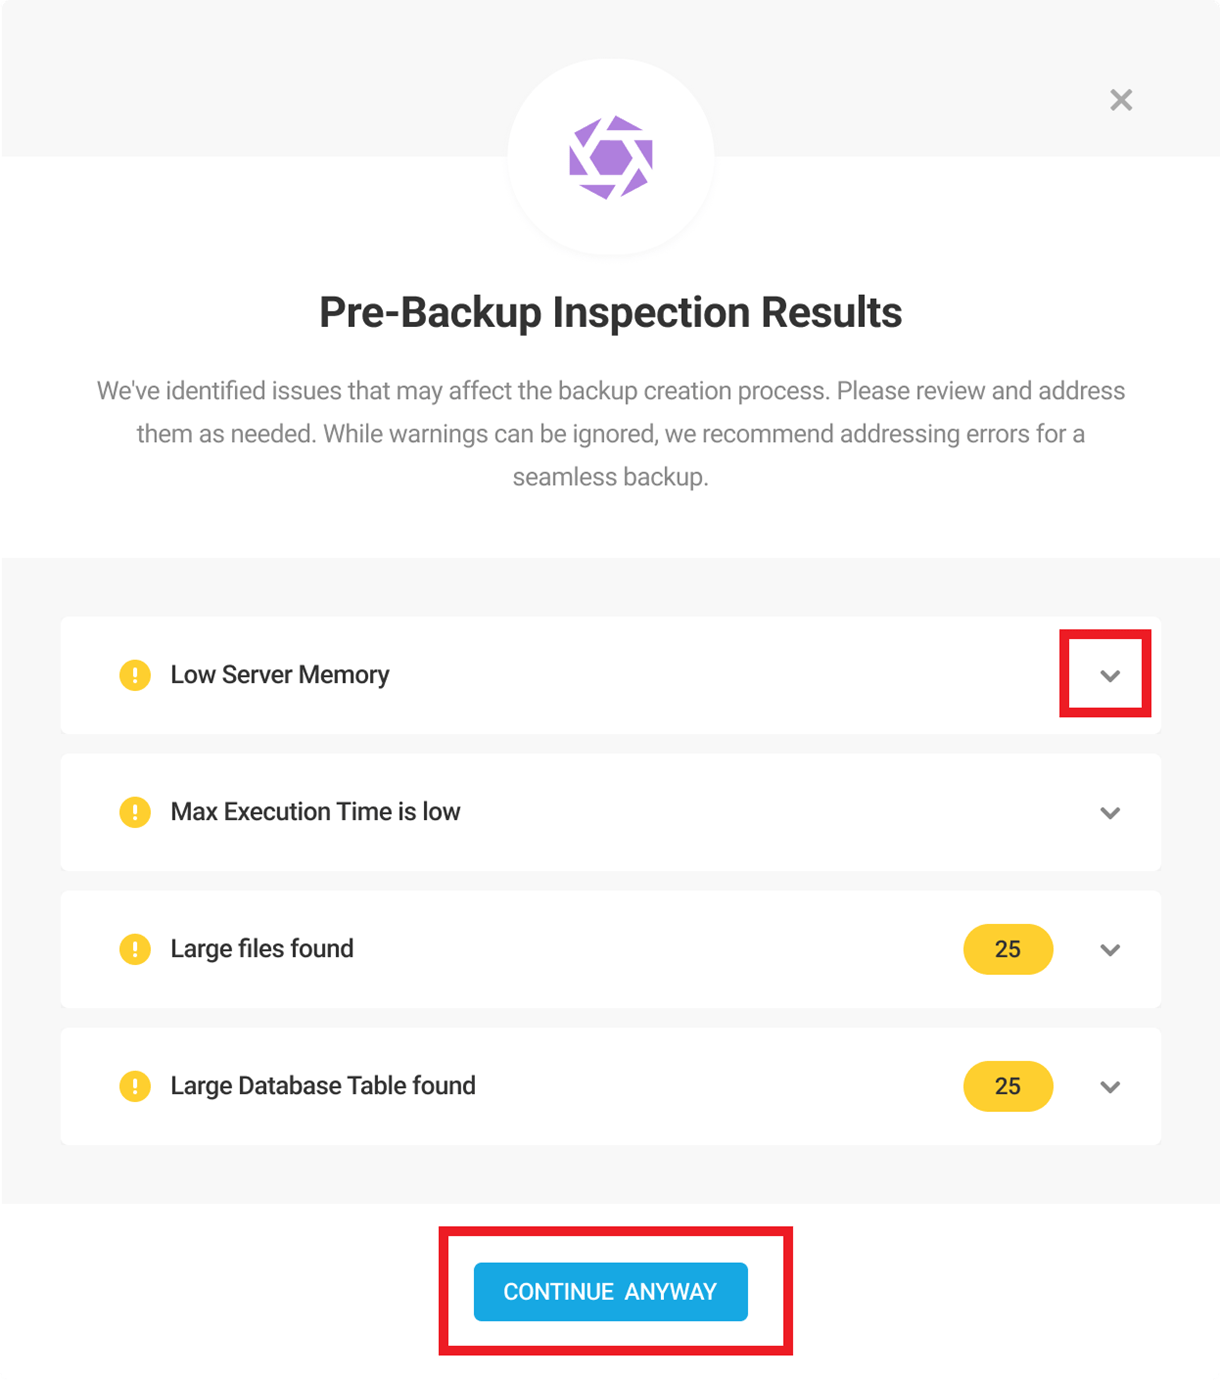
If Snapshot identifies any potential issues during the pre-backup inspection, the warnings will all be listed in the Pre-Backup Inspection Results modal.
Expand each warning to reveal additional information on how to fix it. You can choose to ignore the warnings and proceed with the backup process by clicking Continue Anyway.
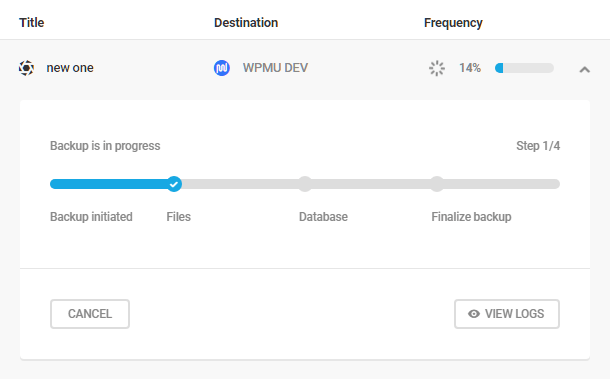
The modal will close and you’ll see a progress bar indicating at which step the backup is currently at. Once that has completed, you’ll see your new manual backup in the list of Available Backups.
Pre-Backup Inspection Troubleshooting
You might encounter any or all of the following warnings during the pre-backup inspection.
Large Files Found
To speed up the backup creation process and effectively reduce the overall backup size, Snapshot detects files that are larger than 100MB.
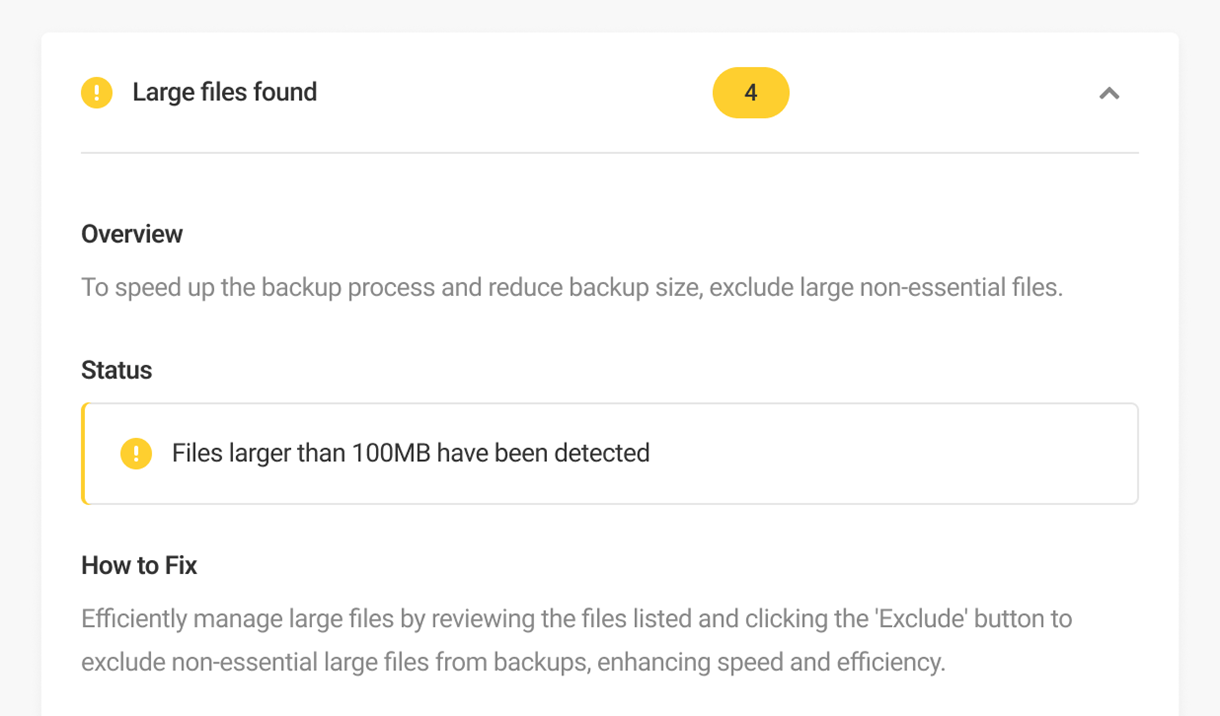
You can choose to exclude or include the files by enabling the checkbox in the filename’s row and clicking Exclude/Include. Click Reset to remove all the selections.
Large Database Tables Found
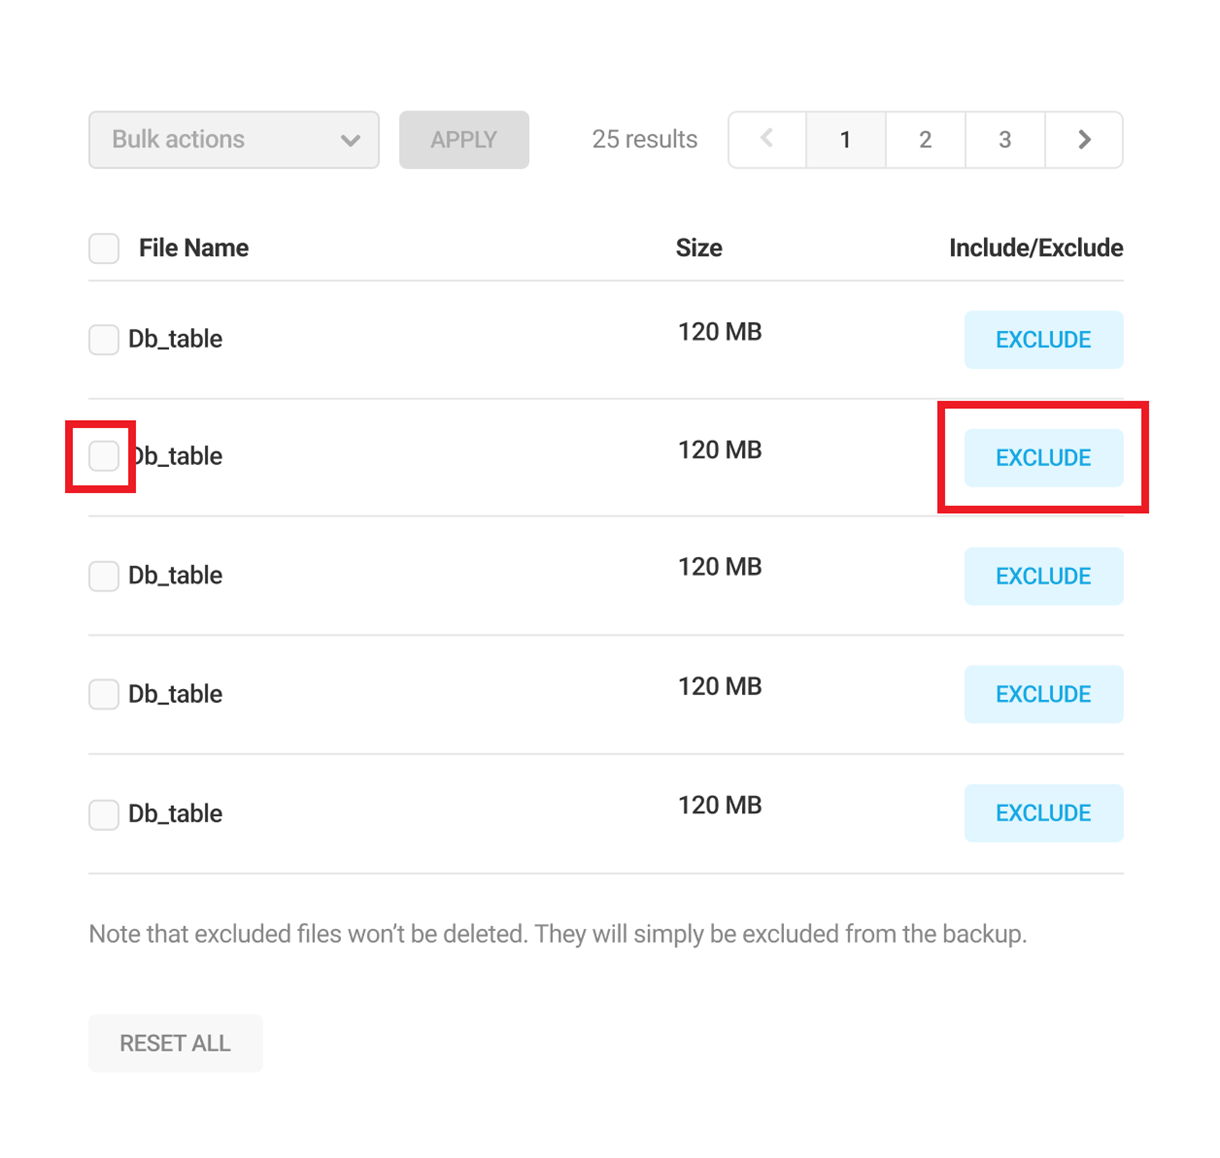
Similar to large files, database tables that are larger than 50MB will be listed. You can choose to exclude or include them in your backup. Excluding larger database tables can significantly improve the speed and size of the backup files.
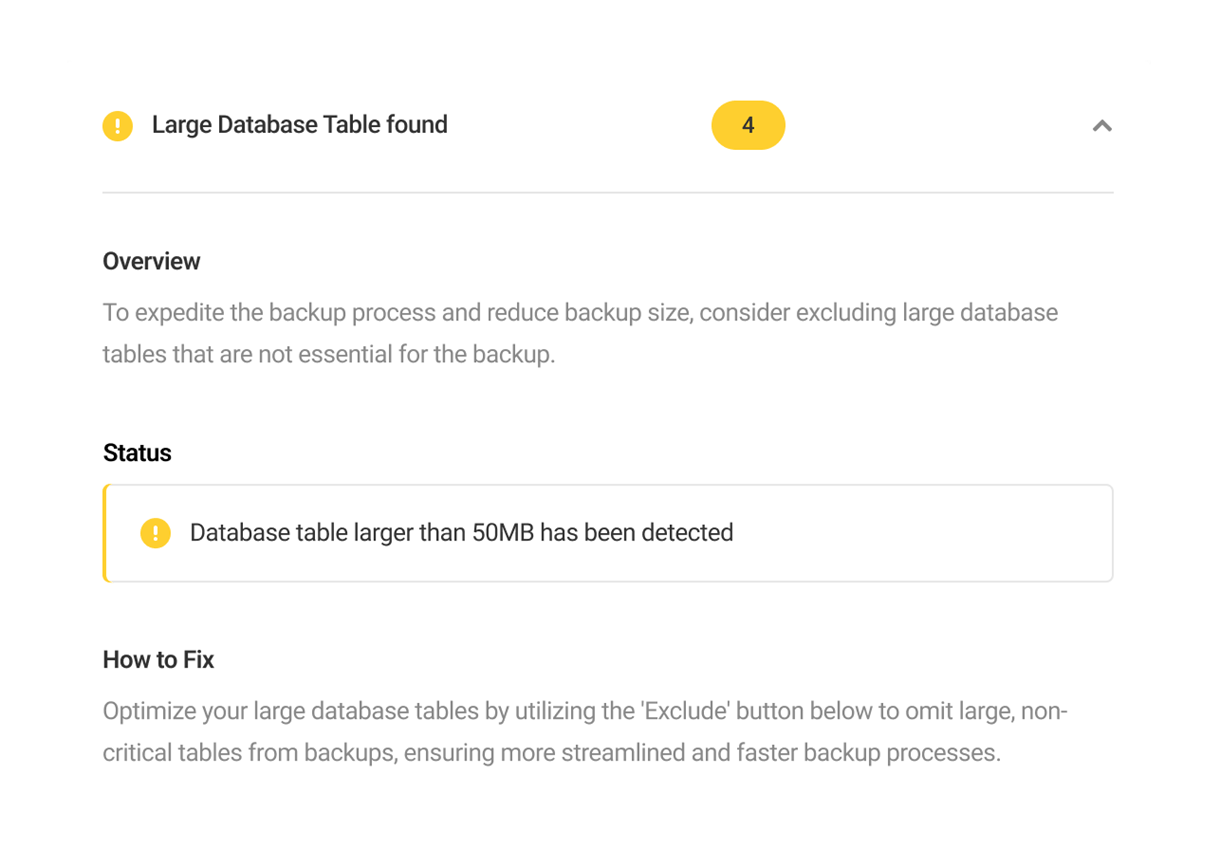
Click the checkbox in the corresponding database table’s row and click Exclude/Include. Click Reset to remove all the selections.
Max Execution Time is Low
Snapshot requires a maximum execution time of 60 sec or above for successful backup creation. Having a longer max execution time ensures that Snapshot is given enough time to create a complete backup of all the files and database without running into timeout errors.
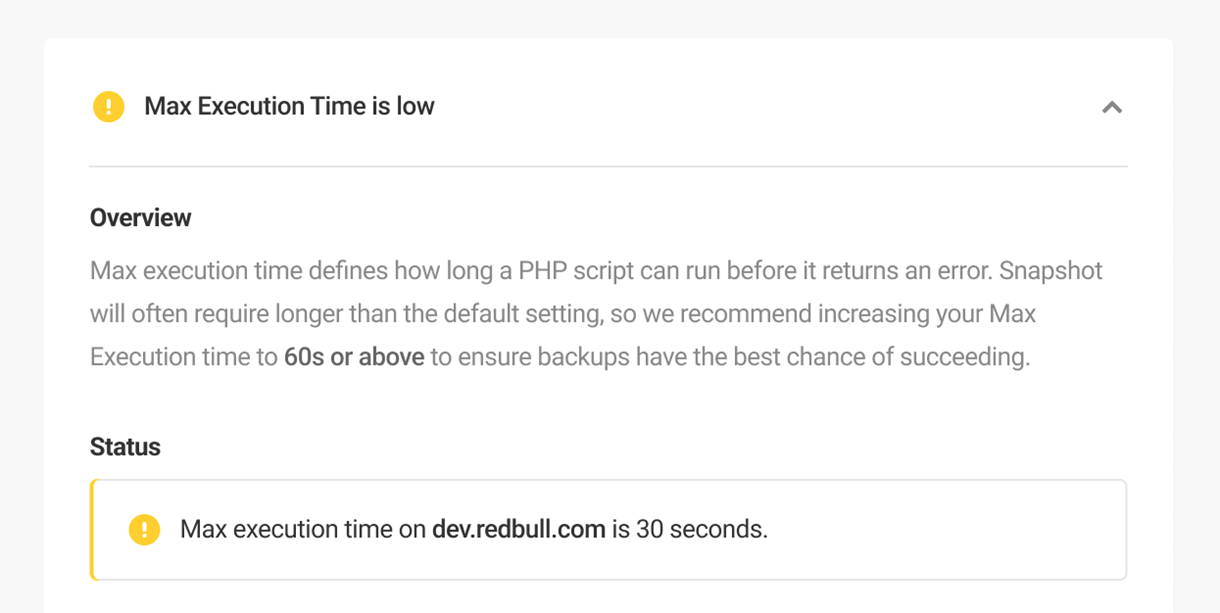
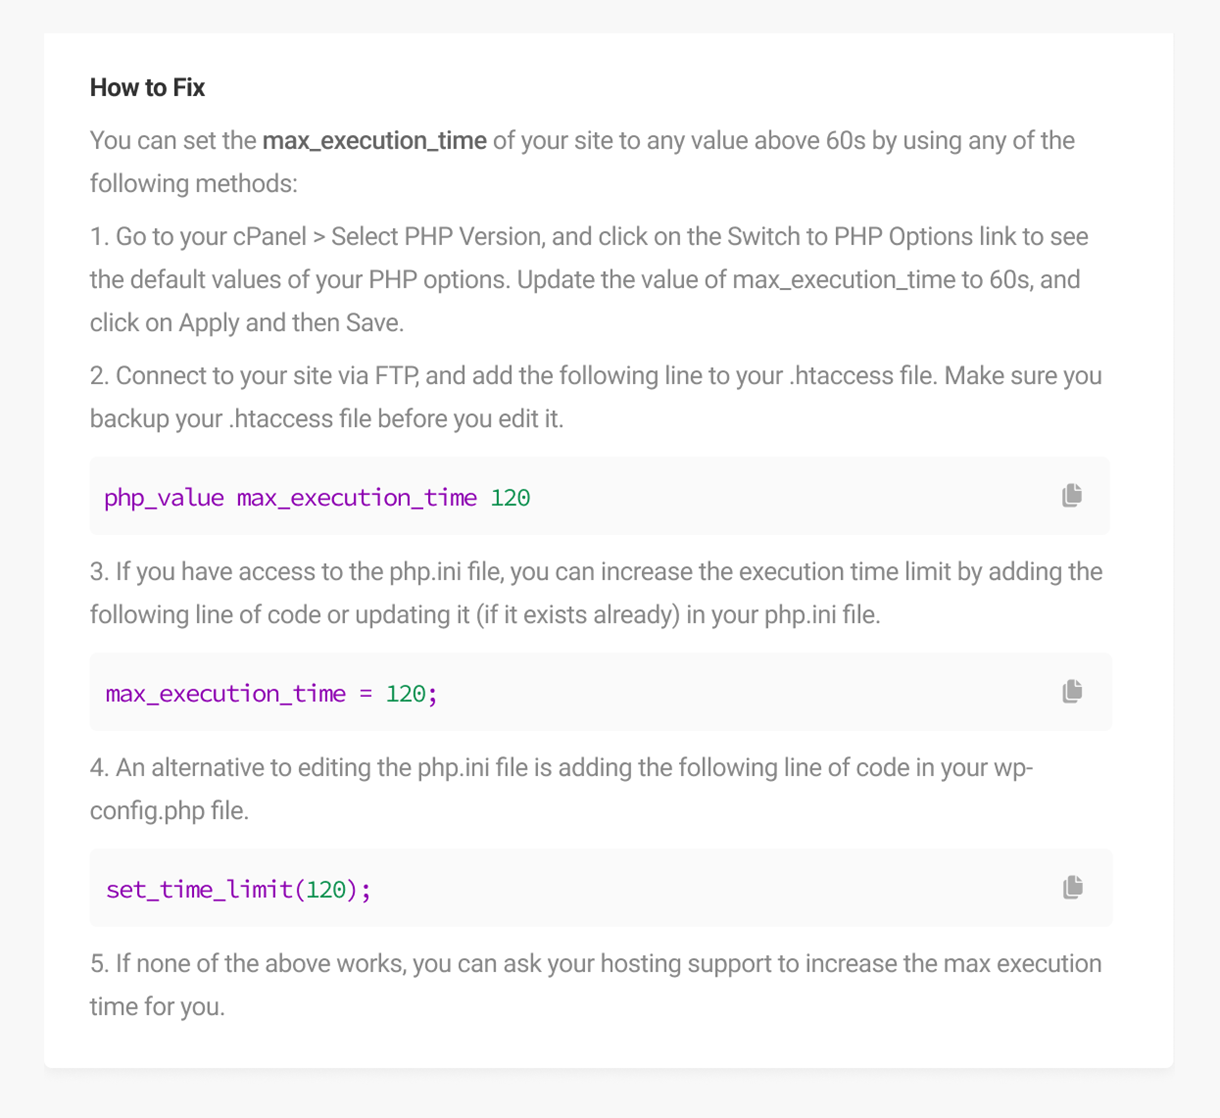
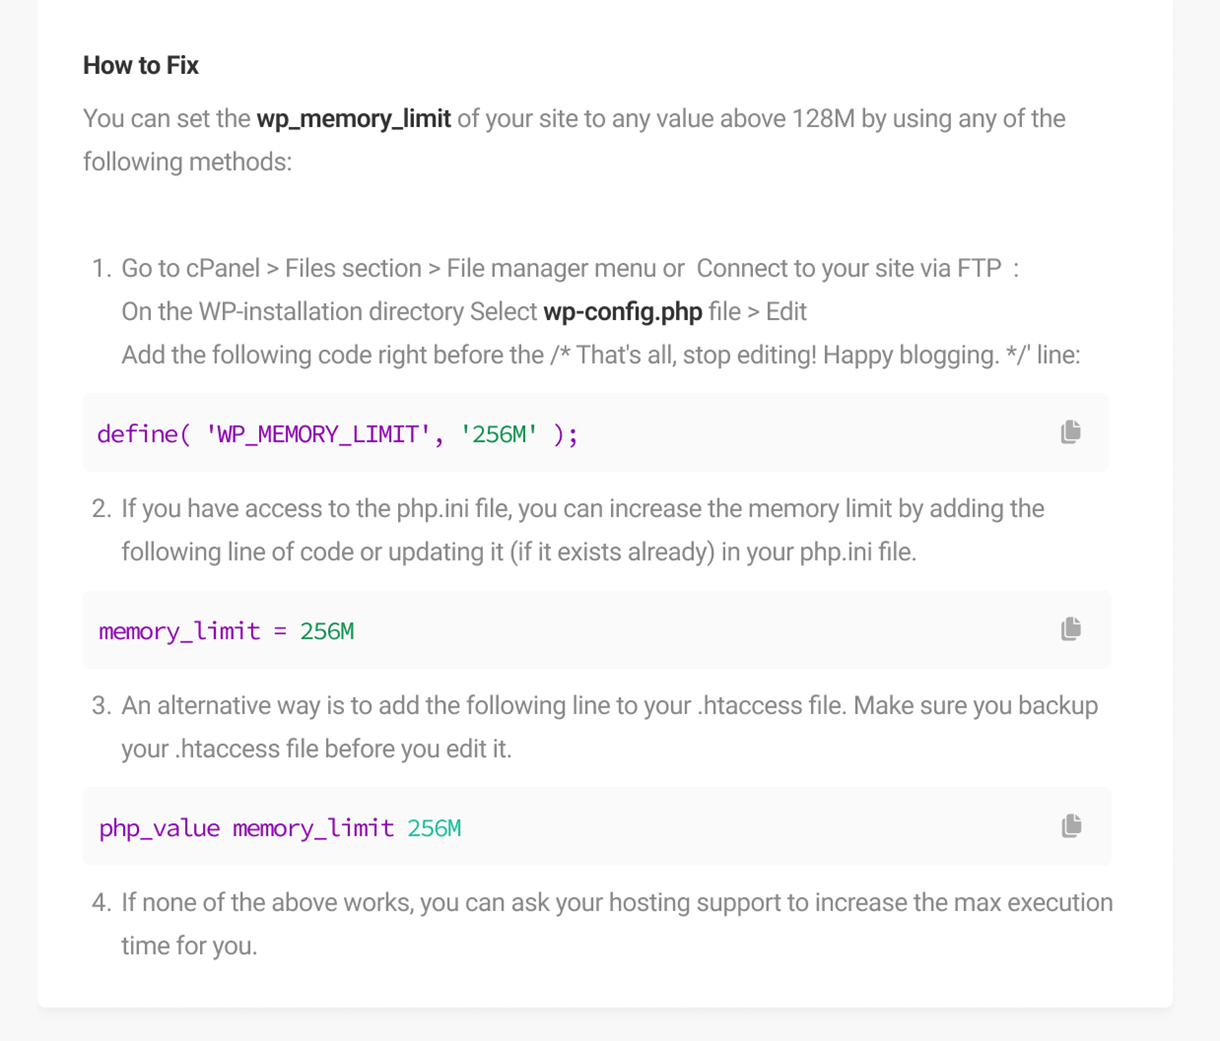
Follow the instructions in the How to Fix section to increase the max execution time of your site.
Low Server Memory
If your site’s server is short of memory resources, the backup process can get disrupted. Increase the allocated server memory to a value greater than 256MB to ensure smooth and reliable backup.
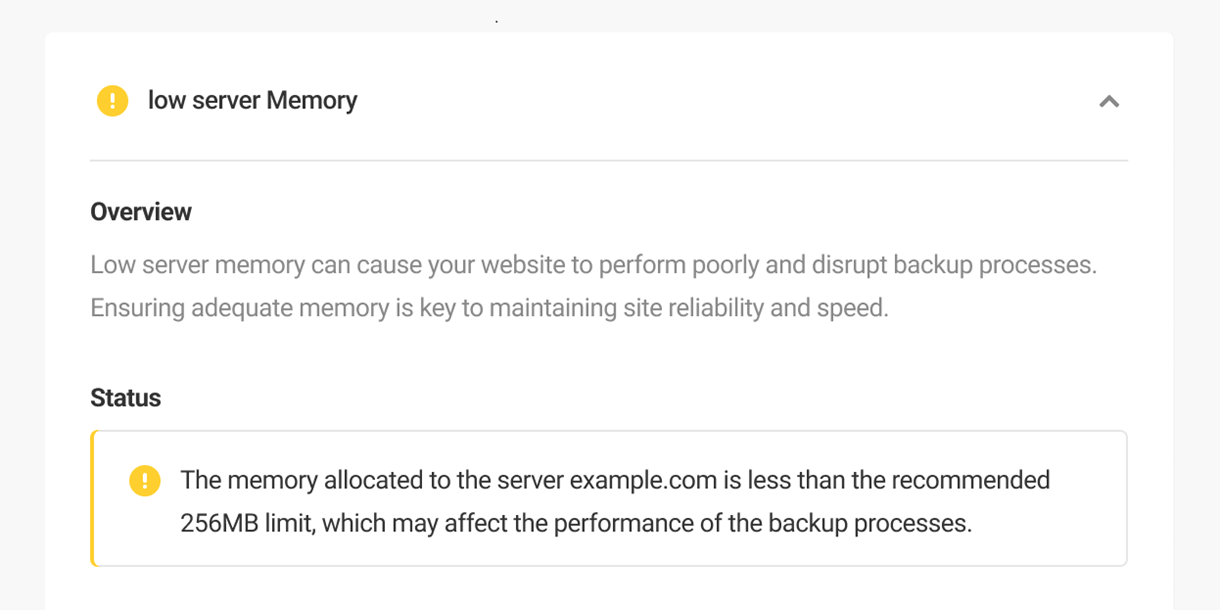
Follow the instructions in the How to Fix section to increase the server memory of your site.
Create a Backup Schedule
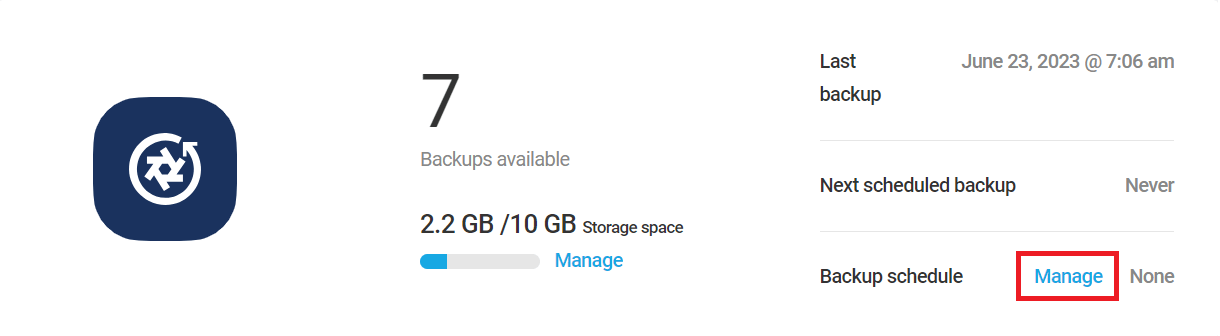
If you have not yet set up a schedule for your backups, or wish to modify your existing backup schedule, click the Manage link in the Overview section next to Backup schedule.
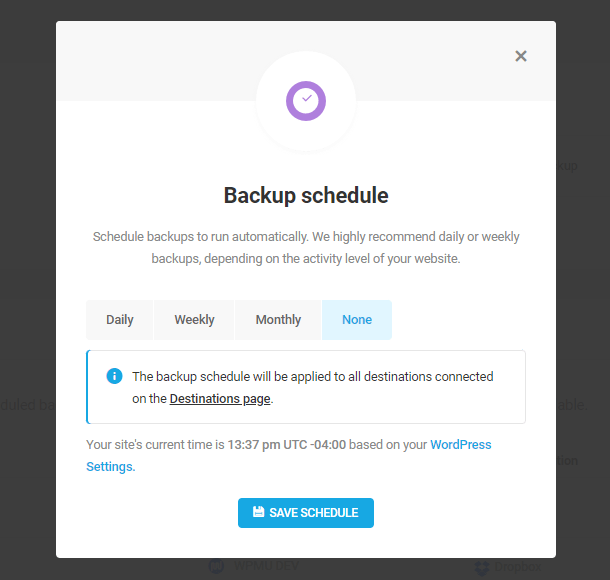
This will open a modal just like the one you saw when you went through the Setup Wizard. The backup scheduler lets you choose to create a “Daily”, “Weekly”, or “Monthly” schedule. Choose the day, day of the week/month, and time you want backups to be scheduled. Click the Save Schedule button to finish.
Stand-alone hosting plans are limited to scheduling monthly backups only.
Available Backups
Once you have at least one backup completed, you’ll see a list of all your available backups with the most recent one at the top. You can create a new incremental manual backup at any time by clicking the Backup Now button at top-right.
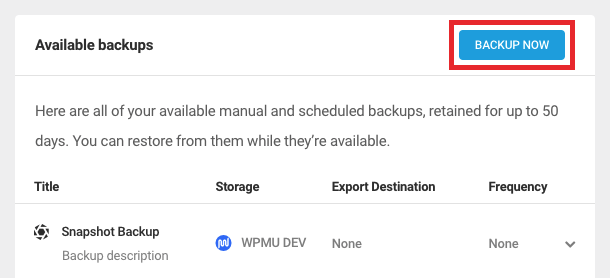
For each backup, the Title is either the name entered at the time of backup, or the date. The Storage is WPMU DEV, and the Destination is the cloud service to which the backup was exported. The Frequency is either the schedule at which the backup was saved (Daily, Weekly, or Monthly), or None if the backup was saved manually.
Click on a listed backup to access additional information and available actions. The following details are available for each backup:
- Export Destination – This lists all of the destinations to which your backup has been exported.
- Current Schedule – Clicking on the schedule opens the schedule modal for you to change the frequency, day, and time your backup runs.
- Excluded Files and Folders – A list of any global file exclusions applied to your backup at the time of the specific backup.
- Excluded DB Tables – A list of any Database Table exclusions applied to your backup at the time of the specific backup. Get more details about setting and understanding Global Exclusions in the Settings chapter of this document.
- Date – When the selected backup ran.
- Backup Size – This indicates the size of the incremental backup.
- Comment – A descriptive comment to help distinguish between saved backups. Click the pencil icon next to the comment to edit the backup comment.
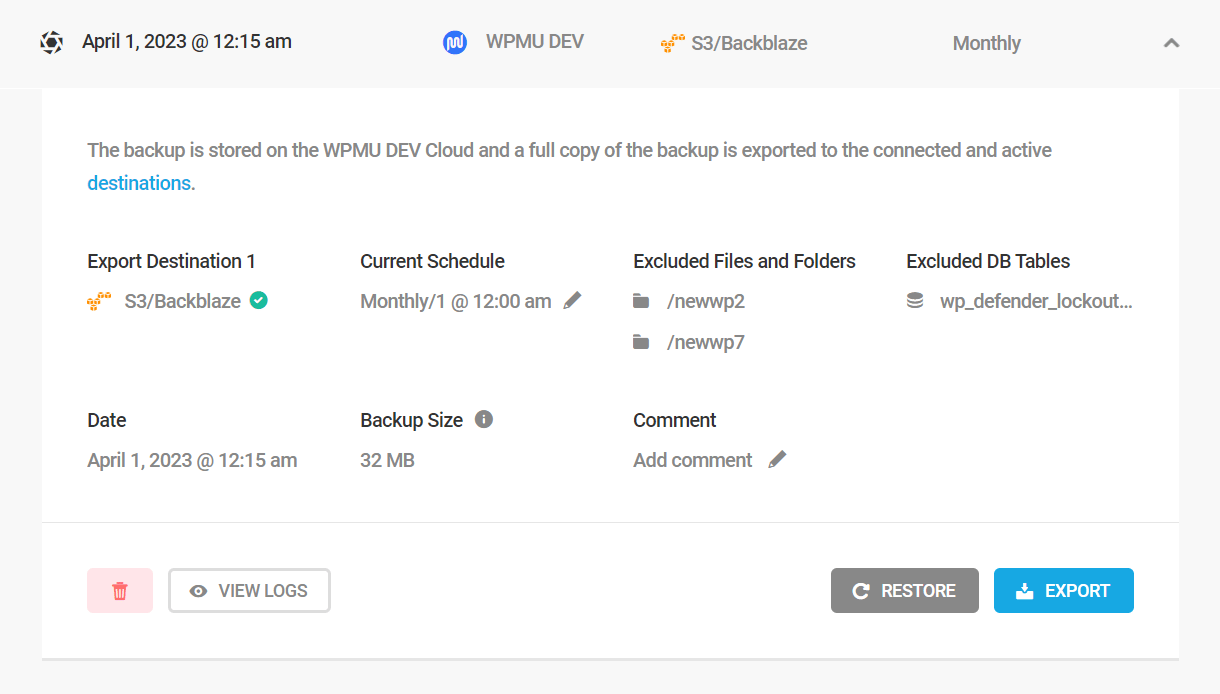
Additional Actions per Available Backup
There are four action buttons along the bottom of the details section for any backup:
- Delete
- Restore
- View Logs
- Export
Delete a Backup
Click the Trash icon to delete the most recent backup.

As Snapshot backups are incremental, you can only delete the most recent backup of the site from this page. See the Incremental Backups chapter below for more information. If you need to delete all the backups from your site, you can do that on the Backups > Settings tab.
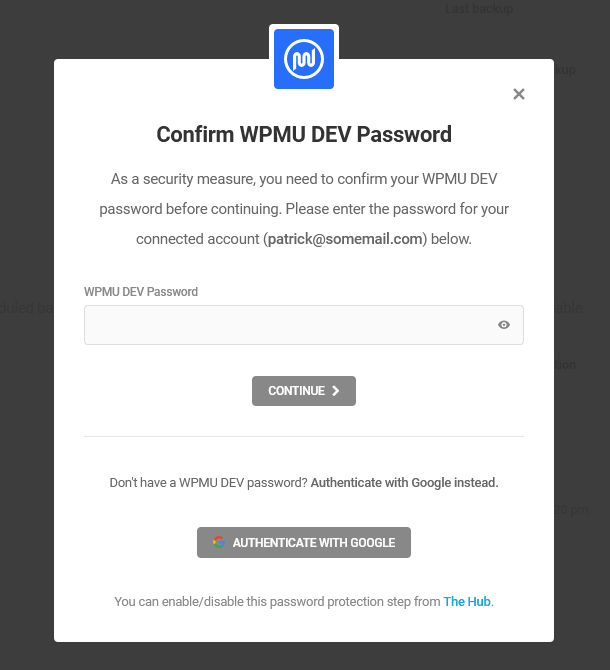
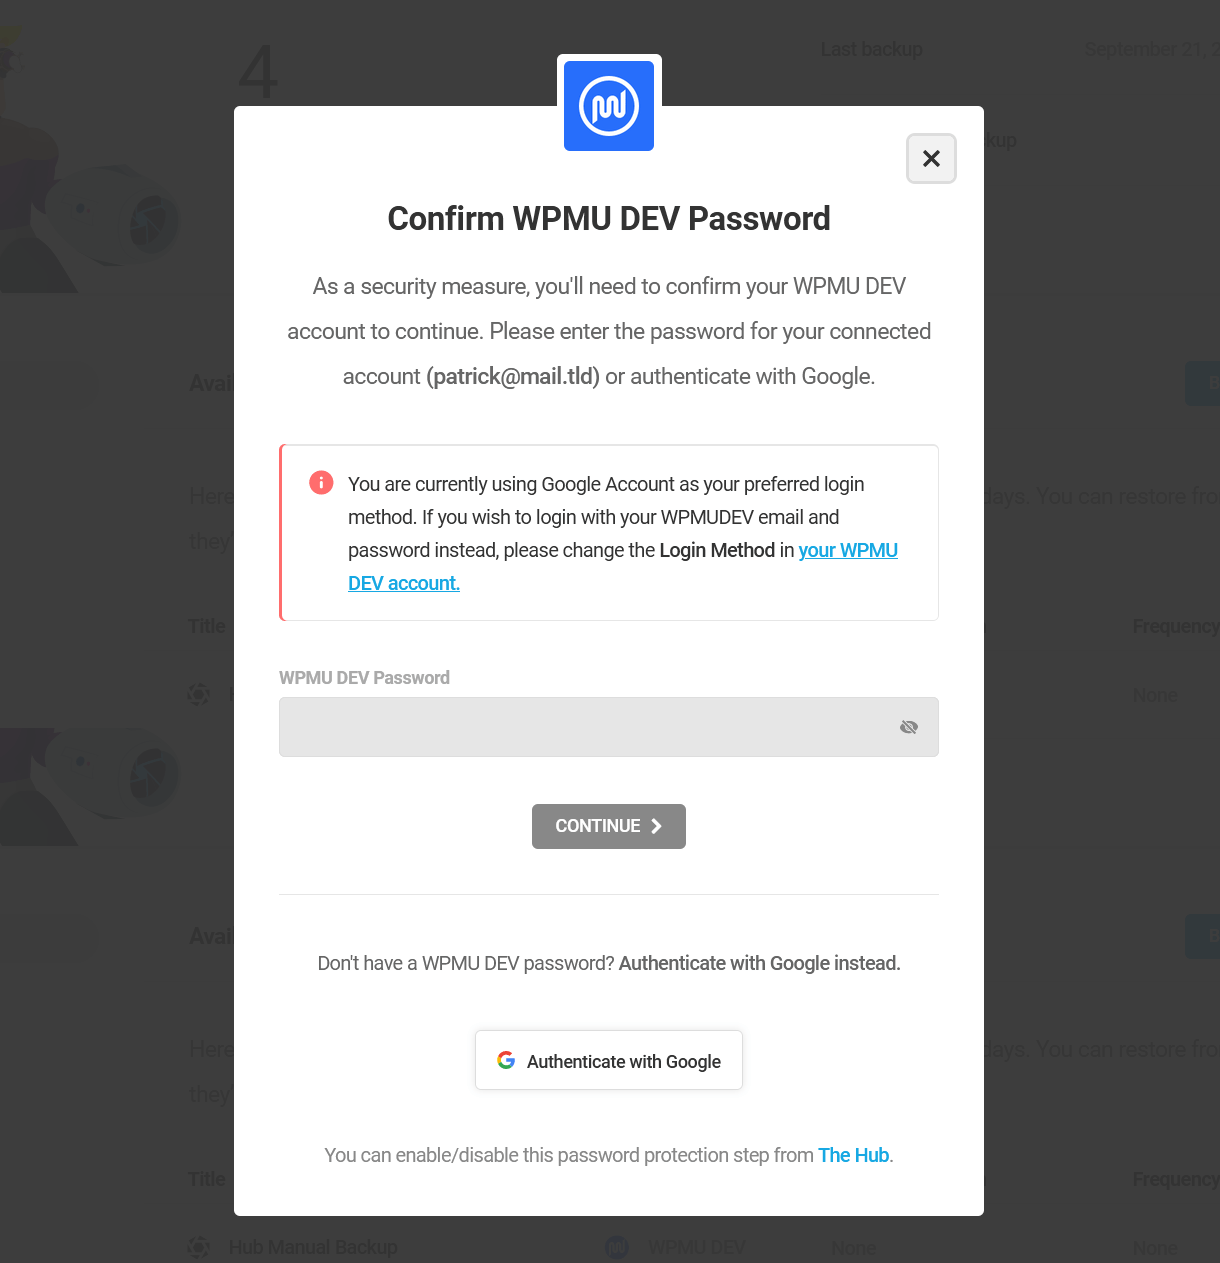
When you delete backups, you will be asked to authenticate your WPMU DEV account as a security precaution. Use whichever method is set as your preferred Login Method in your account.
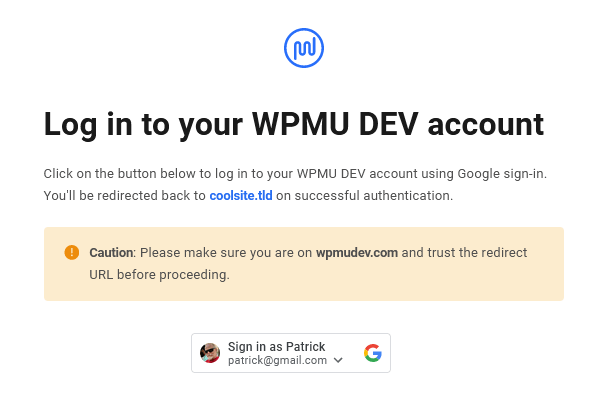
If you signed up to WPMU DEV using your Google account and have not yet set a WPMU DEV password on your Hub Account page, you can authenticate the backup deletion using your Google account.
If you select to authenticate with your Google account, you’ll be prompted to select and confirm the account you wish to use for this action.
If you try to authenticate with a method that is not set as your preferred Login Method on your WPMU DEV account page, a notice will appear to prompt you to either use that method, or change the method in your account first.
If you want to delete subsequent backups after providing your password, you will simply need to confirm the deletion and will not need to provide your password each time.
This security precaution can be enabled/disabled via The Hub backup settings. For more information on those settings, please refer to the Hub 2.0 Backups documentation.
View Logs
Clicking the View logs button opens the backup log in the Logs tab. Get more information about the logs tab in the Logs section of this document.

Export a Backup
Clicking the Export button will open up the Export Backup modal where you can choose to either directly download the backup or send it to mail.
Send to Mail
If this option is selected, you can choose whether the exported backup should be sent to the default mail (email associated with the Hub) or a different email address.
If the Use different email option is selected, enter the email to which the backup should be sent in the email address field and click Next.
From the export options choose whether you want to export both the files and the database, only the files in the WP installation directory, or only the database, and click Send to Mail.

Once ready, the chosen backup items will be sent to the provided email. Note that the link in the email expires in 7 days, but the backup itself will of course still be stored for 50 days.
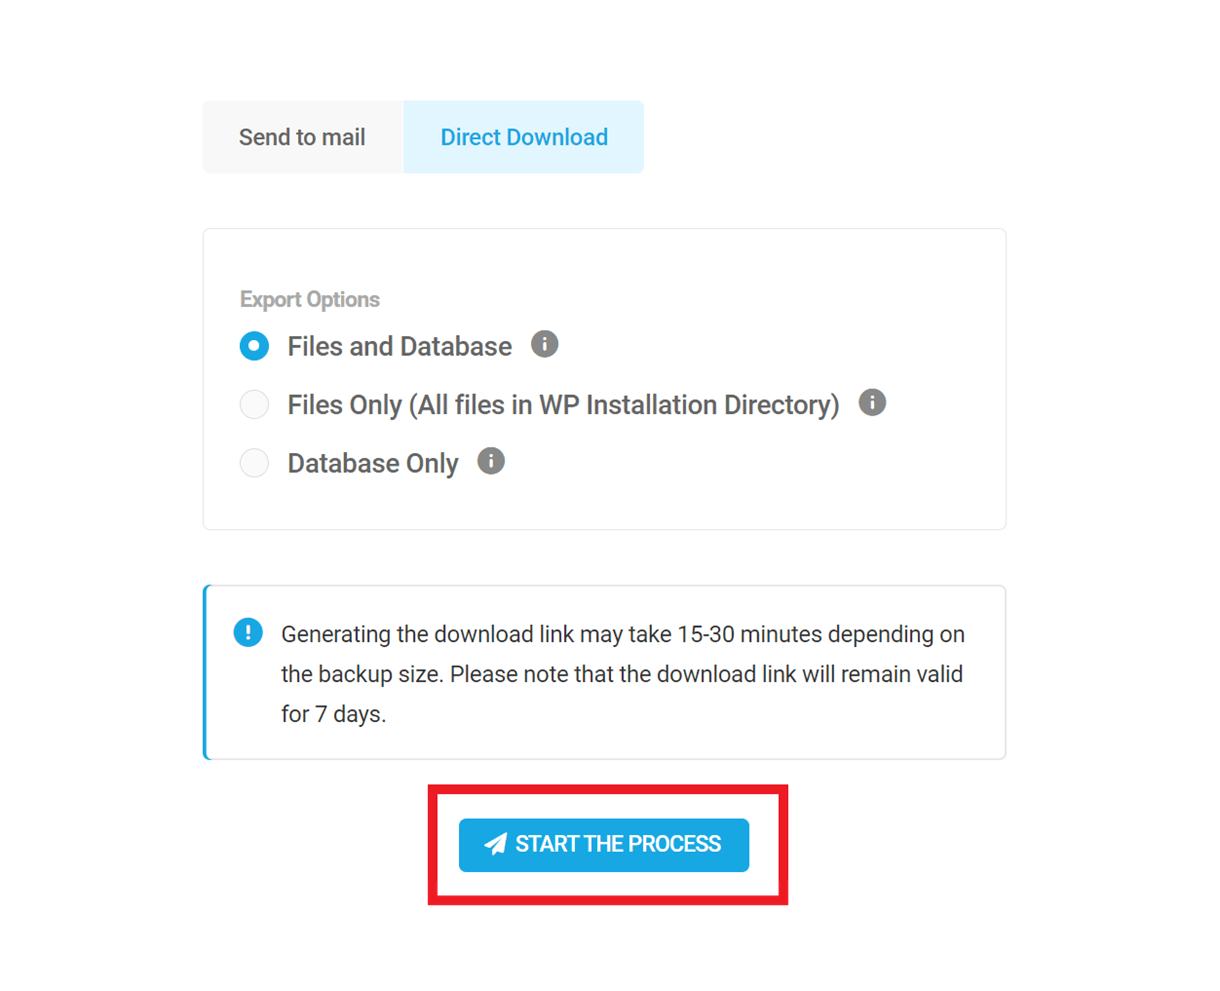
Direct Download
Select this option to download the backup directly from the Snapshot plugin interface. From the export options choose whether you want to export both the files and the database, only the files in the WP installation directory, or only the database.
To initiate the download process, click Start the Process.
The modal will close and you’ll see a progress bar indicating at which step the export is currently at.

After successful completion of the process, you can download the export file by clicking the Download icon in the listed backup or by expanding and clicking Download Ready.
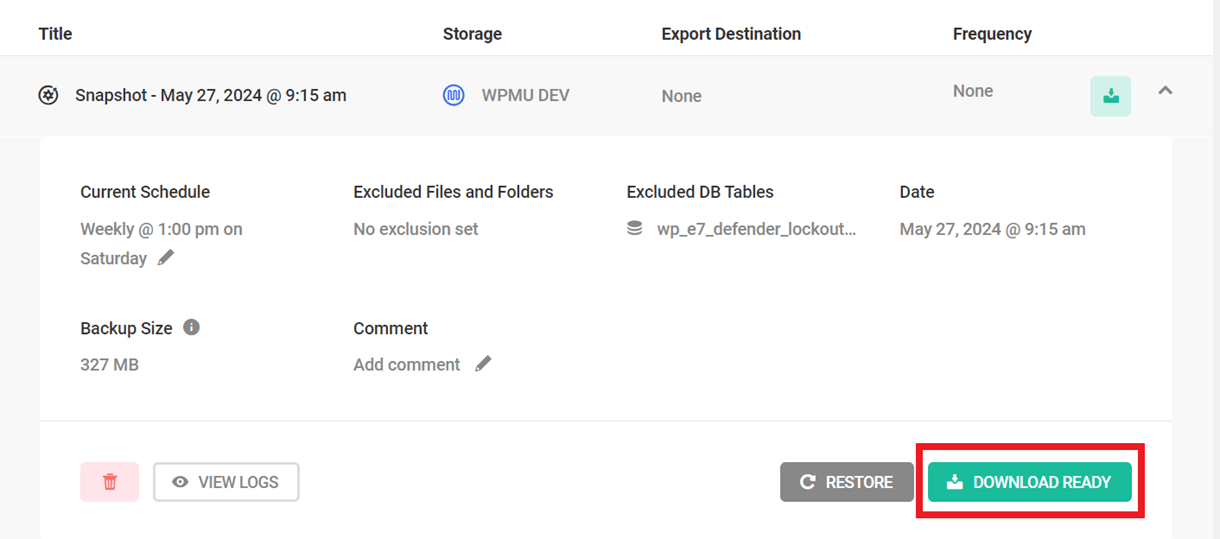
The backup will be downloaded as a zip file and the backup’s filename will include a unique alphanumeric sequence along with your site’s domain name so you can easily identify it; handy in case you’re downloading backups from several sites. It would look something like this: yoursite.com_61d4551f332d.zip
12.3.2 Logs Tab
Link to chapter 3Clicking the Logs tab opens a history of all the backups for the site. You can use these to debug issues and see what’s happening behind the scenes with each backup.
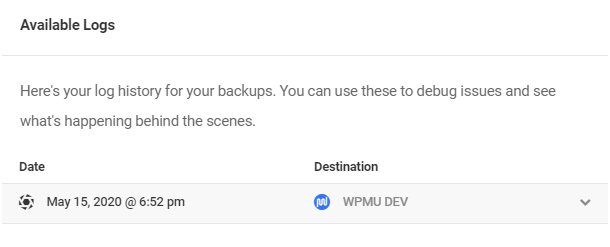
The Available Logs section is an overview of all backups with the most recent backup at the top. Backup information includes the Date and Destination.
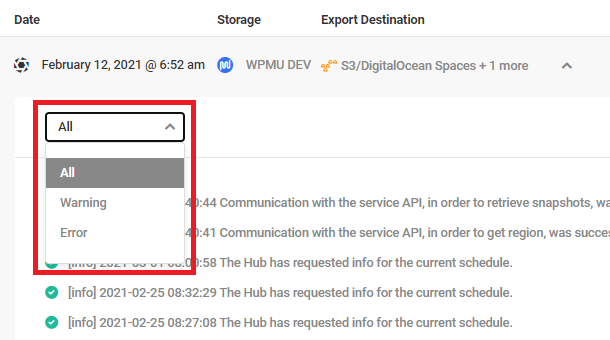
Clicking a backup will open the full log for that backup. Sort the information from your log with:
- All – Display the entire report
- Warning – Only display warnings and errors
- Errors – Only display errors
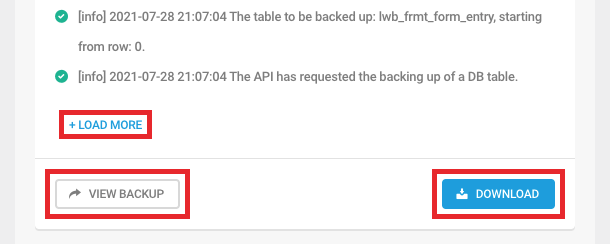
Click Load More to view additional log entries, or click Download to download the entire log of timestamped actions. Additionally, click View Backup to navigate to the backup listed on the Backups page.
12.3.3 Settings Tab
Link to chapter 3The Backups Settings tab allows you to set exclusions and view the number of backups your site will save, among other useful settings.
Exclusions
Any file(s) or database table(s) that you choose to exclude from backups here will remain untouched when any backup with these exclusions is restored.
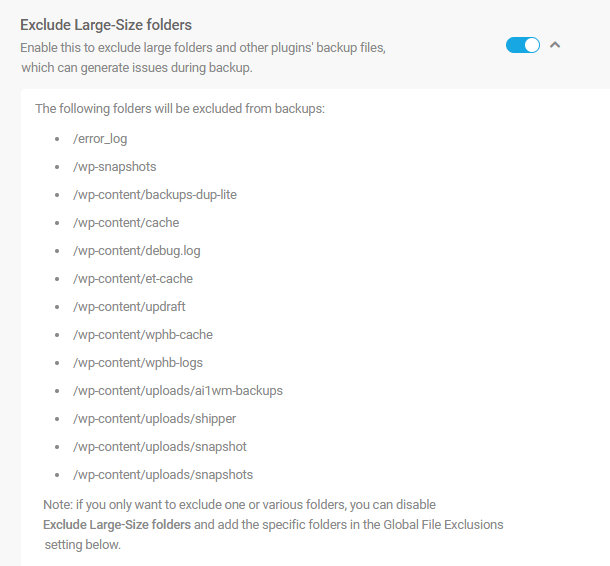
Exclude Large-Size Folders
Sometimes large folders and other plugins’ backup files cause issues during a backup, causing it to get stuck. Use this feature to exclude those potentially problematic folders by clicking the toggle.

You can view the full list of folders that will be excluded by the feature by clicking on the arrow next to the toggle. This will trigger the row to drop down and reveal the list.
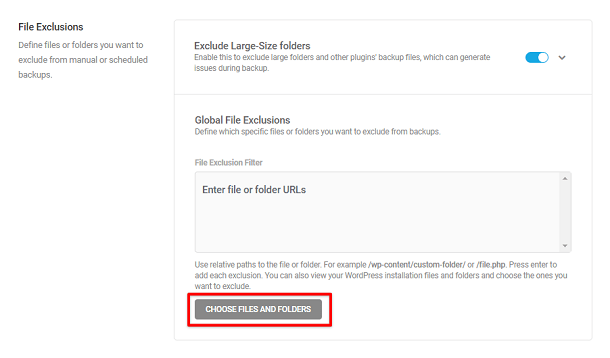
Global File Exclusions
This setting allows you to choose specific files or folders you want to exclude from your once-off and scheduled backups. Enter the relative path to the file or folder you would like to exclude from your backup and press enter to add an exclusion; for example: /wp-content/custom-folder/ or /file.php.
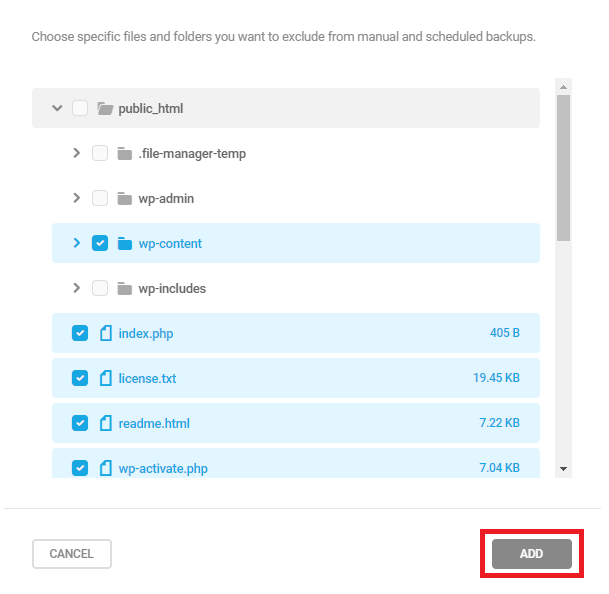
Alternatively, you can click Choose Files and Folders to reveal a list of files and folders to view, select and exclude from backups. Click the arrow to the left of any directory to reveal a list of subdirectories, and click the arrow to the left of any subdirectory to reveal the files within.
The size of each file is displayed next to its file name, making it easier to exclude large files from backups.
Enable the checkbox next to any directory/subdirectory/file to select it. By default, if you select any directory, Snapshot will automatically select all the subdirectories and files within the selected directory. Click Add to add the selected exclusions.
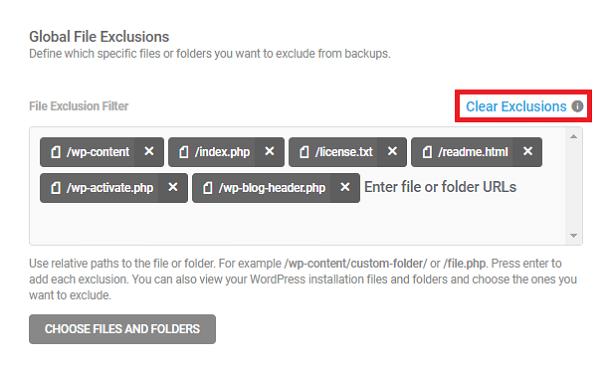
Click the X icon next to any added exclusion to remove it from the list. If more than one exclusion has been added, click Clear exclusions to remove all exclusions at once.
Database Exclusions
This setting lets you choose the database tables you want to exclude from your manual and scheduled backups. The database tables are segmented into WordPress Core tables, WordPress non-core tables, and Other tables. Click the caret icon to see the tables under each segment. Enable the checkbox to exclude any table from the backups.
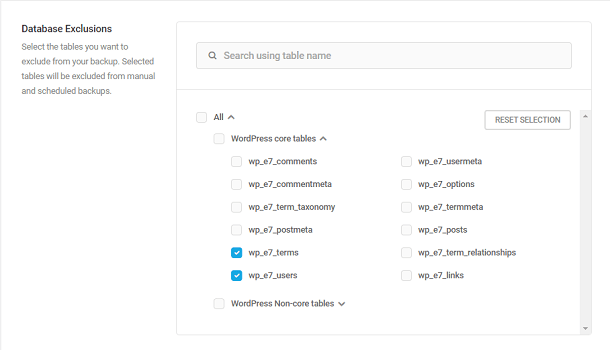
You can search for a table by typing its name in the search field. Additionally, you can click the Reset Selection button to reset your tables selection.
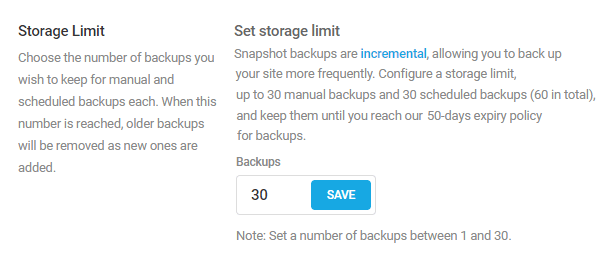
Storage Limit
By default, WPMU DEV’s cloud storage will keep the most recent 30 backups of manual and scheduled backups each, before removing the older ones. However, you can change this to any number between 1 and 30 by inputting the number and clicking Save.
This can also be adjusted within The Hub. Check The Hub Backups documentation for more information on this.
Please be aware that backup rotation can take some time if you change the limit to a lower number here. For example, if you already have 30 backups stored and set the limit to 10, it may take several hours for the API to process the request and remove older backups.
This is not to be confused with how long backups are retained. Remember, you won’t necessarily create one new backup per day. Backups are retained for 50 days, meaning that you could hit your storage limit of 30 backups (or whatever limit you have set) before you hit your time limit of 50 days. For example, if you create one new manual backup every day for 31 days (with a storage limit of 30 days), the first manual backup you created would be replaced on the 31st day and therefore would not have been retained for the full 50 days that are available. The difference between the storage limit and the retention time for backups is an important distinction to make.
Where Snapshot v4 really shines is in the fact that you can store up to 30 manual backups and 30 scheduled backups (60 in total) for up to 50 days. This means that more backups are stored for longer and it is largely due to the fact that v4 uses incremental backups. More information on incremental backups and why it is more efficient can be found in Incremental backups.
Note that manual and scheduled backups each have a separate incremental backup chain, and each has a separate base backup. So if you are already running scheduled backups on your site, there is no need to run regular manual backups as that would just wind up doubling the backup storage space used.
If your snapshot storage reaches a certain limit, snapshot will automatically send you an email notification about your current usage. You can either choose to free up your storage space or upgrade your current plan to meet your storage requirements.
Database Build Type (3rd-Party Hosted Sites)
On 3rd-party hosted sites, you can choose the database build type enabling you to select the most efficient one according to your hosting plan.
Select either the MySQL Dump or PHP Code option for the database build. We recommend the MySQLDump method where possible, as that’s the more efficient method.
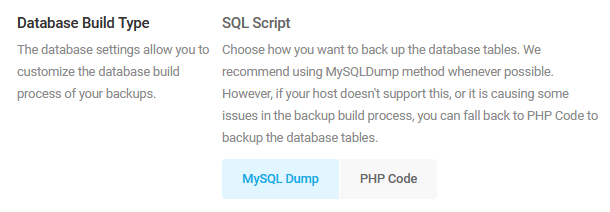
Choosing this option requires mysqldump to be enabled on your server. If your host does not support that, you may need to use the PHP Code option instead.
If you choose the mysqldump option, please verify that the exec and escapeshellcmd functions are enabled. If there is an issue in any of these steps, you’ll see the following message.

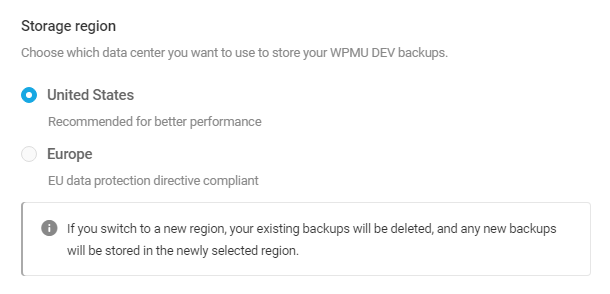
Storage region
You can select which storage region you prefer for all your backups:
- United States – This region is recommended for better performance.
- Europe – This region is EU data protection directive compliant.
If you switch between regions, you will be required to provide your WPMU DEV account password as a security precaution.
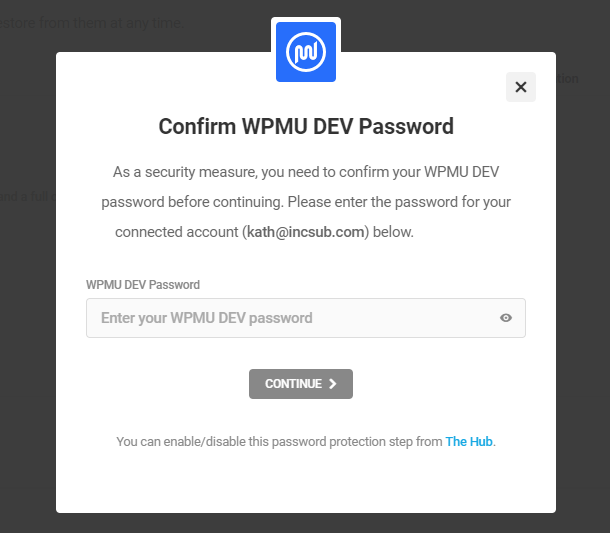
This security precaution can be enabled/disabled via the Hub backup settings. For more information on those settings, please refer to the Hub 2.0 Backups documentation.
If you switch to a new region, your existing backups will be deleted, and any new backups will be stored in the newly selected region.
Delete Backups
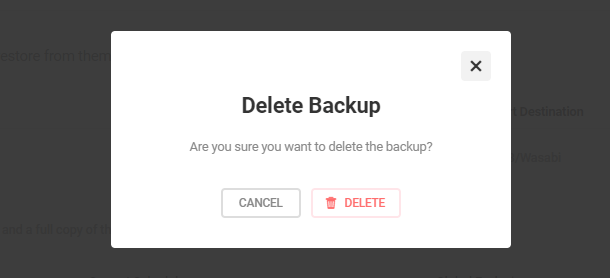
Delete is a one-click option to remove all backups. Clicking the Delete button will open a modal where you will need to confirm your action by providing your WPMU DEV account password and clicking Delete. Click Cancel or the close modal icon [X] to close without Deleting remote backups.

If you just need to free up storage space that may still be in use by old backups of sites that you have disconnected from your Hub, you can delete those old backups in the Snapshot Backups section of your WPMU DEV Account.
12.3.4 Notifications Tab
Link to chapter 3When enabling the Notifications module, you can select to receive an email notification when either a manual or scheduled backup fails or completes.
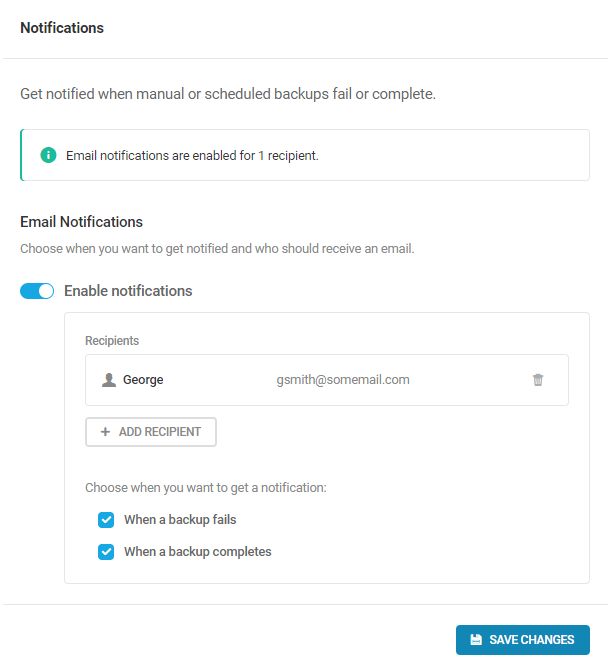
By default, your admin email will appear as a recipient but all emails can easily be added or removed. If you remove all recipients, we’ll automatically turn off the notifications. Remember to Save Changes to keep your changes.
12.4 Restoring Backups
Copy chapter anchor to clipboardSnapshot enables you to restore a site backup using any of several options.
If your site is still up and running:
- Restore any available backup right in your wp-admin with a click of a button. See the Restore From Your Site Admin chapter below for details.
If your website is down (ie. white screen of death or unable to access wp-admin), there are 2 ways you can restore a backup:
- Manually restore by uploading your backup and an installer file to your server and use the Snapshot Installer wizard. See the Restore With An Installer File chapter below for details.
- Alternatively, you can try the automated FTP restore tool in your Hub; see Auto restore via FTP in our Hub 2.0 > Backups documentation.
The restore process will overwrite the database and restore all files contained in the backup, but it will not delete any files uploaded to the site after the backup was made. So any plugins, themes, media, etc, added to the site after the backup was made will still be there once the restore completes. Please keep this in mind and know that you would need to delete those files manually before or after the restore if you don’t want them anymore.
12.4.1 Restore From Your Site Admin
Link to chapter 4On the Snapshot Backups screen in your site admin, click on your desired backup to expand it. Then click the Restore button to open the Restore Backup modal.

Under the Restore Options section, select whether you want to restore both the files and the databases or only the files or only the database.

The Default directory indicates the directory where the backup will be restored. Click the “Restore” button to restore to the selected backup. Keep the page open until the process has finished.
During the restoration, a progress indicator will let you know where the restore is at, and which steps have already been taken.
There are 5 steps in restoring your site:
- Backup exported
- Download backup
- Restore files
- Restore database
- Finalize restoration
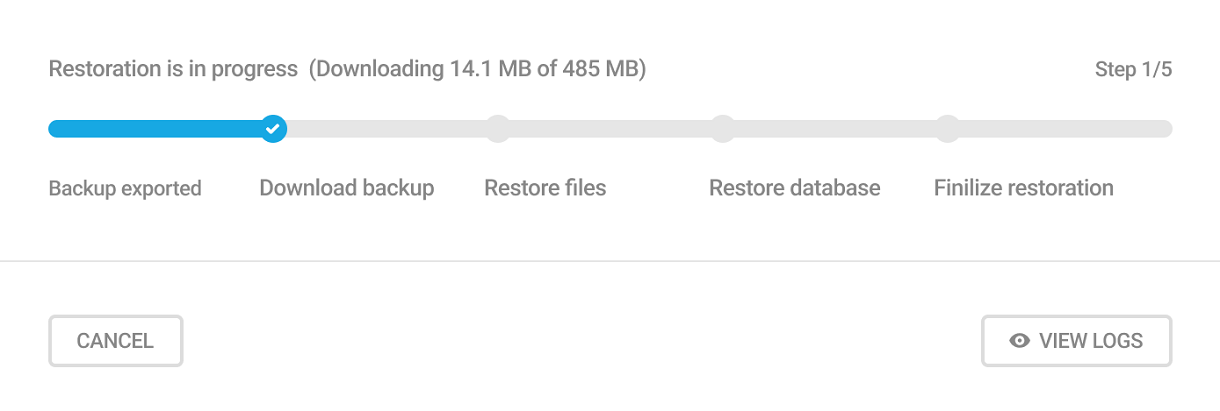
This process could take a few minutes for small sites and up to a few hours for larger sites. A notification will appear at the top of your screen when the restoration is complete, and will include a link to view the site.
Note that you will not be able to cancel the restoration process once it reaches the Restore Files phase to avoid potential disruptions.

If the backup restore from your site fails for any reason, you’ll see an alert like this at the top of your screen, with specific information about the failure if it’s available. Click the links to check the logs or contact our support if you need help.
Note: If the backup restoration is interrupted or fails, the next time you attempt to restore, it will resume from the stage where it was previously interrupted. However, if the restoration process fails while restoring files or the database, it will not resume and the process will restart from the beginning.

You can also try restoring via FTP instead from your Hub. Click the FTP restoration method link to be redirected automatically to the correct screen in your Hub to proceed with that. For more information about that process, please see our Restore Website (Snapshot) documentation.
To protect your site during the Restore process, if an error occurs while a backup is being exported or downloaded, the restoration will pause, cancel the restoration process, and leave your site as is. If the errors persist, use the Logs to locate the issue or contact your support team.
Restore Backups in WordPress Multisite
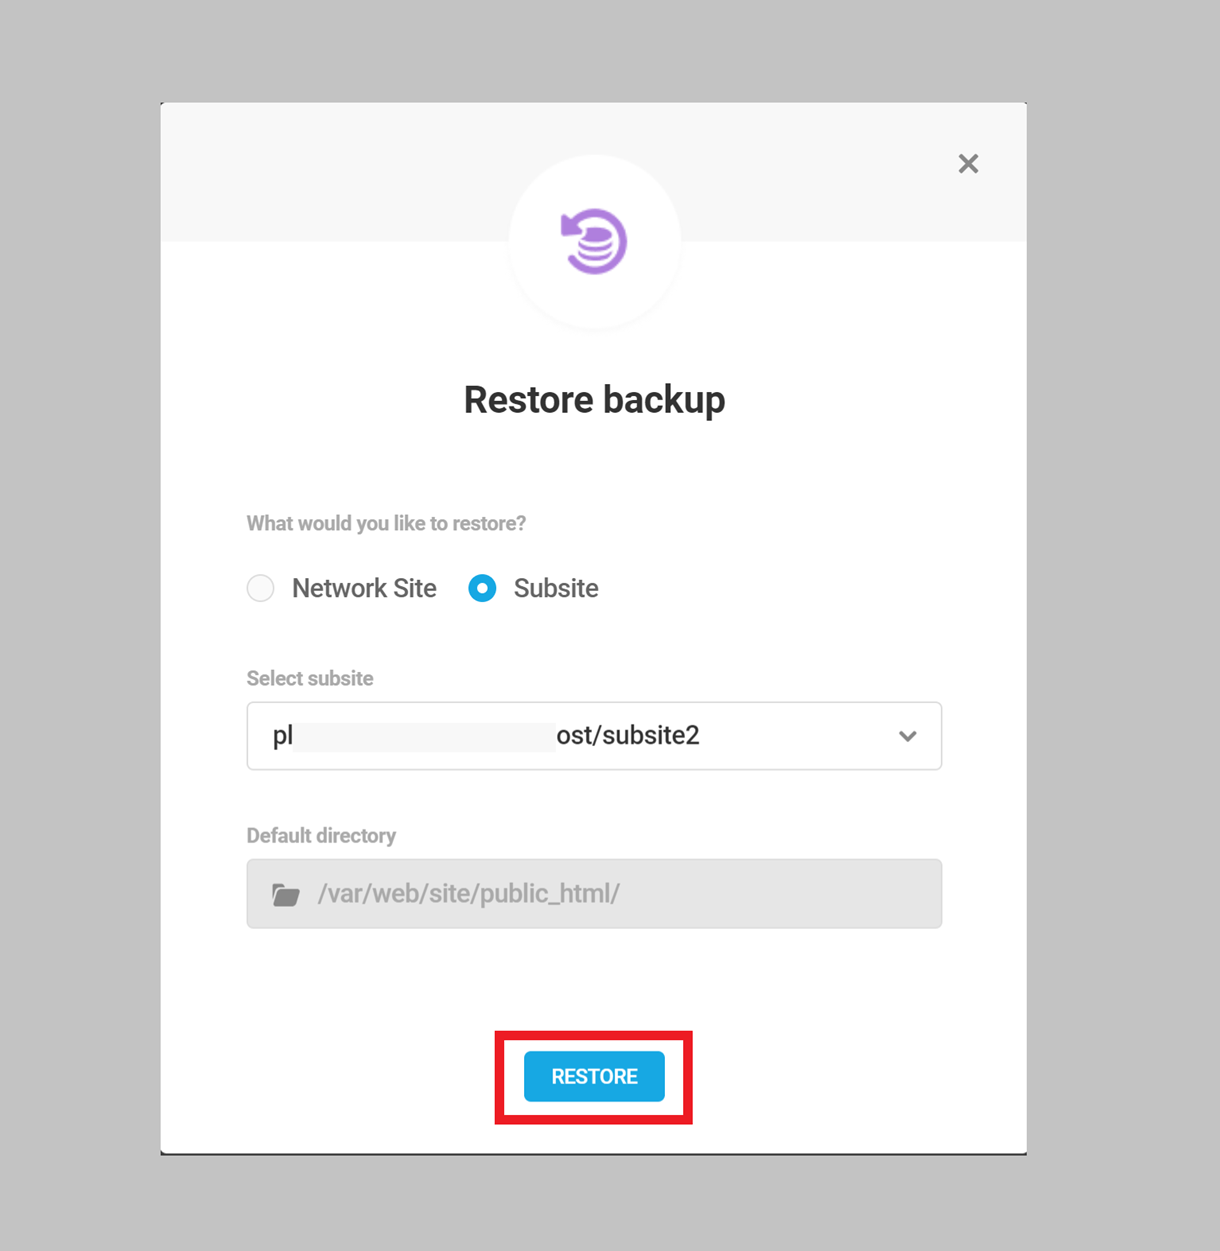
On the Snapshot Backups screen in your WordPress multisite, click on the desired backup to expand it. Now, click the Restore button to open up the Restore Backup modal.
From the modal, select if you want to restore the entire network site or any of the available subsites.
The Default directory indicates the directory where the backup will be restored. Click the Restore button to restore to the selected backup. Keep the page open until the process completes.
During the restoration, a progress indicator will let you know the progress of the restoration process and steps that have already been taken. Note that the steps are the same as the normal restoration process mentioned above.
Restore backup when there is no access to the site
If you need to restore a backup of your site, but can’t access the wp-admin to get it done, the above procedure of restoring your website will of course not work.
Snapshot v4 also allows you to restore backups via the Hub where you can use the Auto restore via FTP process.
You can also download the needed files to restore the site manually with an installer file, as seen in the next chapter.
12.4.2 Restore With An Installer File
Link to chapter 4If your site is not accessible, and the Auto restore via FTP option in your Hub is not working for you, you can download the needed backup files and upload them to your server manually. Then follow the directions in the Snapshot Installer Wizard to get the site back up and running again.
This is also the method you’d want to use to restore a backup that you have downloaded from a 3rd-party destination. Note that if you have deleted all Snapshot backups from your WPMU DEV storage, you will need to contact support to get the latest version of the snapshot-installer.php file needed for the restore.
Step 1 – Get your backup files
There are 2 places where you can get the files you need for your backup restore:
Get the files from your Hub
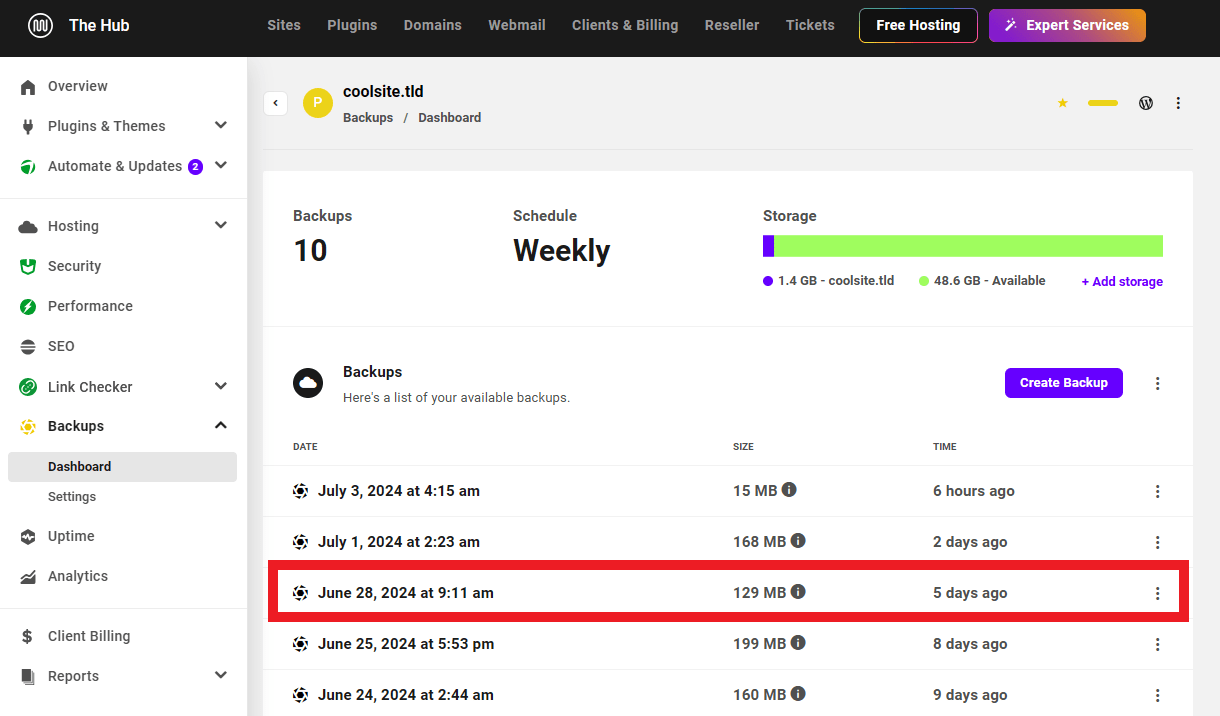
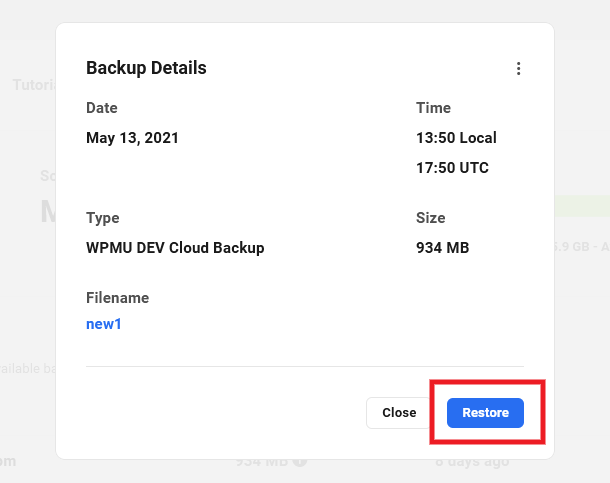
To get the files from your Hub, go to the Backups tab for the site you need to restore, and click on the backup you want.
Then, in the modal window that pops open, click the Restore button.
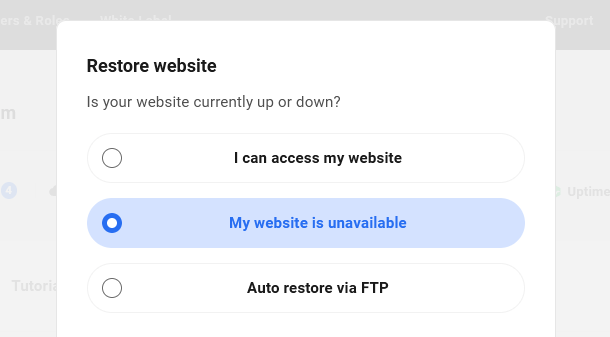
Select the My website is unavailable option.
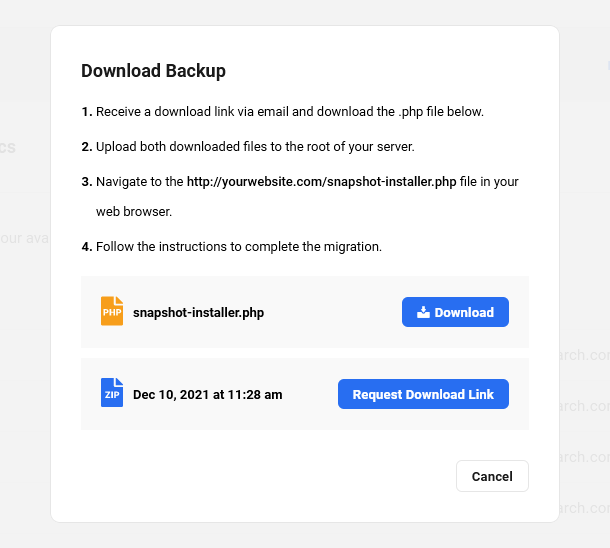
You’ll then see the 2 files you need to download: your backup zip file and the snapshot-installer.php file.
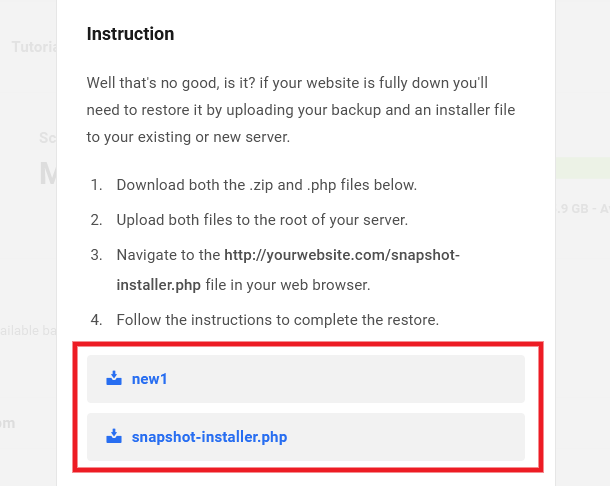
The installer file will download right away. But it will take a few minutes for the backup files to be zipped up, so the system will send that to you at your WPMU DEV account email address as soon as that’s done.
Get the files from your Account page
If your site is no longer connected to your Hub, you can access your backup and the installer file from your WPMU DEV Account page. Click on your profile image in the top-right corner of your Hub and select My Account.
In the Add-Ons section, click the View Backups & Statistics link on the far-right of the Snapshot row to toggle it open. Under All Backups, filter the list if needed to display only backups for Active, Deleted or All Sites. Then click the Download link for the backup you want.
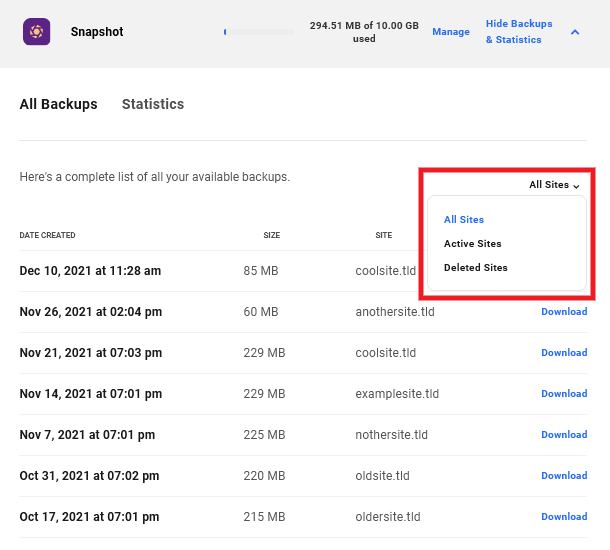
This will open a modal window where you can download the full backup and the snapshot-installer.php file which is required to restore a backup for a site that is inaccessible.
Step 2 – Upload the files to your server
Now that you have obtained the files you need to restore your backup, you’ll need to use either an FTP/SFTP or SSH connection to upload the backup package and installer file to your server. If you are not sure how to use an FTP/SFTP client or SSH, see our SFTP & SSH documentation.
The installer file will download as a zip file named snapshot-pro-standalone-restore-script-2.zip. If that file does not unzip automatically on your computer, be sure to unzip it manually to get the snapshot-installer.php file inside. That’s the installer file you want to upload.
However, do not unzip the backup download once you receive it via email though. If that one does unzip automatically on your computer when you download it, be sure to zip it up again before uploading to your server.
Upload both the zipped backup package and the unzipped snapshot-installer.php file to the root directory of your WordPress site. This is most often the public_html directory, but it may be different depending on your particular setup.
Before uploading your files and running the restore wizard, please ensure you have enough disk space on your server for the process to run. You should account for at least double the size of your backup zip as the restore process will extract its contents and create temporary folders while it is running. A lack of adequate disk space on your server will cause the restore to fail.
Step 3 – Run the Snapshot Installer wizard
When the files have been uploaded to your server, go to https://yourwebsite.com/snapshot-installer.php in your browser, replacing yourwebsite.com with your site’s actual domain name.
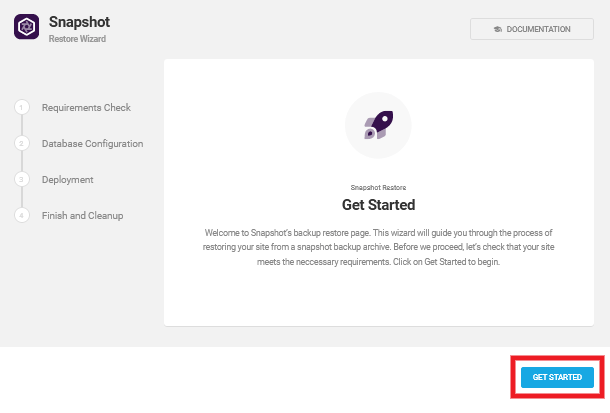
This will open the Snapshot Wizard that will walk you through all the steps of your backup restore. Click the Get Started button at the bottom to begin.
Requirements Check
The first step will begin by running a check of all the requirements for the backup restore.
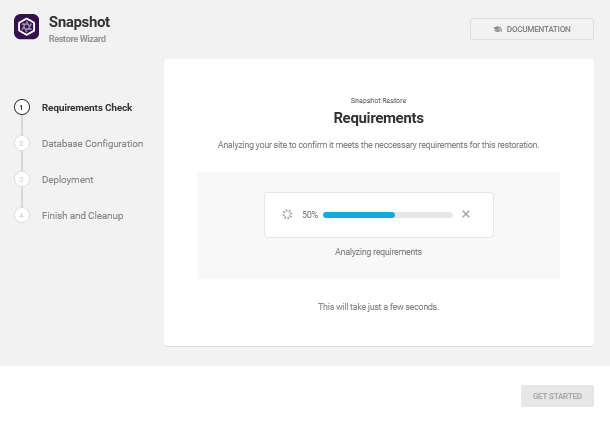
This step only takes a few seconds and will look for any issues that can possibly hinder a successful backup restore.
If you are trying to restore a partial backup (either files or databases) and not a complete backup, you will be prompted with a confirmation notice, as partial restoration of files may result in malfunction. Click Continue to confirm and continue with the restoration process.

If no issues are found, the wizard will automatically proceed to the Database Configuration step.
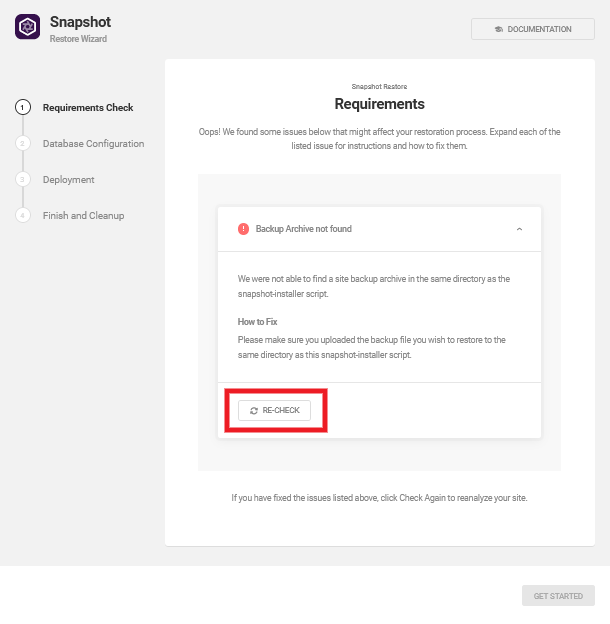
If any issues are found, they will be listed as below.
- Backup Archive not found – This appears if the backup zip has not yet been uploaded to the same directory as the installer file.
- Corrupted Backup Archive – This appears if you have uploaded a corrupted zip file. To fix this, download a new backup zip file, upload it to the same directory, then run the Snapshot installer wizard.
- PHP MySQLi module not found – Snapshot needs the MySQLi module to be installed and enabled on the target server. If you use a managed host, contact them directly to have this module installed and enabled.
- Zip module not found – To unpack the zip file created by Snapshot, the PHP Zip module will need to be installed and enabled. If you use a managed host, contact them directly to have it added or updated.
- PHP v7.0 or newer is required – Snapshot Pro requires PHP version 7.0 or later. If your host is using an older version of PHP Snapshot Pro will display a low PHP version or PHP version is out of date warning. You’ll need to update your PHP version to proceed.
- Open_basedir is enabled – open_basedir must not be configured on your server. If it is, you’ll need to disable it or contact your host for help to get that done.
- Max Execution Time is too low – A minimum execution time of 150 seconds is recommended to give the migration process the best chance of succeeding. If you use a managed host, contact them directly to have it updated.

Click on any issue to expand it and reveal the steps needed to resolve it. Then click the Re-Check button at the bottom to run the requirements check again.
Once all issues are resolved, the wizard will automatically proceed to the next step.
Database Configuration
The next step is to connect to your database. It is recommended you create a new database, but if you are restoring a backup to overwrite an existing site where a wp-config.php file is detected, you’ll have the option to overwrite the existing database once you’ve tested the connection.
Click the toggle next to Use the database credentials from your current wp-config file. Then click the Test Connection button at the bottom to verify that the connection does indeed work.
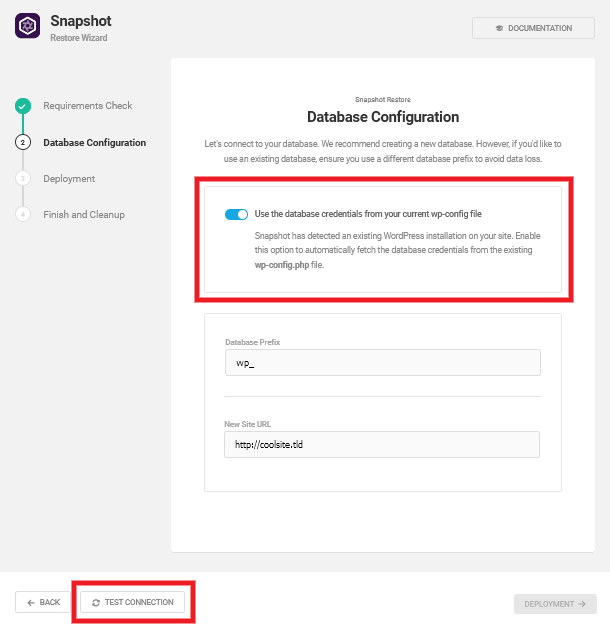
Note that if you change the detected Database Prefix shown here, the restore process will create a new set of database tables with that new prefix instead of overwriting the existing tables.
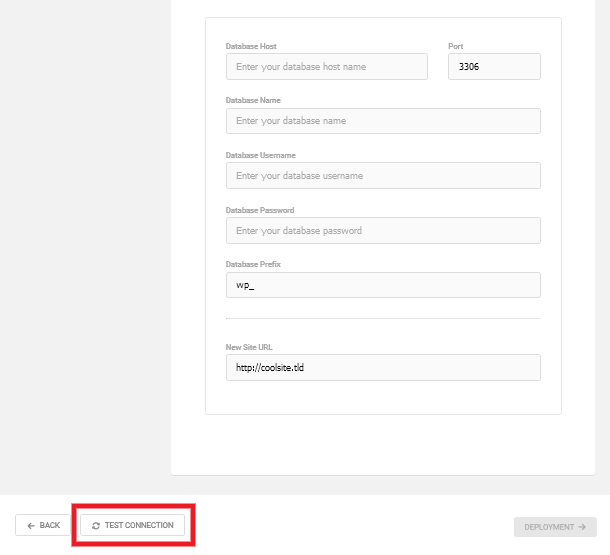
If you prefer to use a new database as recommended, do not toggle the option above, and enter the credentials in the fields provided instead. Then click the Test Connection button.
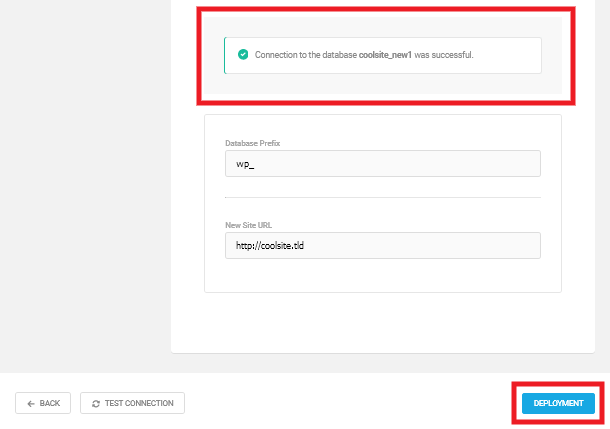
If the connection is successful, you’ll see a confirmation message appear, and you can then click the Deployment button to proceed.
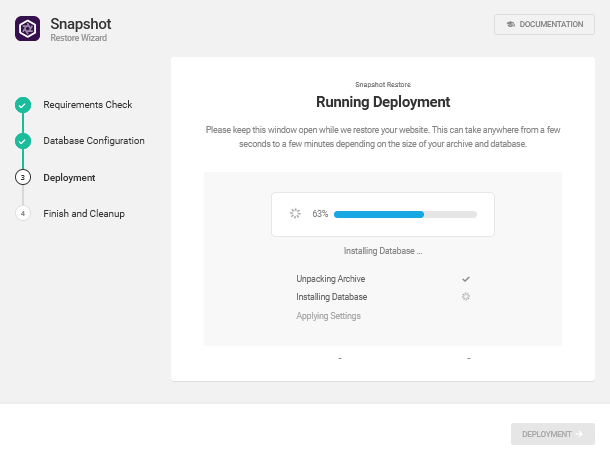
Deployment
While the Deployment is running, you will see a progress bar indicating the overall progress of the backup restore, and which step the installer is currently working on.
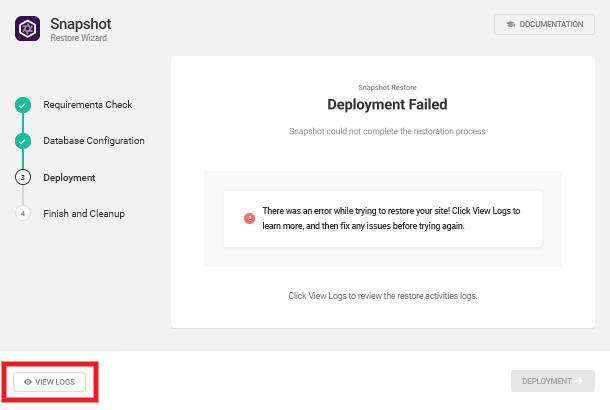
If there are any issues that prevent the backup restore from completing, the installer will stop and notify you that the deployment has failed.
Click the View Logs button to get detailed information about what went wrong so you can fix the issues and attempt the restore again.
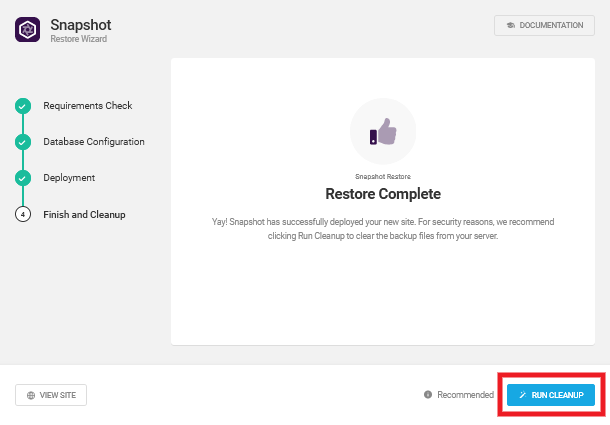
Once the restore has completed, you’ll be prompted to click the Run Cleanup button, which we highly recommend.
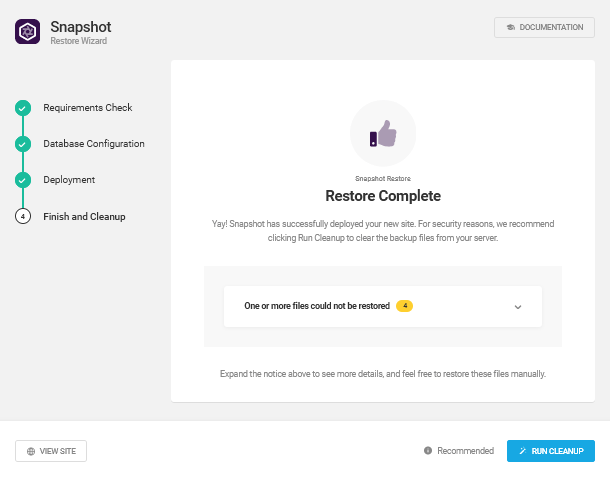
Note that if there are any files included in your backup that could not be restored, due to permission issues for example, a notice will appear once the deployment has completed. Click on that notice to view a list of which files could not be automatically restored so you can upload them manually if needed.
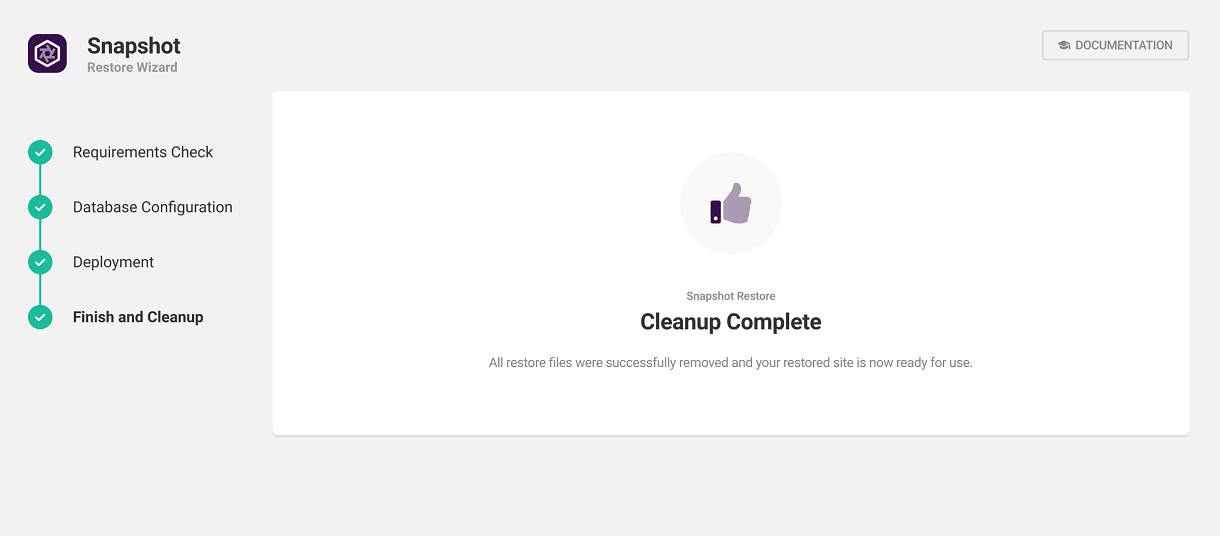
Finish and Cleanup
This final step will remove the installer file, the backup zip and all temporary files created by the restore wizard so your site will be exactly as it was when you made the backup.
Once that’s done, you’ll see a confirmation message which will disappear after a few seconds and your newly restored site will load in your browser.
12.5 Hosting Backups
Copy chapter anchor to clipboardIf your site is not hosted with WPMU DEV, this module will not be visible to you. At the top of the screen is an overview showing the following information:
- Backups available – Number of backups currently being stored in your cloud storage
- Last backup – Lists the date and time of your most recent successful backup
- Next scheduled backup – The date and time of the next backup according to the schedule you set. If no schedule is set yet, this will indicate “Never“.
- Backup schedule – The currently set backup schedule. If none is set yet, this will indicate “None“.

Underneath the overview is a panel with more details on each backup. This is where you will find a list of all your backups created on WPMU DEV hosting, as well as Automate backups.
If you want to download a hosting backup straight from Snapshot v4, click the Export button and a backup link will be processed and sent to your email address. Please note that the time taken for the backup link to be processed and sent to you varies depending on the size of the site.

At the moment, backups cannot be created or restored through the plugin but this is something that will be incorporated in future releases. For the time being, you can click the Manage button for a quick link to the Hub, where you can fully manage all of your hosting backups.
Currently, WPMU DEV hosting backups will be removed after 30 days. This storage limit cannot be changed.
12.6 Destinations
Copy chapter anchor to clipboardA destination is a 3rd-party location where your Snapshot backups can be stored.
Check out How to Quickly Backup to S3, Google Drive, and Dropbox Using Snapshot Pro on the blog. Read on below for detailed instructions for each available destination.
At the top of the Destinations screen, is an Overview module with:
- Number of destinations
- Last backup destination
- Available WPMU DEV storage space
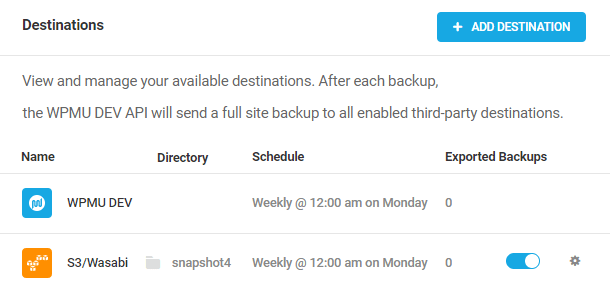
Below is the Destinations module with a list of connected destinations. Hub connected sites are automatically connected to WPMU DEV cloud storage and do not require any additional setup to connect. The Hosting Backups module is only accessible by WPMU DEV Hosting and does not require any further configuration.
The Destinations module lists:
- Name – Name of the destination, provider, or location where the backup will be stored.
- Directory – This is where the backups are being stored. WPMU DEV cloud storage does not allow you to change directories.
- Schedule – The current schedule for your backups.
- Exported Backups – This is the number of backups currently being stored on your account.
While you can add as many destinations as needed, you can only set up one backup schedule. It is not possible to have different schedules running for different destinations. The schedule that you have configured will apply to all destinations that you have added.
The destinations module allows you to add multiple destinations for your backups, even from the same third-party storage provider. You can manage these destinations with the configuration tools.
As you may know already, WPMU DEV Cloud Storage stores incremental backups of your site. However, if you choose to add a third-party destination, full site backups will be uploaded to that destination, not incremental backups.
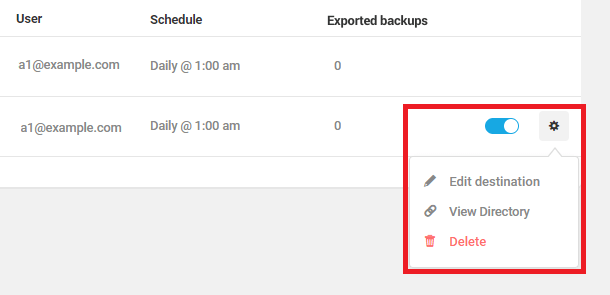
All destinations can be re-configured, deactivated, or deleted at any point. Simply slide the toggle to deactivate the destination, or click on the gear icon for alternative options, which are:
- Edit destination – Change your current setup with regards to your destination name, bucket, directory path, connection credentials, and storage limit.
- View directory – Use this to jump to your third-party destination account.
- Delete – Click Delete to remove his destination.
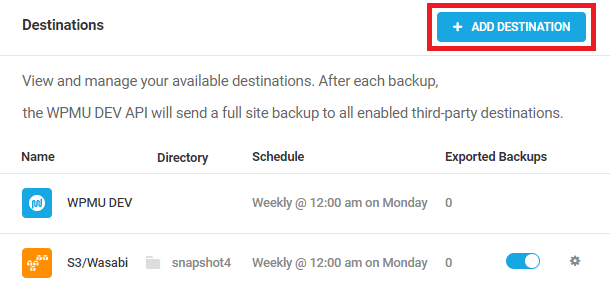
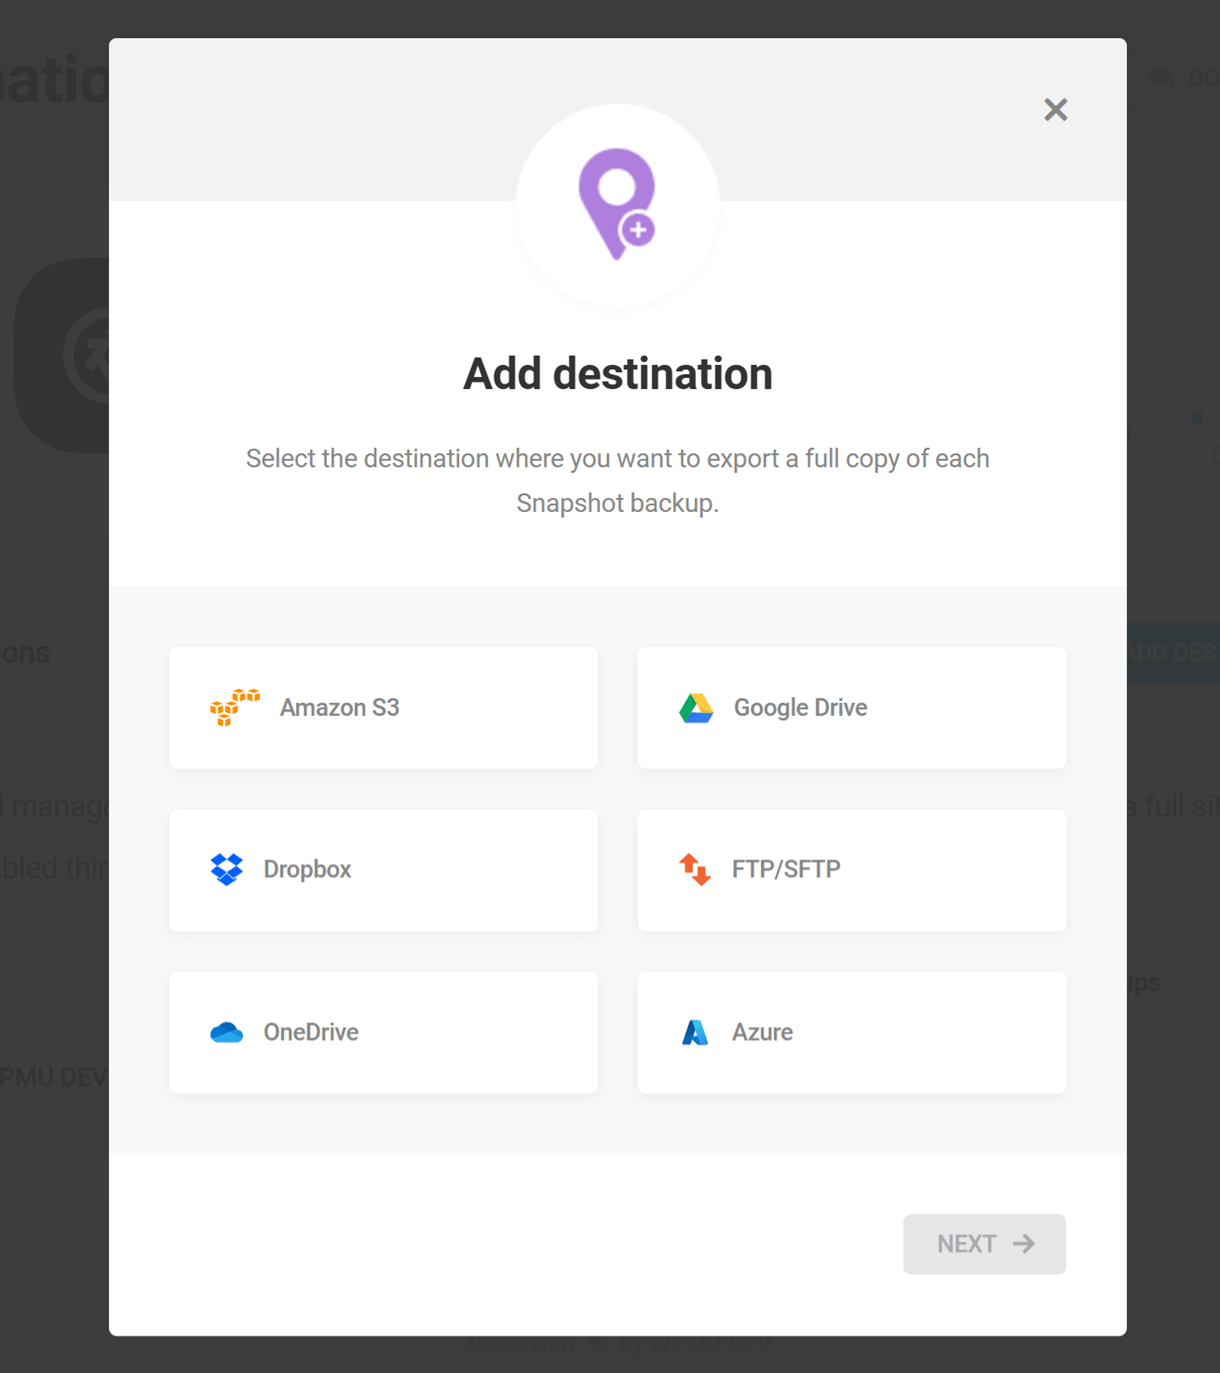
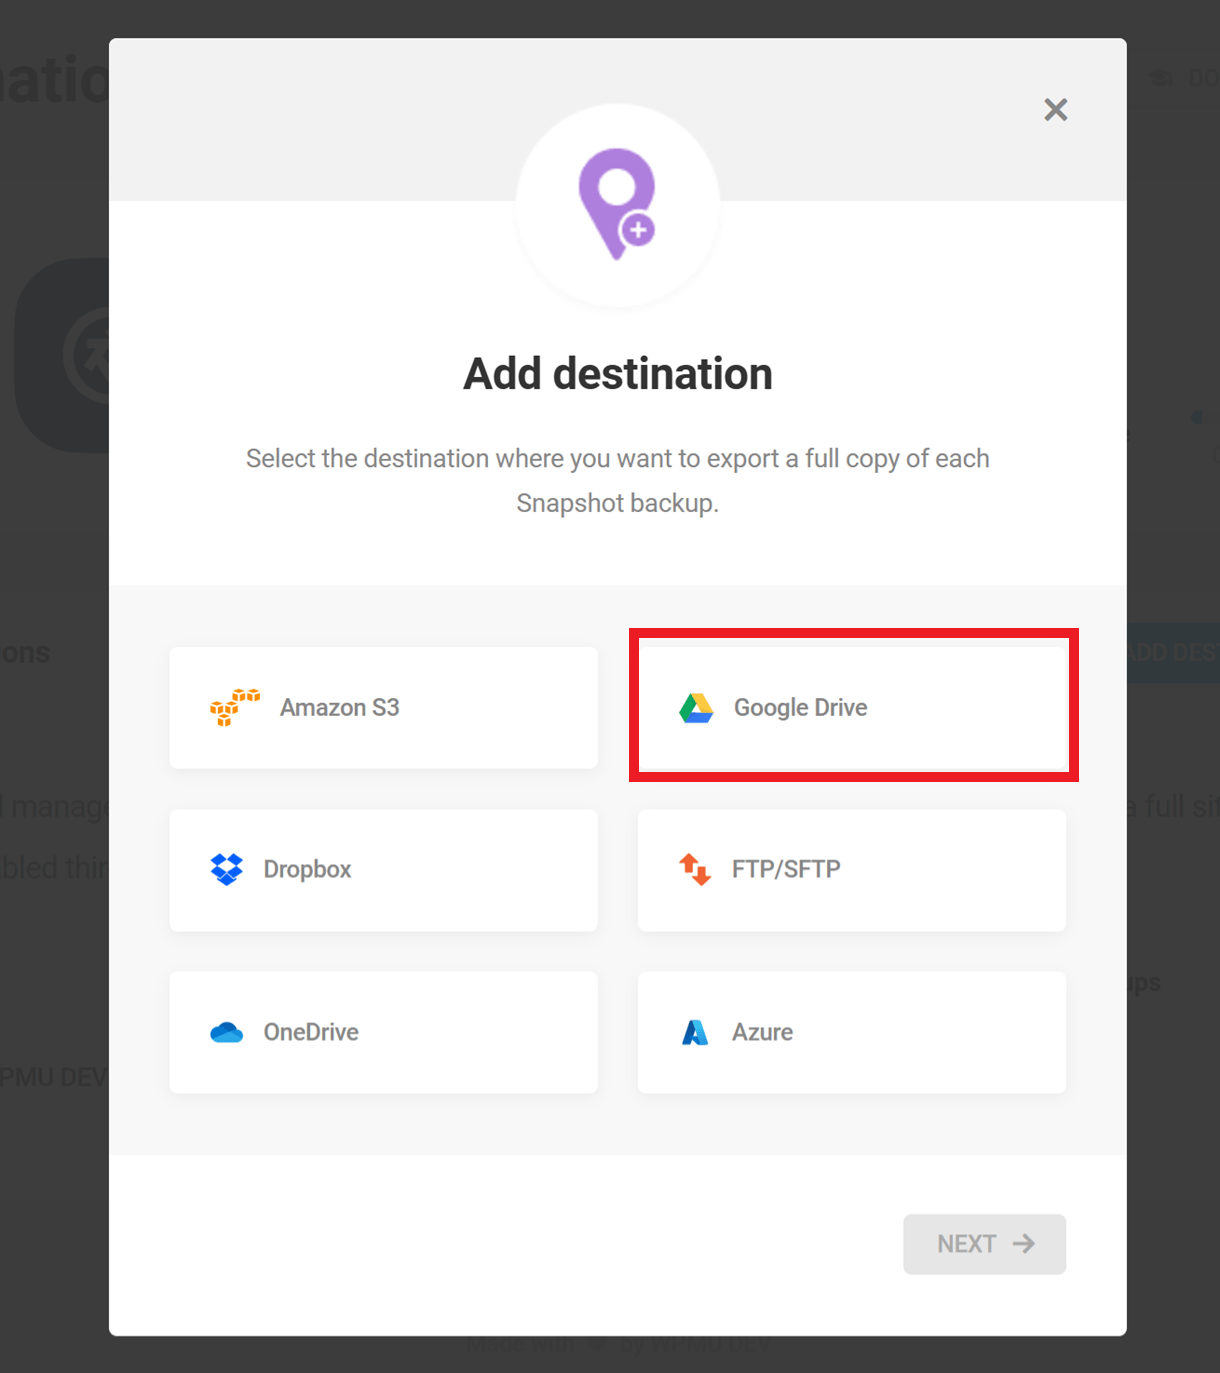
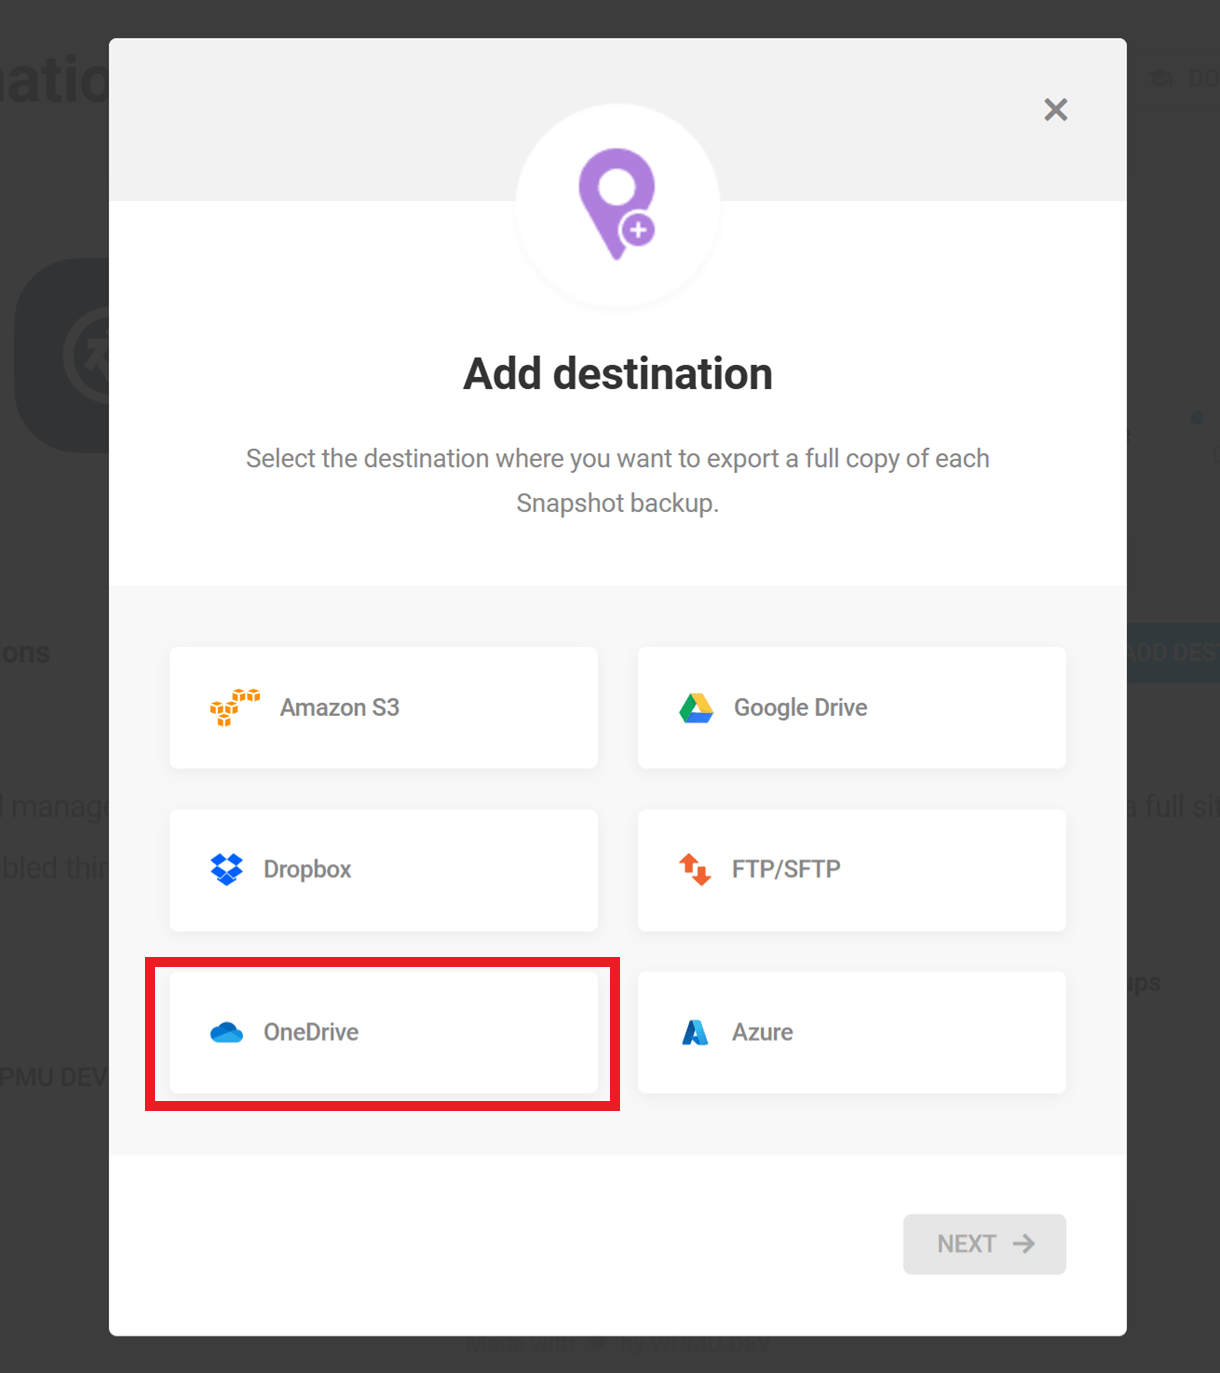
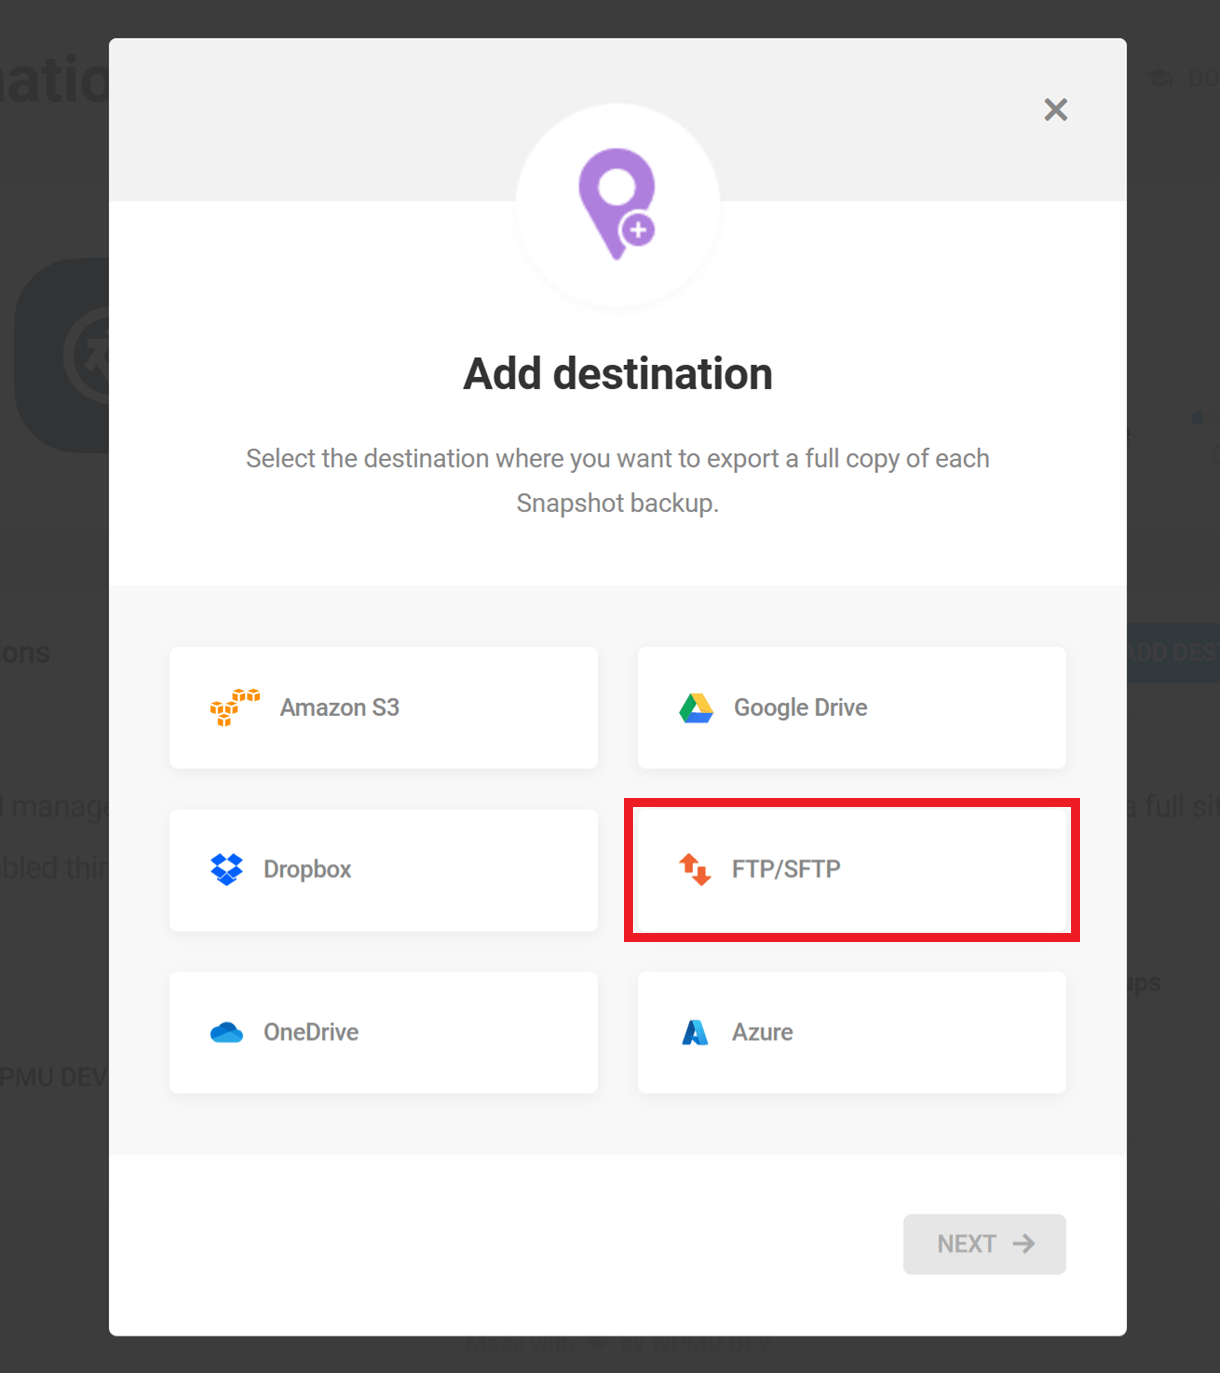
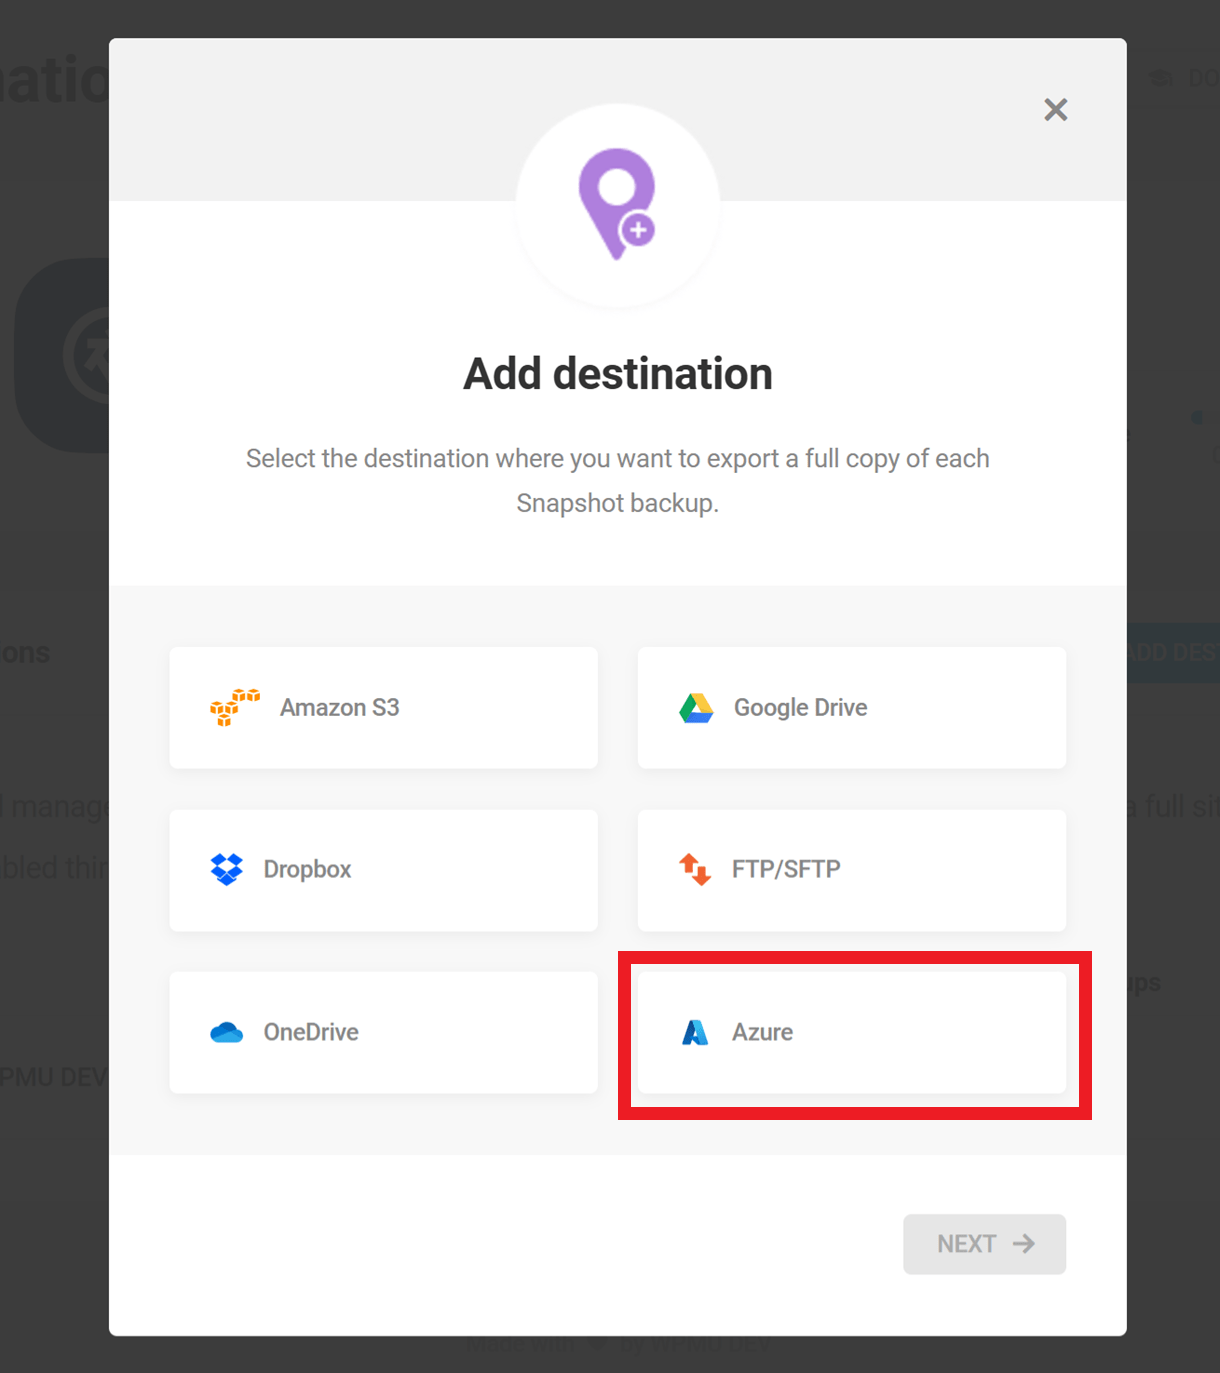
To add a new destination for your backups, click the Add Destination button.
The following Snapshot destinations are supported:
- Amazon S3 (and S3 Compatible Storage)
- Google Drive
- Dropbox
- OneDrive
- FTP/SFTP
- Azure
Any third-party destinations that are added do not bypass the WPMU DEV Cloud Storage. Your backups go through the WPMU DEV Cloud Storage and from there, they are sent to the new destination. So, you can think of these third-party destination backups as full site copies of your last backup, rather than a new backup.
New destinations are added by using a set of credentials to connect to the third-party destination. These credentials are not stored on your site, they are stored safely on the WPMU DEV end.
Since the backups sent to third-party destinations are copies of the WPMU DEV backups, The Hub only shows the backups stored on the WPMU DEV storage space. This means that deleting a WPMU DEV backup will not delete the copy stored on any third-party destination. You will have to access your own accounts for the connected third-party destinations to delete the copies stored there.
Restoring Backups from Destinations
It is not possible to restore a backup directly from a 3rd-party destination.
You would need to first download the backup you need from your destination. Then get a copy of the snapshot-installer.php file from your Hub or your WPMU DEV Account page.
Finally, follow the directions in the Restore With An Installer File chapter above to get your backup restored.
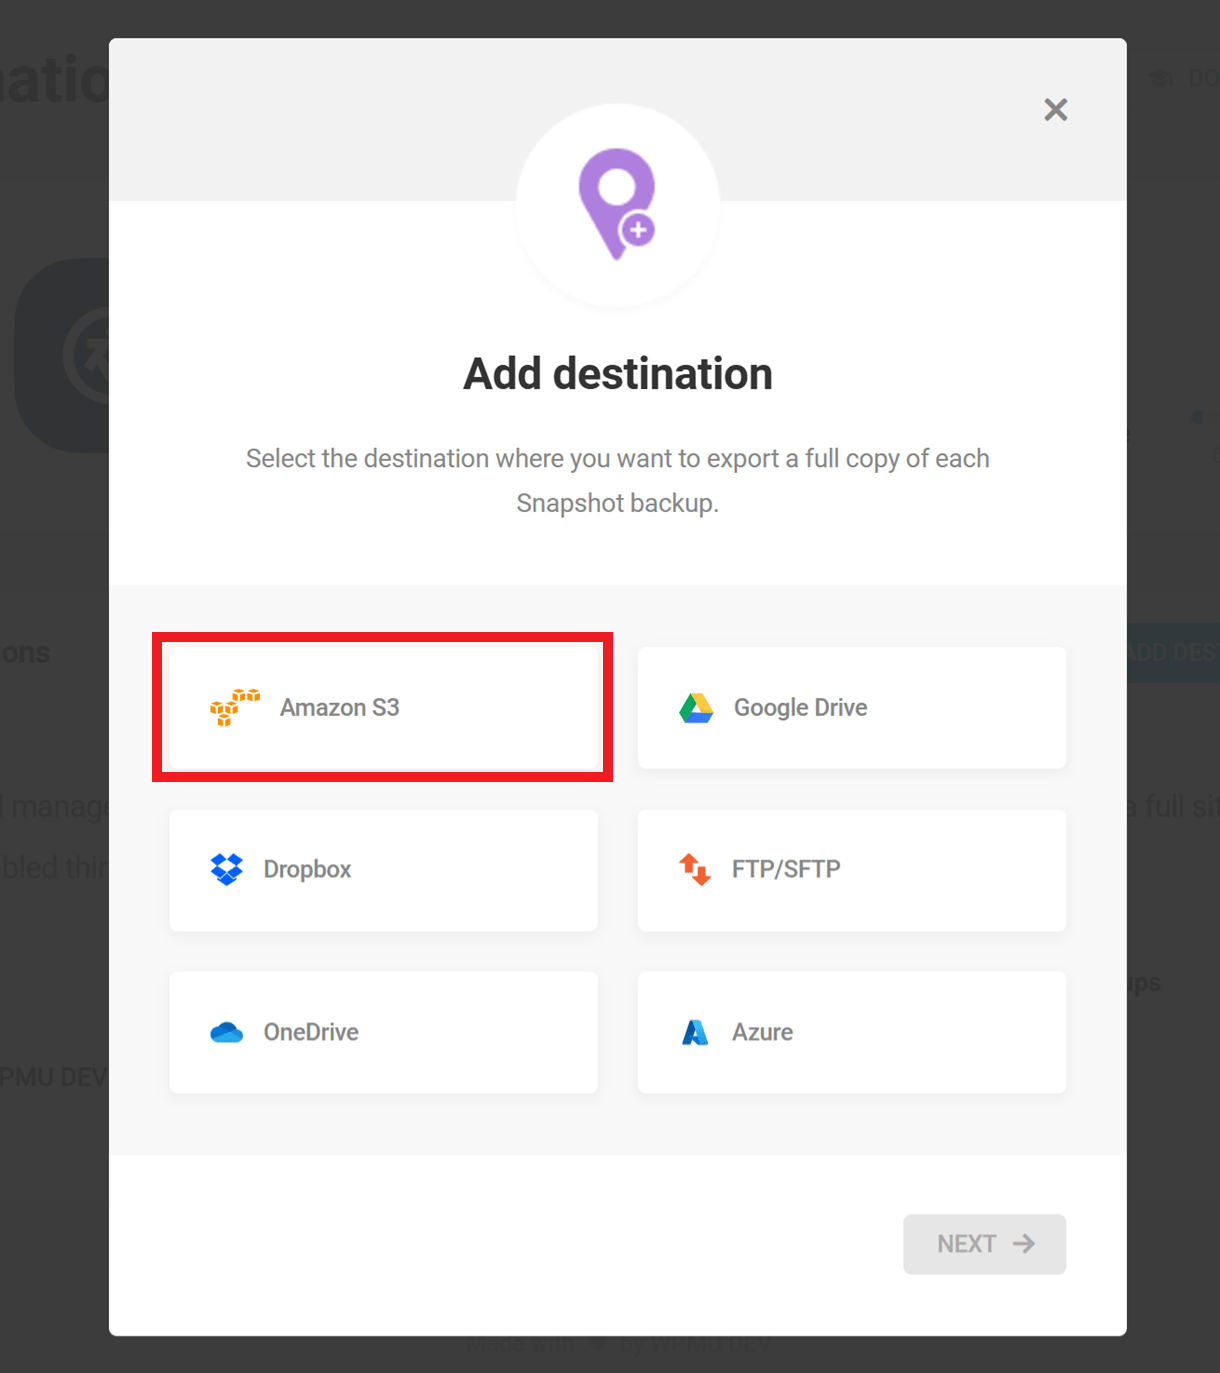
12.6.1 Amazon S3
Link to chapter 6After clicking Add Destination, a modal will pop up with the backup destination options. Ensure that Amazon S3 is selected and click Next.
Under the Amazon S3 tab, enter the following information to connect:
- AWS Access Key ID
- AWS Secret Access KEY
- Bucket Name
- AWS Region

China (Beijing) and China (Ningxia) AWS regions are currently unsupported by Snapshot.
If you are unsure about how to find your Amazon S3 credentials, you can click on the How to get Amazon S3 credentials? dropdown arrow. This will trigger the row to expand and reveal a step-by-step guide to finding your credentials for both Root and IAM users.
We have also included a full step-by-step guide which you can find in the How to get Amazon S3 Credentials section below.
Once you have entered your bucket name, and credentials and selected your AWS Region, click Next. The entered bucket name will be displayed. Enter the Directory Folder Path (optional).
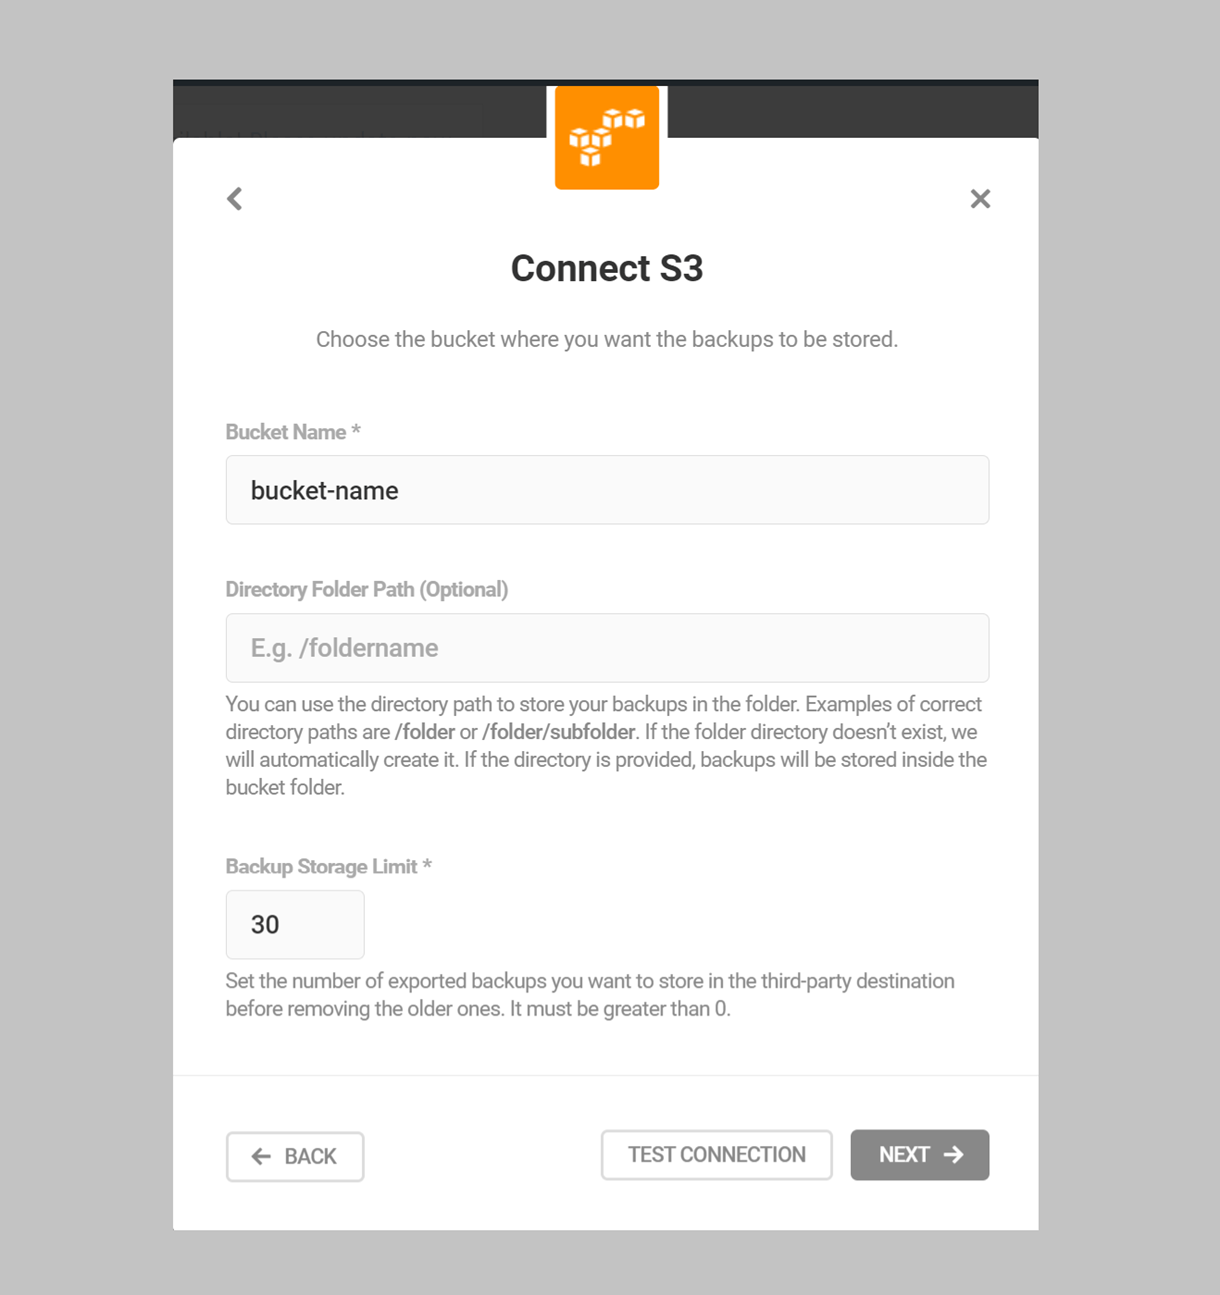
Remember to add a forward slash before your folder name. You also need to separate any subfolders from the main folder with a forward slash, as well as any subsequent sub-folders. For example, these would be correct directory folder pathways: /folder and /folder/subfolder/next_subfolder.
You will also be required to set the Backup Storage Limit. This is the number of backups that will be stored before new backups start to replace old ones.
If you want to test whether your connection is working, you can click the Test Connection button. If your connection is on the right track, you will receive a success notification. Click Next to proceed.
Now you can give your destination any name that you want. This is to help you identify your new destination from the full list.
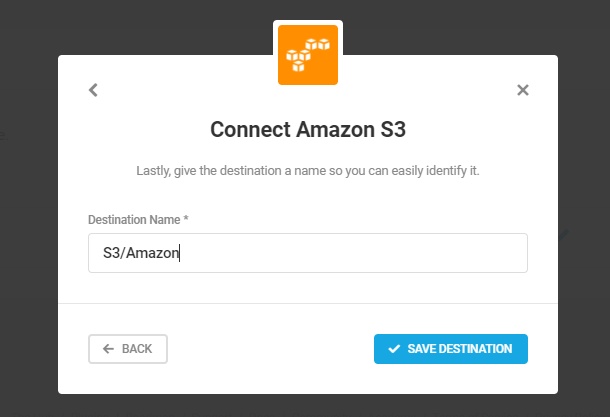
You can return to any steps by clicking the Back button or if you’re done with everything, click Save Destination.
How to Get Amazon S3 Credentials
To find your Amazon S3 credentials, all you have to do is follow these simple steps:
- Visit the Amazon Web Services Sign-in page and log in as usual.
- Create a new bucket if you haven’t already done so.
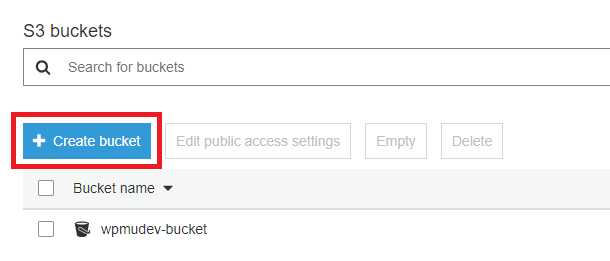
Take note of the Bucket region as you will need this to connect properly.
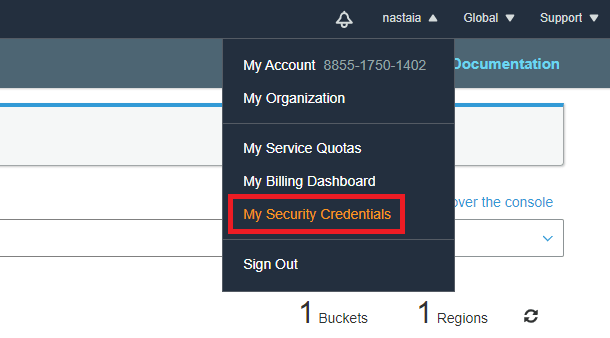
Navigate to the My Security Credentials section by clicking on your account name in the top right-hand corner.
From there, you can expand the Access keys (access key ID and secret access key) tab and click Create New Access Key.
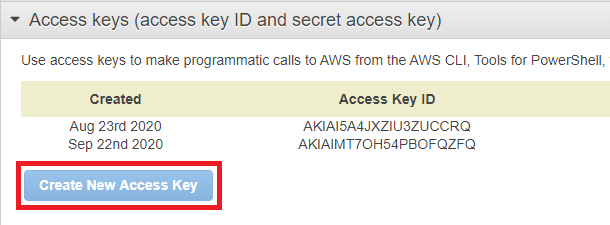
In the popup modal, you will receive your Access Key ID and the Secret Access Key. Be sure to download the key file and keep your access keys safe. Use these credentials to connect Amazon S3.
12.6.2 S3 Compatible Storage
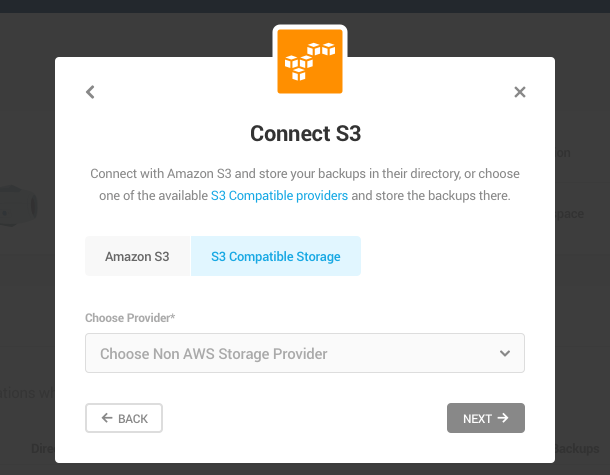
Link to chapter 6The beginning of this process is much like connecting Amazon S3. From the Destinations tab, click the Add Destination button and select Amazon S3 from the available options.
Click Next to proceed to the next screen.
Now, you can select your preferred S3 Compatible Storage option from the dropdown menu.
The available storage options are:
Backblaze
Once you have selected Backblaze from the drop-down menu, you will see a set of fields that need to be filled. Enter the following information:
- Bucket Name
- keyID
- applicationKey
- Region
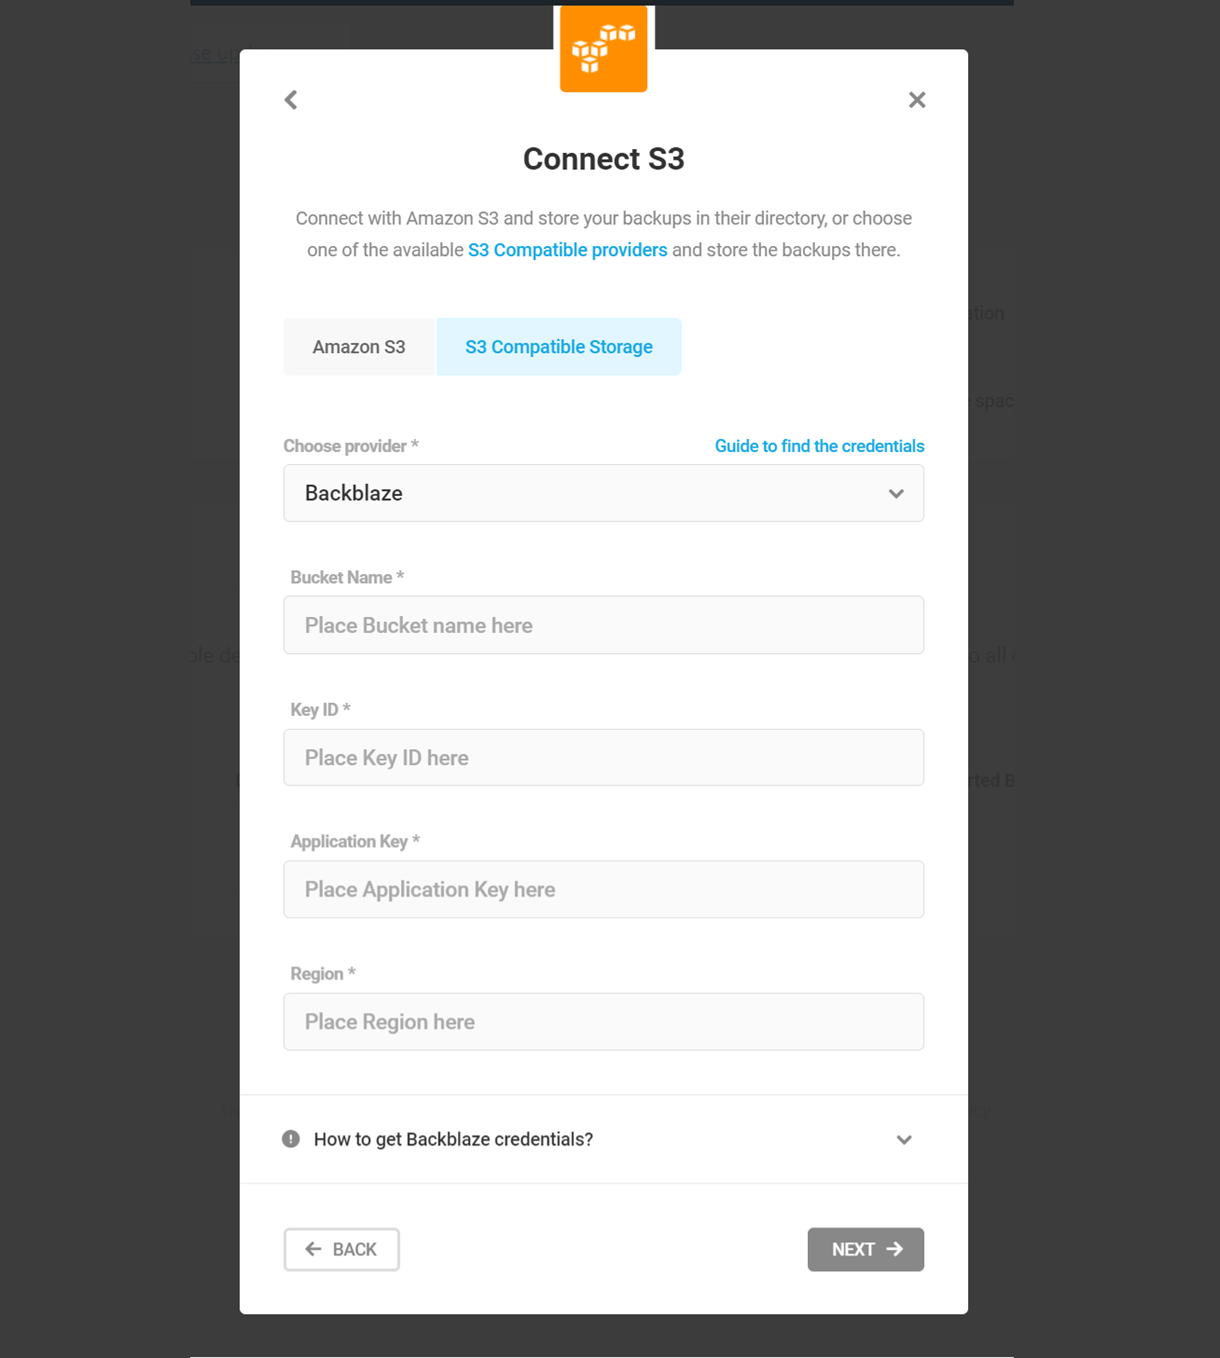
Copy and paste the name of the bucket you created in Backblaze in the Bucket Name field.

To find the credentials, expand the How to get Backblaze credentials bar or see the the section below.
Enter all the required information and click Next.
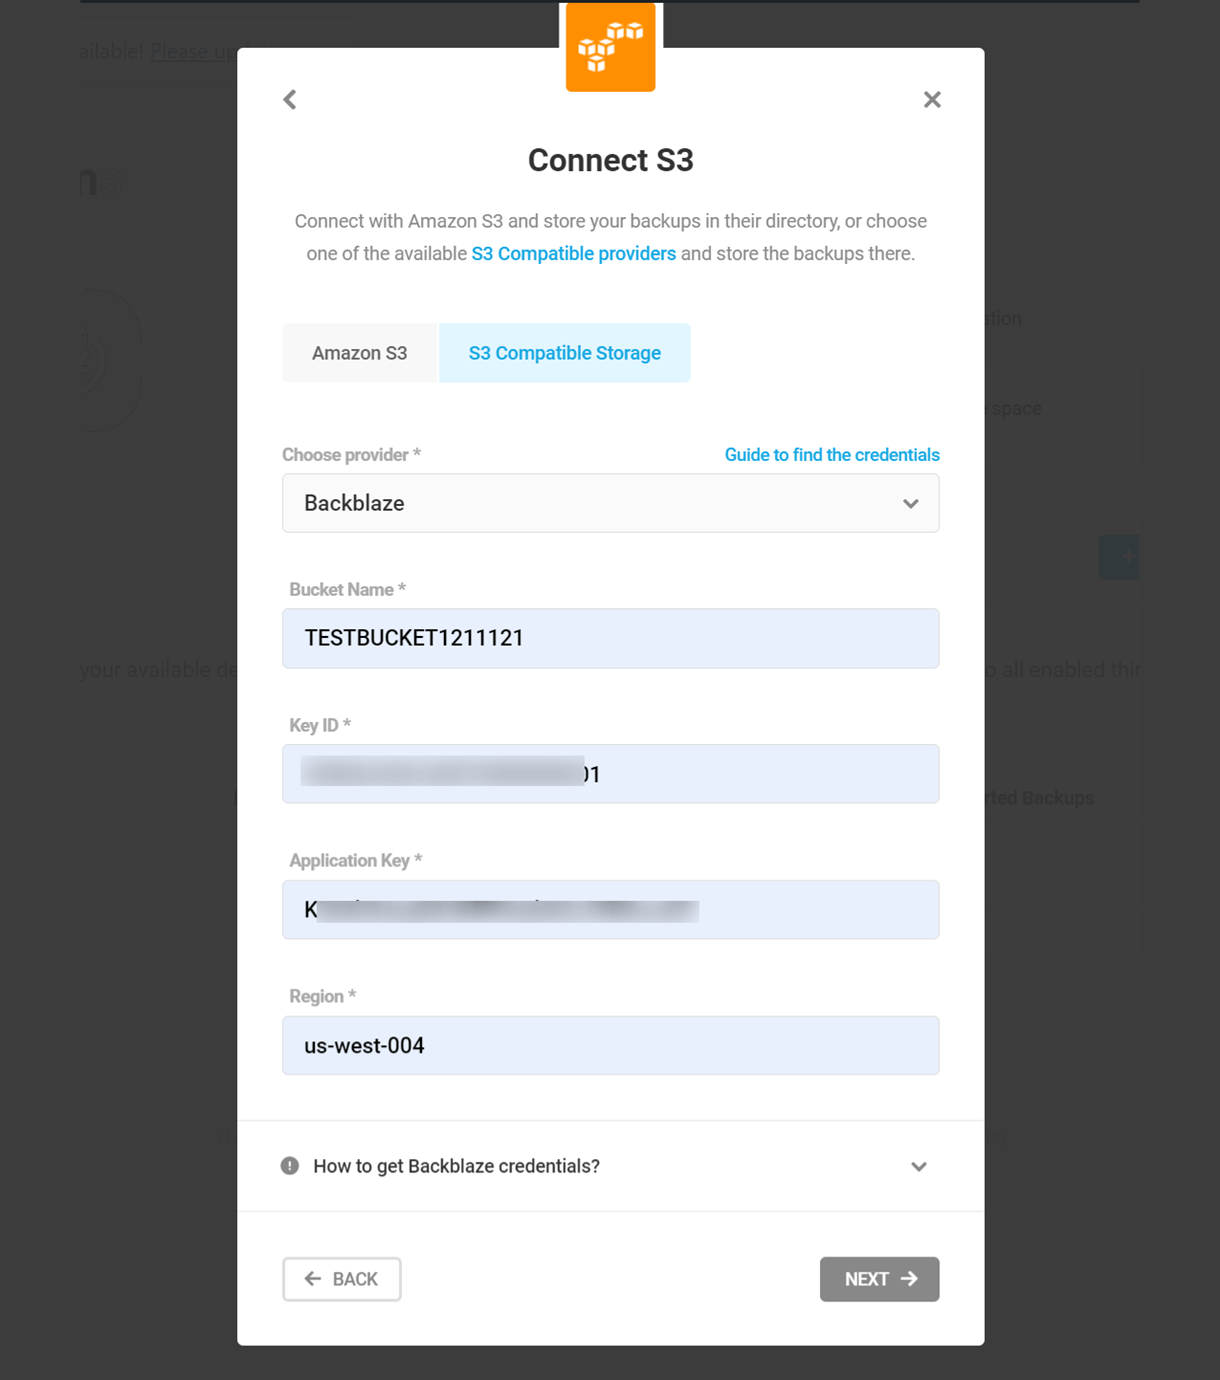
In the Region field, enter only the region code “us-west-004” instead of the complete endpoint “s3.us-west-004.backblazeb2.com”. Using the complete endpoint may lead to an authorization error.
Now, choose your bucket (depending on your plugin version), and enter the directory path and storage limit. Click Test Connection to verify the connection. After successful verification, click Next.
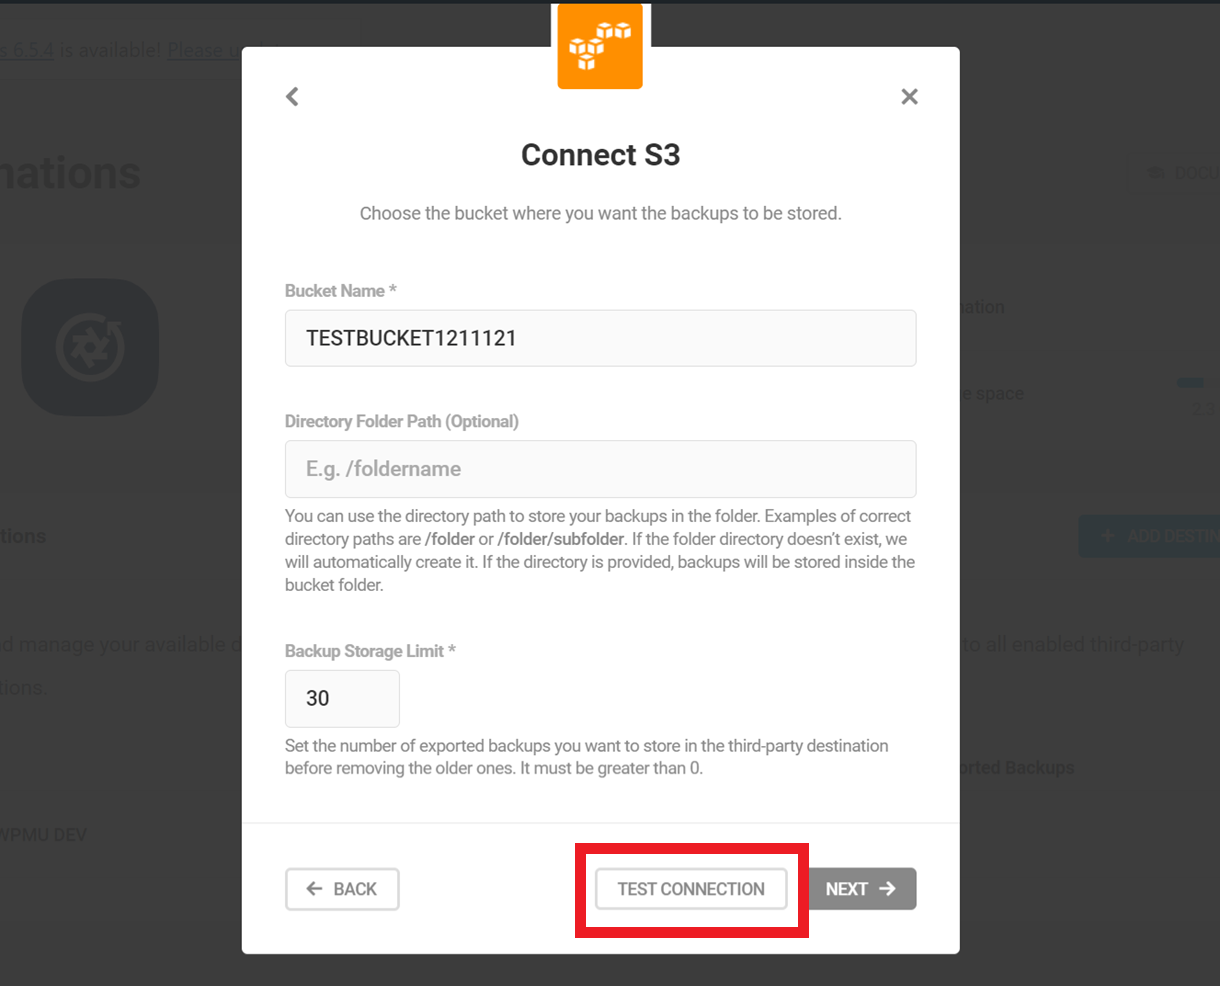
Finally, enter a destination name and click Save Destination to complete the setup.

How to Get Backblaze Credentials
- Visit the Backblaze sign-in page and log in as usual.
- Navigate to the buckets page and create a bucket if you haven’t already created one.
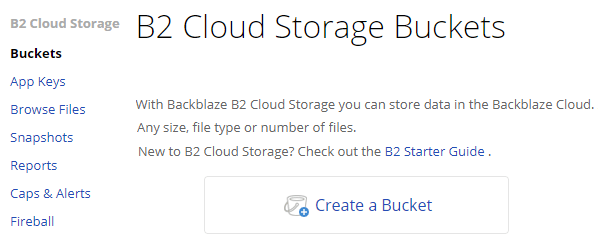
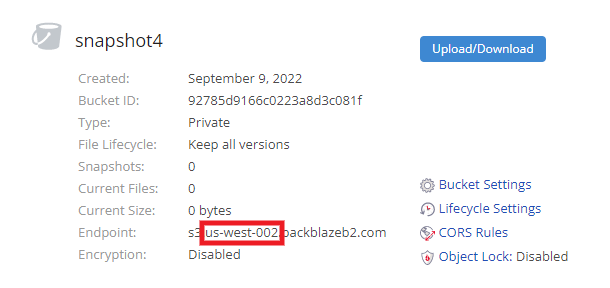
Take note of the region as this is something you will need later to connect. Your region can also be viewed in the Buckets section and is specified in the Endpoint. In this example, the region is us-west-002.
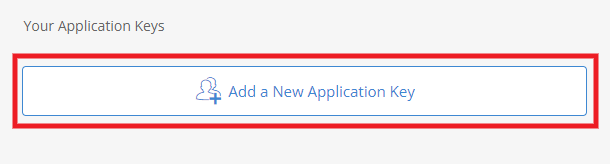
Go to App Keys, scroll down to the Your Application Keys section, and click the + Add a New Application Key button.
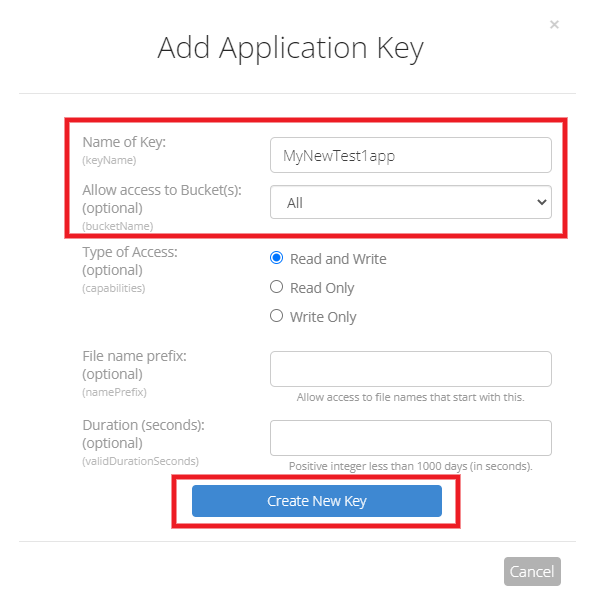
In the modal window that pops open, give your app key a Name, and select whether it should have Access to all buckets or just a specific one. Adjust the other options if needed and click the Create New Key button.
You will then see a Success message where your applicationKey will be displayed only once.
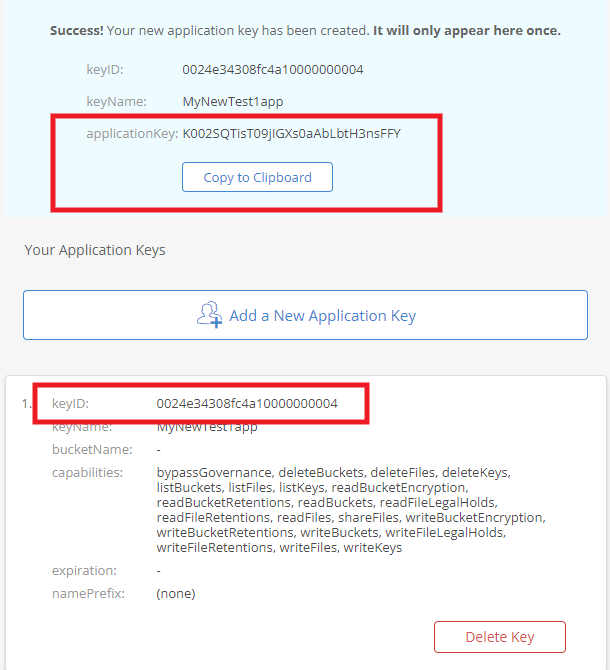
Copy the applicationKey, keyID, Region, and Bucket Name and paste them into the corresponding fields in the Snapshot modal.
DigitalOcean Spaces
Once you have selected DigitalOcean Spaces from the dropdown menu, you will see a set of credentials that you need to provide. The required credentials are:
- Access Key ID
- Secret Access Key
- Region

Either expand the How to get DigitalOcean credentials bar or see the section below for a guide to finding those credentials. After entering your credentials in the fields, click Next. You can now choose your bucket, directory path, and storage limit, as shown in the Amazon S3 section. Give your destination a name and save it to complete the setup.
How to Get DigitalOcean Spaces Credentials
- Visit the DigitalOcean login page and log into your account.
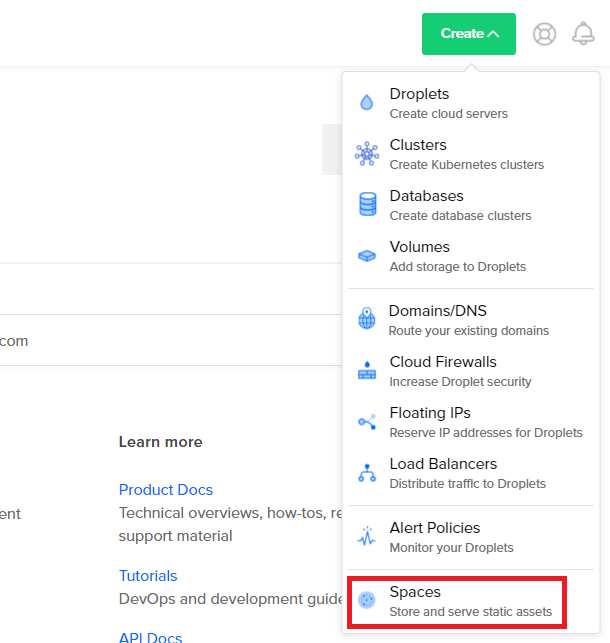
If you don’t already have an existing space, click Create and select Spaces from the dropdown menu.
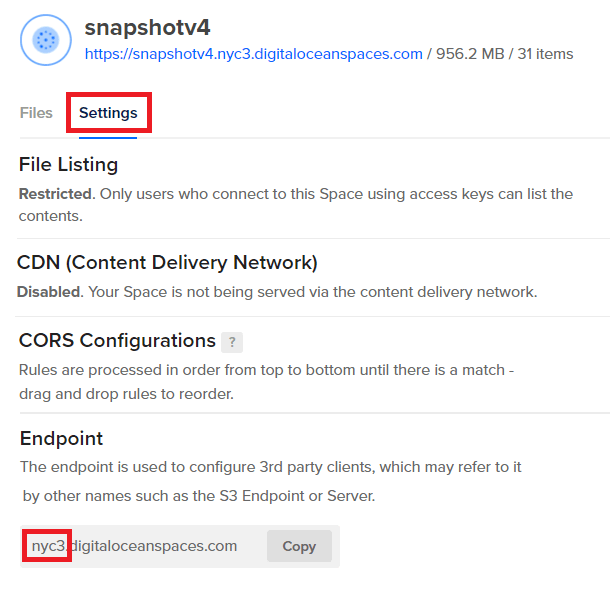
Take note of the region chosen for the space, as this is an important credential to successfully connect DigitalOcean Spaces as a new destination. You can always view your region at a later stage by viewing your Endpoint in your Space Settings section. The region appears before .digitaloceanspaces.com; in the example below, this would be nyc3.
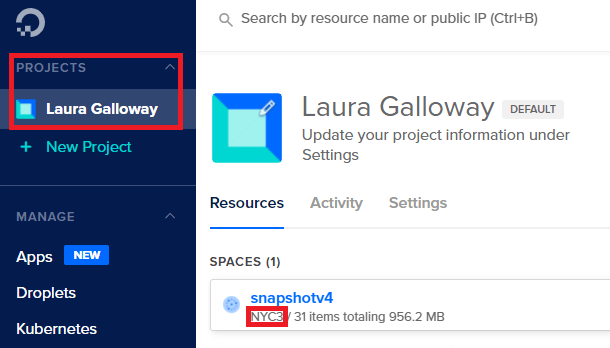
Furthermore, the region can be viewed by hovering over your space under the main Projects tab.
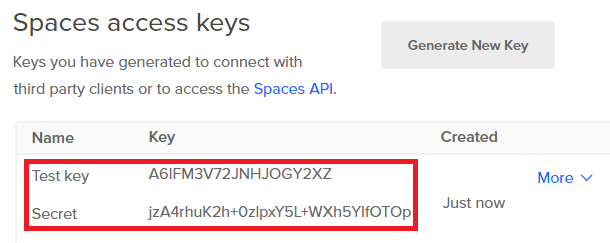
Navigate to the API section and under Spaces access keys, click Generate New Key.

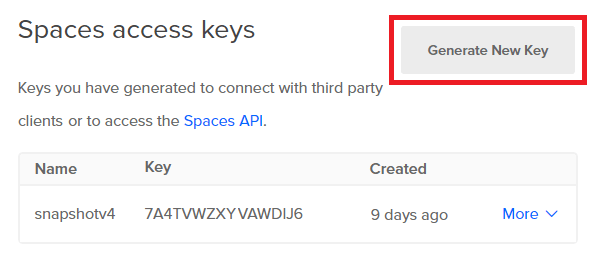
Once you have named your key and have clicked Generate Key, you will see the Test key (access key) and Secret (secret key) appear. These are the credentials you can use to connect your DigitalOcean Space.
Wasabi
If you have selected Wasabi from the dropdown menu, you will see a set of credential fields that you need to fill in to connect. The required credentials for Wasabi are:
- Access Key ID
- Secret Access Key
- Region
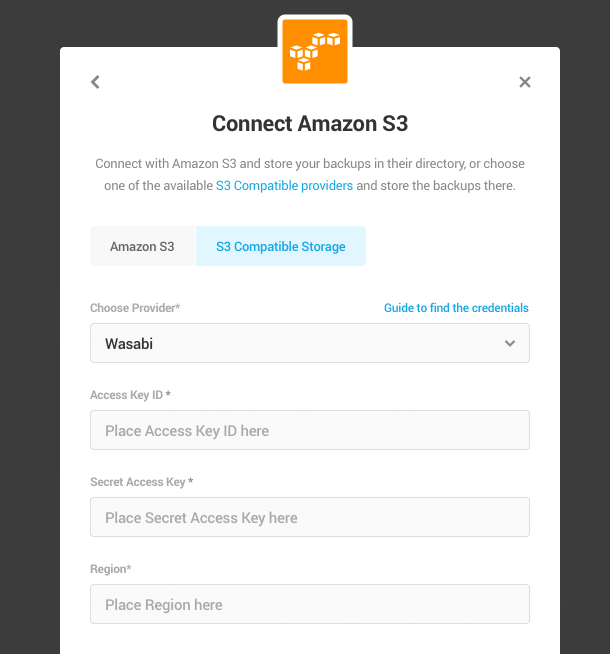
Either expand the How to get Wasabi credentials bar or see the section below for a guide to finding those credentials. Once you have entered your credentials, you can click Next. You can now choose your bucket, directory path, and storage limit, as shown in the Amazon S3 section. Give your destination a name and save it to complete the setup.
How to Get Wasabi Credentials
- Go to the Wasabi sign-in screen and log into your account.
If you haven’t created a bucket yet, you can create one by clicking on Create Bucket.
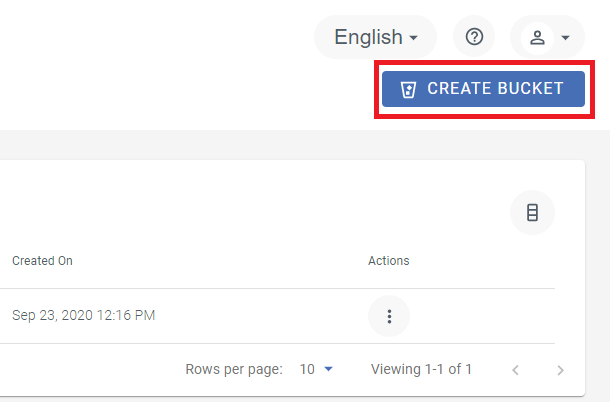
Remember the region you have chosen here since this is an important piece of information needed to successfully connect Wasabi.
Next, go to the Access Keys tab on the left sidebar and click Create New Access Key.
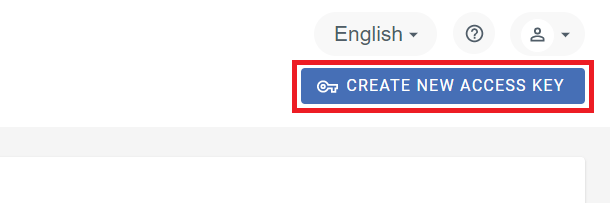
Select Root User and click Create.
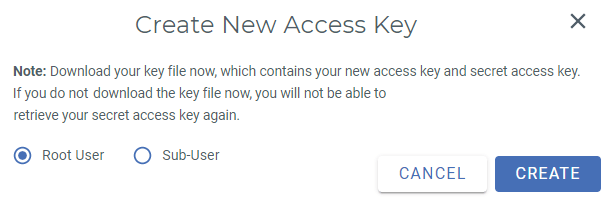
This will generate your access key and secret key credentials. Be sure to download the key file now because you will not be able to retrieve your access key again.
Google Cloud
If you have selected Google Cloud from the dropdown menu, you will see a set of credential fields that you need to fill in to connect successfully. The required credentials for Google Cloud are:
- Access Key
- Secret
- Region
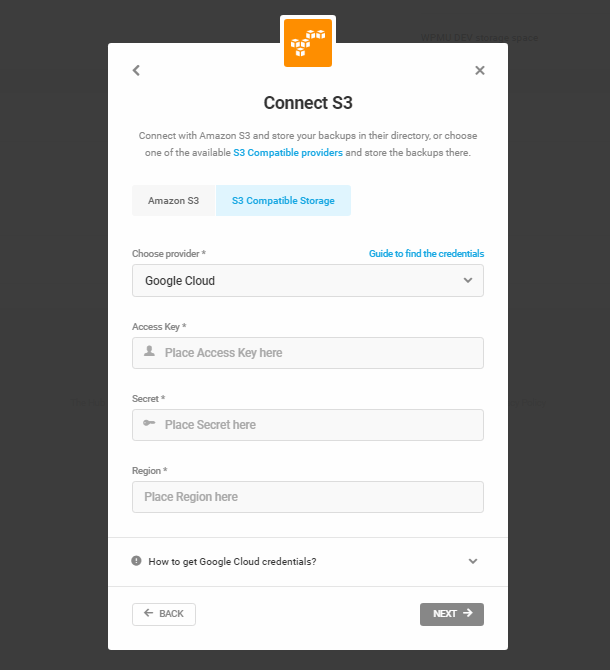
Either expand the How to get Google Cloud credentials bar or see the section below for a guide to finding those credentials. After providing your credentials, click Next. You can now choose your bucket, directory path, and storage limit, as shown in the Amazon S3 section. Give your destination a name and save it to complete the setup.
How to Get Google Cloud Credentials
- Navigate to the Google Cloud Platform page and log into your account.
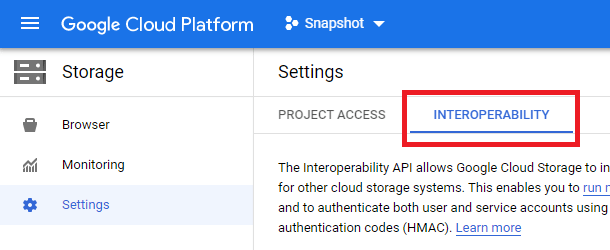
Once you have logged in, you need to navigate to your Storage page from the sidebar on the left.

Next, go to Settings>Interoperability, which is where you can create a new HMAC key.
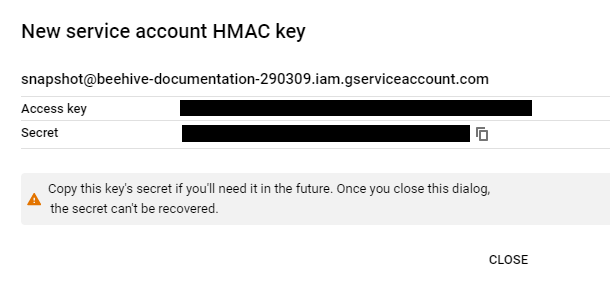
A little further down that page, you can click Create a key for a service account.
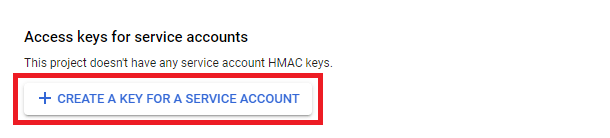
Now choose the service account that you want your HMAC key to be associated with and click Create key. A key module will pop up where you can copy your Access key and Secret. Make sure to copy the key’s secret at this point because once you close the module, you won’t be able to view it again.
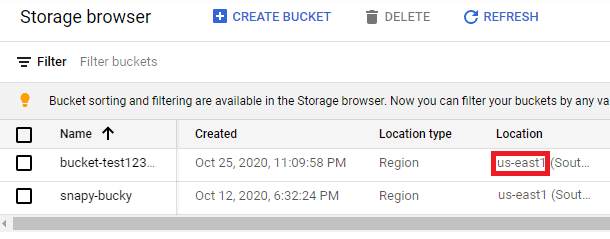
The last piece of the puzzle to connect everything is the Region which can be found on your Storage page. If you look under the Location column, you will be able to see the region for that bucket. In the example below, the region is us-east1.
Other
Selecting Other from the S3 Compatible options allows you to add a destination that may not be listed. To connect to this destination, you will need to provide the following credentials:
- Access Key ID
- Secret Access Key
- Endpoint
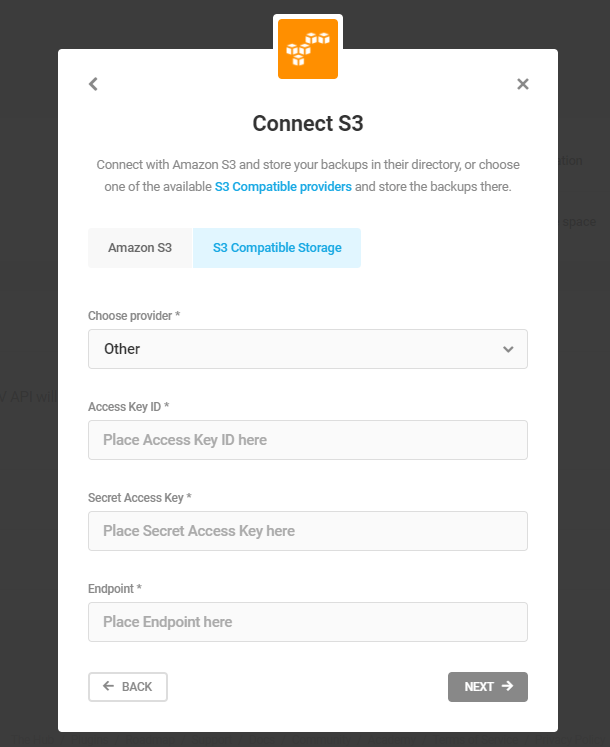
Once you have filled in these credentials, click Next.
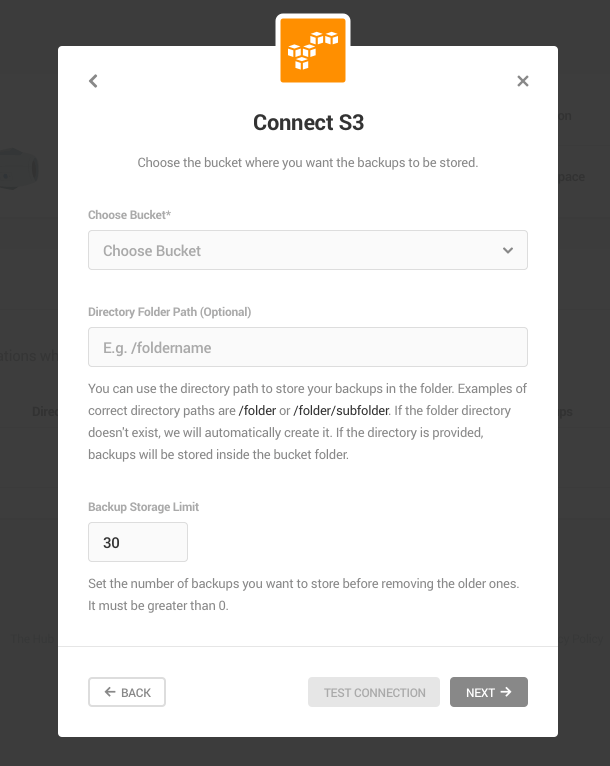
Choose the bucket for your destination by using the dropdown field. You can also provide a Directory Folder Path if you wish, but this is not essential, as well as adjust your Backup Storage Limit. Click Next when you’re done.
Lastly, give your destination a name to distinguish it from your other destinations and click Save Destination.
12.6.3 Google Drive
Link to chapter 6Once you have clicked Add Destination from your Destinations tab, you will need to select Google Drive in the destination modal and then click Next.
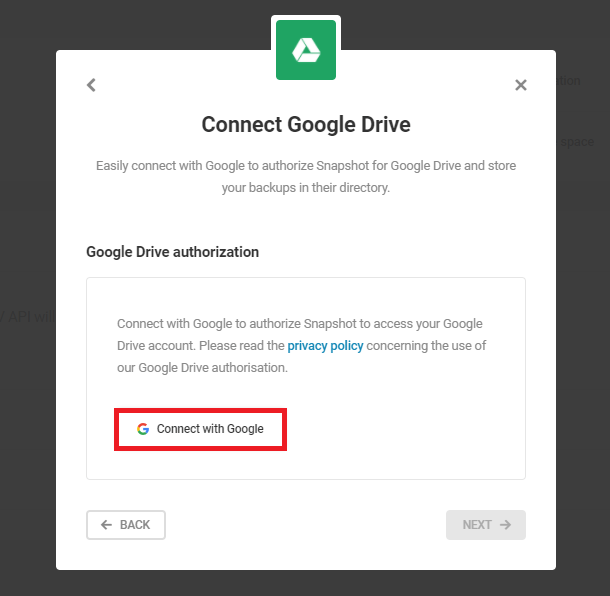
From here, all you need to do is click Connect with Google to connect Snapshot with your Google Drive. For more information on the use of our Google Drive authorization, read our Privacy Policy.
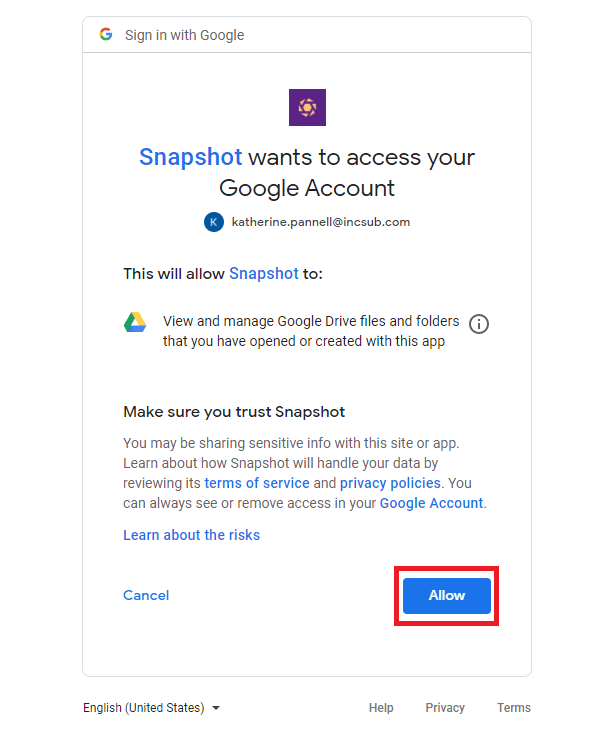
Select which Google account you want to connect to Snapshot. If you are using a shared folder in your Drive, be sure the account you’re logging in with has been granted share access to that folder first.

Click Allow so that Snapshot can access your Google Drive to store copies of your backups. You can always de-authorize your Google Drive connection with Snapshot by following the steps in De-authorize Google Drive account.
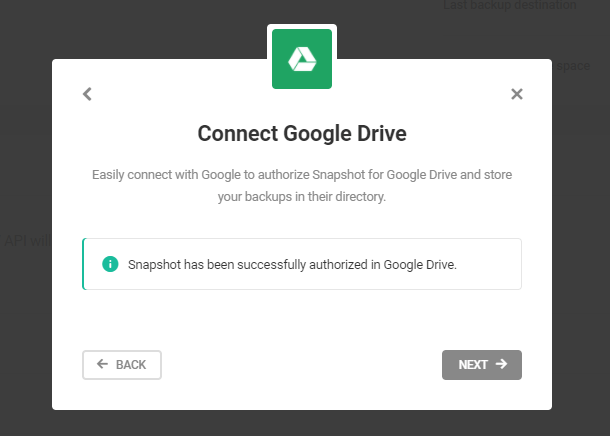
Once the connection has been established, you will see a confirmation modal where you can click Next to continue setting up your destination.
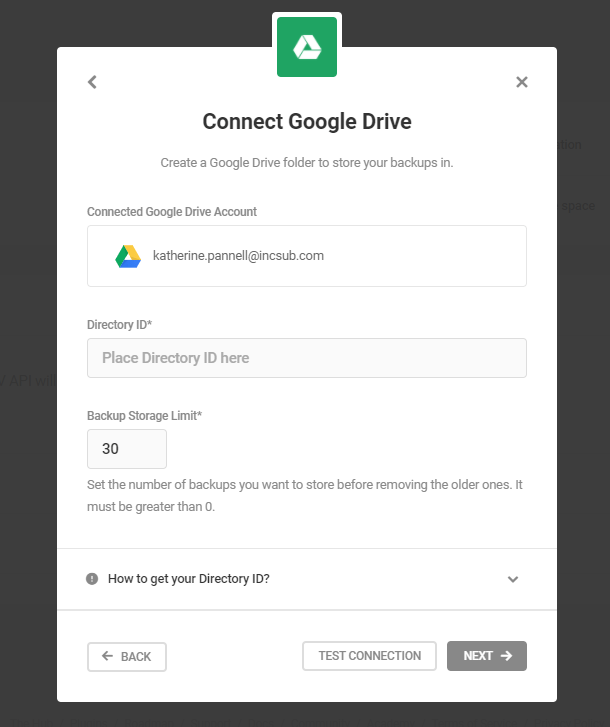
All that is required now is for you to provide your Directory ID. If you are unsure of where to find your Directory ID, you can refer to our guide on How to find your Directory ID. You can also adjust your Storage Limit, which will set the maximum number of backups that will be stored before new backups start replacing older ones. When you’re ready, click Next.
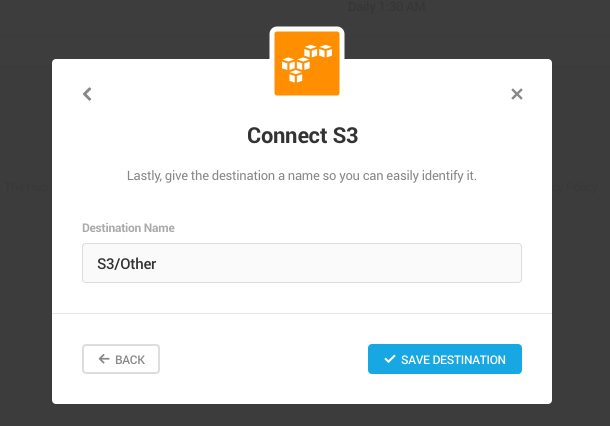
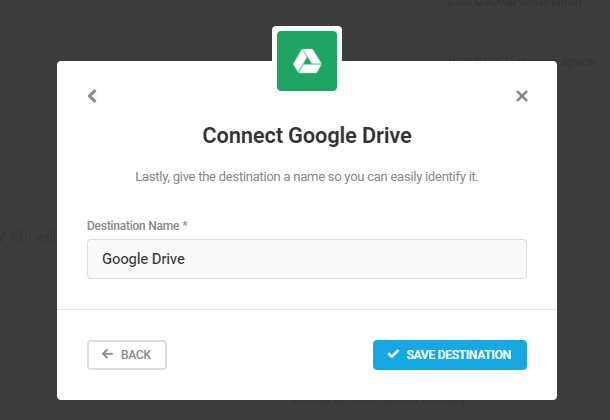
The last step is to give your destination a name to help you identify it among your other destinations. When you’re done, click Save Destination to complete the process.
How to find your Directory ID
- Visit Google Drive and sign in to your account.
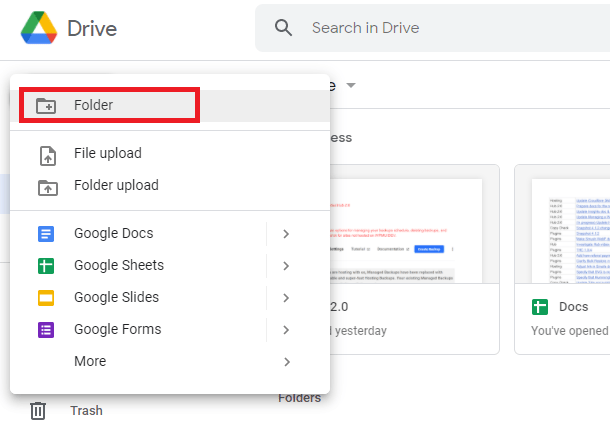
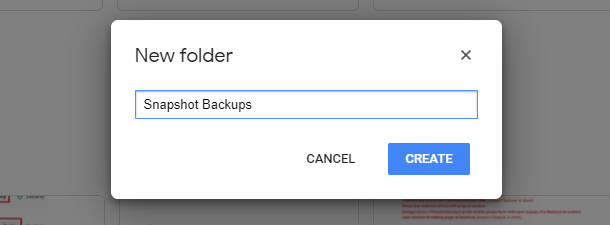
Snapshot will send your backup copies to a folder of your choice which means that if you don’t already have a folder for this, you will need to create one. You can create one by clicking New in the top left-hand corner and selecting Folder.
Name the folder and click Create.
Navigate to your folder and copy the Directory ID from the URL. This is the path at the end of the URL. In the example below, the full URL is https://drive.google.com/drive/folders/1IUupJopejLS4Piauv9yB_p9nz3ZK0ggy which means that the Directory ID would be 1IUupJopejLS4Piauv9yB_p9nz3ZK0ggy.
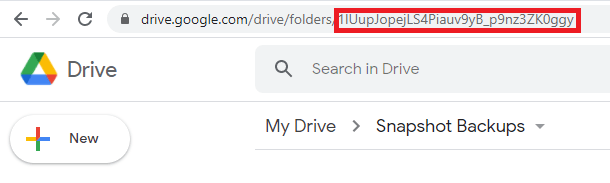
This is the Directory ID that you can use to complete your Google Drive destination setup.
Snapshot will create a child-folder inside your destination folder with the name of the site you connect, and store that site’s backups in that folder. Do not use any such auto-created child-folder as the Destination ID for a different site’s backups, because the API will overwrite the contents inside with new backups from the site it was created for. Also, do not delete or rename these auto-created child-folders as that will cause subsequent backups to fail.
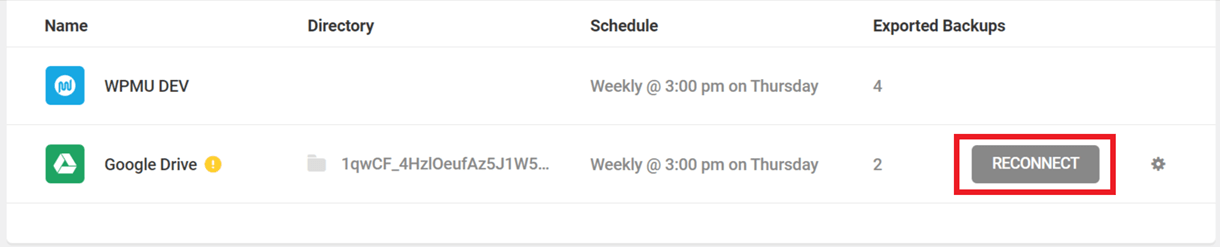
Google Drive Export Fails
If the export to Google Drive is unsuccessful, you can either navigate to the Destinations page and click the Reconnect button next to the Google Drive destination, or click the Reconnect button on the Dashboard page to reauthenticate your Google Drive destination.
De-authorize Google Drive Account
If you decide at any point that you no longer want WPMU DEV to be linked to your Google Drive, you can choose to de-authorize the account. This is stipulated in our Privacy Policy document, which you may want to read through if you have any questions regarding the use of your data with Snapshot.
De-authorizing your Google Drive account will mean that any Google Drive destinations on all of your sites will no longer work. For this reason, we advise that you only de-authorize your account if you are sure that you do not want Google Drive to be connected to Snapshot.
To remove WPMU DEV access, follow these steps:
- Go to your Google Account and navigate to the Security section.
Scroll down to Third-party apps with account access and click Manage third-party access.
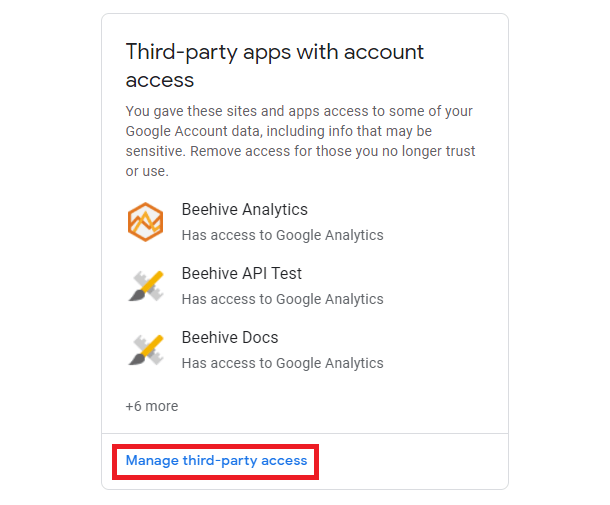
Select Snapshot from your list of third-party apps and click Remove Access.
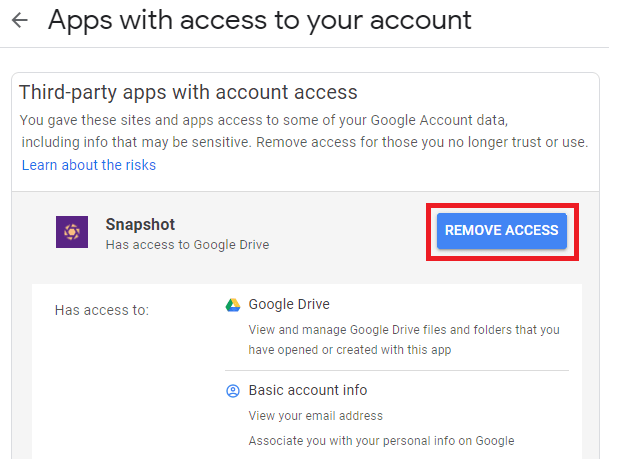
You will then be asked to confirm the removal of access. Click Ok to proceed or click Cancel to exit without making any changes.
12.6.4 Dropbox
Link to chapter 6To add a Dropbox account as a Snapshot destination, first click Add Destination.
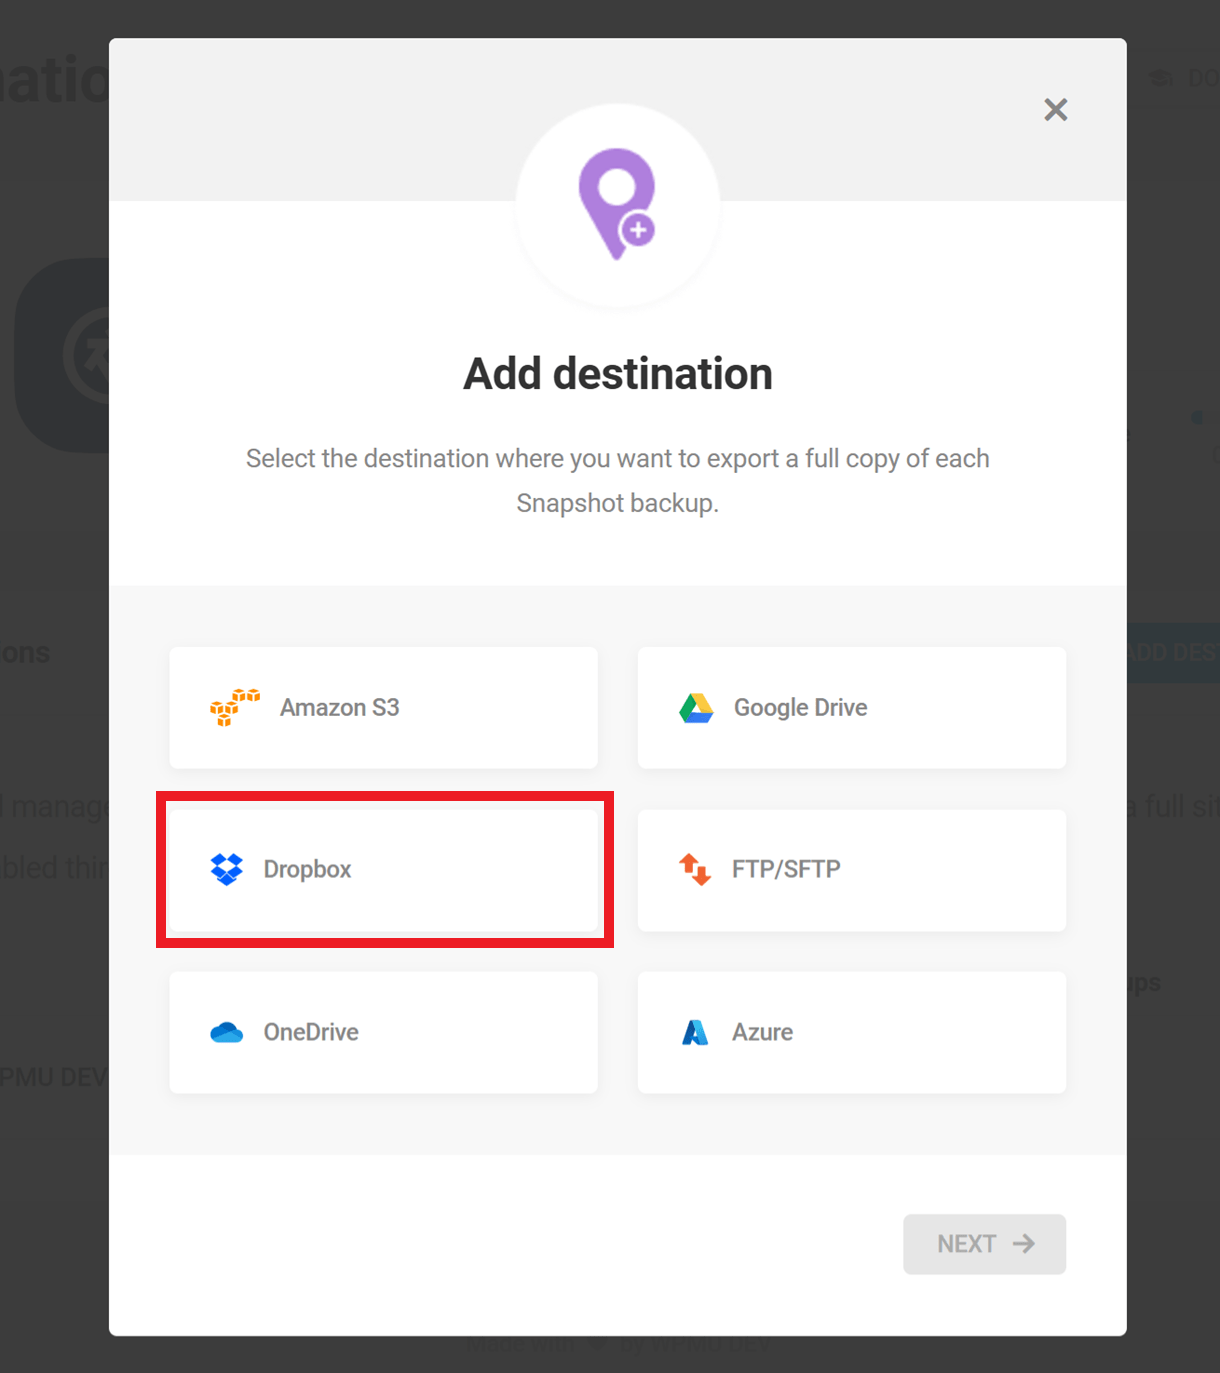
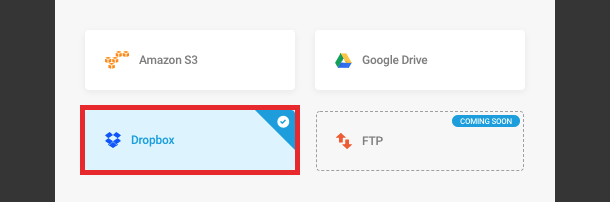
Select Dropbox from the list of destinations, and click Next.
Click Authenticate to be redirected to the Dropbox authorization page.
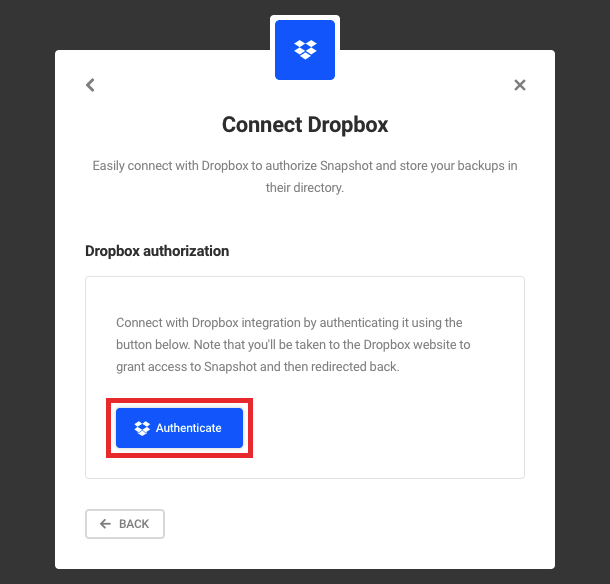
Sign in with your Dropbox account credentials, or create a new account.
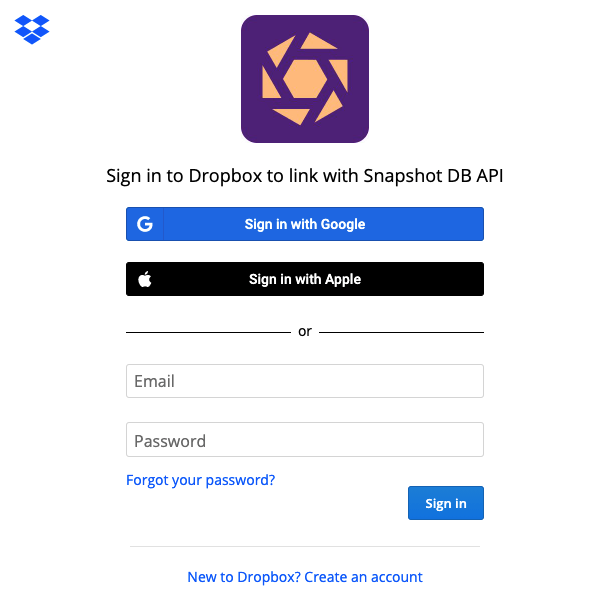
When prompted, click Allow to allow the Snapshot DB API to connect to your Dropbox account.

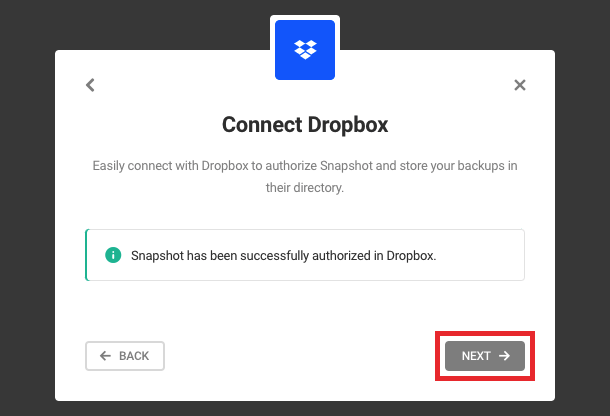
Once the connection has been established, you will be redirected back to Snapshot. Click Next to proceed.
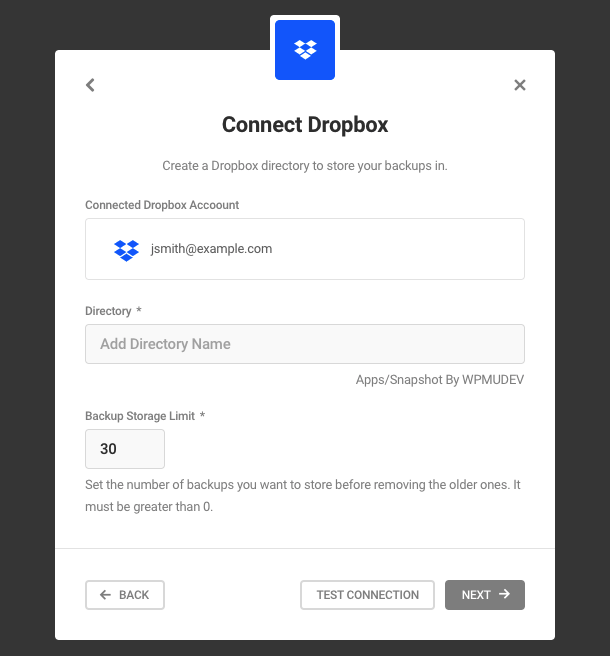
Enter a name for the Dropbox directory to which Snapshot backups will be saved, and the maximum number of backups that should be saved to Dropbox before older backups are removed. Click Next to proceed.
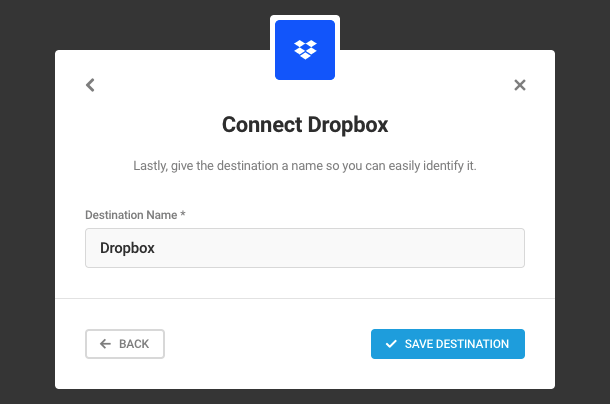
Finally, enter an identifying name for the new Dropbox destination, and click Save Destination to complete the connection process.
12.6.5 OneDrive
Link to chapter 6Once you have clicked Add Destination from your Destinations tab, you will need to select OneDrive in the destination modal and then click Next.
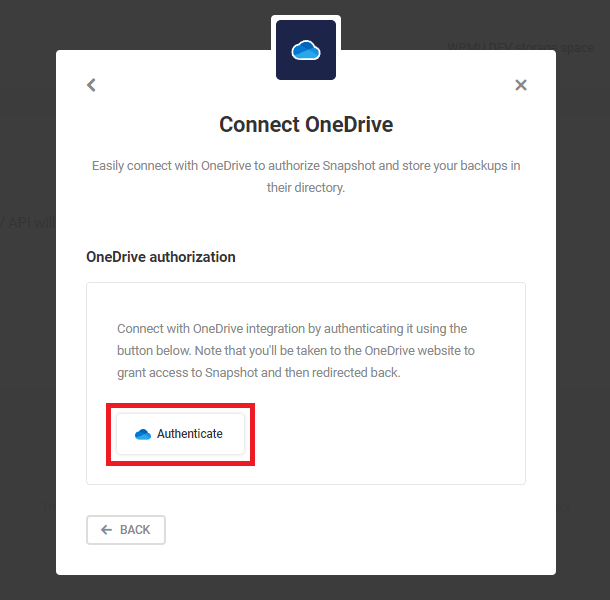
Click Authenticate to be redirected to the OneDrive authorization page.
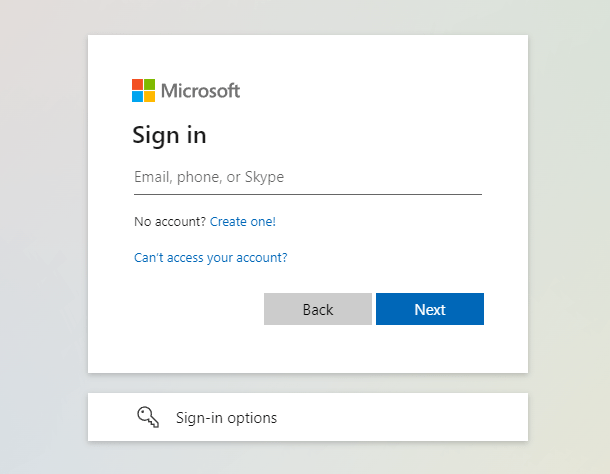
Sign in with your Microsoft account credentials, or create a new account.
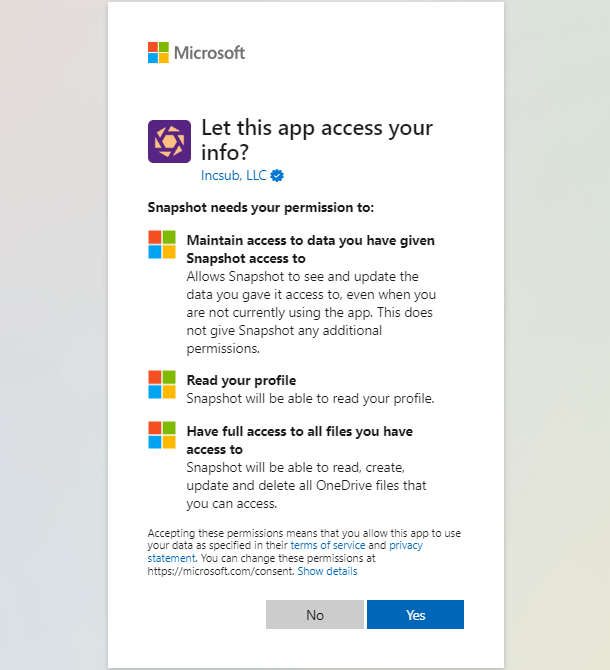
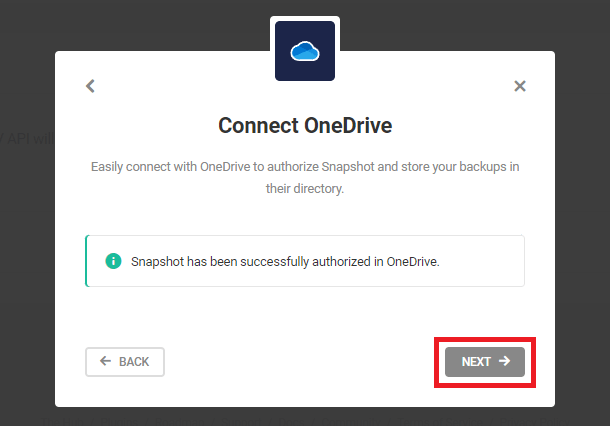
When prompted, click Yes so that Snapshot can access your OneDrive account to store copies of your backups.
Once the connection has been established, you will see a confirmation modal where you can click Next to continue setting up your destination.
All that is required now is for you to provide the directory path where you want to store your site backups. If you leave the Directory path field empty, Snapshot will automatically create a default directory named SnapshotBackups. In case you want to create a new directory with the same name you specified in the Directory path field, check the box to Let Snapshot create the above directory path if it doesn’t exist.
You can also adjust your Storage Limit, which will set the maximum number of backups that will be stored before new backups start replacing older ones. When you’re ready, click Next.
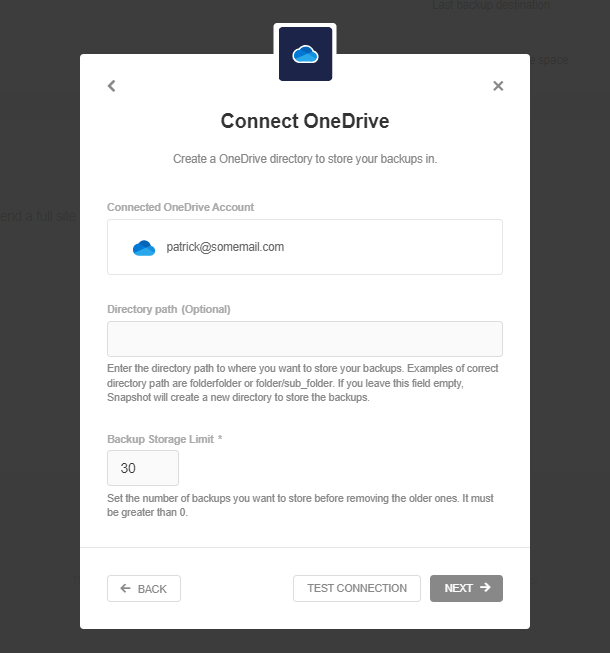
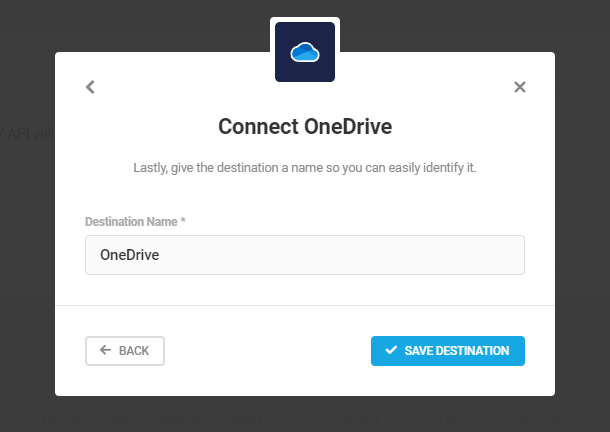
The last step is to give your destination a name to help you identify it among your other destinations. When you’re done, click Save Destination to complete the process.
12.6.6 FTP/SFTP
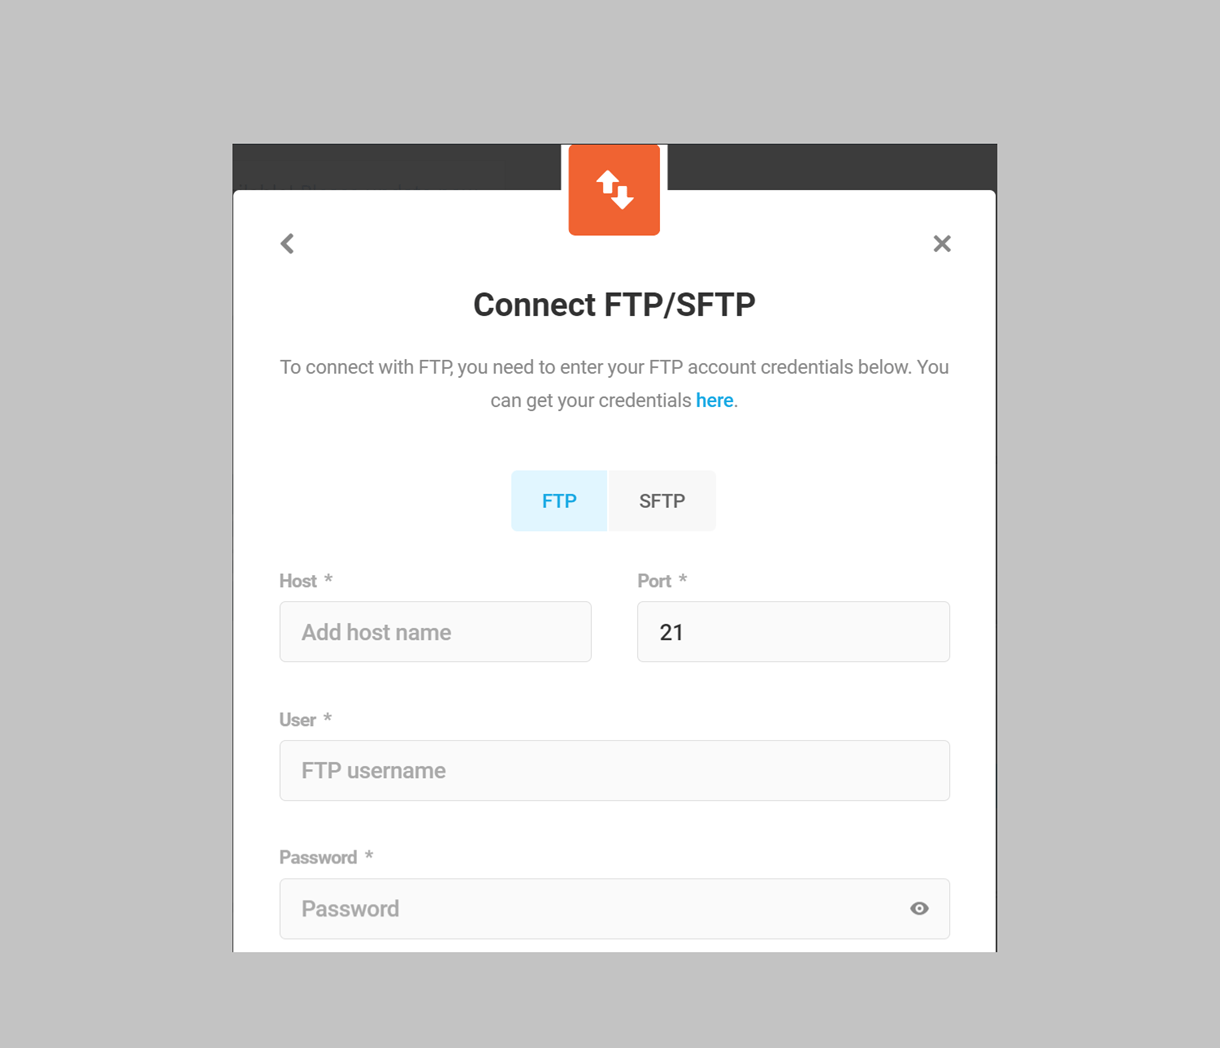
Link to chapter 6After clicking Add Destination from your Destinations tab, select FTP/SFTP in the destination modal and then click Next.
In the 1st part of the form that appears, select the protocol required by your host – FTP or SFTP – then enter the details needed to connect to your server.
- Host – The hostname provided by your host, for example: ftp.somesite.tld
- Port – Defaults to 21 for FTP or 22 for SFTP. Change if a specific port is provided by your host.
- User – The username you chose when creating your FTP account.
- Password – The password you chose when creating your FTP account.
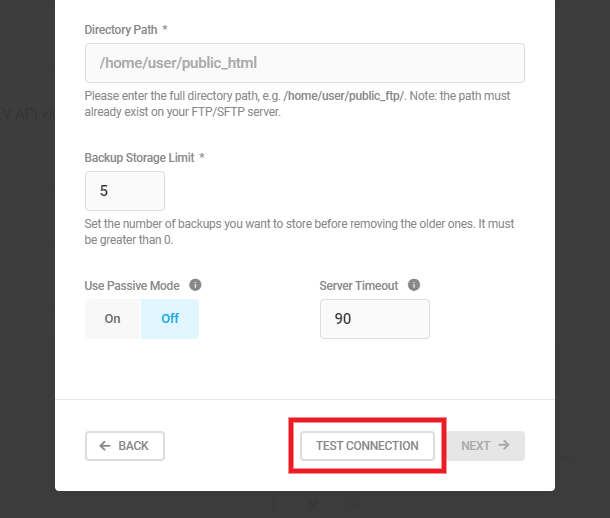
In the 2nd part of the form, you’ll specify the following information:
- Directory Path – The location on your FTP server where you want your backups to be stored.
- Backup Storage Limit – The maximum number of backups that will be stored before cycling out the oldest ones. For example, if you set this to 10 and run an 11th backup, the oldest one will be deleted from your FTP destination and replaced with the newest one.
- Use Passive Mode – If you are configuring a plain FTP connection, you can set this to On if needed (default is Off). Note that this option does not appear for SFTP connections.
- Server Timeout – Increase this for slow connections if needed.
Snapshot will create a folder with your site name in your specified Directory Path location, and all backups for the site will be stored there. Note that the directory path you specify must already exist on your server.
For example, if you set the Directory Path to the root of your WordPress install, the backup location will be created there. Ideally, you would store backups outside of your WordPress install or on a different server though; we have just provided this example as an illustration.
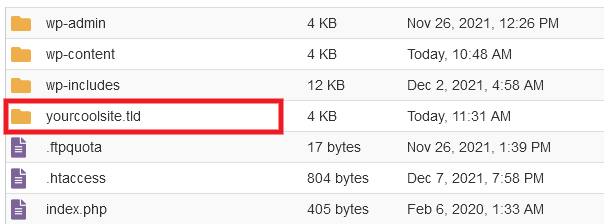
Note that if you use the same location as the Snapshot FTP destination for multiple sites, each site will have its own folder with the corresponding site name.
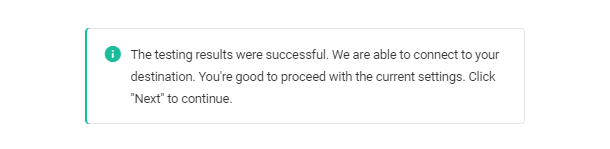
When you’ve entered all the information, click the Test Connection button. You should see a message appear at the top of the modal to confirm the connection is successful.
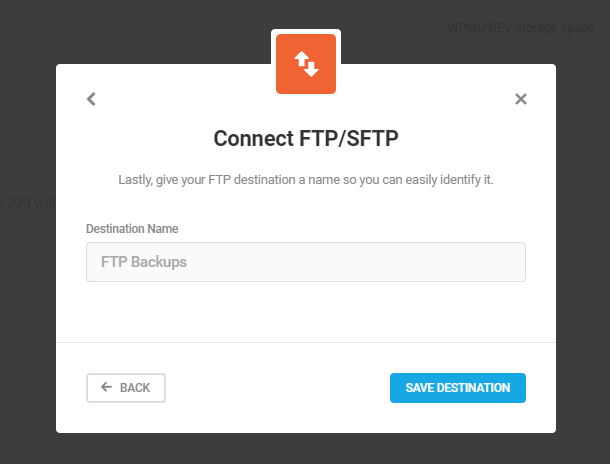
Click Next, and enter a Name for your destination so you can easily identify it. Then click Save Destination to finish.
12.6.7 Azure
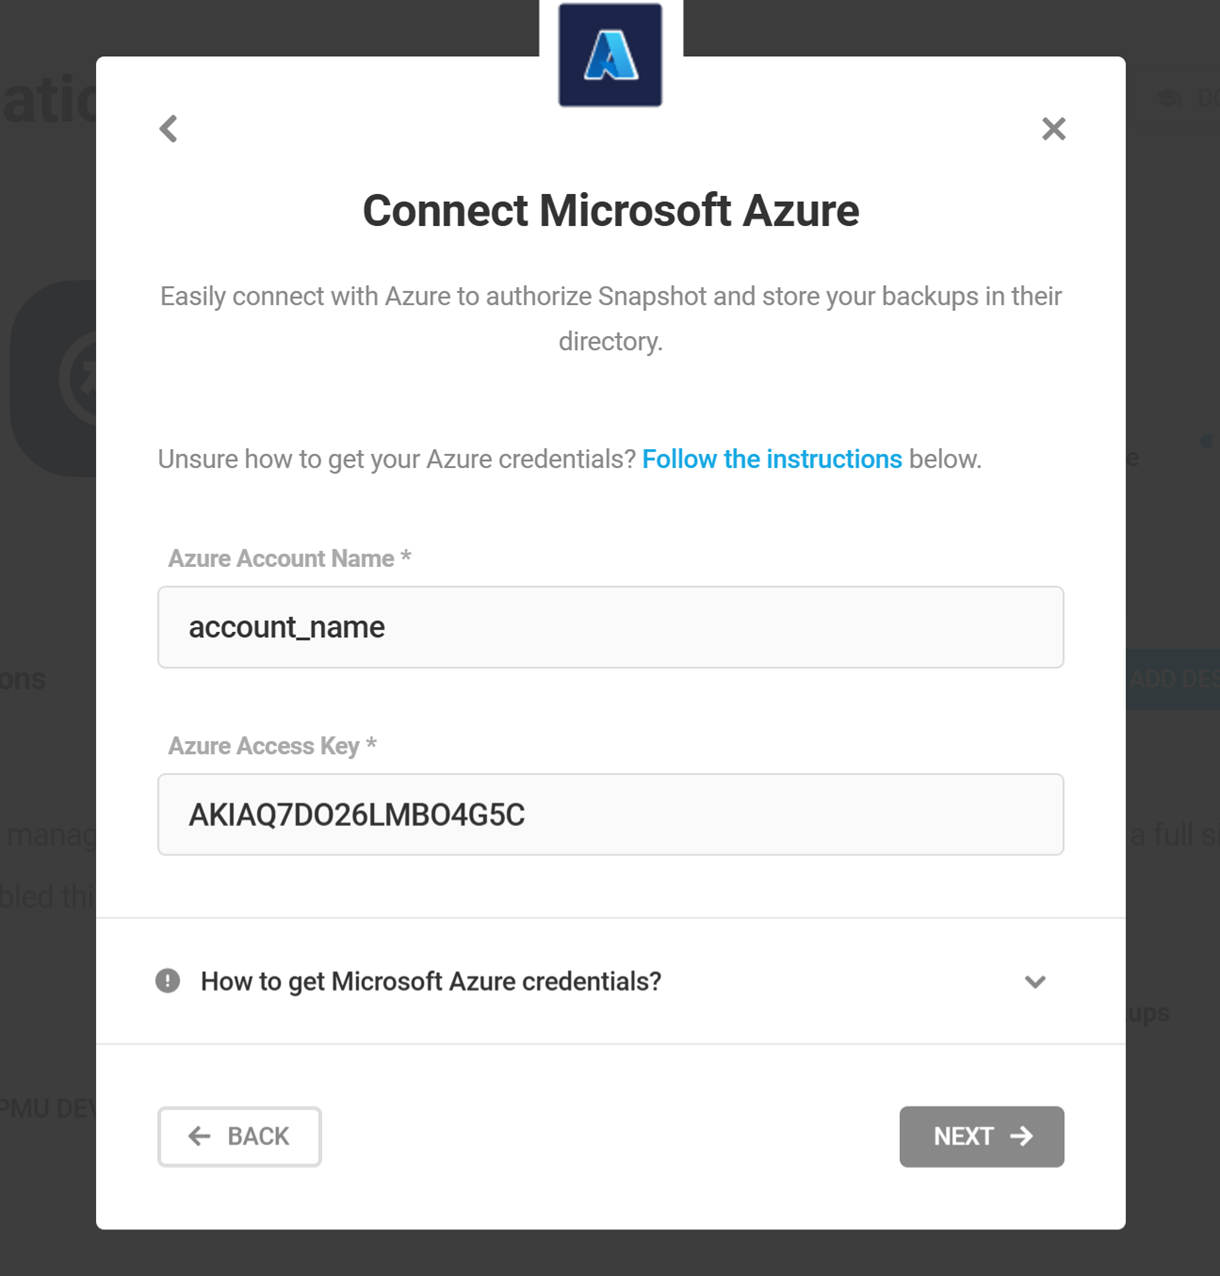
Link to chapter 6After clicking Add Destination, a modal will pop up with the backup destination options. Ensure that Azure is selected and click Next.
In the modal that pops up, enter your Azure account name and access key.
To find the access key
Sign in to your Microsoft Azure account as the root user.
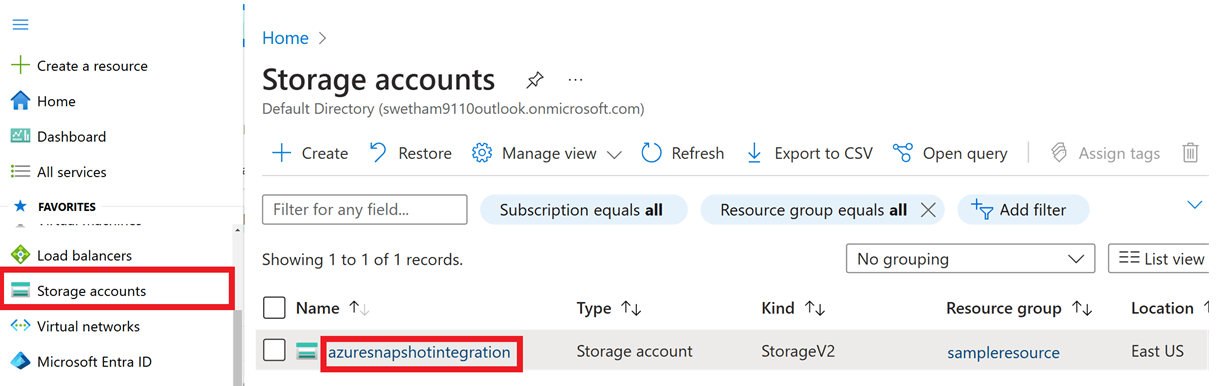
In the dashboard, click on the Storage Accounts option located in the left-hand menu.
Next, choose the Storage account from which you wish to obtain the credentials. If you don’t have an existing storage account, create a new one.
In the menu, under the Security + Networking section click Access keys.
Your account access keys will be displayed along with the name of your Azure Storage Account.
Click on Show to reveal your access keys.
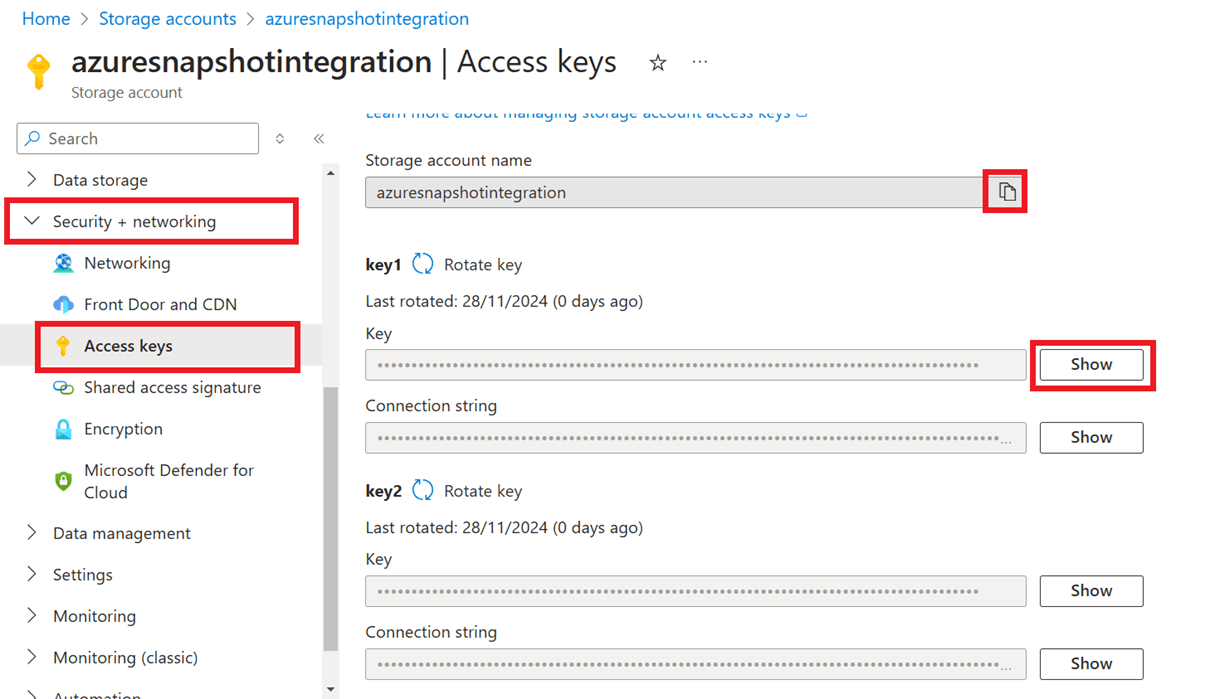
Copy the storage account name and access key.
Enter the account name and the access key in the respective fields in the modal and click Next.
If you have already set up an Azure container, select the Use Existing Container option. From the drop-down menu, choose your container and specify the optional folder path and storage limit.
However, if you haven’t set up a container or if you prefer to create a new Azure container, click the Create a New Container option.
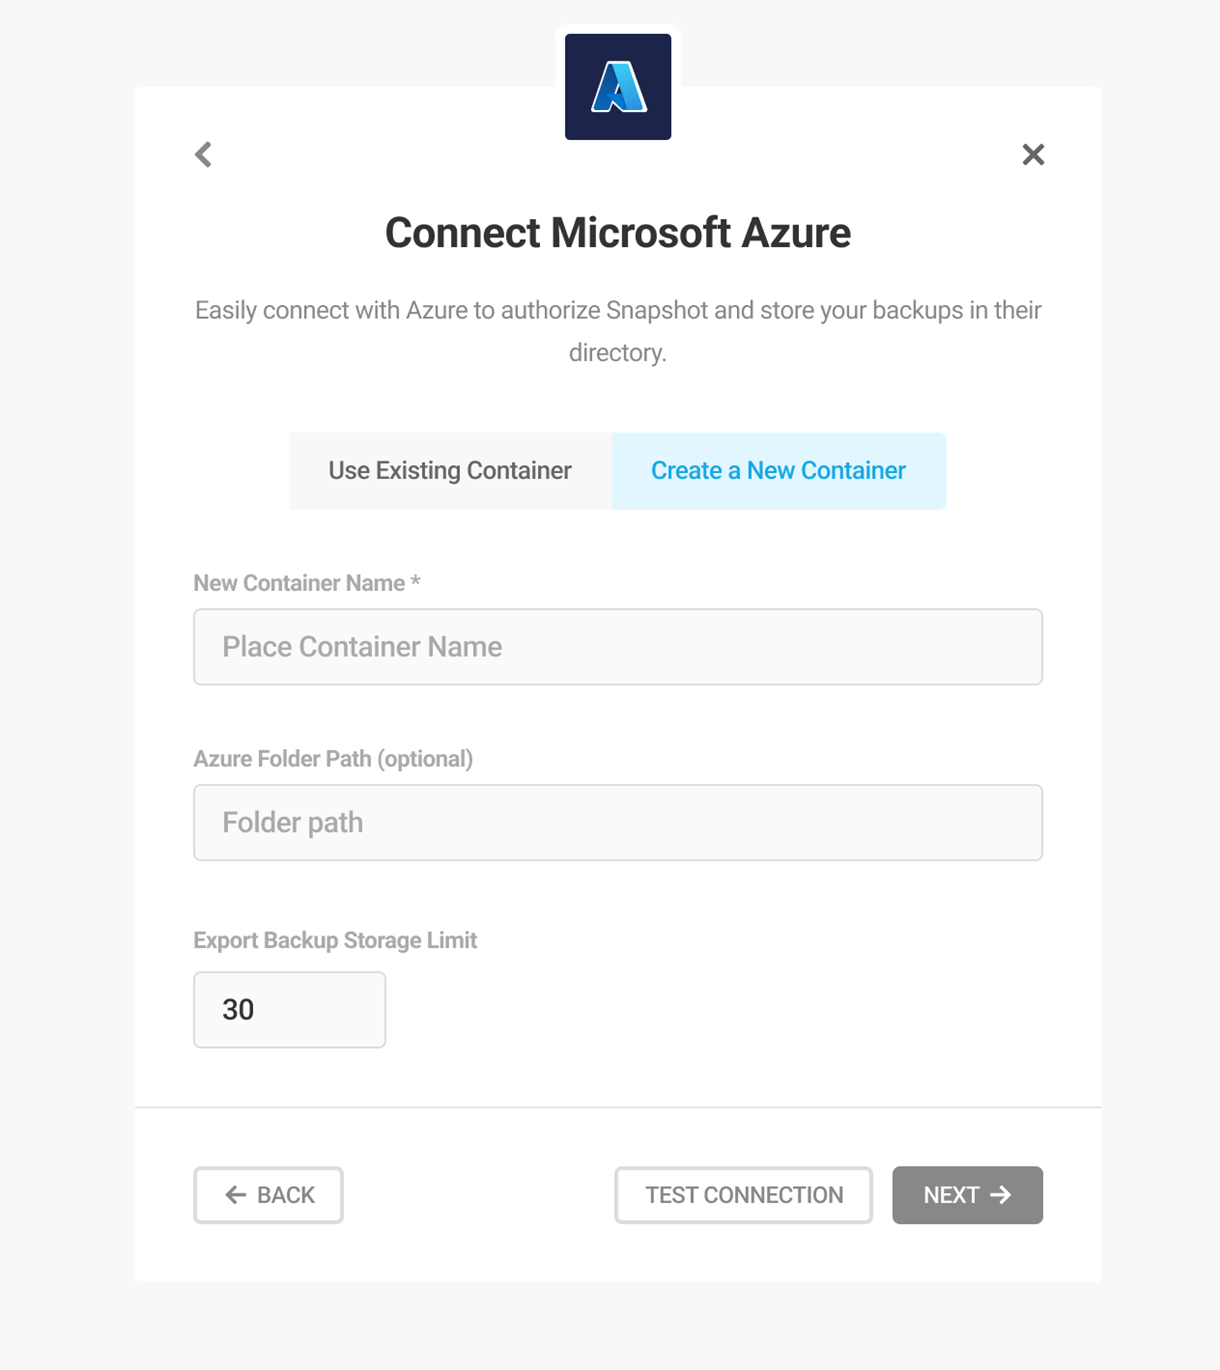
Enter the container name and optional folder path and provide the backup storage limit.
Click Test Connection to ensure the Azure connection has been established successfully. Click Next.
Provide a name for the destination and click Save Destination.
If you encounter any error during the process, click Re-check Setup to set up the account configurations again.
12.7 Settings
Copy chapter anchor to clipboardThe Settings screen is where you will find your Snapshot API Key, Site ID, options to manage what happens to content if Snapshot is deleted, and gives you the ability to reset your plugin settings.
12.7.1 General
Link to chapter 7The General tab is basic information about your Snapshot connection, including your Snapshot API Key that connects to your cloud storage and your website ID.
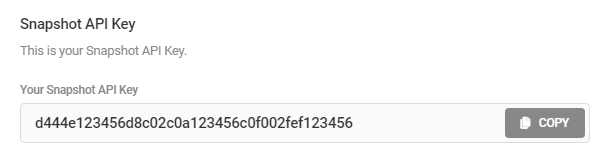
Snapshot API Key
This unique key is used to connect Snapshot on your site with WPMU DEV cloud storage. Click the copy button to copy the Snapshot API key to your clipboard if needed.
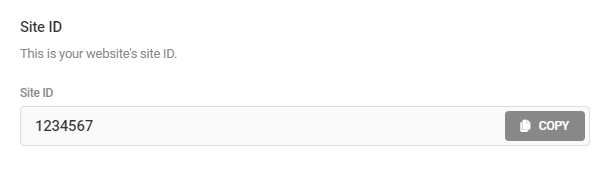
Site ID
This is your website’s WPMU DEV ID. Click the copy button to copy the Snapshot API key to your clipboard if needed.
12.7.2 Configs
Link to chapter 7The configs module allows you to save your Snapshot configurations and apply them to your current site or any of your other sites in just a few clicks.
To help you get started, we provide a Basic Config denoted with a blue checkmark. It includes the recommended settings that are ideal for fresh installations. Applying the Basic Config will configure Snapshot as follows:
- Schedule – Weekly @ 12:00 am on Sunday
- Region – US
- Storage Limit – 5
- Notifications – Enabled
- Exclusions – Enabled
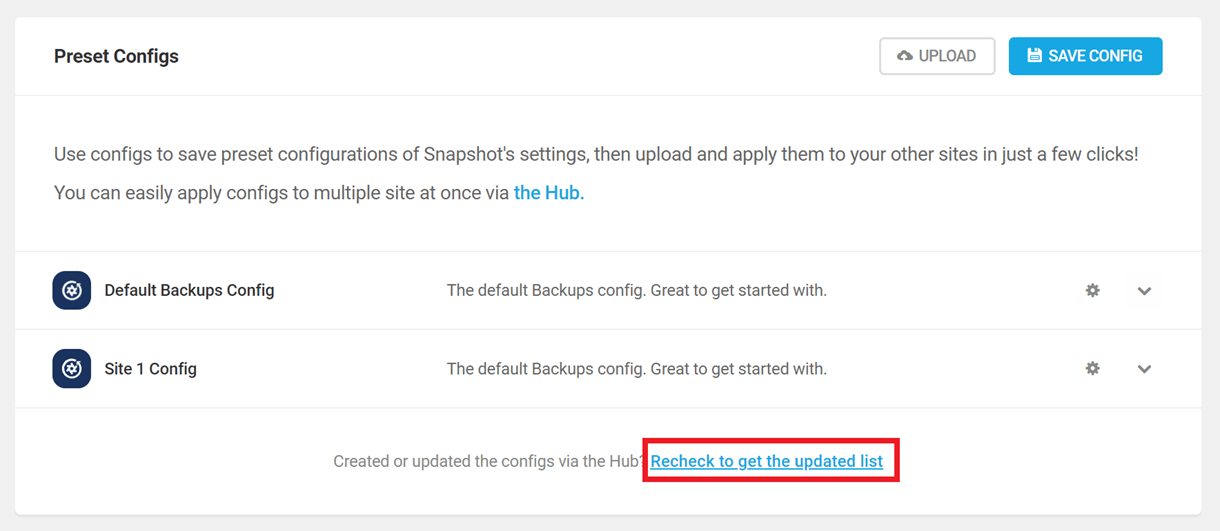
Save a Configuration
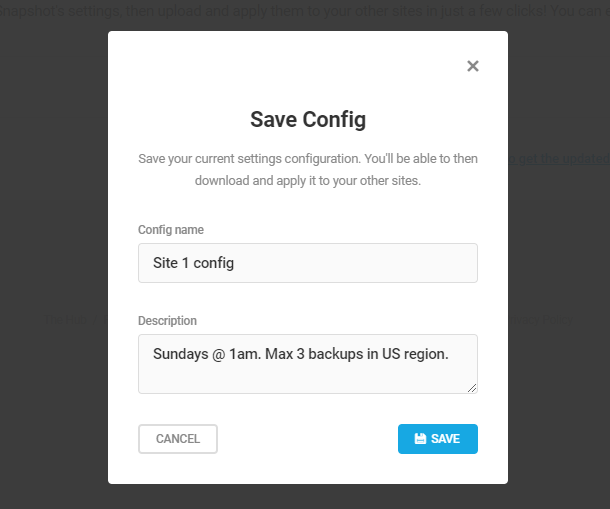
To save your current configuration, click Save Config.

Then, enter the name and optional description you want to use to identify your configuration and click Save or click Cancel to exit without saving.
You can save an unlimited number of configurations so there is no need to be frugal with how many configurations you save for your sites. All configurations will be listed alphabetically according to the names you set.
If you want to view more information about your saved configuration, click the arrow to reveal a list showing you which modules are active for that configuration.
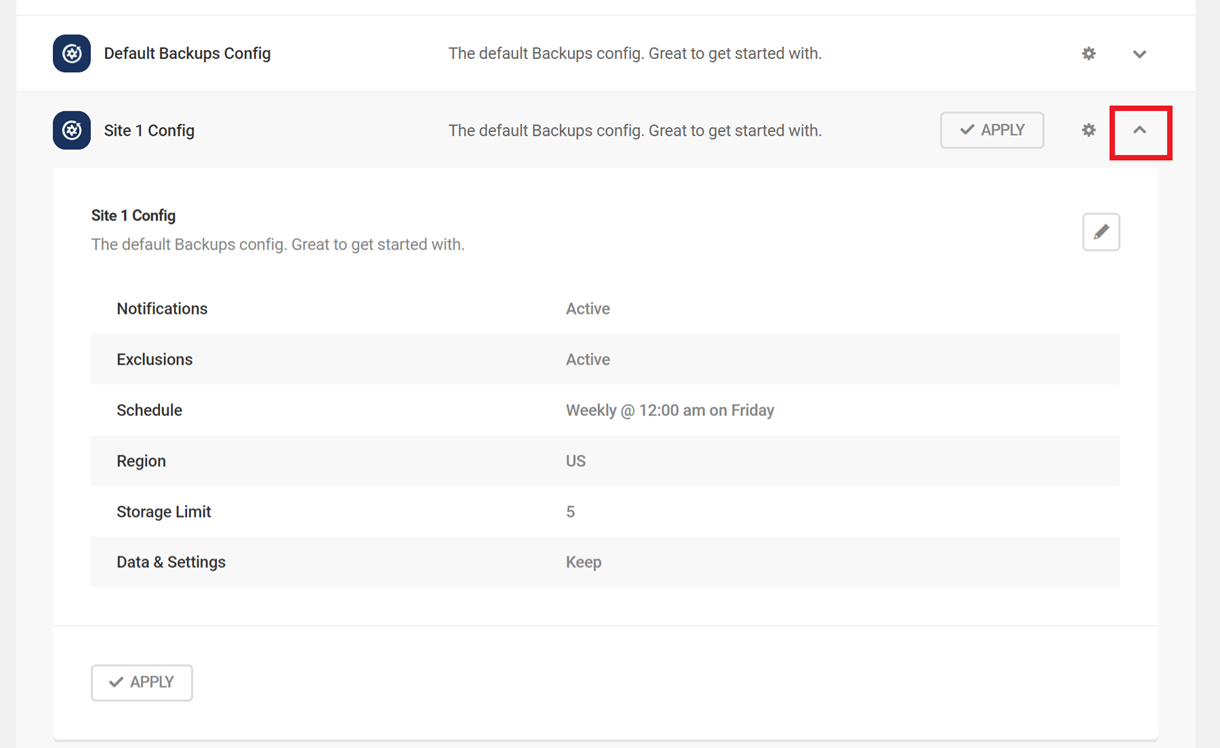
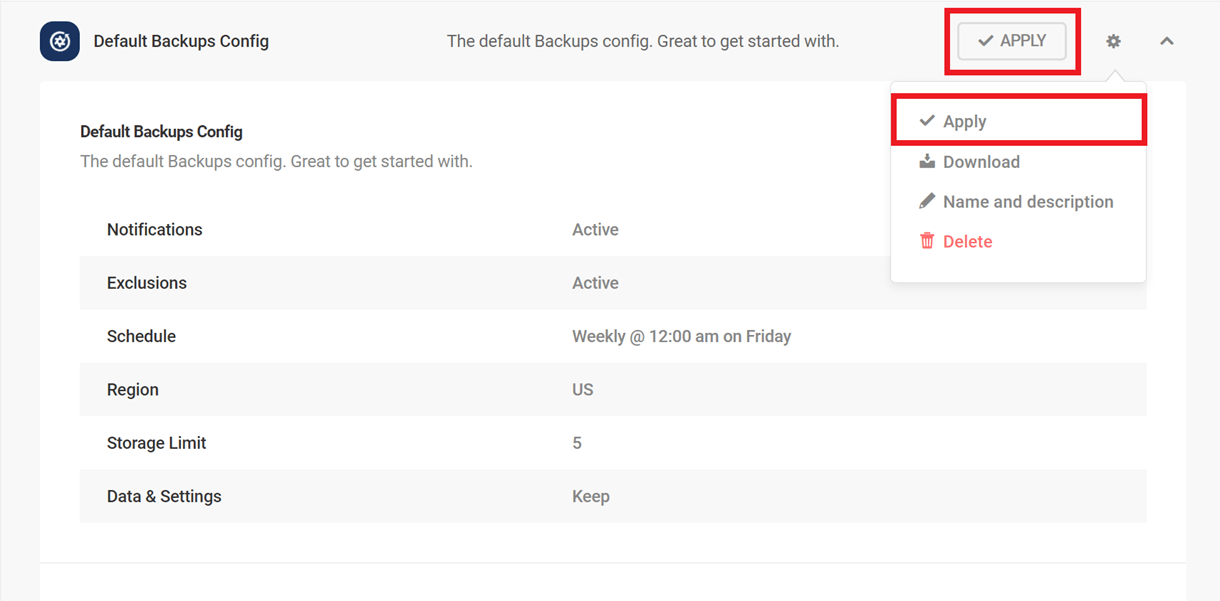
To make changes to a saved configuration, click the gear icon. The available actions are:
- Apply – Apply the saved configuration to this Snapshot installation.
- Download – Download the saved configuration as a .json file.
- Name & Description – Edit the name and description for the saved configuration.
- Delete – Permanently delete the saved configuration.

Apply a Configuration
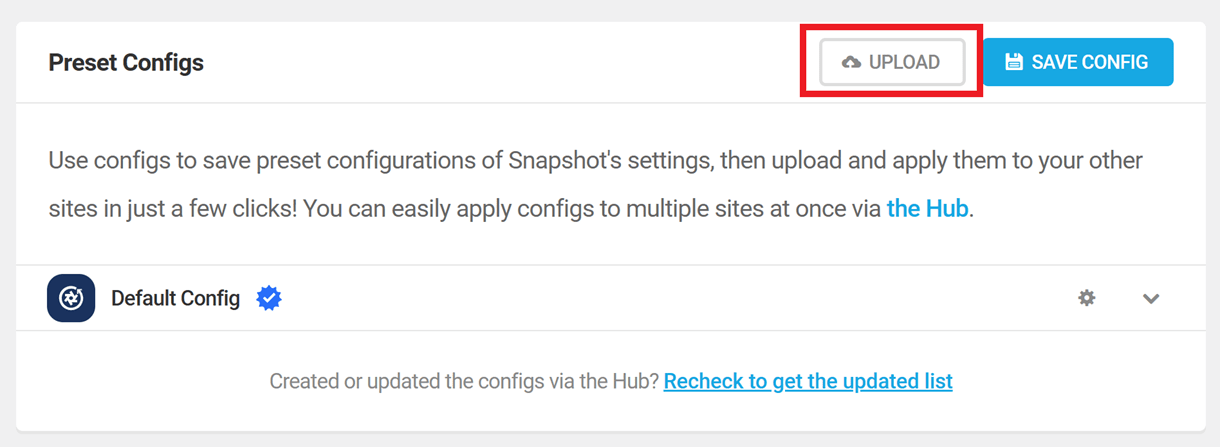
If you have downloaded a configuration from another site and you want to apply it to your current one, click Upload at the top of the Configs screen, and select the relevant .json file from your computer. Snapshot will import your settings and add the imported config to your list of Preset Configs.
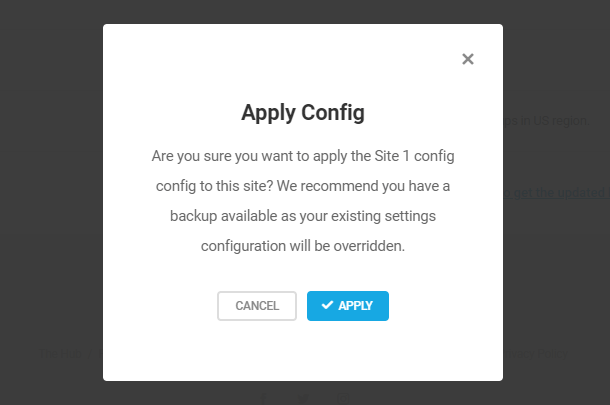
You will be asked to confirm the configuration application to the site. Click Apply once again to follow through with applying the chosen configuration or click Cancel to exit without changing any of your current Snapshot settings.
You can also apply any existing config to your site by hovering your mouse over the one you want and clicking on the Apply button, or by clicking on the gear icon and then selecting Apply from the options menu.
If the storage region in the config you select is different than the one you have currently set in Snapshot Backups > Settings, applying the config will delete all existing backups. An alert will appear in the confirmation modal to remind you of this.

Sync with the Hub
Snapshot configurations will automatically be synced with the Hub. Synced configs can be accessed and applied directly from the Config or Backups modules in the Hub, or from the Snapshot installation of any of your sites.
If a new config created in the Hub doesn’t appear immediately in the Snapshot Settings module, click Recheck to get the updated list to refresh your data.
Exceptions
It’s important to note that the following settings & options cannot be exported or imported from one site to another with a custom config as they must be configured individually on each site:
- Destinations – Any Destinations you may have set up will not be included in the config, and any existing destinations will not be affected when you apply a config to a site.
12.7.3 Password Protection
Link to chapter 7If your site is hosted by us, this feature will not appear as it is not required. Snapshot can back up your live and staging sites even when password protection is enabled on the site in your Hub.
The Snapshot API cannot connect to a 3rd-party hosted site to perform its backup tasks if that site is password-protected.
If your site is password-protected, you’ll see an alert pop up in your admin to remind you to add your credentials so the API can access the site.
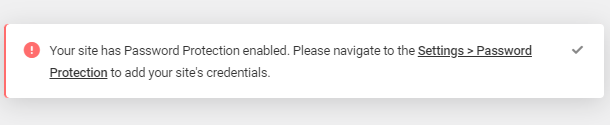
To get that done, go to Snapshot > Settings > Password Protection.
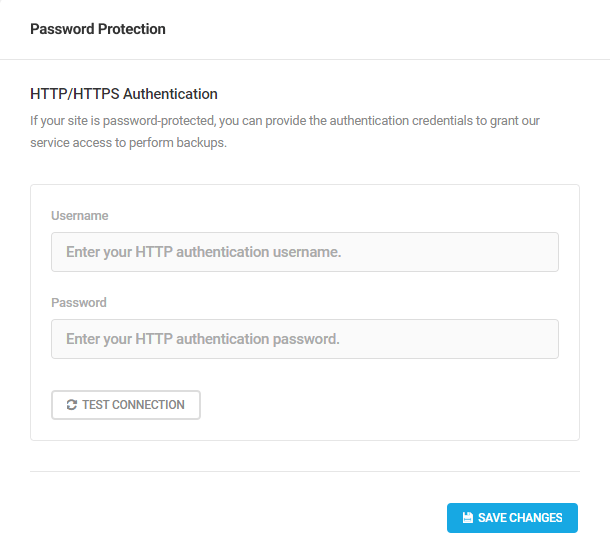
Enter your HTTP/HTTPS Authentication Username and Password in the fields provided, and click the Test Connection button.
Once you see a success message appear at the top of the screen, click Save Changes.
12.7.4 Data & Settings
Link to chapter 7The Data & Settings tab is where you manage how Snapshot stores and handles information created by the plugin.
Uninstall
The Uninstall module allows you to configure what you do with backups when Snapshot is uninstalled. You can choose to either Keep or Remove backups.
Be sure and click the “Save Changes” button after making changes.

Note: Selecting the Remove option here will not restore the default storage limit nor will it delete your connected destinations. Please be sure to either make those changes manually or use the Reset Settings option below before uninstalling the plugin.
Delete Logs
If you need to delete the backup logs from your server, click the Delete button here, and confirm the action in the modal that pops open.

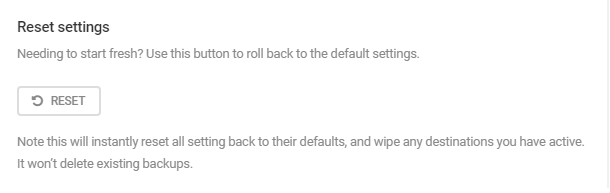
Reset Settings
Use the Reset button in the Reset Settings module to instantly reset all settings back to their defaults, and remove any destinations you have active. This option will not delete existing backups though.
Note this will also re-launch the Setup Wizard to help you reconfigure the plugin.
12.8 Tutorials
Copy chapter anchor to clipboardThis module gives you direct access to Snapshot tutorials that may be extremely beneficial in helping you get the most out of the plugin. Click on any of the articles to read the full blog post or click View All to view all WPMU DEV tutorials.
12.9 Incremental Backups
Copy chapter anchor to clipboardSnapshot cloud backups are incremental. This means the only time Snapshot iterates over all files and db tables is the very first backup (unless a site is changed drastically between backups). The first backup in each site (manual or scheduled) is a full-site backup. We call that the base backup. Note that if an existing backup schedule is modified, a new base backup will be taken. All later backups — both scheduled and manual — are incremental backups, and understanding what that means is important.
In simplest terms, an incremental backup copies and stores only data that has been changed since the last backup. When you look at your backup list and see multiple backups created during the past several days, you are not looking at multiple copies of your full site, but rather the incremental changes that have been backed up since the last full backup.
Incremental backups are superior to traditional backups in a number of ways; perhaps most importantly, they are small and fast. This allows you to backup your site more frequently.
Example: A 500MB site was backed up last night and today you added 5MB of data. You want to protect the new data, but why backup the entire site when 99% of its data hasn’t changed? An incremental backup only includes the new data, will have the smallest possible impact on your storage capacity, has a lower impact on server load, and is much faster.
When a backup is restored or downloaded, these incremental backups are merged with the full backup (base backup) to produce an up-to-date copy of the site. You can download the exported up-to-date backup from the Backups page and also from the Hub.
As noted above, Snapshot has a 30-day backup rotation schedule and a 50-day time to expiry. When the oldest backup is removed from our storage, Snapshot automatically converts the next oldest backup to the new base backup. No action is required on your part.
12.10 FAQ
Copy chapter anchor to clipboardAre 3rd-party destinations available?
Yes, Snapshot v4 includes support for the following destinations. See the Destinations chapter above for details.
- Amazon S3 (and S3 Compatible Storage)
- Google Drive
- Dropbox
- FTP/SFTP
- OneDrive
- Azure
Is Snapshot 4 compatible with WordPress multisite?
Yes! Snapshot 4 is completely compatible with WordPress multisite installations, so you can be sure your entire network is covered.
Does Snapshot 4 support subsite backups?
The initial release of Snapshot 4 does not support subsite backups, and this feature will be considered for future releases. Currently, you can create and restore backups for the entire network, as well as restore backups of any of the subsites within the network.
Does Snapshot 4 support partial backups?
The initial release of Snapshot 4 does not support partial backups, although this feature is slated for a future release.
Do I have to update to PHP 7.0 or higher?
Yes. Snapshot 4 requires PHP 7.0 or higher. If you are running an earlier version of PHP and do not wish to update to 7.0 or higher, you should not upgrade to Snapshot 4.
Does Snapshot 4 support white label?
Yes, Snapshot 4 can be white labeled via the features found in WPMU DEV Dashboard > White Label.
Can I download backups directly?
Yes, after you click “Download” we’ll send you a secure download link via email to your WPMU DEV account email address.
Can I change the email where backups are sent?
Yes you can. See Export a Backup above for details.
Can I store my backups locally?
Snapshot version 4 will not have a backup to local feature. This is by design, and there is not a plan to add this feature. But backups can be stored locally using the FTP/SFTP destination.
Where are my backups specifically stored?
Snapshot 4 lets you choose between two data centers located in the United States (east N. Virginia) or in Europe (Ireland).
Can I use Snapshot 4 to migrate my site?
Snapshot 4 was specifically created to be a backup plugin, and does not include any functionality that may be required for site migration. For example, if you restore a backup to a different server and domain, you would likely need to perform manual search and replace operations in the database to update URLs in several tables. If you need to migrate a site, we recommend our Shipper Pro plugin, or the migration options in your Hub if you’re migrating to WPMU DEV hosting.
How are my Snapshot backups secured?
The WPMU DEV Cloud Backups are protected by server-side encryption. When a backup file is saved, it is encrypted at the object level and decrypted for you when you access it through the Hub or via the plugin’s back end.
Do I need to connect my site to the Hub?
Yes, for Snapshot to work, your site needs to be connected to the Hub via the WPMU DEV Dashboard installed on the site.
Is SSL required?
Yes, Snapshot 4 requires your website to be publicly accessible on the internet over a secure SSL connection (https).
Does Snapshot work on localhost?
As noted above, Snapshot requires a connection to the WPMU DEV API, and the site must be publicly accessible to create backups. However, you can use the Restore With An Installer File method on localhost to restore your backups without the need for a connection to the WPMU DEV API or Dashboard.
What is included in the backups?
Snapshot begins iterating files at the WordPress root (usually public_html). Everything in that directory is iterated and included in the backup. Example: If your website has an abc/public_html/wp-config.php, an abc/public_html/exampleA path will be included in the backup. An abc/exampleB file path will not be included the backup. Snapshot will backup any file added to your filesystem no matter how it was added – whether uploaded through the WP admin page, FTP/SFTP, SSH, or another method. If a file exists on the server, it will be iterated and included in the backup.
Does Snapshot work on Windows hosts?
Snapshot does not currently have support for websites on a host using the Windows operating system.
12.11 Troubleshoot
Copy chapter anchor to clipboardOur awesome support team is always on call, should you need any help. However, sometimes it is helpful to troubleshoot issues yourself first. Below is a list of some known troubleshooting cases and their appropriate responses to help you along.
Many of the solutions to the issues mentioned in this section will require you to access your wp-config or .htaccess file. If you are new to making adjustments to these files, we recommend reading Editing Your WordPress wp-config File and Editing Your .htaccess File for more information.
12.11.1 Backup Failed
Link to chapter 11Insufficient Storage
Message in Snapshot log: snapshot_failed_storage_limit
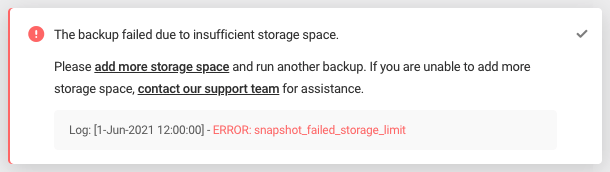
If you receive the snapshot_failed_storage_limit message, you may be out of storage on the WPMU DEV Cloud. In these cases, try to free up some space for the new backup or consider upgrading your WPMU DEV Cloud storage.
File Error
Message in Snapshot log: snapshot_failed_FetchFileslist
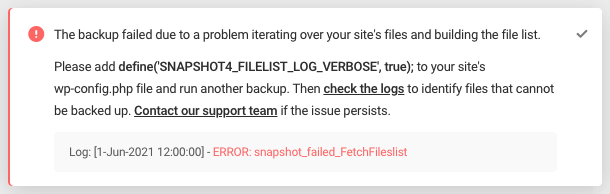
Another possible issue for a failed backup is the snapshot_failed_FetchFileslist error. To fix this, follow these steps:
Step 1: Add define('SNAPSHOT4_FILELIST_LOG_VERBOSE', true); to the wp-config.php file right above the *That's all, stop editing! Happy publishing* line.
Step 2: Run a manual backup and check the log file to see where the backup failed. Exclude the reported file or folder.
You may also need to increase the memory limit and execution time to these values:
max_execution_time = 600
memory_limit = 512M
This can be added to your php.ini.
Sometimes the standard WordPress configuration doesn’t meet the standards required by your site. With a few tweaks, you could aid some of the errors that you may be experiencing. Read our blog on how to Increase the Maximum Upload and PHP Memory Limit for more information.
Large File
Message in Snapshot log: snapshot_failed_SiteNotRespondedZipstreamError
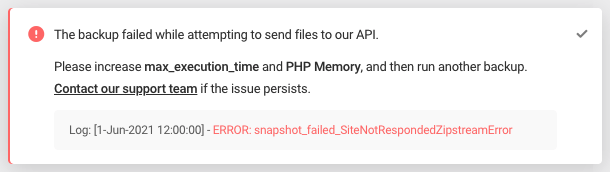
If you receive the snapshot_failed_SiteNotRespondedZipstreamError error, try the following options to resolve the issue.
Option 1
Try increasing the memory limit and execution time to these values:
max_execution_time = 600
memory_limit = 512M
This can be added to your php.ini.
Option 2
Step 1: Add define( 'SNAPSHOT4_CHUNKED_ZIPSTREAMING_LARGE', true ); to the wp-config.php file right above the *That's all, stop editing! Happy publishing* line.
Step 2: Run a new backup.
Option 3
Message in Snapshot log: snapshot_failed_SiteNotRespondedLargeFileError
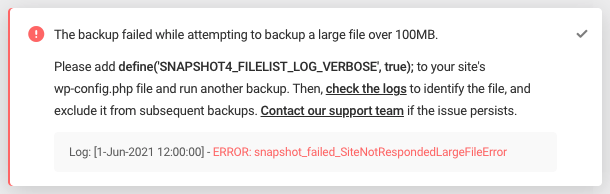
Step 1: Add define('SNAPSHOT4_FILE_ZIPSTREAM_LOG_VERBOSE', true); to the wp-config.php file right above the *That's all, stop editing! Happy publishing* line.
Step 2: Run a manual backup and check the log file to see where the backup fails. Exclude the reported file or folder and run a new backup.
File Renamed / Deleted
Message in Snapshot log: snapshot_failed_ZipstreamFileMissing

Your backup may fail while attempting to send files to our API if a file is renamed or deleted during the backup process. If this happens, follow these steps:
- Add
define('SNAPSHOT4_ZIPSTREAM_FLUSH_BUFFER', true);to your site’s wp-config.php file right above the*That's all, stop editing! Happy publishing*line. - Run another backup.
- Check the log file for any folder(s) that contain files that are rapidly changing and exclude the folder(s) from subsequent backups.
Resource Limit
Message in Snapshot log: snapshot_failed_SiteNotRespondedError

If your backup fails with the snapshot_failed_SiteNotRespondedError error, it could be because you have reached your resources limit. The solution to this is to increase the memory limit and execution time, as seen below:
max_execution_time = 600
memory_limit = 512M
This can be added to your php.ini.
Nonce Desynchronization
Message in Snapshot log: snapshot_failed_nonce_failed
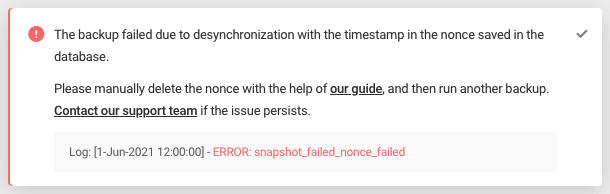
This error occurs due to desynchronization with the timestamp in the nonce saved in the database. If you receive this error message, you can resolve the issue by manually deleting the nonce using phpMyAdmin.
If your site is hosted with WPMU DEV, your database can be easily accessed from The Hub. First, navigate to your site’s Hosting tab and click Tools.

Then, click Manage Database to open phpMyAdmin.

If your site is hosted externally, your webhost’s control panel may have phpMyAdmin pre-installed. Check out this article from WordPress for more information about phpMyAdmin.
In phpMyAdmin, navigate to and select the _options table.
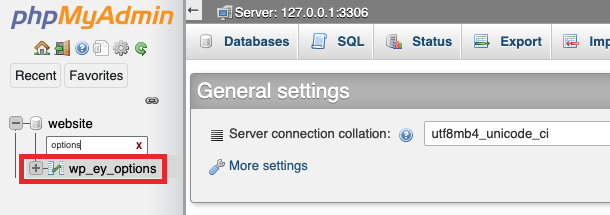
Search for or navigate to the entry with the option_name value wdp_un_hub_nonce, and then click Delete to delete the nonce.
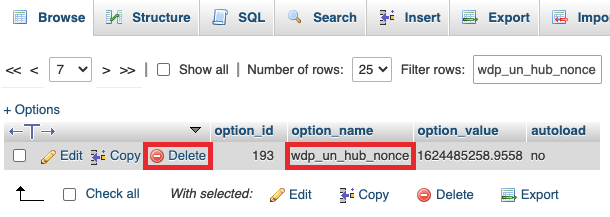
In the Snapshot interface, run another backup.
Export Failed
If your backups have a larger export size, we recommend lowering your snapshot storage limit. With larger export sizes, the consolidated size of all the backups can sometimes exceed your snapshot storage space based on the storage limit value set. This will result in an ERROR: EXPORT_FAILED_IOERROR error during backup(s)
Output Buffer Stuck
On some hosts, with the default configuration, you may experience a snapshot_failed_SiteNotRespondedError error. In this case, it may be due to a problem with the output buffer which can be fixed by switching the configuration to flush the output buffer after each zipstream write. Do this by following these steps:
Step 1: Add define('SNAPSHOT4_ZIPSTREAM_FLUSH_BUFFER', true); to the wp-config.php file right above the *That's all, stop editing! Happy publishing* line.
Step 2: Run the backup again.
Server Resources
Message in Snapshot log: snapshot_failed_genericError
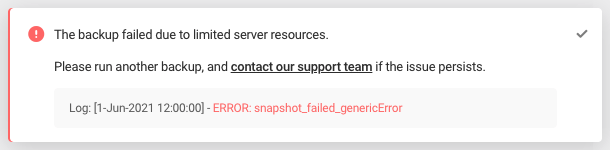
Your backup may fail due to limited server resources. If this happens, try running another backup.
API Connection
Message in Snapshot log: snapshot_failed_HubInfoRespondedInvalidURI
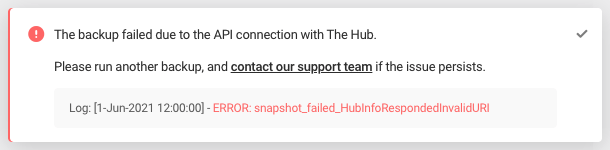
Your backup may fail due to the API connection with The Hub. If this happens, try running another backup.
Table Error
Message in Snapshot log: snapshot_failed_Wrapper_DBlistFetch
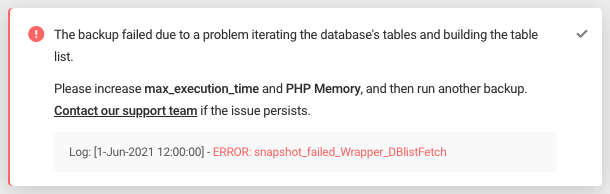
Your backup may fail due to a problem iterating the database’s tables and building the table list. If this happens, try increasing the memory limit and execution time as follows:
max_execution_time = 600
memory_limit = 512M
This can be added to your site’s php.ini file.
Large Table(s)
Message in Snapshot log: snapshot_failed_TooLargeTableHanged
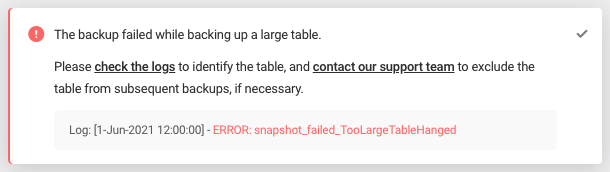
Your backup may fail while backing up a large table. If this happens, check the logs to identify the table in question, and then contact our support team to exclude the table from subsequent backups (if necessary).
Table Not Sent
Message in Snapshot log: snapshot_failed_Wrapper_TableZipstream

Your backup may fail while attempting to send a database table to our API. If this happens, try increasing the memory limit and execution time as follows:
max_execution_time = 600
memory_limit = 512M
This can be added to your site’s php.ini file.
Other
Message in Snapshot log: snapshot_failed_UnknownError
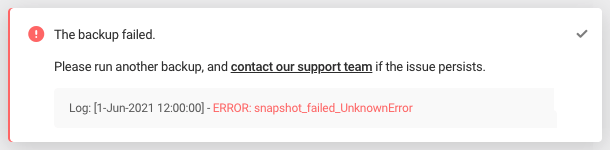
Your backup may fail for some other unknown reason. If this happens, first try running another backup, and then contact our support team if the issue persists.
12.11.2 Backup Stuck
Link to chapter 11IP Not Allowlisted
If you experience your backup being stuck at 0% with no log, it could be because our IPs are not allowlisted on your site. This can be addressed by adding WPMU DEV IP addresses to your allowlist.
Alternatively, if you are a member on our hosting, there could be a large queue and your backup will process ASAP.
Number of Files Too Large
If your backup is getting stuck at 13-14%, it could be related to having too many large files. These are often cached files and backup files from 3rd party plugins. To fix this, use your preferred FTP client to find your cache folder. Add this folder URL to your Global file exclusions field in the Snapshot Pro>Backups>Settings tab. Once this has been added, you can rerun the manual backup.
Did you know that our hosting tools include a quick-access File Manager, straight from the Hub? No need for 3rd party FTP clients, just open the File Manager and start editing.
Zipstream Stuck
Backups that get stuck at 25% could be because of the zipstream getting stuck for small chunks of a large number of files. This can be helped by using your preferred FTP client to find your cache folder. Add this folder URL to your Global file exclusions field in the Snapshot Pro>Backups>Settings tab. Once this has been added, you can rerun the manual backup.
Large Files
Another reason that a backup may get stuck is because of large files. In this case, you can follow these steps:
Step 1: Add define( 'SNAPSHOT4_CHUNKED_ZIPSTREAMING_LARGE', true ); to the wp-config.php file right above the *That's all, stop editing! Happy publishing* line.
Step 2: Run the backup again
12.11.3 Backup Email Not Received
Link to chapter 11WordPress Failed to Send Email
When the download backup email is not received, it is likely because your WordPress setup failed to send the email. This can usually be solved by installing and setting up an SMTP plugin.
12.11.4 API Connection Not Established
Link to chapter 11IP Not Allowlisted
If you are struggling to establish a connection with the API, it may be an issue with our IPs. In a case like this, add WPMU DEV IP addresses to your allowlist and retry the connection.
Inactive Membership
Issues with establishing a connection with the API could be due to a problem with your membership status in the Hub. Be sure to verify your membership and ensure that it is active. If issues persist, contact our Support team who can check if there are any problems with your account.
12.12 Get Support
Copy chapter anchor to clipboardIf you still have questions or need assistance after reading this document, please don’t hesitate to contact our support superheroes using the available options under the Support tab in your Hub or via the Support tab in your WPMU DEV Dashboard.
