8. Reseller
Exclusive to Premium members, the Reseller section in your Hub is where you can create your own WPMU DEV hosting and domain products to resell to your clients.
Before setting things up in Reseller, you must first configure Clients & Billing as that is where you will be handling all your clients and invoicing activities.
To enable your clients to purchase reseller products directly from you, and have the WPMU DEV hosted sites automatically created for them, you must add the products you create here to the Hub Client plugin installed on your own site. Then embed your pricing tables on any site pages you like. You can even use checkout links to sell your hosting products from anywhere, even on a different site or on your social media pages.
8.1 Getting Started
Copy chapter anchor to clipboardAccess the Reseller feature in your Hub by clicking the Reseller tab in the main navigation menu.
![]()
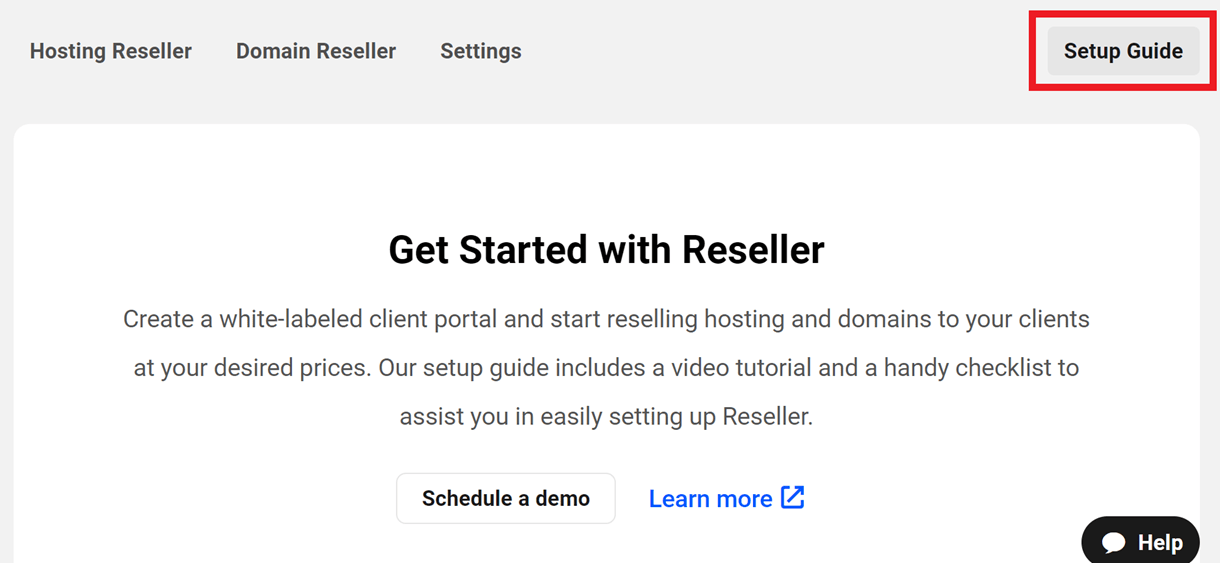
When you first visit the Reseller section in the Hub, you’ll land on the Setup Guide page where you’ll find a video tutorial and a handy checklist to help you get started with the configuration.
You can access the guide at any time by clicking the Setup Guide button.
You can review the setup video here:
And here are the setup steps for your convenience:
Step 1 – Activate Clients & Billing
- Visit the Clients & Billing page in your Hub and connect your Stripe account to activate it.
- Configure Clients & Billing as per your requirements, such as billing currency, business profile, branding, and customization of emails and invoices.
Step 2 – Create Reseller Products
- Create your first Hosting and/or Domain Reseller products, enabling clients to purchase directly from your website or client portal.
Step 3 – Create a White-Labeled Hub
- Install & activate The Hub Client plugin on your website where you want to set up a white-labeled client portal for your clients.
- Go through the Client Portal tab and set up branding, navigation, login & signup settings.
Step 4 – Set Up Reseller on Your Client Portal
- Go to The Hub Client > Reseller page and activate Hosting and Domain Reseller.
- Create a pricing widget from the Hosting and Domain Reseller products created in The Hub in step 2.
- Customize the hosting and domain pricing widgets as needed.
- Embed the hosting pricing widget and/or the domains widget on pages on your website so your clients can start buying hosting and domains from you.
If you still need a helping hand setting up the reseller, then click the Schedule a demo button to schedule a demo on how to get started with the Reseller.
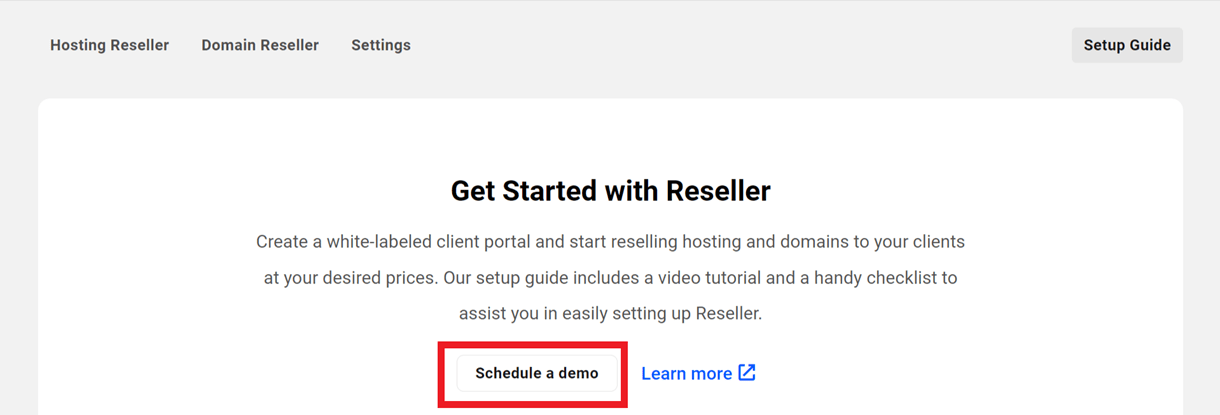
Note: You will not be able to schedule a demo if you have completed all the setup steps.
8.2 Hosting Reseller
Copy chapter anchor to clipboardIf you haven’t created any hosting reseller products yet, click the + Create Hosting Reseller Product button.

If you already have one or more hosting reseller products created and wish to create another, click the Add New Product button at the top-right of the screen.
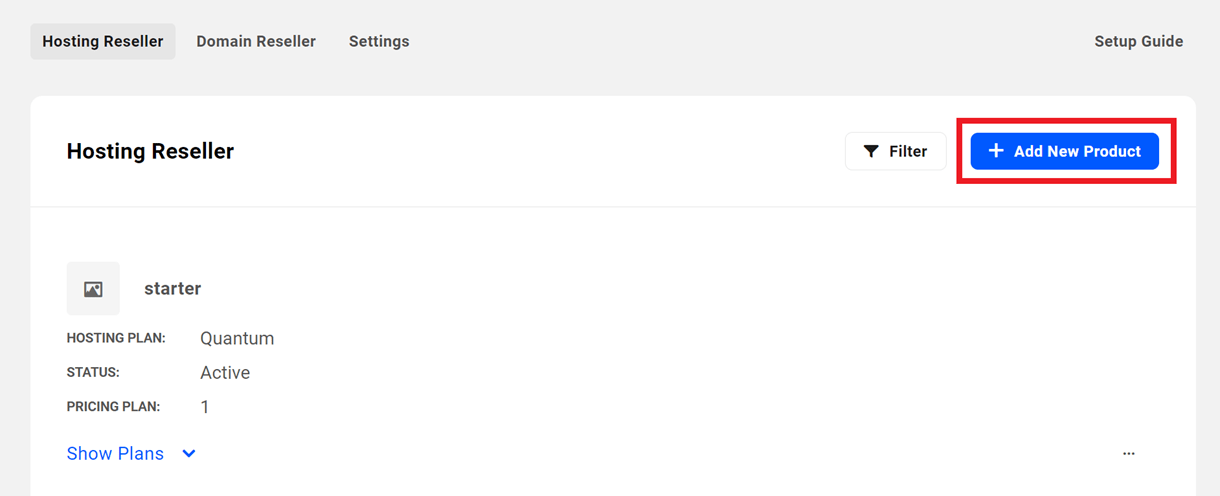
Clicking either button will pop open the Create Hosting Reseller Product modal window.
Note that it is not possible to resell WPMU DEV add-ons and services via the Hub reseller. However, you can create a new product in the Client and Billing for the add-on or service you wish to offer and then manually activate it for your client’s site via the Hub.
8.2.1 Creating Hosting Products
Link to chapter 2Hosting Product Setup
Once you’ve clicked to open the Create Hosting Reseller Product modal window, enter your desired Product Name, and optionally upload a Product Image, and give your product a Description in the Product Setup step.
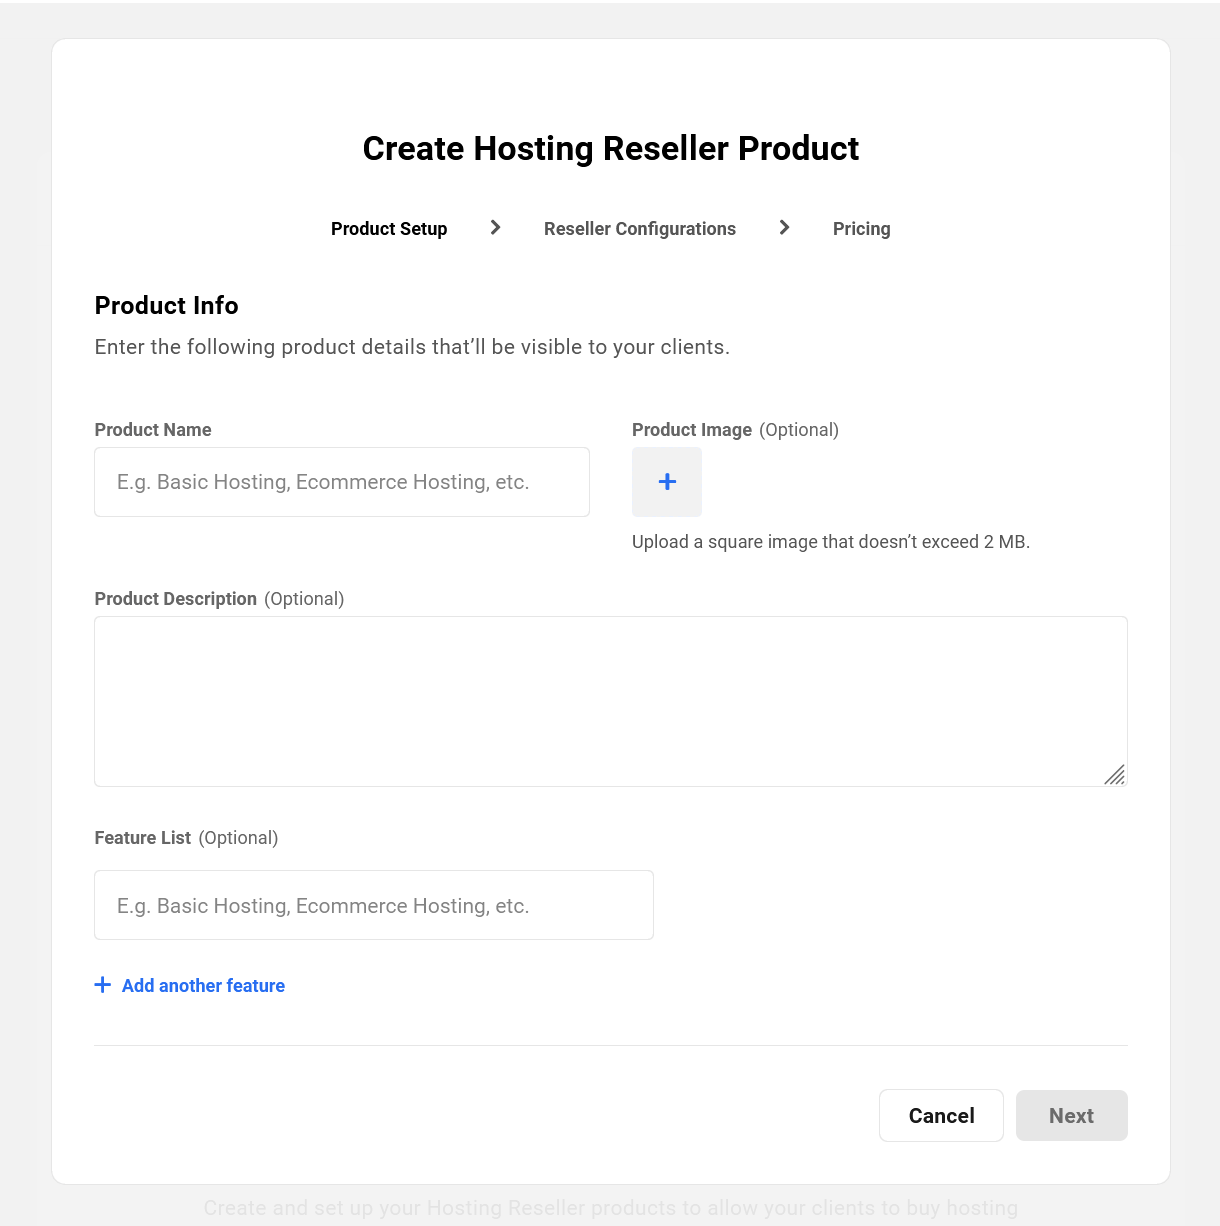
Note that the product Description is limited to a maximum of 100 characters to ensure your pricing table looks nice and tidy. See Customize the Hosting Reseller Pricing Table in The Hub Client plugin documentation for more information.
You can also optionally create a Feature List for the product. Enter the first item to be listed, and click the + Add another feature link for each additional one as needed, up to a maximum of 10 items. Drag and drop the items to reorder them as needed. Click the trashcan icon to remove a feature.
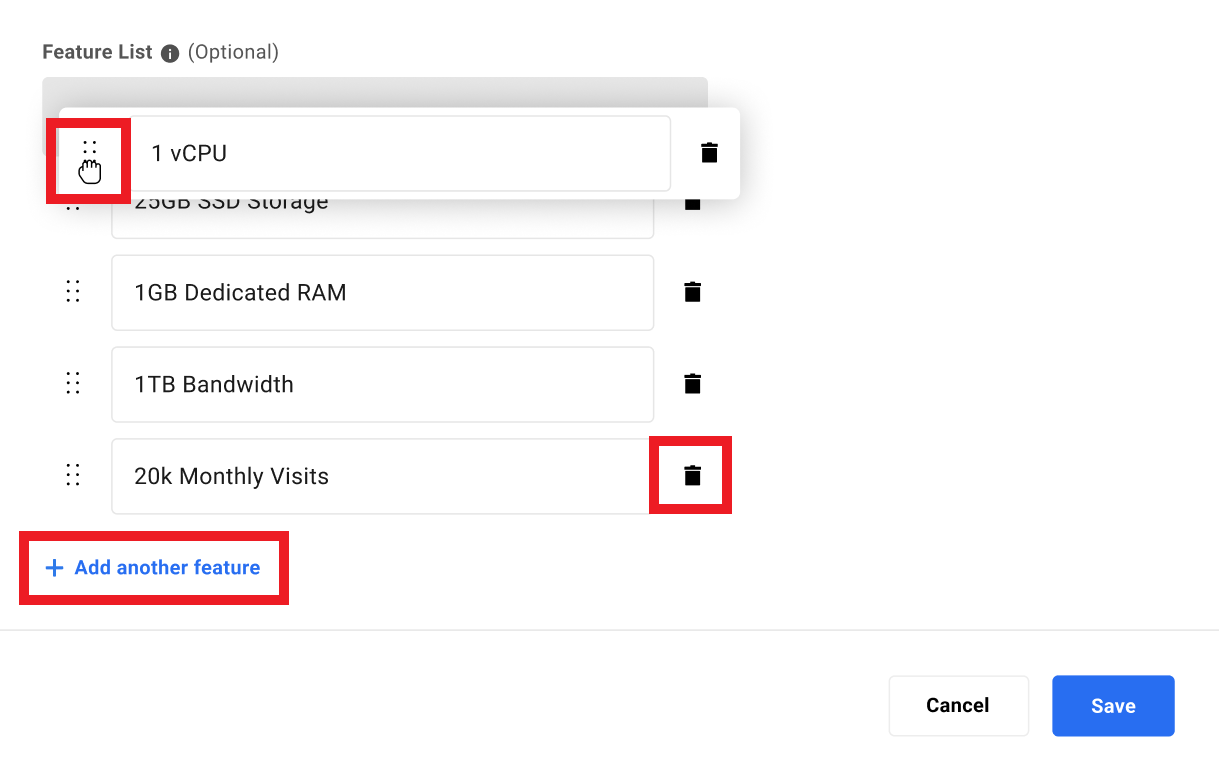
Click the Next button when you’re done.
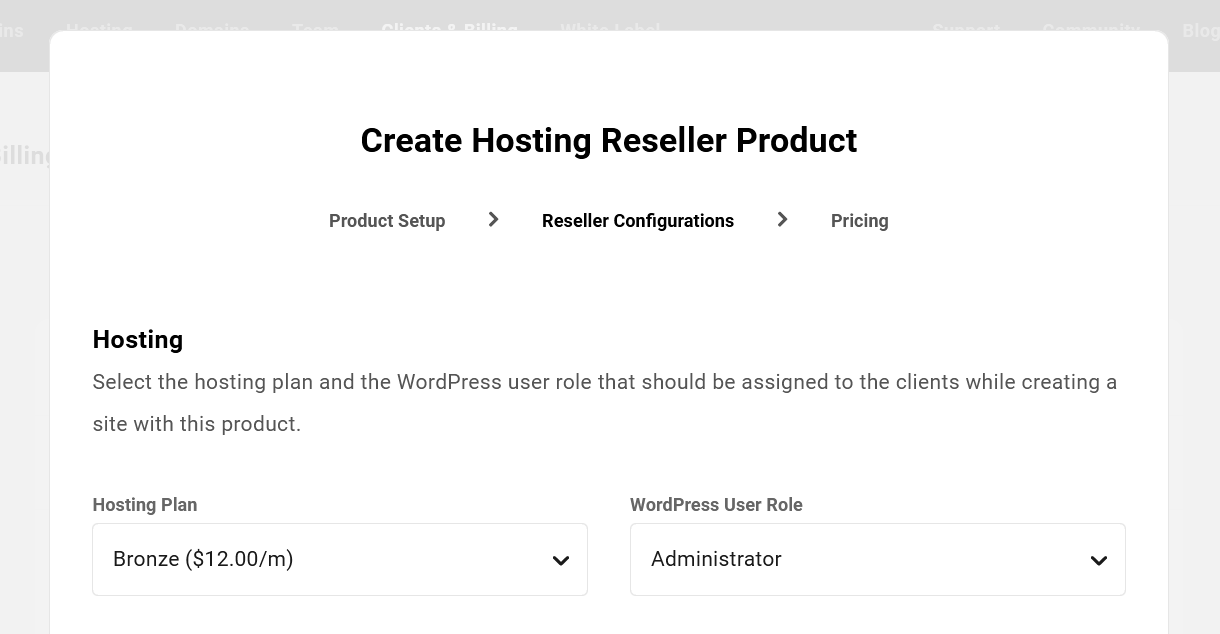
Hosting Reseller Configurations
Hosting
The first thing to do under the Reseller Configurations tab is to select the WPMU DEV Hosting Plan to be applied to the created site when a client purchases the product from you.
If you include one or more annual WPMU DEV hosting plans in your offering, you would receive the complimentary domain and webmail credits when a reseller client purchases such a product from you. There is however no automated way to pass that credit on to your clients. So if you wish to do so, you would need to set that up manually by associating the domain and webmail with your client.
Then select the WordPress User Role to be given to the client on their new site. Only default WordPress user roles are available for selection here. There is no option to create or assign custom user roles.
In addition to the WordPress user created for your Reseller client with the role selected here, an administrator user will also be created on the client’s site for you as the Hub owner. When logging in via SSO from your Hub, you will have access to the WPMU DEV Dashboard on the client’s site, but it will of course be hidden from the client when they log in.
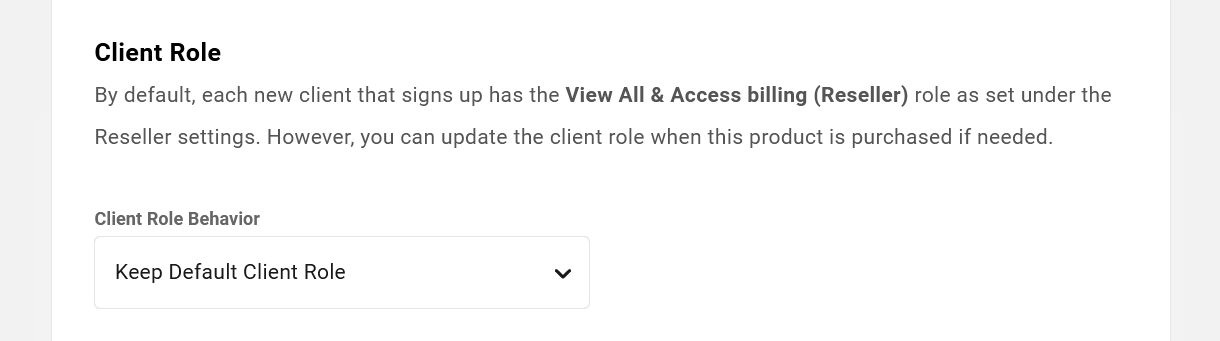
Client Role
By default, clients who purchase this product from you will be assigned the default client role you select under Reseller > Settings in your Hub. But you can set a different role to be assigned here if needed.
Be sure to select a client role that includes the required Create new hosting site capability. If the selected role does not include this capability, a message will appear to remind you of this:
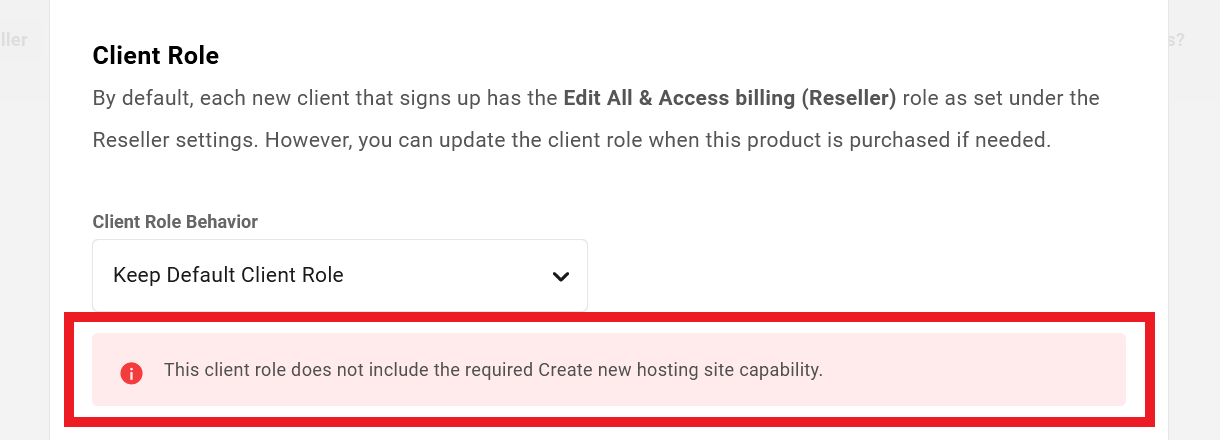
Note that the client role is different from the WordPress User Role set above, and only affects access to features in your Hub.
Site Templates
This section enables you to select whether clients can choose a Site Template to be applied to their new site when they purchase the product from you.
- Allow clients to choose a template – Select this option if you want your clients to be able to select from among the site templates you enable for this product here.
- Force selected template on new sites – This enables you to specify one template that will be applied to all sites created with this product.
- Disable templates – Select this if you do not want to enable site template selection for this product.
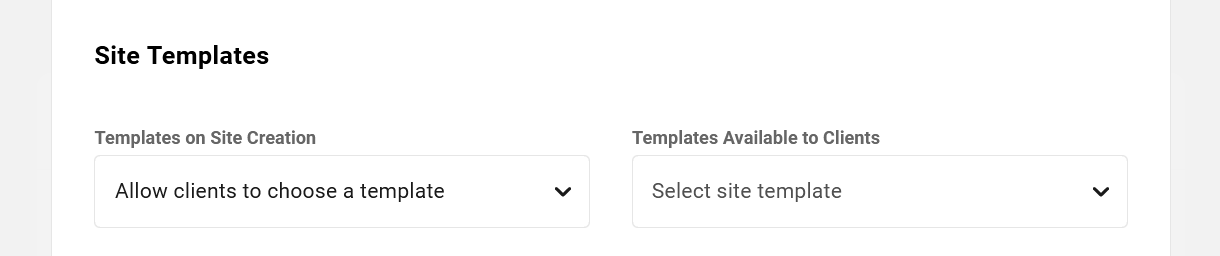
If you want sites created by your clients to be fully white-labeled, create one or more white-labeled sites and create Site Templates from those sites. Then make only those templates available to your clients.
Server Location
This section enables you to specify whether clients can choose a Server Location for their new site when they purchase the product from you.
- Allow clients to choose a location – Select this option if you want your clients to be able to select from among the server locations you enable for this product here.
- Force selected location on new sites – This enables you to specify a single server location that will be used for all sites created with this product.
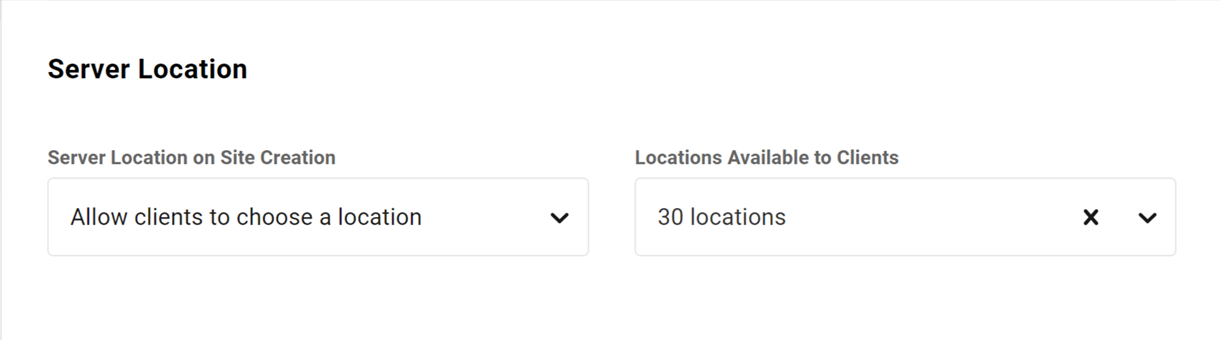
Note that we’ve added 12 new server locations. If you have existing products created before this update, you can edit those products and choose the new server locations.
Auto Suspension
Here, you can choose whether sites should be suspended automatically when invoices are overdue.
- When subscription invoice is due – Select this option and set the number of days after which the site will be automatically suspended.
- Do not auto suspend sites – Select this if you do not wish to suspend sites with overdue invoices.
If you wish sites to be accessible again when overdue invoices are paid, check the box next to Enable automatic unsuspension when the pending invoices are paid.
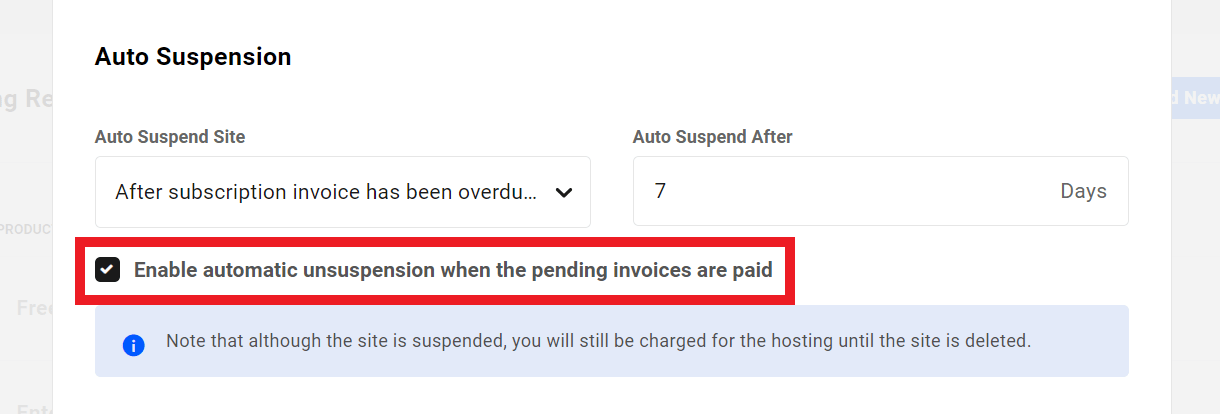
Note that even if a site is suspended, you will still be charged for the hosting until or unless the site is deleted.
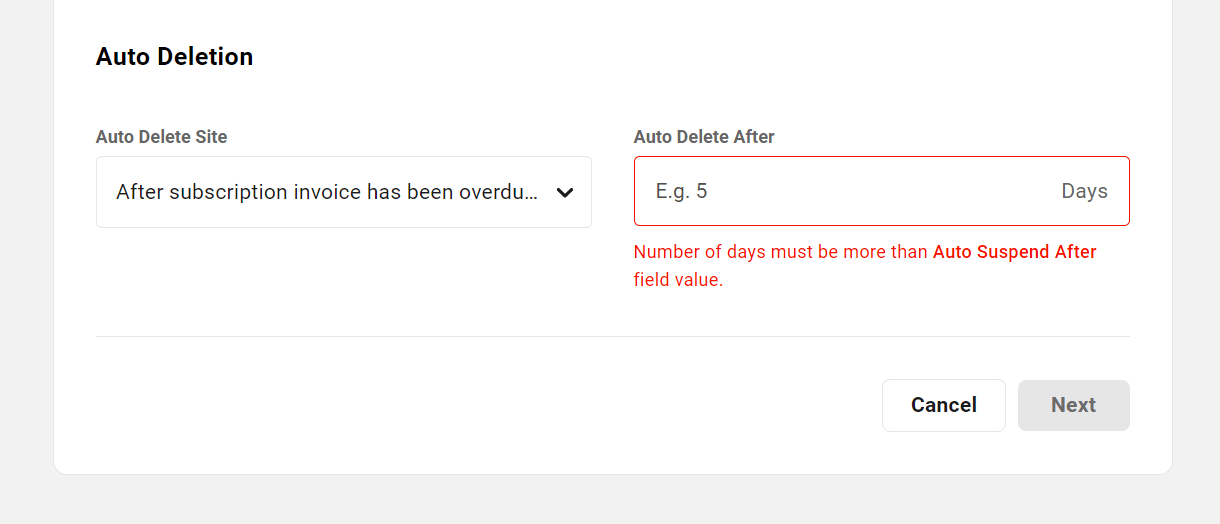
Auto Deletion
Select whether sites should be automatically deleted when invoices are overdue.
- After subscription invoice has been overdue for – Select this option and set the number of days after which the site will be automatically deleted. This number must be greater than the Auto Suspend After setting above if that is configured.
- Do not auto delete sites – Select this if you do not wish to delete sites with overdue invoices.
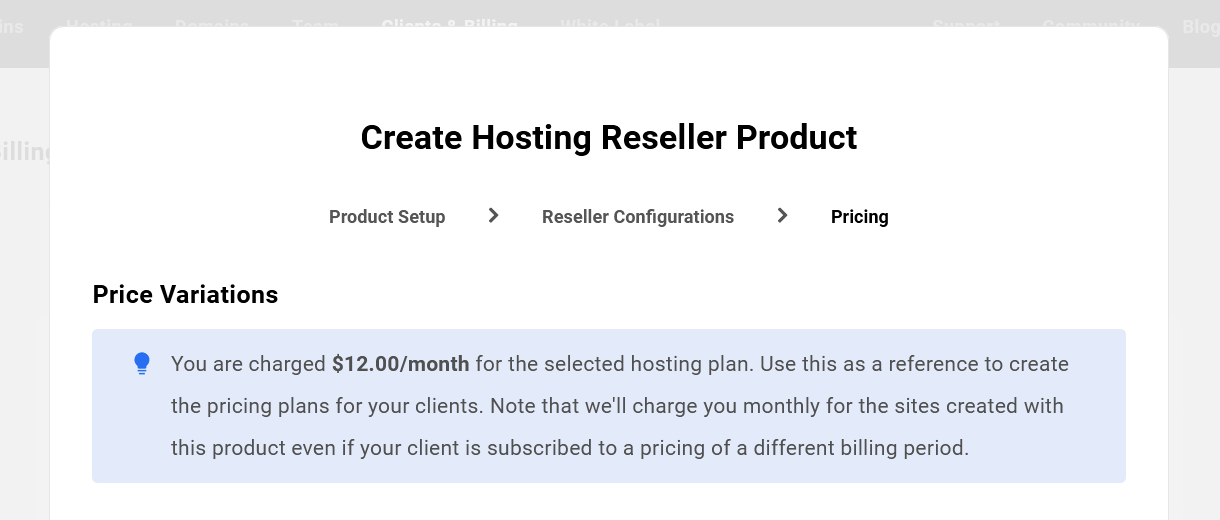
Pricing
Under the Pricing tab, you can create as many pricing plans as you wish for the product, with the billing frequencies you need.
You’ll see a box at the top reminding you of the cost to you for the product so you can set your markup accordingly.
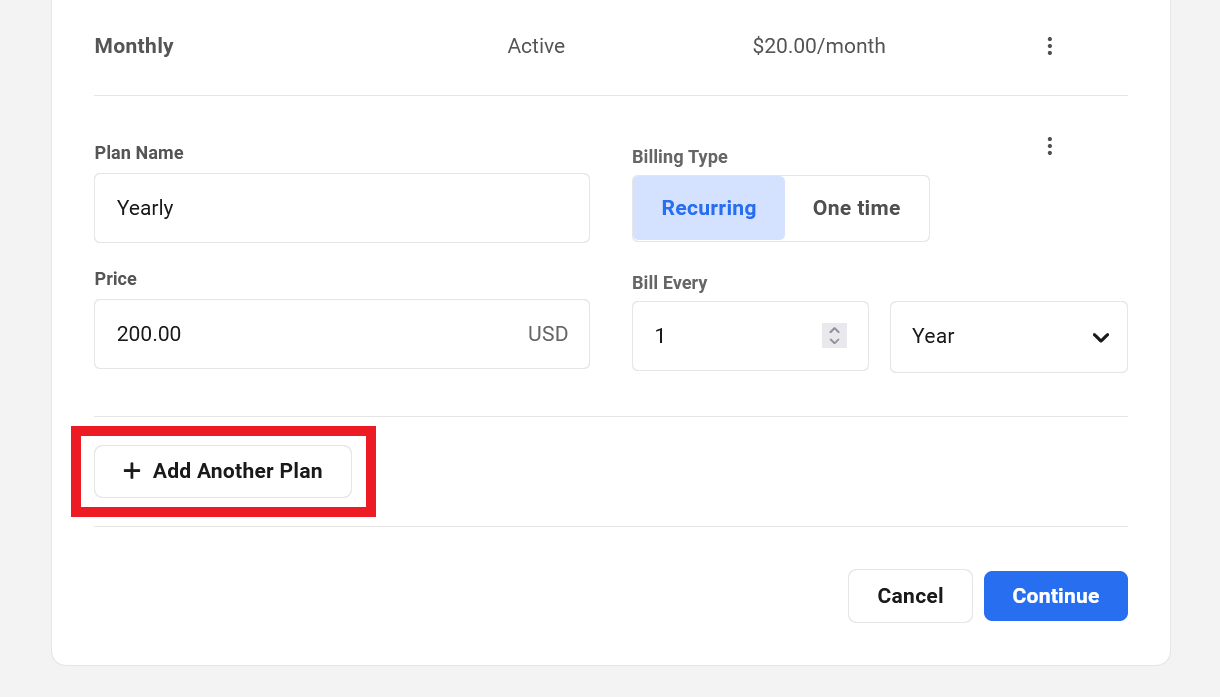
For each pricing plan you add to your product, you’ll provide the following information.
- Plan Name – This is the name of the pricing plan to differentiate it from other plans of the same product.
- Billing Type – Select whether this plan should be billed on a recurring basis or one-time only.
- Price – The price for each billing period if recurring, or the price for the one-time invoice. The price will be in whichever currency you selected when you connected your Stripe account in Clients & Billing.
- Bill Every (appears only if you select Recurring as the Billing Type) – Set the billing interval if this is a recurring plan. This can be any number of days, weeks, months or years up to a maximum of 3 years total (1095 days, 156 weeks, 36 months or 3 years). For example, you may wish to bill the client on a recurring basis every 3 months, or perhaps only every 2 years.
- No. of Billing Cycles (appears only if you select Recurring as the Billing Type) – This is the number of times the client would be billed for a recurring plan before the subscription expires. Leave this field blank if you want the subscription to auto-renew until canceled.

If you wish to add another pricing plan to the product, click the + Add Another Plan button. That will pop open another instance of the form as above. Fill in the fields for the new plan as before.
Click Continue at the bottom once you’ve finished adding your plans.
You’ll then see your product and associated pricing plans listed under the Hosting Reseller tab. In our example below, we’ve created a product named “Starter” with 2 recurring pricing plans; one monthly and one yearly.
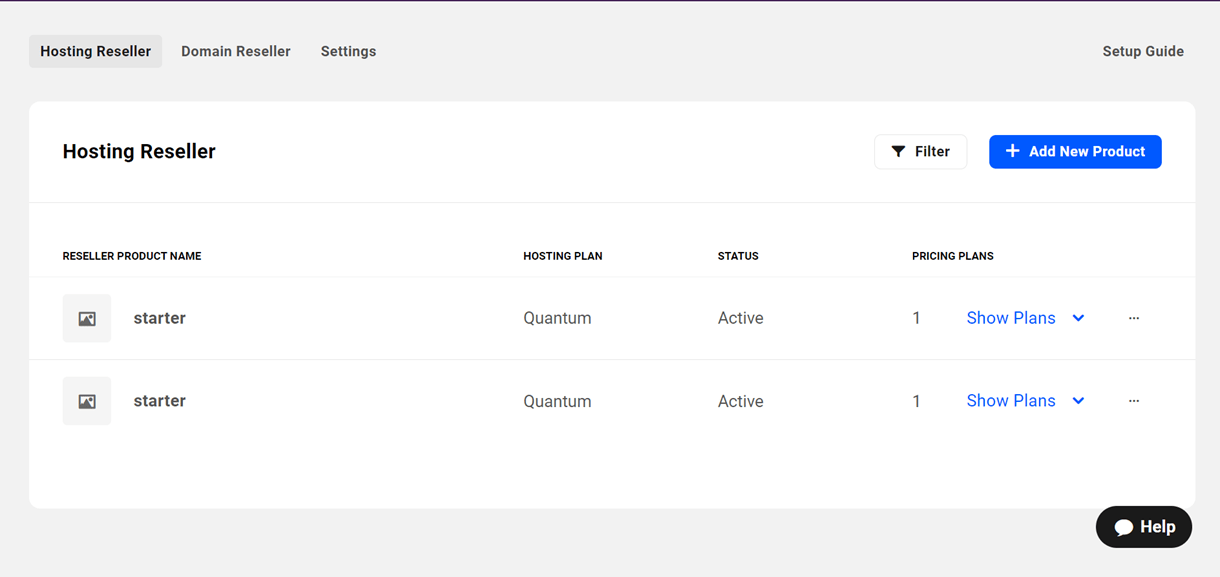
Note that, regardless of the billing frequency you set in your pricing plans for your clients, you will be charged monthly if you have selected a monthly hosting plan when creating your reseller product and yearly if you have selected a yearly hosting plan.
8.2.2 Managing Hosting Products
Link to chapter 2Managing your hosting reseller products works in exactly the same way as managing products & services in Clients & Billing.
All the hosting reseller products you create will be listed under the Hosting Reseller tab, where the Status and the number of Pricing Plans associated with each will be displayed. Click the ellipsis icon in any product’s row to pop open the management options for that product.
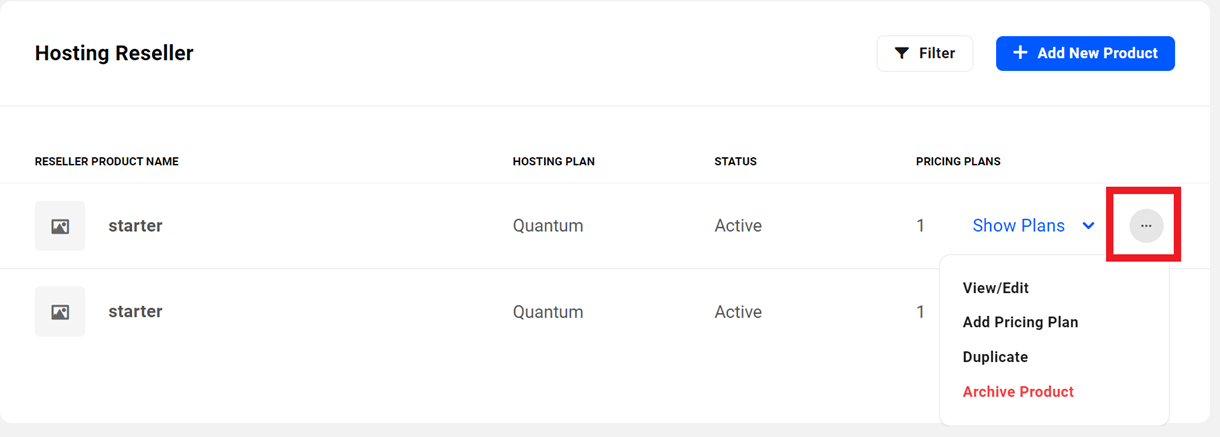
- View/Edit – Click this to pop open a modal where you can edit the info associated with your product. See also Editing a Pricing Plan below.
- Add Pricing Plan – Select this option if you want to add another pricing plan to the product.
- Duplicate – Click this option to create an exact duplicate of the product that you can edit afterwards.
- Archive Product – Select this option if you ever need to deactivate a product so it is no longer available to purchase. Note that archiving a product does not affect any existing client subscriptions, it just makes it unavailable for selection by your clients.
Click the Show Plans link to expand the product and view details about the pricing plans associated with that product. When viewing the plans, you’ll again see an ellipsis icon in each one which, when clicked, will reveal management options for that pricing plan.
- Edit Plan – Select this option to edit settings related to the plan. See also Editing a Pricing Plan below.
- Duplicate Plan – Select this to create an exact duplicate of the plan that you can edit afterwards.
- Archive – Select this option to deactivate the pricing plan. Note that archiving a pricing plan does not affect any existing client subscriptions, it just makes it unavailable for selection by your clients
When you select the Edit Plan option, you’ll have access to all settings of the product and the plans associated with it. Click the Edit button on that screen, or any of the options displayed there, to pop open a modal where you can adjust things as needed.
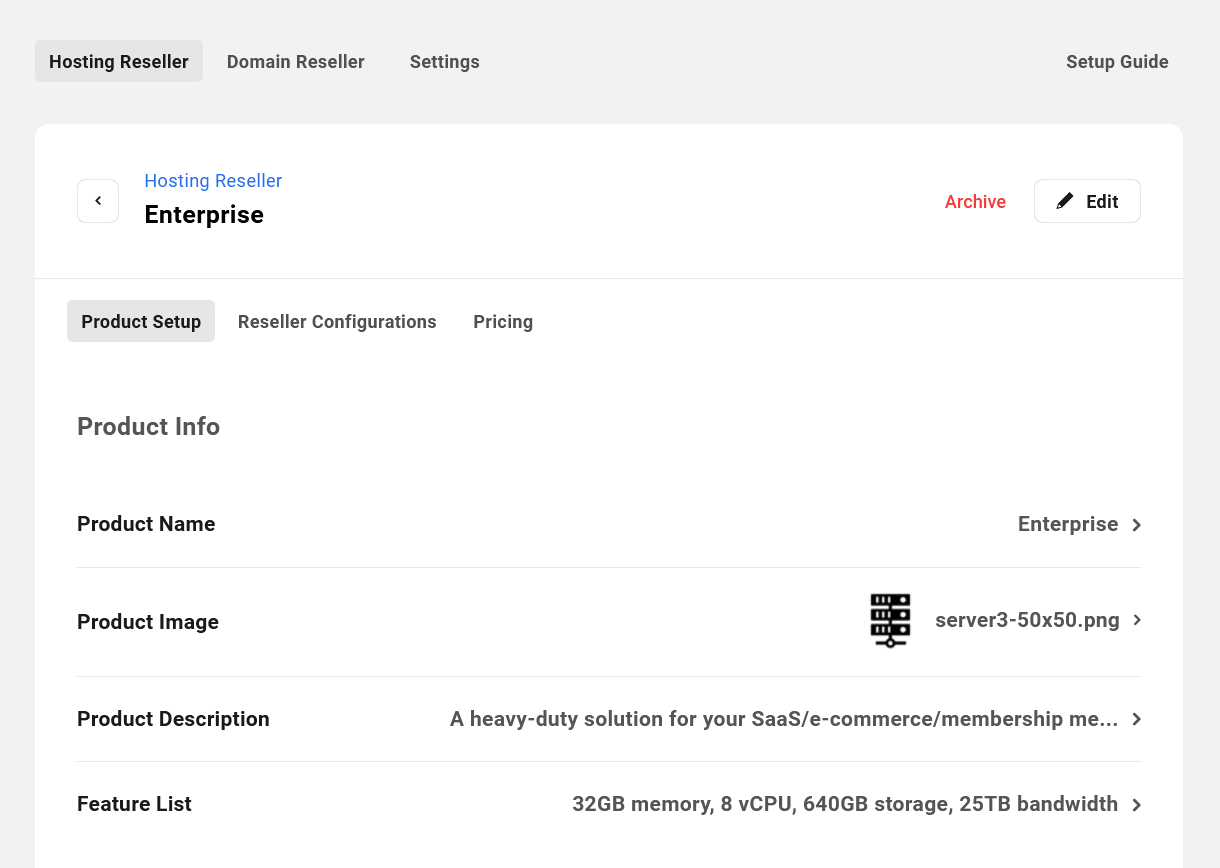
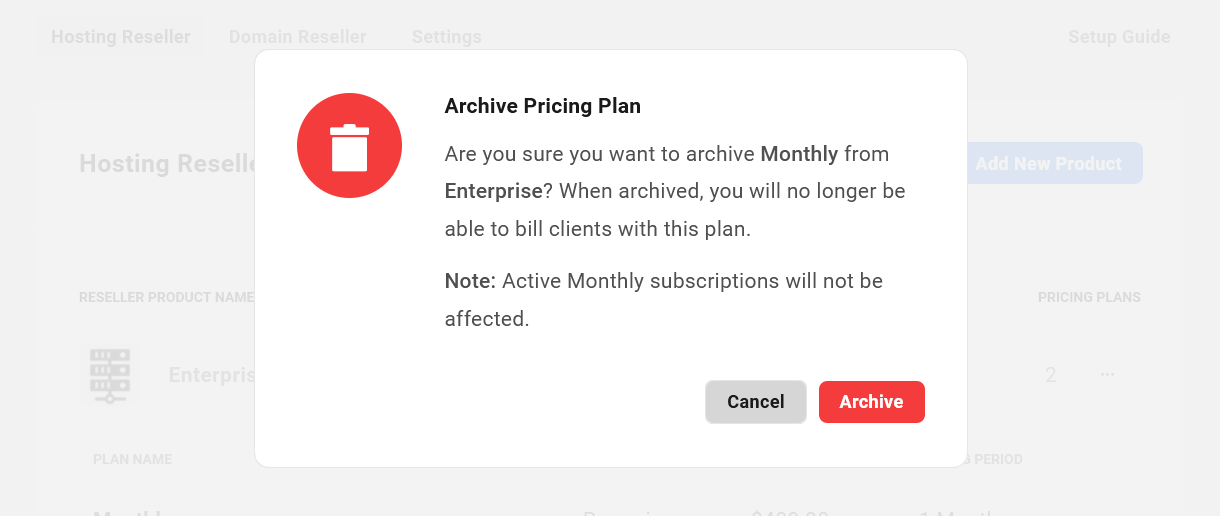
When you click the Archive option for a product or a pricing plan, a confirmation message will pop up prompting you to confirm the action, with a reminder that existing subscriptions will not be affected.
Editing a Pricing Plan
When editing a pricing plan, you can only change the name of the plan. No other options can be changed once created. This is a limitation of the Stripe API and this behavior cannot be modified.
So if you do need to change other settings in an existing pricing plan, like the price or billing frequency, you’d need to first duplicate the plan, then edit the duplicate before saving it.
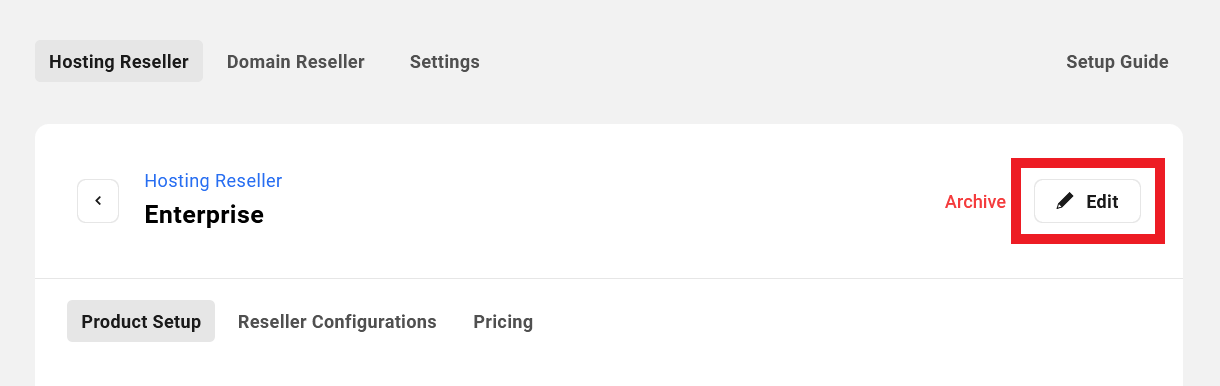
To get that done, click the Edit button on the product to pop open the product editor where all associated plans are displayed.
Then select the Duplicate option under the ellipsis icon of the plan you want to edit. That will create an exact copy of the plan that you can edit before hitting the button to Save the updated product.
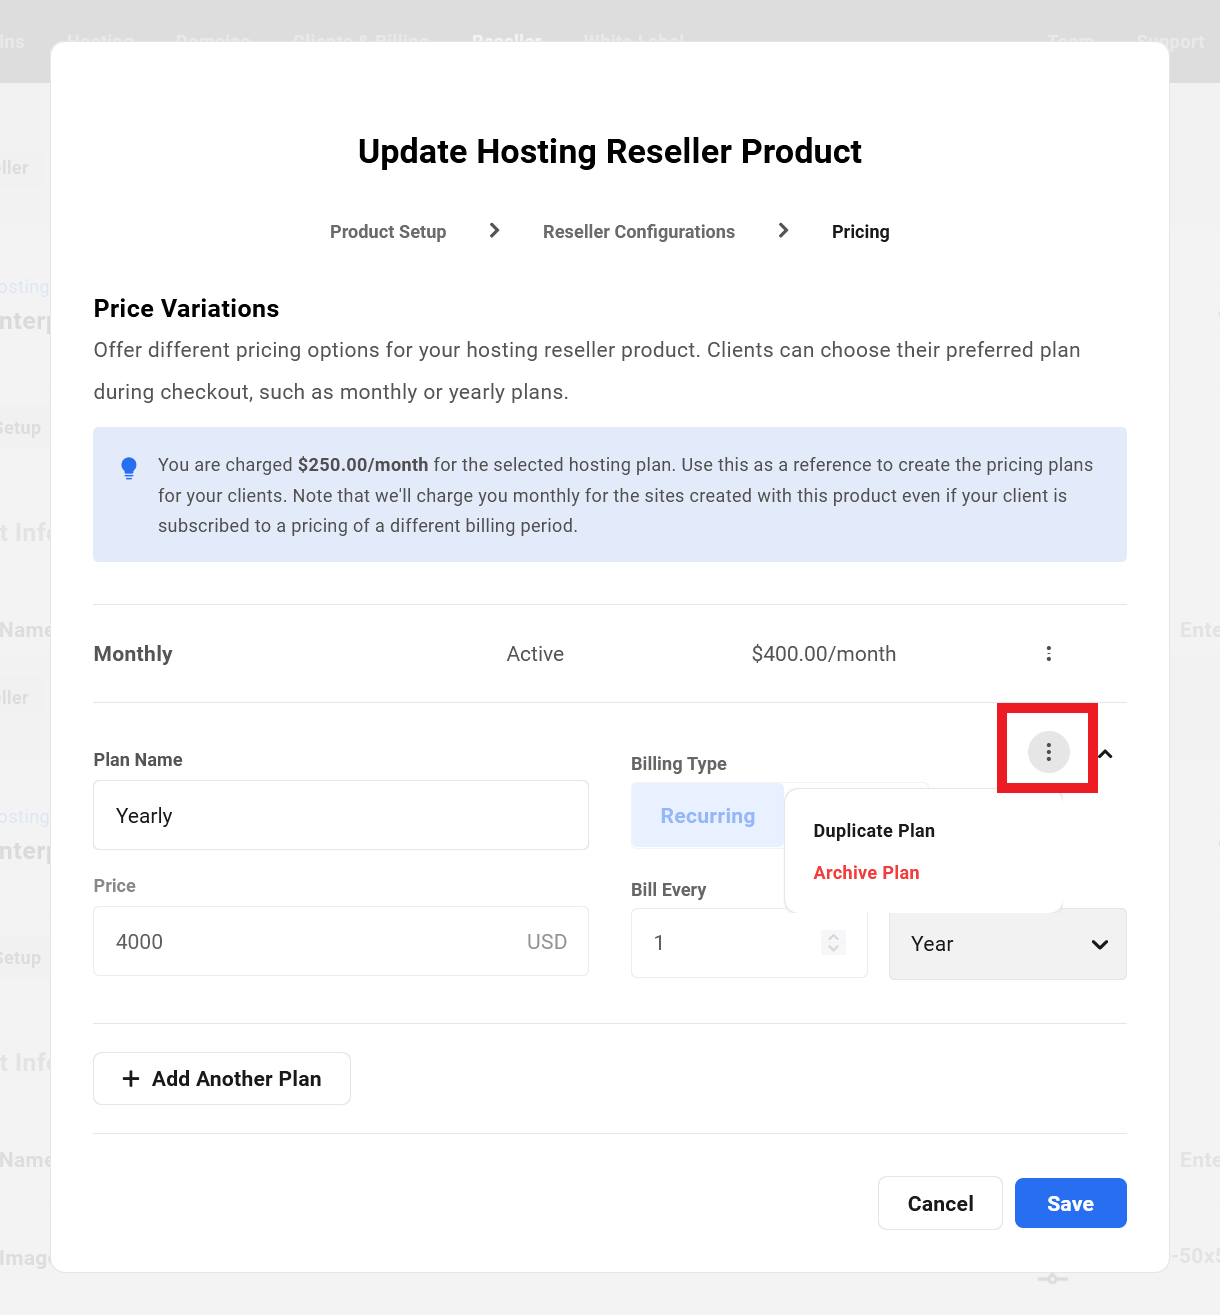
Once you’ve updated the duplicate plan and saved your product, you can archive the original plan if needed so it can no longer be used to bill your clients.
Remember that archiving a plan does not affect existing subscriptions on that plan. So this method can be used to increase the price of a plan when needed, while grandfathering existing customers on their original pricing plan.
Deleting a Pricing Plan
It’s important to note that it is not possible to delete a pricing plan from the Hub; you can only archive existing plans so they can’t be used when invoicing clients, as noted above.
However, you can delete a pricing plan in your Stripe account, as long as the plan has not yet been used in a transaction. If it has, then it can only be archived there as well.
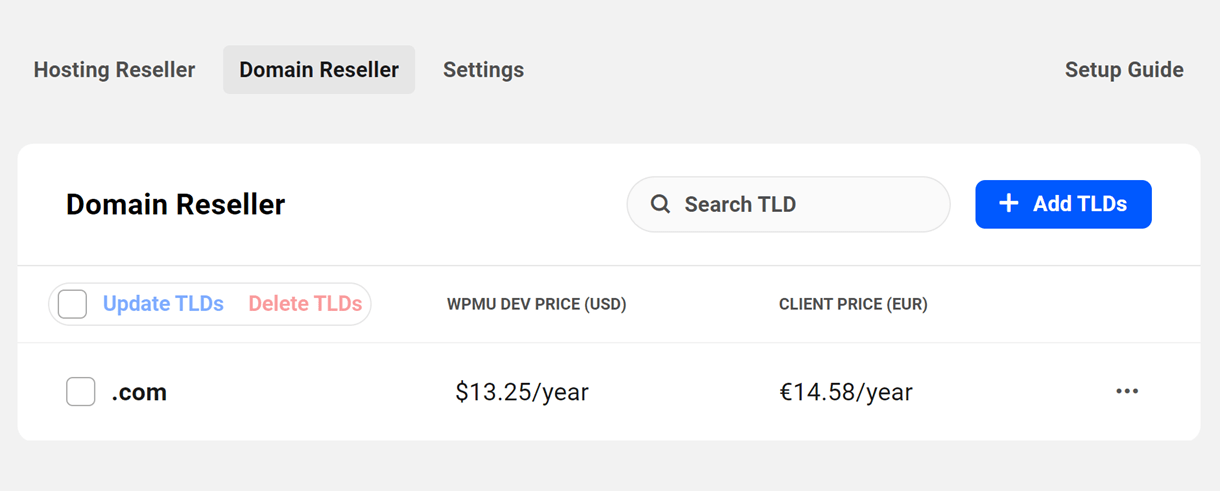
8.3 Domain Reseller
Copy chapter anchor to clipboardIf you haven’t created any domain reseller products yet, click the + Add TLDs button.
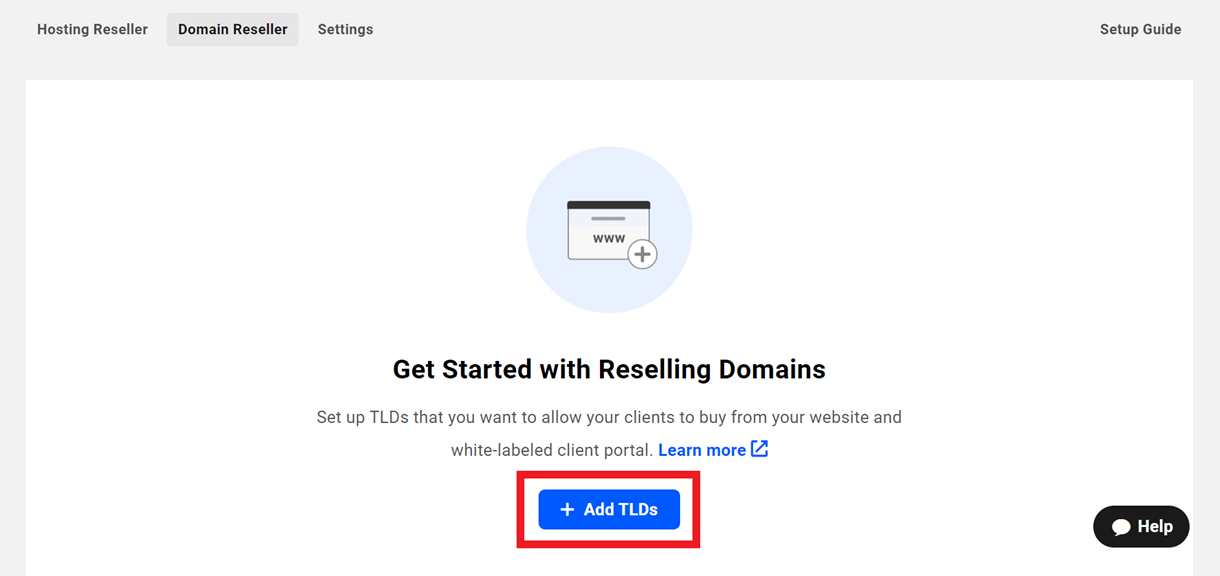
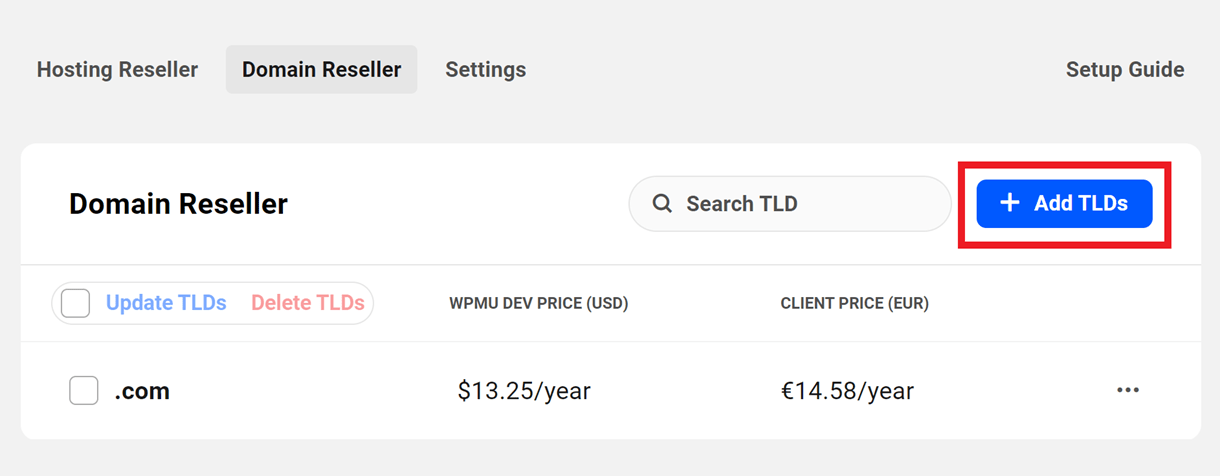
If you already have one or more domain reseller products created and wish to add more, click the + Add TLDs button at the top-right of the screen.
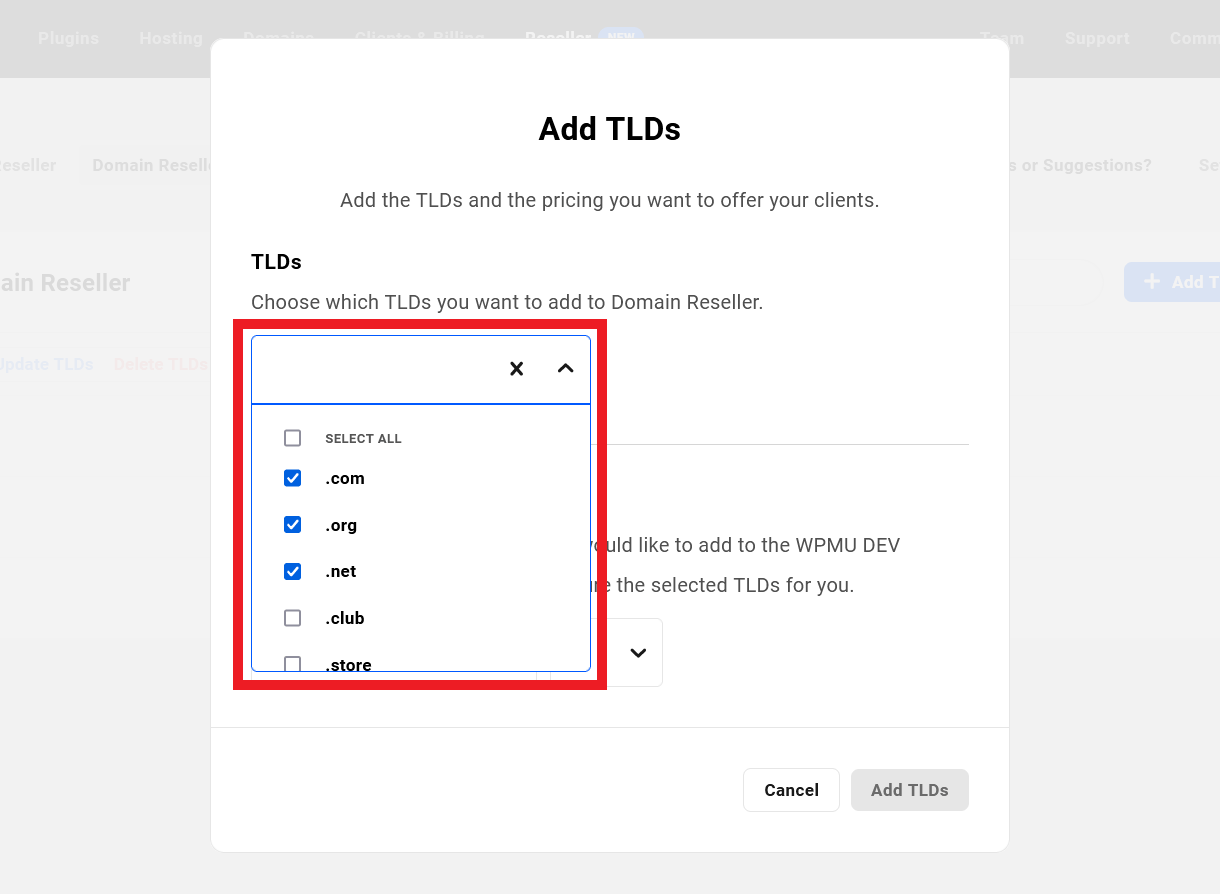
Clicking either button will pop open the Set up TLDs modal window.
8.3.1 Creating Domain Products
Link to chapter 3Once you’ve clicked to open the Add TLDs modal window, click the TLDs dropdown menu to select the domain extensions you wish to sell.
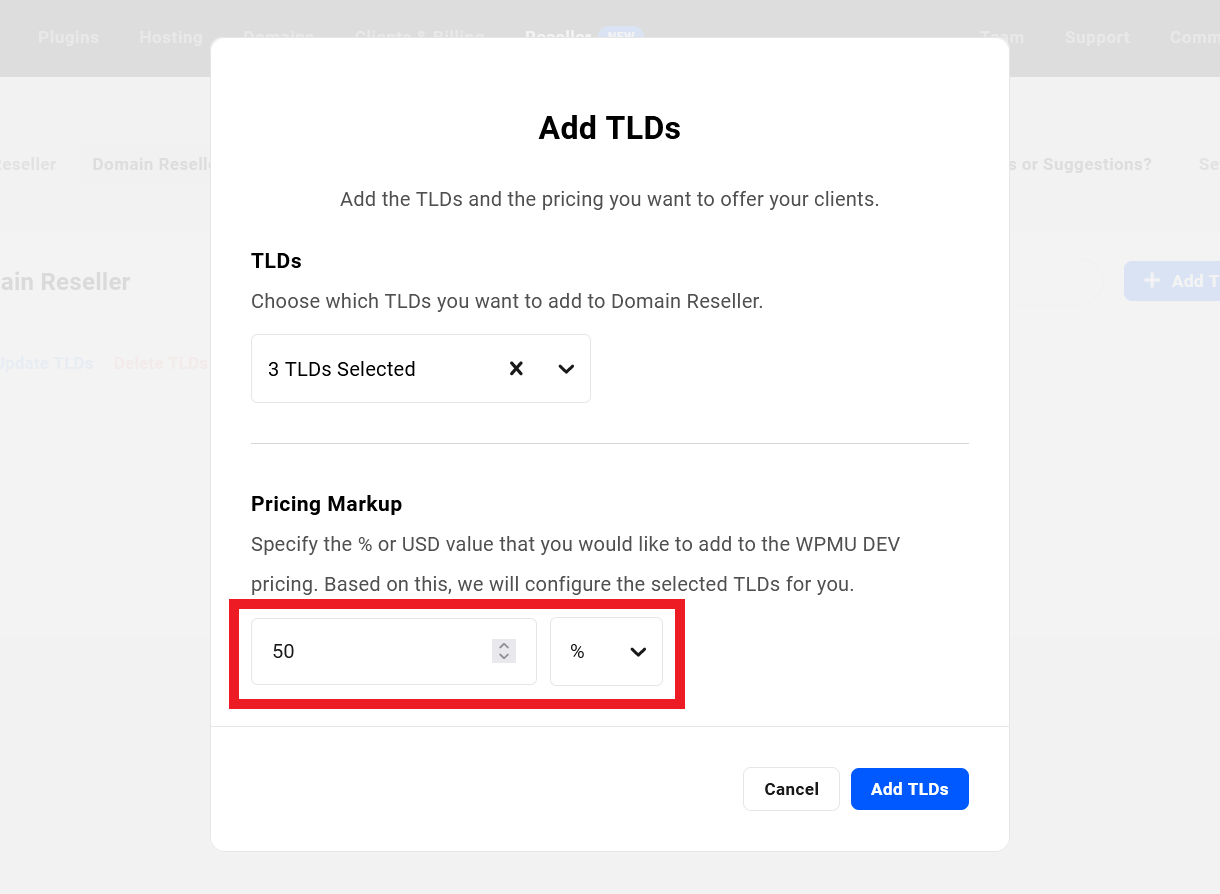
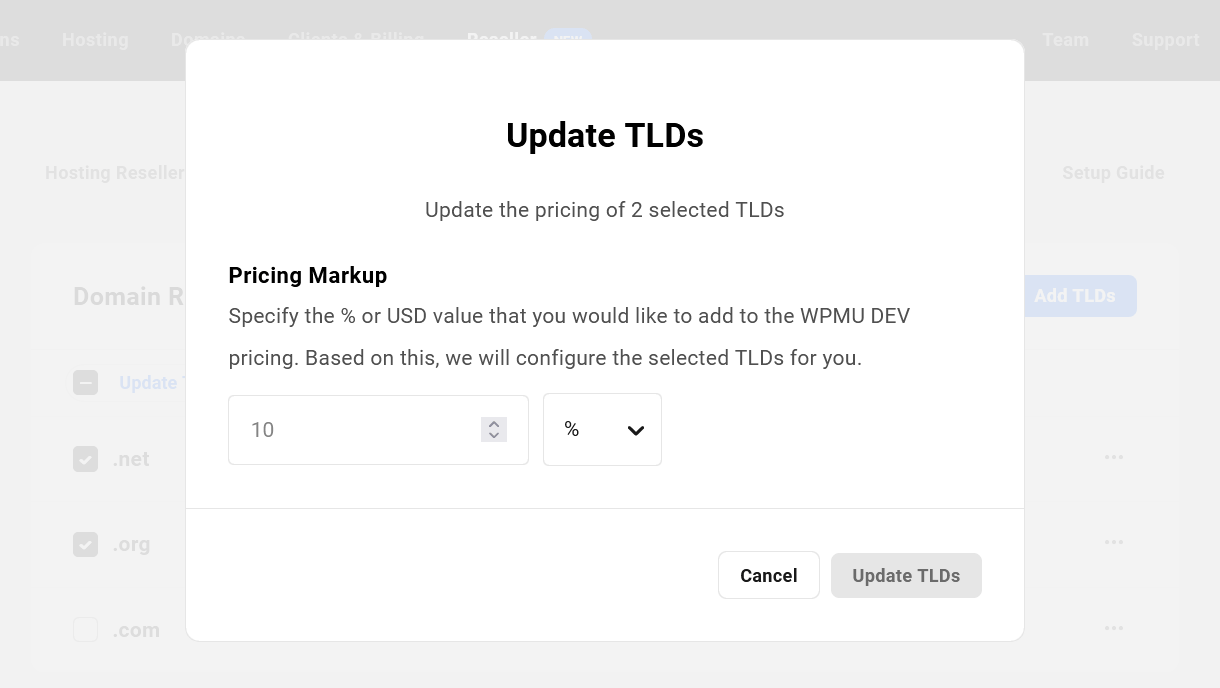
Then, in the Pricing Markup section, enter either a fixed USD amount or a percentage value by which you want to increase your selling price. For example, setting the Pricing Markup at $5 or 50% will make it so that a TLD that costs you $10 will cost your clients $15 when they purchase it from you.
You’ll then see all the domain extensions that you have added appear in your list of domain reseller products. Your cost and selling price will be displayed for each one according to the pricing markup you set.
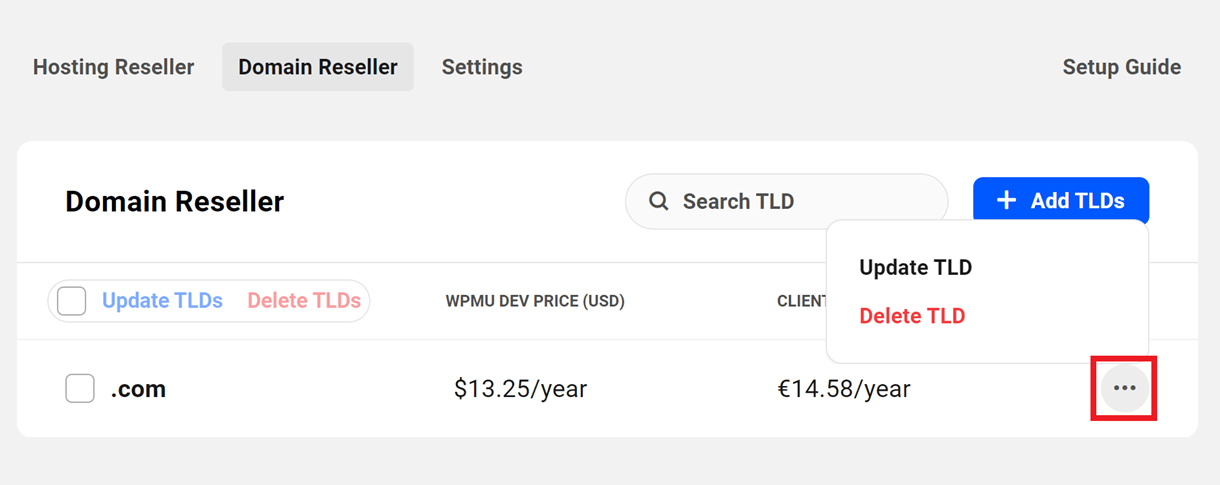
8.3.2 Managing Domain Products
Link to chapter 3If you need to delete a domain extension or update its pricing markup, click the ellipsis icon at the far right of the TLD’s row and select the corresponding option.
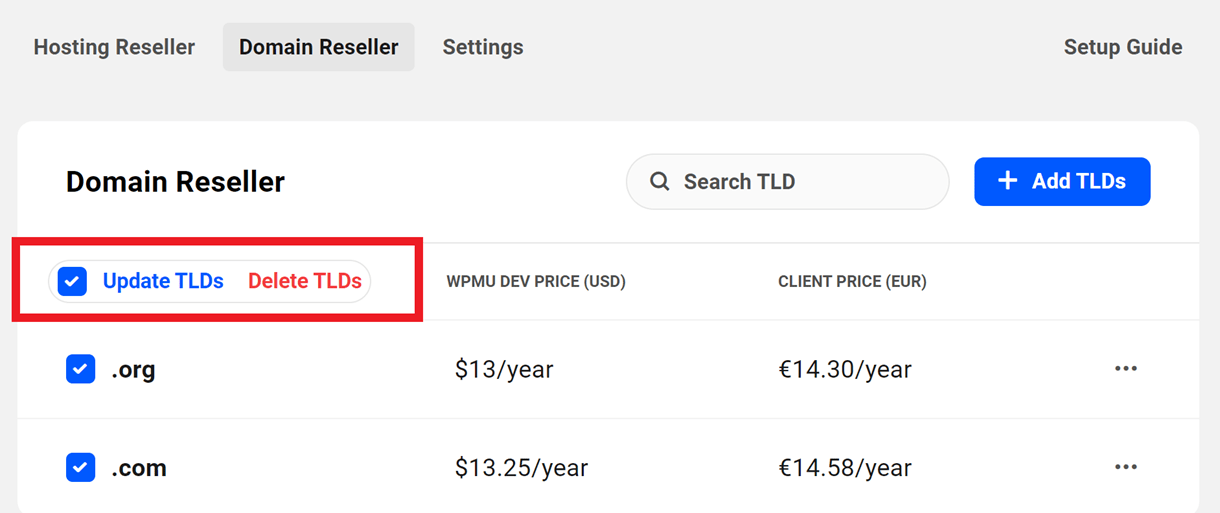
You can also bulk update or delete TLDs by checking the box next to each, and clicking the corresponding bulk option.
When selecting to update one or more TLDs, a modal window will pop open where you can adjust the pricing markup for the selected TLDs.
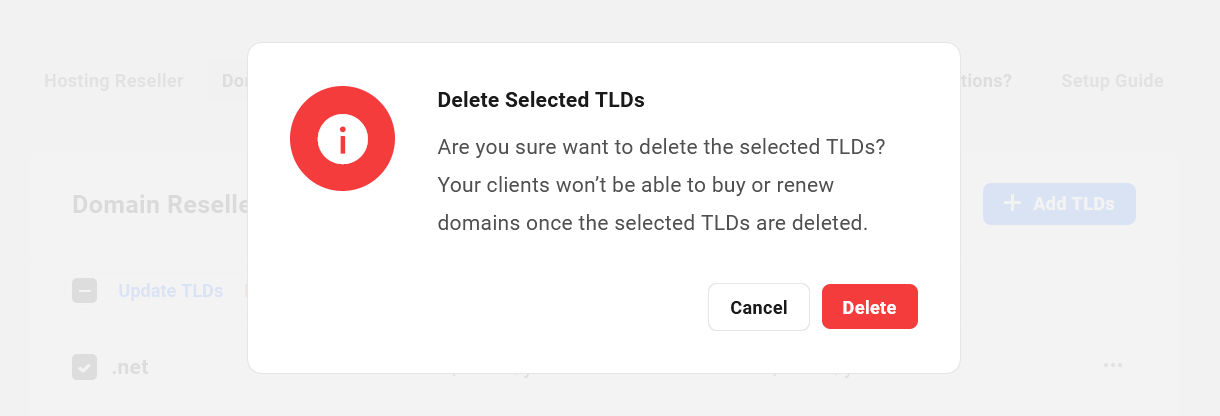
When selecting to delete one or more TLDs, a modal window will pop open prompting you to confirm the action.
8.4 Settings
Copy chapter anchor to clipboardThis is where you can configure the default options that will be applied to all of your hosting and domain reseller products.

8.4.1 Hosting Reseller
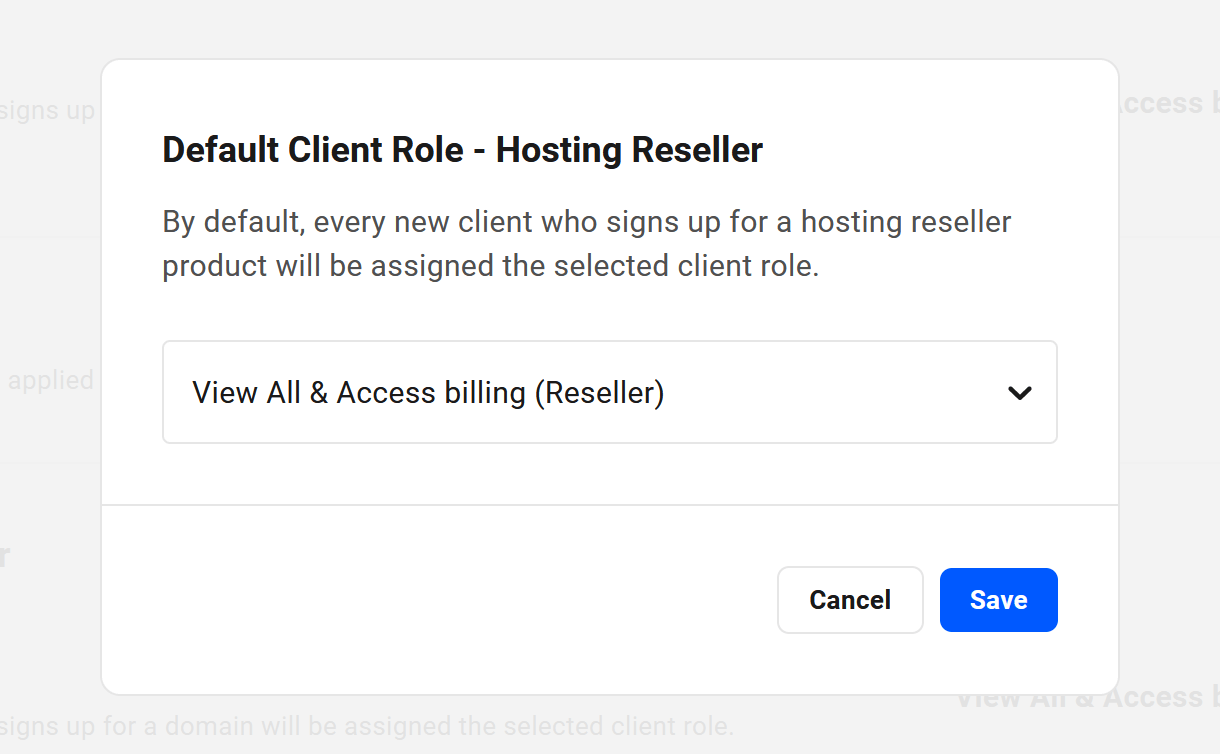
Link to chapter 4Default Client Role
Select the default role you wish to be given to every client who purchases a hosting reseller product from you. This is the role that will be applied by default unless you specify a different role in a hosting reseller product.
If you wish to change the default role, click the role currently displayed to pop open a modal window where you can select the new default role. Click Save when you’re done.
If none of the existing roles meet your requirements, you can create a custom role that includes the required Create new hosting site capability. See Client Role in Creating Hosting Products above for details.
It’s important to note that the Hub client role is applied per client account, not per site. If you have different client roles assigned to different reseller products and a client purchases two or more such products, their Hub role will automatically update to that of the most recently purchased product. If needed in certain situations, you can always edit the client’s role manually in their client profile.
Taxes
Select the taxes you wish to be applied specifically to your hosting reseller products.
Click the Add link, or any tax that you may have already set here, to pop open a modal window where you can select the taxes you need. Click Save when you’re done.
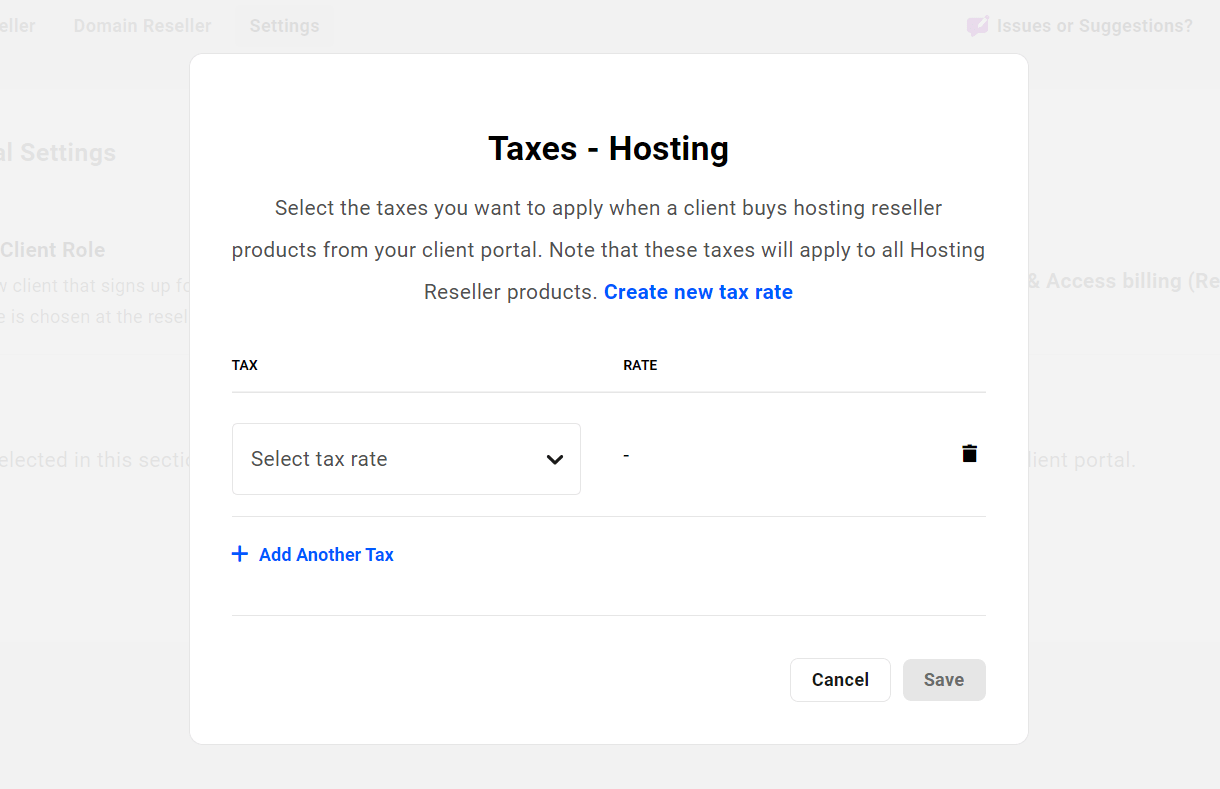
If none of your existing taxes apply, you can create new ones under the Taxes tab in Clients & Billing. Then come back here and select them for your hosting reseller products.
8.4.2 Domain Reseller
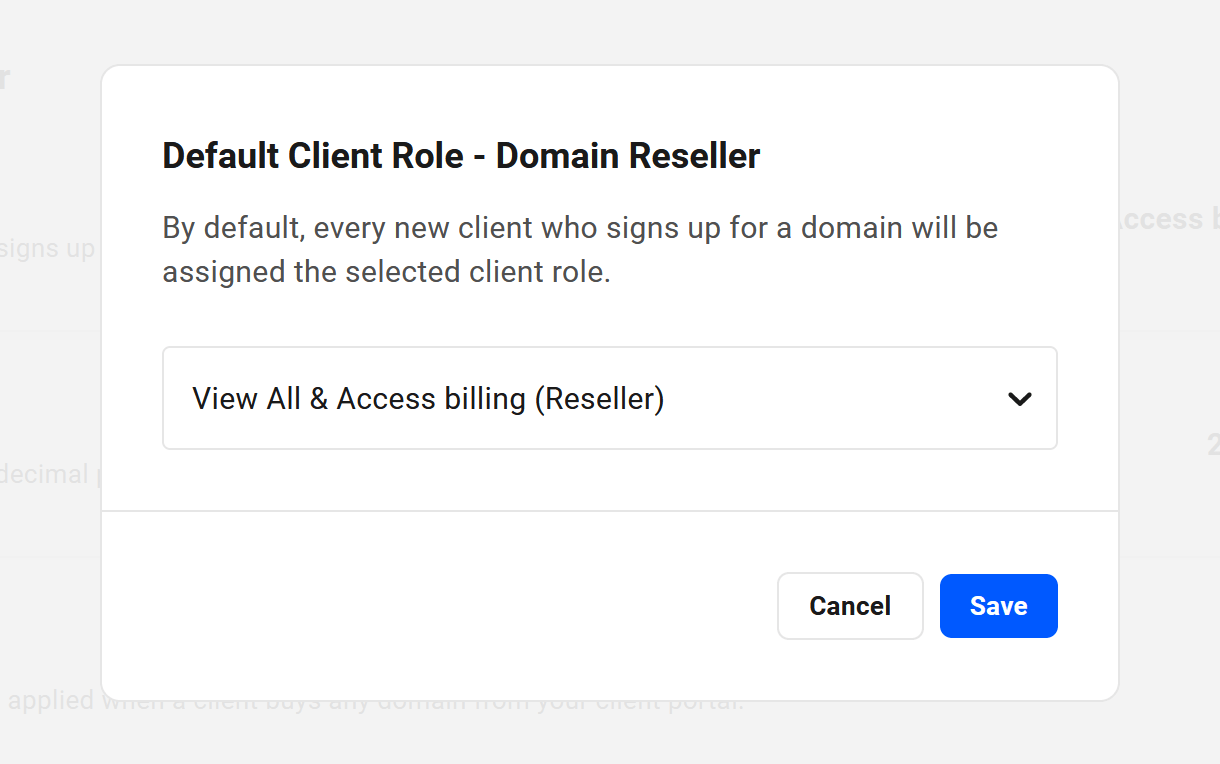
Link to chapter 4Default Client Role
Select the default role you wish to be given to every client who purchases a domain reseller product from you.
If none of the existing roles meet your requirements, you can create a custom role that includes the required Register New Domain capability.
It’s important to note that the Hub client role is applied per client account, not per site. If you have different client roles assigned to different reseller products and a client purchases two or more such products, their Hub role will automatically update to that of the most recently purchased product. If needed in certain situations, you can always edit the client’s role manually in their client profile.
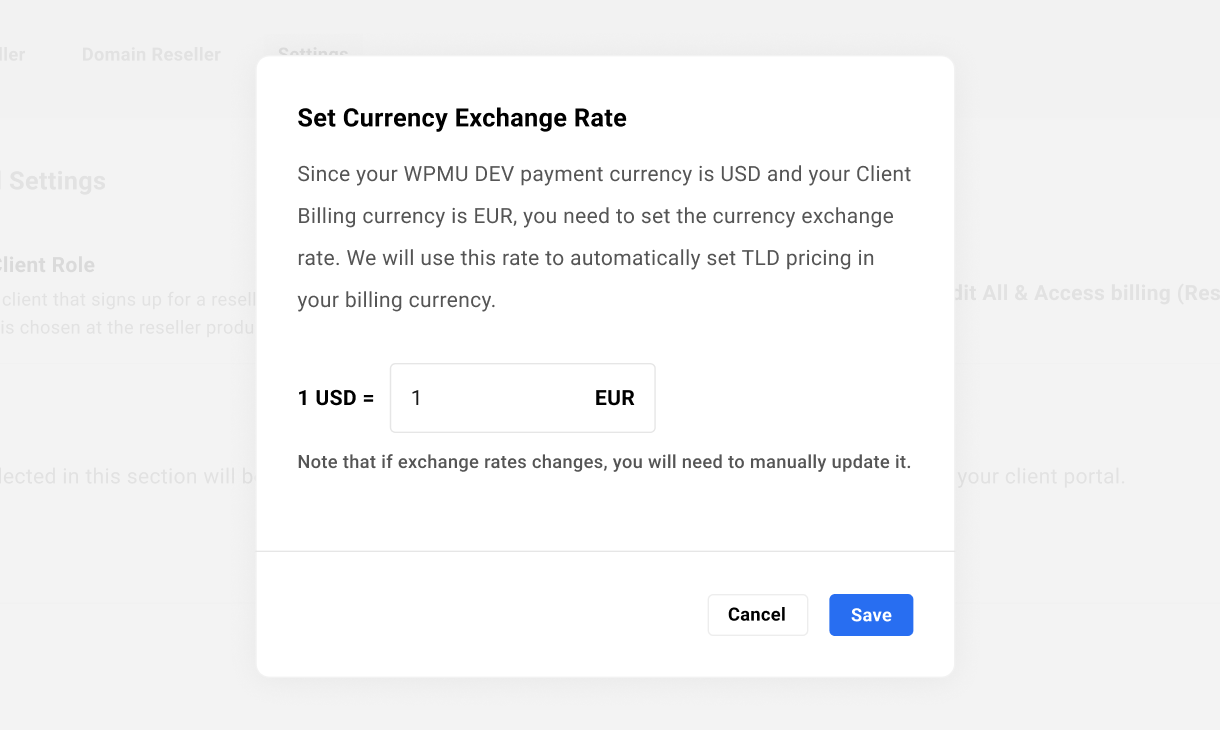
Currency Exchange Rate
This option only appears if your Clients & Billing currency is set to other than USD.
Click the Add link to pop open a modal window where you can set the desired exchange rate for all domains you sell in USD. Note that this is not a dynamically updated value; if exchange rates fluctuate and you need your prices to reflect that change, you would need to update the rate here manually.
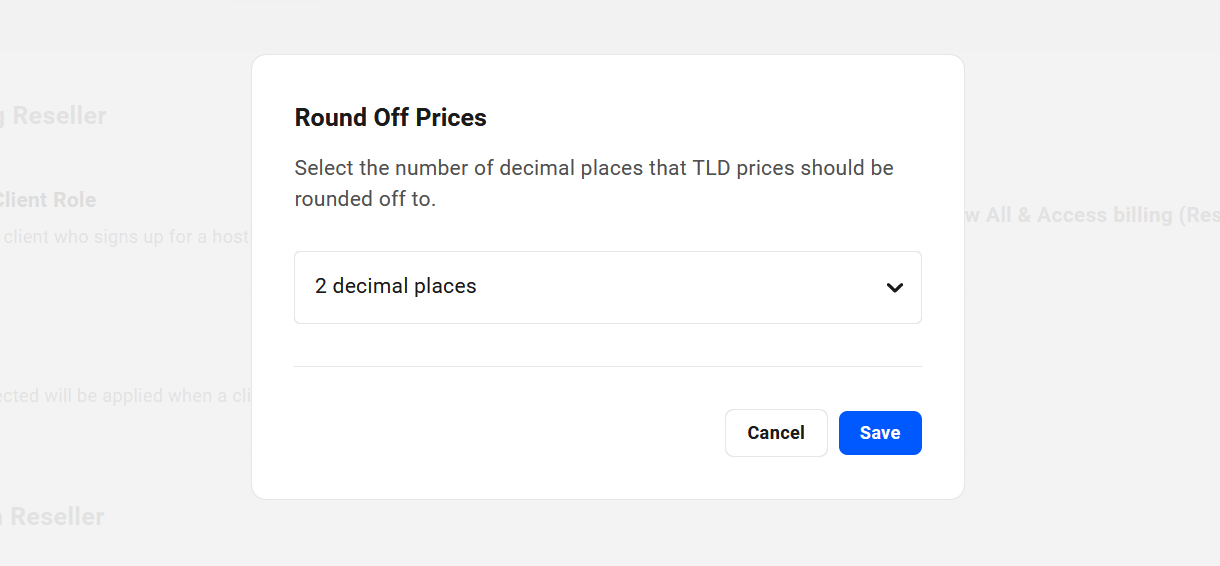
Round Off Prices
Click the currently displayed number to adjust the number of decimal places that your domain prices should be rounded off to, if needed.
Taxes
Select the taxes you wish to be applied specifically to your domain reseller products.
Click the Add link, or any tax that you may have already set here, to pop open a modal window where you can select the taxes you need for your domain reseller products. Click Save when you’re done.
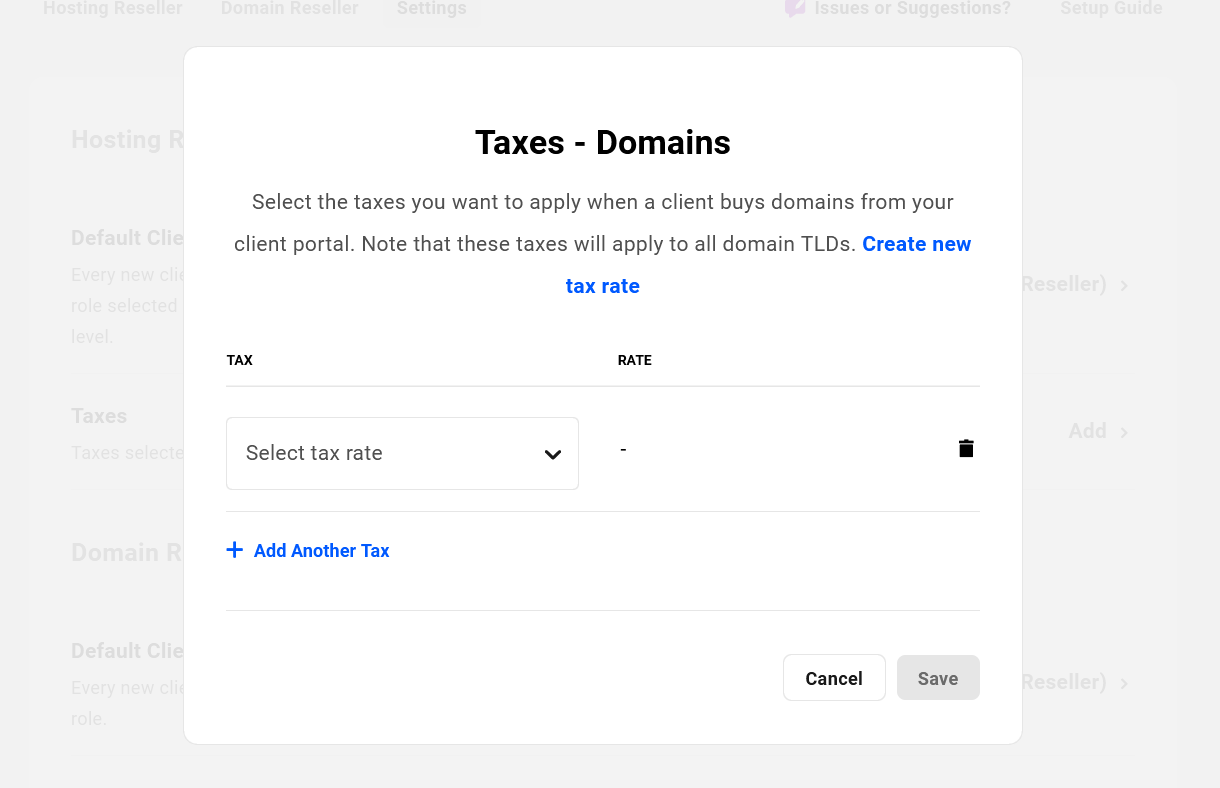
If none of your existing taxes apply, you can create new ones under the Taxes tab in Clients & Billing. Then come back here and select them for your domain reseller products.
8.5 Get Support
Copy chapter anchor to clipboardIf you still have questions or need assistance after reading this document, please don’t hesitate to contact our support superheroes using the available options under the Support tab in your Hub or via the Support tab in your WPMU DEV Dashboard.
