2. Hummingbird
This guide explains how to use Hummingbird’s performance and optimization features to speed up your site while preserving resources.
Hummingbird requires PHP 7.4 or greater. See WPMU DEV Minimum Requirements for details.
Upon activation or when certain features are configured, this plugin may add cookies to the user’s browser, store personal information in your database, or integrate with 3rd-party applications. You may need to disclose this information to your site visitors. For details, see Our Plugins in our privacy policy documentation.
Once Hummingbird is installed and activated, refer to this guide for assistance configuring and managing Hummingbird. The index on the left provides quick access to guidance on specific features.
If you haven’t installed Hummingbird yet, then you should visit the Hummingbird page where you can explore the plugin’s many features, and where WPMU DEV members can install Hummingbird Pro directly to any connected site.
Check out our blog post to get the low-down on the latest updates in Hummingbird: Unified Notifications, a New Wizard, and More!
Note that if you have multiple WordPress performance plugins installed, they may conflict with each other and lead to unpredictable behavior or even break your site. The following list of plugins may cause issues with Hummingbird:
- Autoptimize
- W3 Total Cache
- LiteSpeed Cache
- WP Performance Score Booster
- WP Fastest Cache
- Speed Booster Pack PageSpeed & Performance Optimization
- WP-Optimize
- WP Performance
- Swift Performance Lite
- WP Super Cache
We recommend only using one performance plugin at a time for the best results.
Every WPMU DEV hosted site comes fully loaded with Pro versions of the following plugins automatically installed for you: Smush, Hummingbird, Defender, SmartCrawl, and Forminator. Not hosting with us yet? Check out our Hosting page to see if we might be a good fit for your projects.
Many performance-enhancing opportunities involve image optimization, and it just so happens that we produce the most successful image optimization tool in WordPress History — Smush Pro. We strongly encourage you to install and activate Smush, because when you do, Hummingbird’s image optimization tips will include a link to the Smush module where that fix can be applied.
Check our blog post on how you can optimize your site’s performance in 5 simple steps for free using Hummingbird!
We’ve put together some awesome tutorials on optimizing content & pages created with some of the most popular page builders out there. If you’re using any of the ones listed below, we highly recommend checking out the associated posts to help you get the most out of Hummingbird.
Optimize Elementor Using Smush and Hummingbird
Optimize Elementor for Core Web Vitals Using R.O.S.E.
Optimize WPBakery Sites
Optimizing WPBakery’s Impreza Theme
Optimize Divi with Hummingbird and Smush
Optimizing Astra with Hummingbird and Smush
How to Speed Up Slider Revolution in WordPress
Speed Up and Optimize Avada Using Smush and Hummingbird
2.1 Quick Setup Wizard
Copy chapter anchor to clipboardThe Quick Setup Wizard will walk you through the configuration of all the basic plugin features so you can get your site optimized with just a few clicks.
The wizard appears the first time the plugin is activated, or if you use the Reset option in Data & Settings.
If you do not wish to use the wizard to set up the plugin, you can exit at any time by clicking the Quit Wizard button at the top-right. That will close the wizard and load the Hummingbird Dashboard screen. Any options that you may have already configured in the wizard will of course remain as you have configured them.

If you prefer to apply one of your preset configurations instead of using the wizard, click the Skip wizard and apply a config link at the bottom-left. That will close the wizard and direct you to the Configs screen in the plugin’s Settings section.

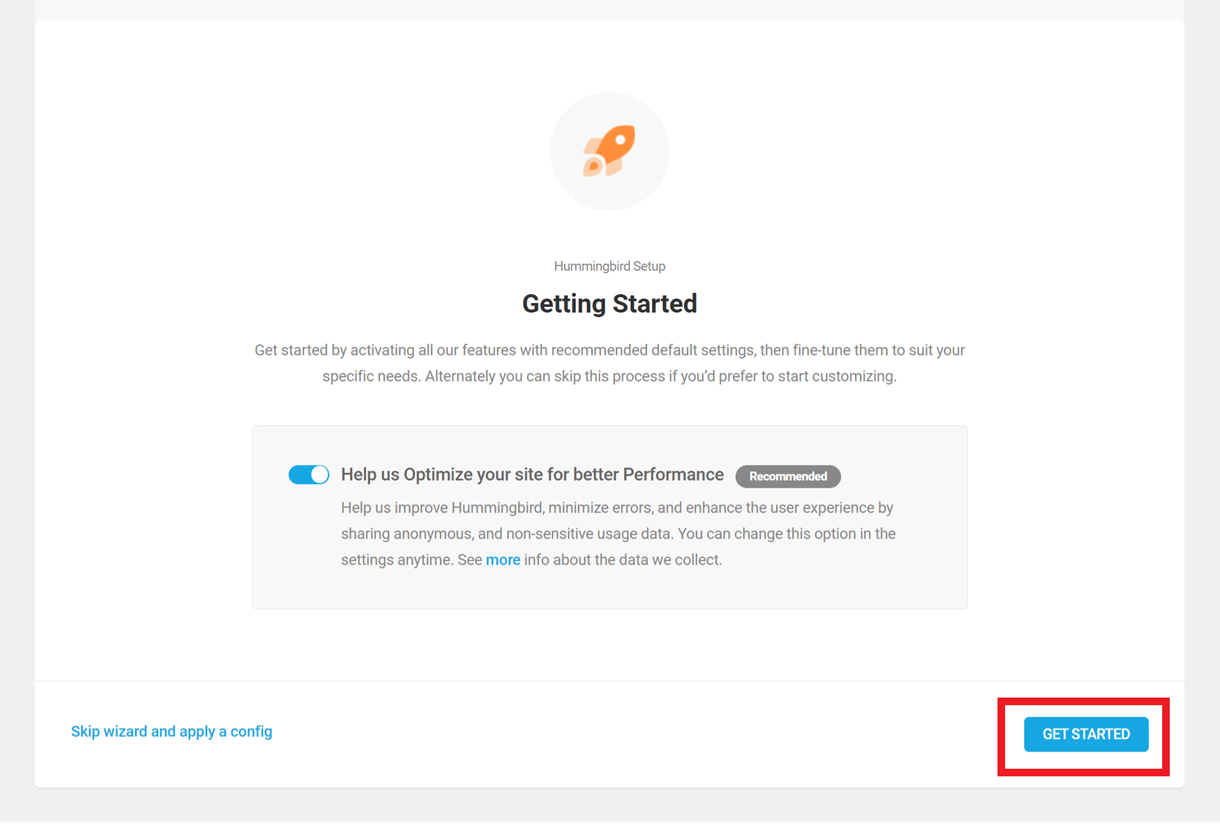
Getting Started
The first step in the wizard will prompt you to optionally enable Usage Tracking. This helps us to make Hummingbird even better by letting our team know how you’re using the plugin. This option can also be enabled or disabled at any time in the General Settings.
WPMU DEV’s usage tracking never collects your personal data or that of your site users. If you enable this option, we will only collect anonymous data about how Hummingbird is used, what errors occur and under what circumstances, and we use this data to improve the plugin. Leave the usage tracking option enabled if you want to help out or disable it if you’d prefer to opt-out.
Click the Get Started button to proceed to the next step.
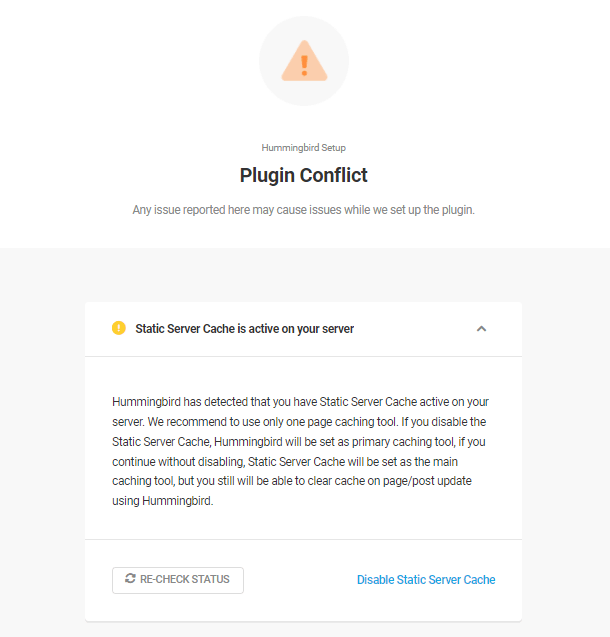
If your site is currently not hosted with WPMU DEV and you have Static server cache enabled, you will see a notice recommending using one caching tool. Click the Disable Static Server Cache link to use Hummingbird cache only, or click the Continue Anyway button to continue using the static server cache as your primary caching tool.
If you choose to use Static Server Cache, cache will be automatically cleared when you update a post or page. See static server cache compatibility for more details.
Asset Optimization
This step will prompt you to enable the default automatic Speedy configuration for the Asset Optimization features (including the extra optimization features).
Speedy compression will auto-compress and auto-combine smaller files together, and optimize delivery of your font files. This can help to decrease the number of requests made when a page is loaded.
You’ll also have the option to enable asset delivery from the WPMU DEV CDN.
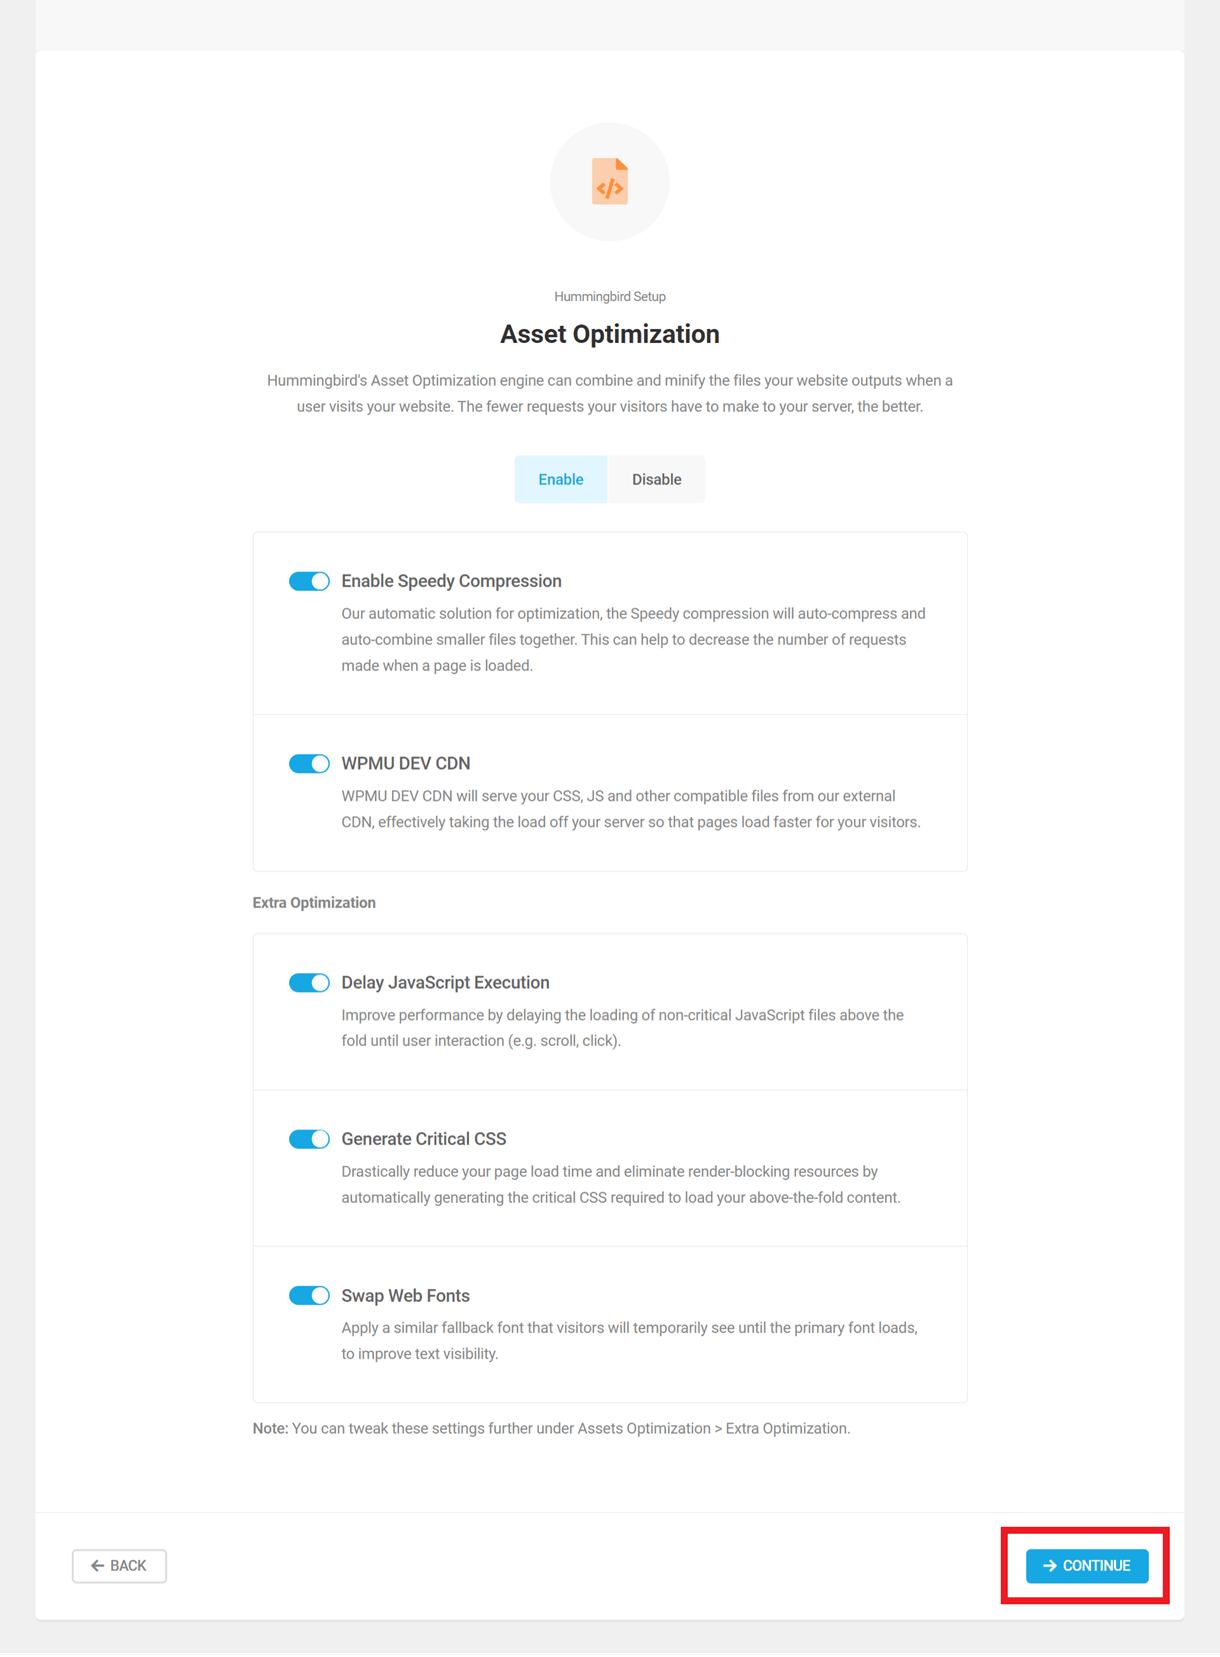
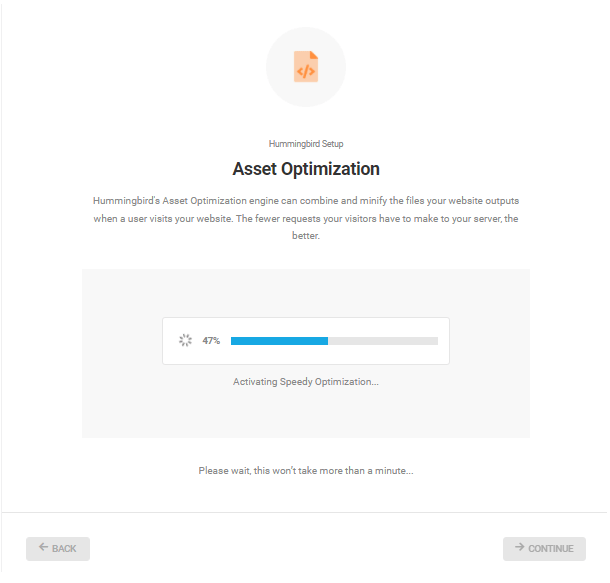
Click Continue when you’re ready to proceed. The wizard will display its progress while it runs through all available assets and optimizes them for you. This will only take a minute or so, and it will proceed automatically to the next step when done.
If you do not wish to configure Asset Optimization at this time, select the Disable option, then click Continue.
This feature can be enabled/disabled and configured at any time in the Asset Optimization section of the plugin settings.
Uptime
Hummingbird’s Uptime feature monitors your server response time and lets you know when your website is down or too slow for your visitors.
Choose whether to Enable or Disable the feature, and click Continue to proceed to the next step.
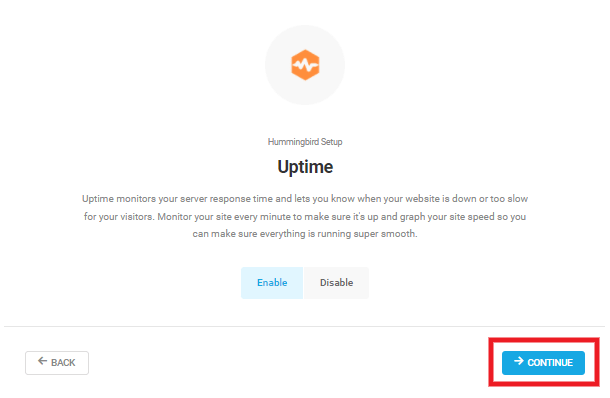
This feature can be enabled or disabled at any time in the Uptime section of the plugin settings.
Page Caching
In this step, you can configure the page caching and static server caching features.
Site Not hosted with WPMU DEV
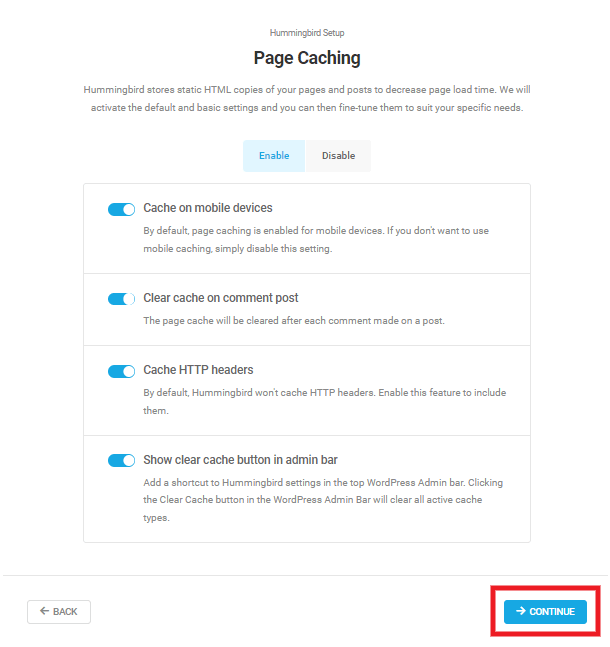
If your site is currently not hosted with WPMU DEV, in this step of the wizard, you can enable one or more of the basic options of the Page Caching feature.
The options available in the wizard are:
- Cache on mobile devices – By default, page caching is enabled for mobile devices. If you don’t want to use mobile caching, simply disable this setting.
- Clear cache on comment post – The page cache will be cleared after each comment made on a post.
- Cache HTTP headers – By default, Hummingbird won’t cache HTTP headers. Enable this feature to include them.
- Show clear cache button in admin bar – Add a shortcut to Hummingbird settings in the top WordPress Admin bar. Clicking the Clear Cache button in the WordPress Admin Bar will clear all active cache types.
Select the options you wish to enable and click the Continue button to proceed to the next step.
You can enable/disable or configure these and many more options in the Page Caching section of the plugin settings.
WPMU DEV hosted sites
If your site is hosted with WPMU DEV, in this step of the wizard, you can enable Static Server Cache or one or more of the basic options of the Page Caching feature.
If you select Static Server Cache, the cache will be automatically cleared when you update a post or page. See static server cache compatibility for more details.

If you select Local Page Cache, the following options will be available in the wizard:
- Cache on mobile devices – By default, page caching is enabled for mobile devices. If you don’t want to use mobile caching, simply disable this setting.
- Clear cache on comment post – The page cache will be cleared after each comment made on a post.
- Cache HTTP headers – By default, Hummingbird won’t cache HTTP headers. Enable this feature to include them.
- Show clear cache button in admin bar – Add a shortcut to Hummingbird settings in the top WordPress Admin bar. Clicking the Clear Cache button in the WordPress Admin Bar will clear all active cache types.
Select the options you wish to enable. Or, if you want to completely disable page caching, select Disable.
Now, click the Continue button to proceed to the next step.

You can enable/disable or configure these and many more options in the Page Caching section of the plugin settings.
Advanced Tools
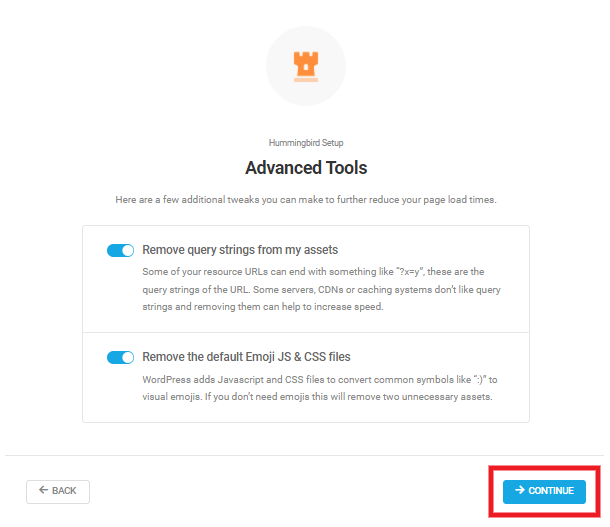
In this step, you can enable one or more of the advanced options in Hummingbird.
The options available in the wizard are:
- Remove query strings from my assets – Some of your resource URLs can end with something like “?x=y”, these are the query strings of the URL. Some servers, CDNs or caching systems don’t like query strings and removing them can help to increase speed.
- Remove the default Emoji JS & CSS files – WordPress adds Javascript and CSS files to convert common symbols like “:)” to visual emojis. If you don’t need emojis this will remove two unnecessary assets.
Select the options you wish to enable and click the Continue button to proceed to the final step.
You can enable/disable or configure these and many more options in the Advanced Tools section of the plugin settings.
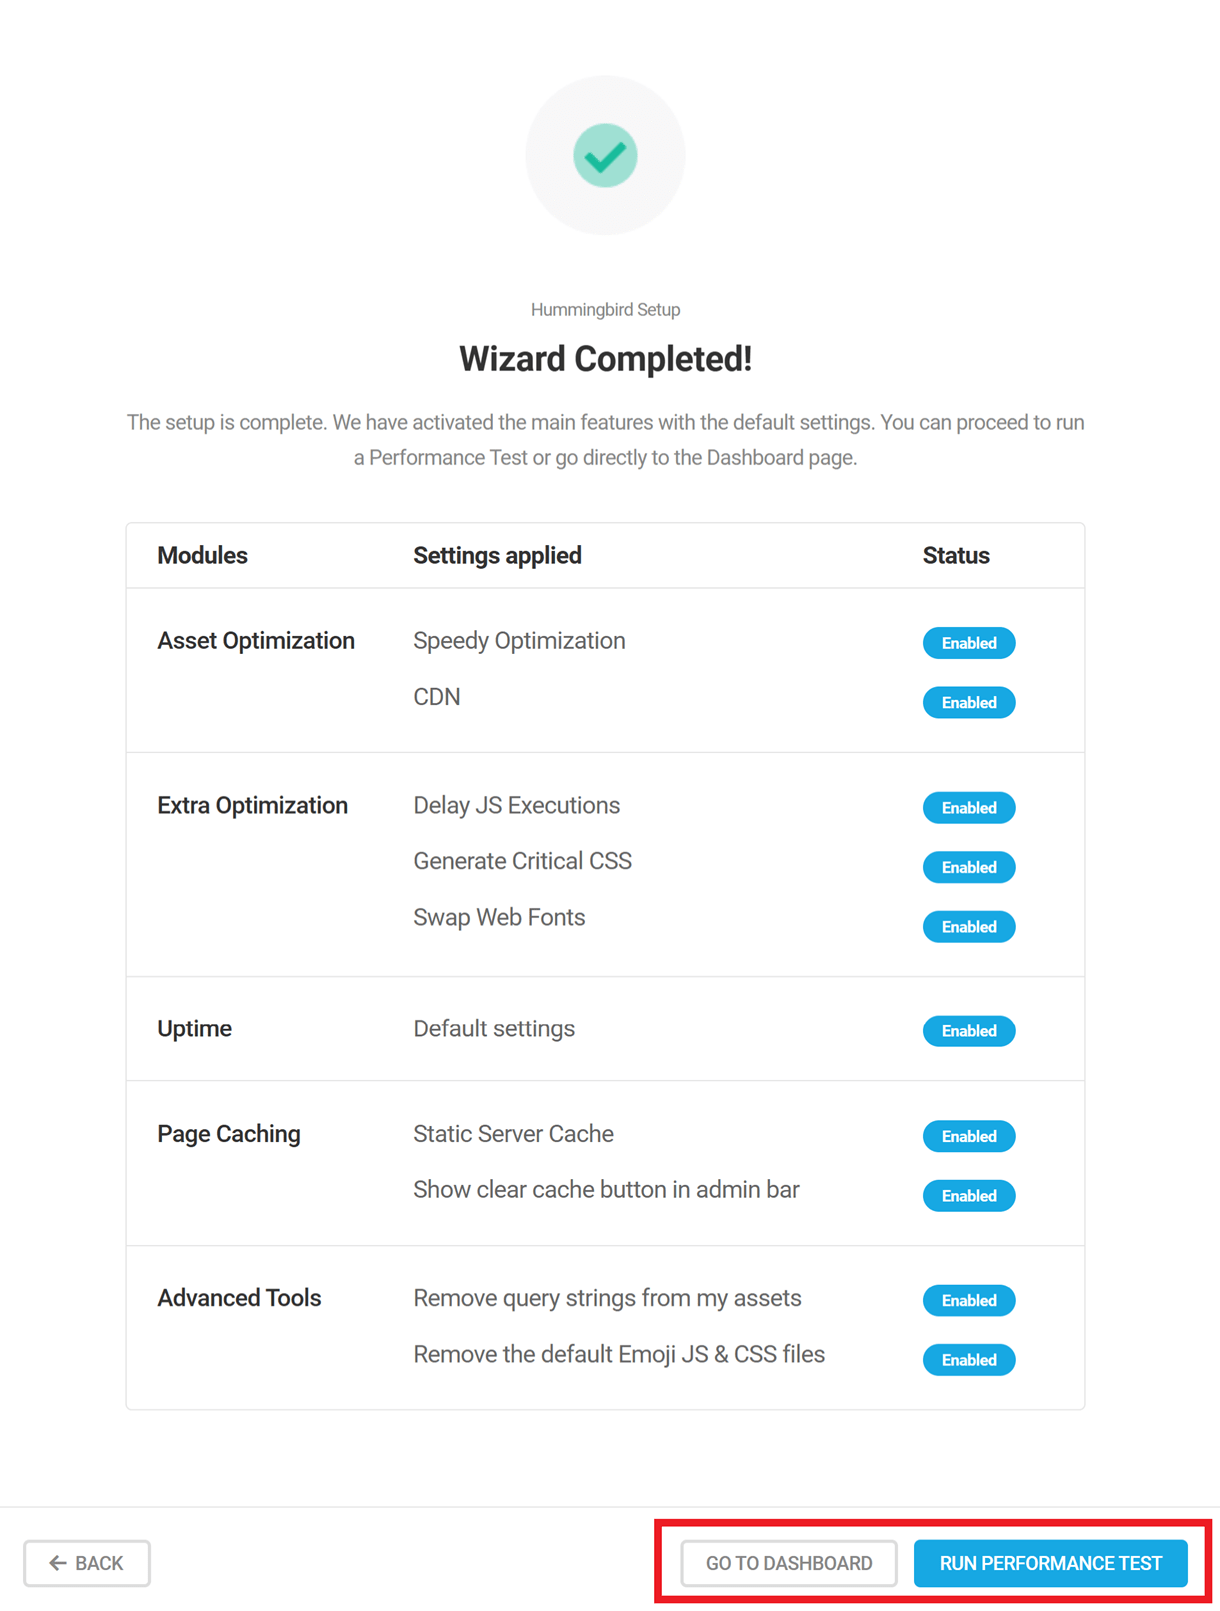
Wizard Completed
Once you’ve run through all the steps in the wizard, a summary will appear showing all the features you have enabled or disabled.
We suggest you click the Run Performance Test button to get a detailed report on your site’s current performance.
Or click the Go To Dashboard button if you don’t want to run a performance test at this time.
2.2 Dashboard
Copy chapter anchor to clipboardThe Dashboard consists of the Overview panel and Quick Access panels for each Hummingbird module.
Overview
The Overview panel provides a summary of Hummingbird’s current configuration and the results of the latest performance test.
Click the Desktop/Mobile toggle above your Performance score to switch between Desktop and Mobile reports.
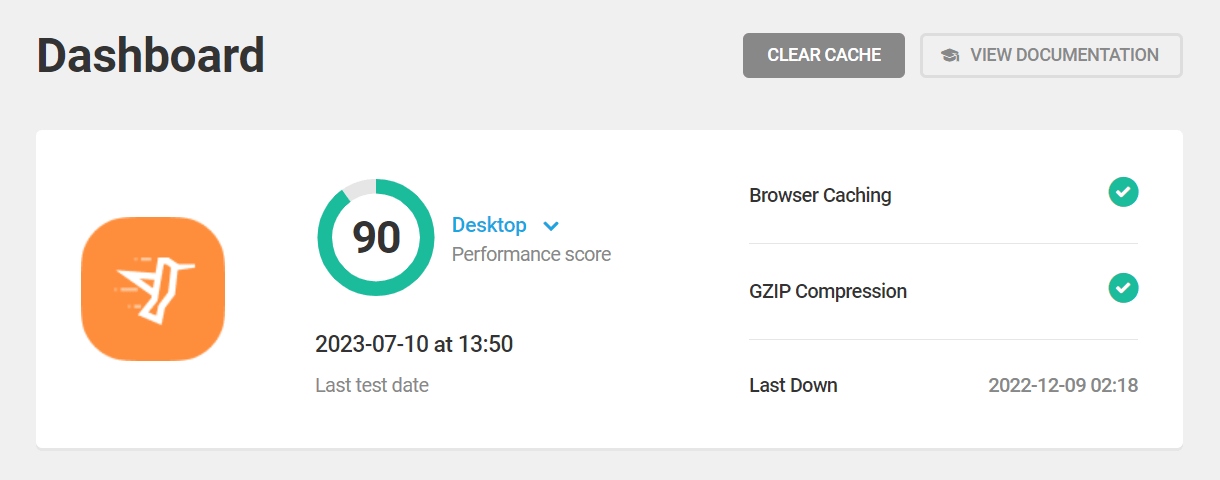
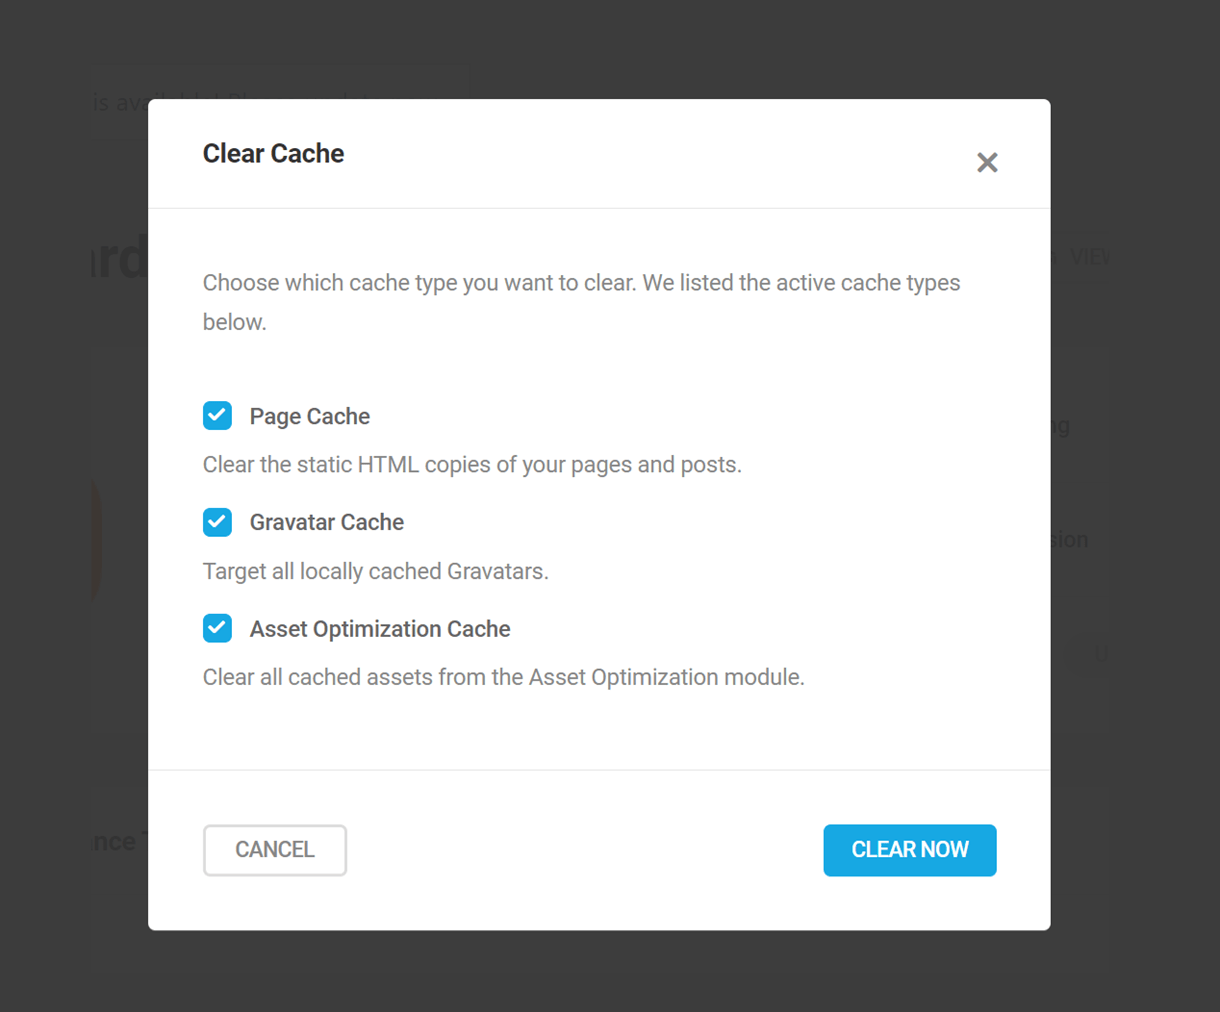
When you click the Clear Cache button at the top of the screen, a modal window will pop open where you can select which active cache types you want to clear. Note that this button will only appear here if at least one of these cache features is enabled:
- Page Cache
- Asset Optimization Cache
- Gravatar Cache
- OpCache
- Varnish Cache
- CloudFlare (if integrated)
Check the box for each active cache type you want to clear, and click Clear Now to proceed.
Quick Access
The Quick Access panels provide easy access to every Hummingbird module. View current data, turn modules on and off or click the Configure button to access a specific module’s configuration screen.
Performance Test
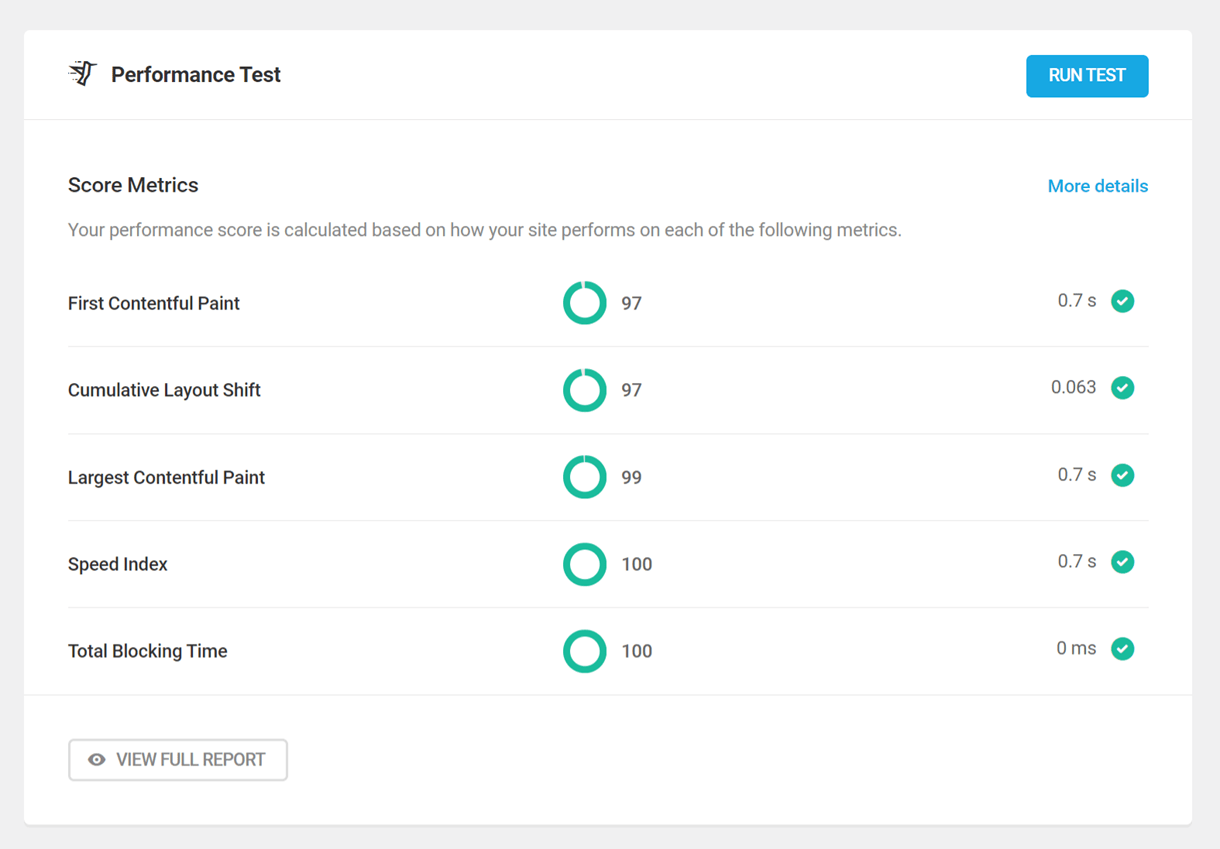
Hummingbird scans the site, assessing the speed and efficiency of multiple assets and scripts, and then renders a report that includes guidance on how to resolve issues and improve performance.
The module displays your current scores for each metric that contributes to your overall Performance score, as seen in the Overview module above.
Click the Run Test button to trigger a new Performance Test. Click the More Details link or the View Full Report button to view the full Performance Report for your site.
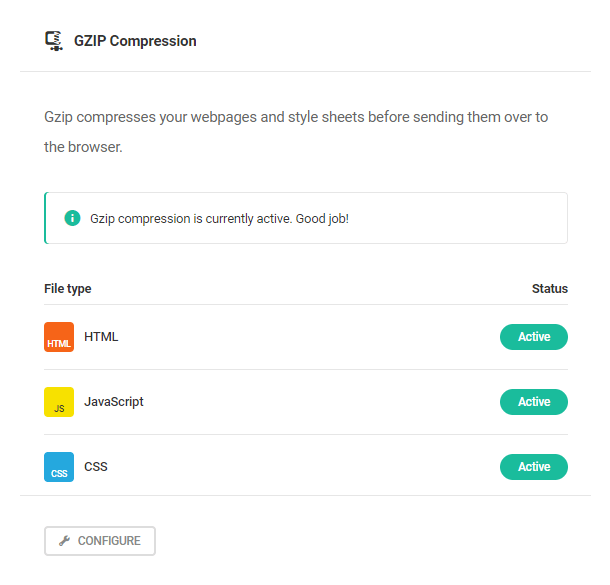
Gzip Compression
Gzip achieves significantly greater compression than .zip because .gzip doesn’t have to be self-extracting.
The module displays the currently active file compression types. Click the Configure button to access the feature’s settings screen.
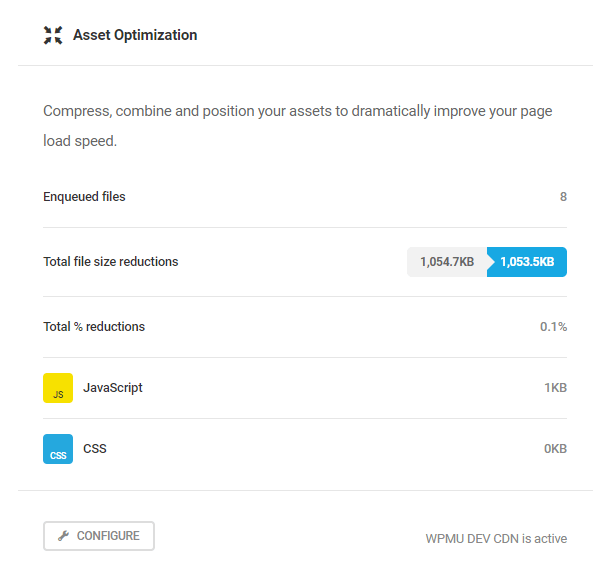
Asset Optimization
The nuts and bolts of your performance must-dos: minify, combine, optimize, and position files to improve page speed.
The module displays summary information about how many assets are enqueued, as well as file size reductions. It also indicates whether you’re using the WPMU DEV CDN to deliver your optimized assets. Click the Configure button to access the feature’s settings screen.
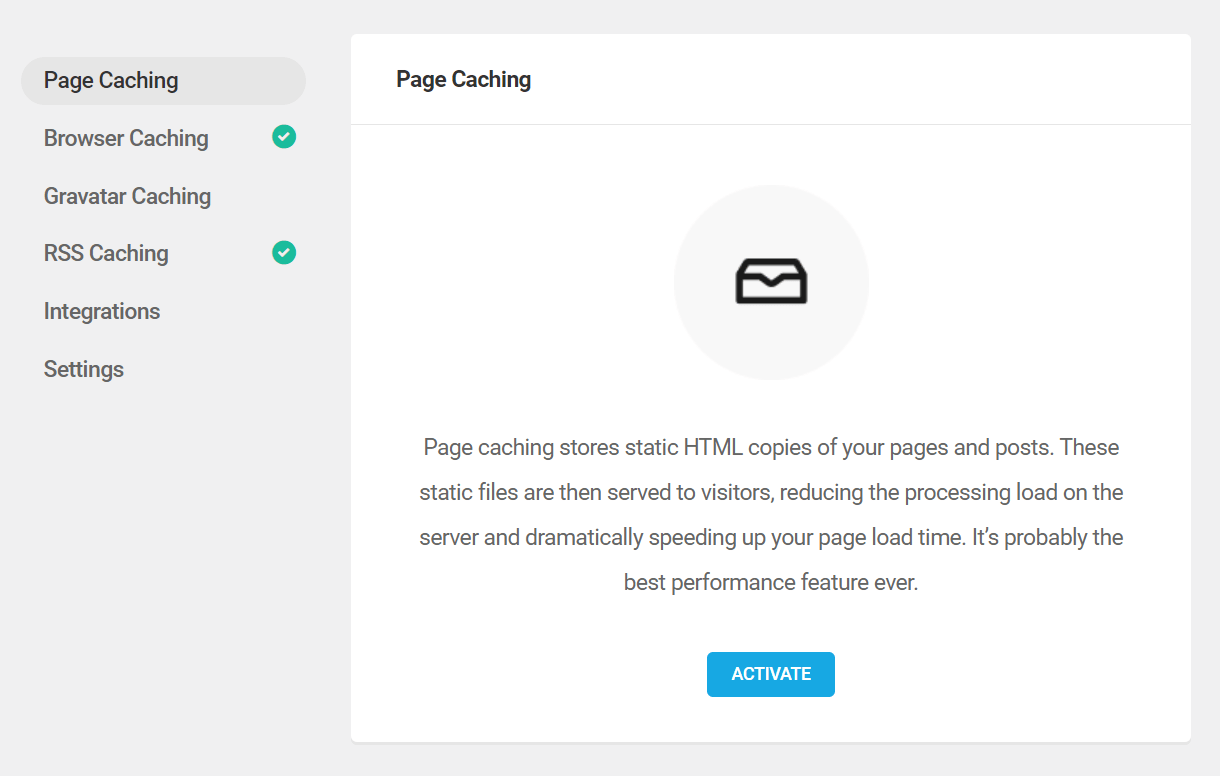
Page Caching
Page caching creates and stores static HTML copies of your pages and delivers those to the user’s browser to dramatically reduce page load time.
The module simply displays the current active status of Page Caching. Click the Configure button to access the feature’s settings screen.
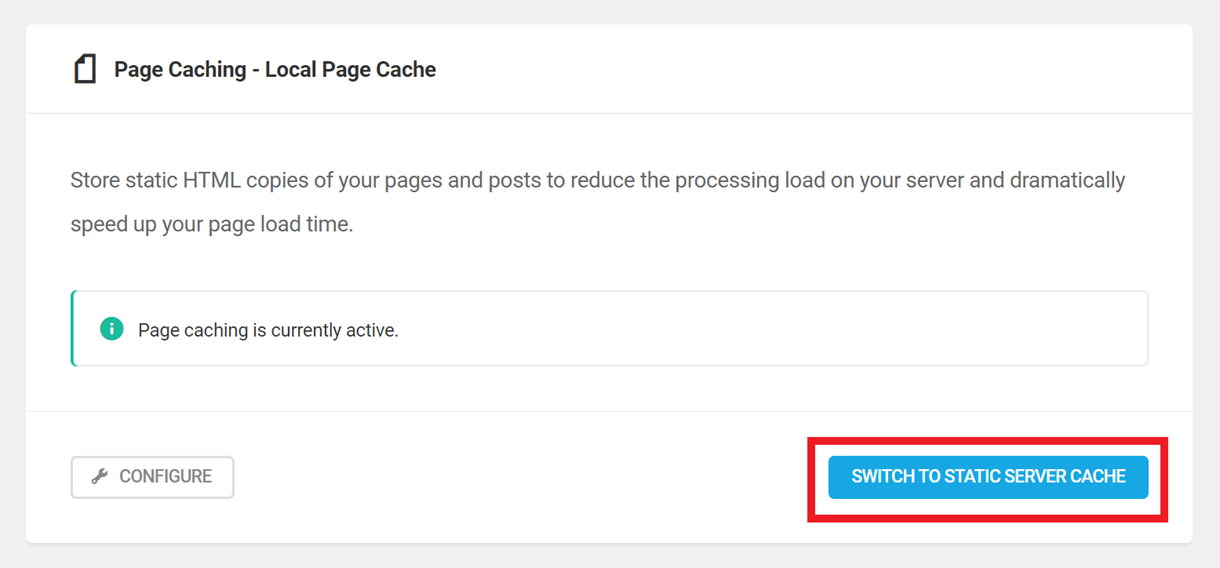
If your site is hosted with WPMU DEV, click the Switch to Static Server Cache button to switch from page cache to static server cache. However, if your site is not currently hosted with WPMU DEV, you can switch to our hosting to access this feature.
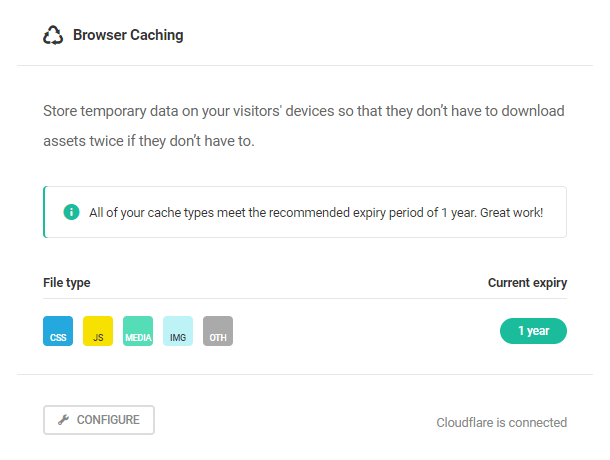
Browser Caching
Browser caching stores temporary data on the user’s device so they don’t have to download the same assets every time they visit your pages. This greatly reduces page load time on subsequent visits.
The module displays the current expiry time of cached file types, and indicates if you have connected your Cloudflare account to Hummingbird. Click the Configure button to access the feature’s settings screen.
Gravatar Caching
This feature caches local copies of user Gravatars so they don’t have to be downloaded on every page visit. The module simply indicates the current status of the feature. Click the Configure button to access the feature’s settings screen.
![]()
Image Optimization
Use Smush Pro to manage image resizing, compression, and optimization.
This module indicates the current status of the Smush plugin, along with the total image filesize reduction. Click the Configure button to access Smush settings screen.

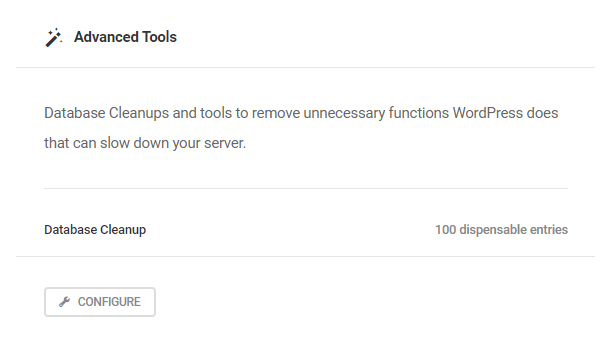
Advanced Tools
Manage query strings, cart fragments emojis, prefetch requests, and maintain your database. Click the Configure button to access the feature’s settings screen.
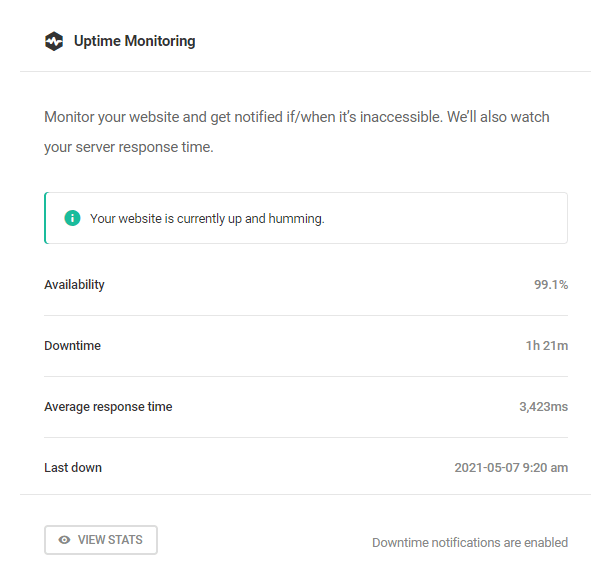
Uptime Monitoring
This feature monitors your site’s uptime, and notifies you if your site is ever inaccessible.
The module displays summary information for the last 7 days, including overall accessibility, total downtime and average response time. Click the View Stats button to access the feature’s settings & detailed statistics screen.
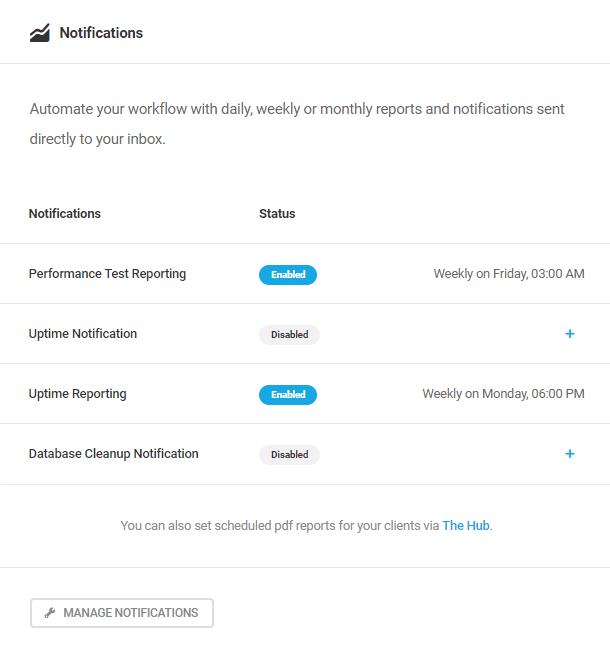
Notifications
Automate your workflow with daily, weekly or monthly reports and notifications sent directly to your inbox.
This module indicates which notification types you have configured on your site and their frequency. Click the plus icon or the Enabled/Disabled tag of any report type, or the Manage Notifications button, to access the Notifications settings.
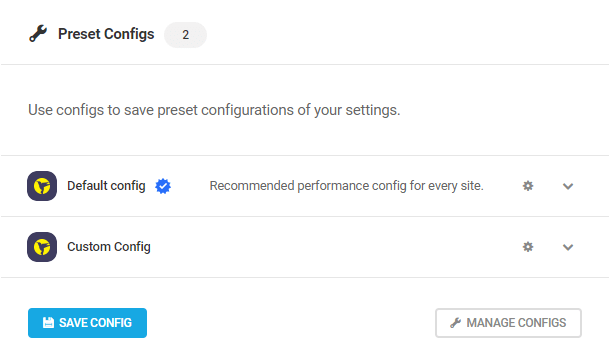
Configs
Preset configs allow you to save your Hummingbird configurations so that they can be applied to another site in just a few clicks.
2.3 Performance Test
Copy chapter anchor to clipboardThe Performance Test Overview panel presents you with a summary of your current performance report, including your current overall score, the date of the last test, as well as how many Opportunities, Diagnostics and Passed Audits are in your current report.

Click the Desktop/Mobile toggle next to your score to switch between Desktop and Mobile reports.
Click the Settings tab to access the optional Performance Test Settings.
Beneath the Performance Test overview, you’ll find detailed result of the latest Performance Test broken into two sections:
- Performance Results – A breakdown of the important metrics and data that directly affect your overall performance score.
- Audits – A breakdown of all opportunities and diagnostics that can improve your overall performance score, as well as a list of passed audits with a score of 90 or above.
Note that if Asset Optimization is in progress, it is recommended to wait till the process completes before running a Performance Test to get the most accurate scores.
See the corresponding sub-chapters of this document for more information about each section and subsection.
2.3.1 Score Metrics
Link to chapter 3This section displays the metrics that directly affect your overall performance score. You may recognize them as they are the same metrics you’ll find when running a performance test at Google’s Pagespeed Insights, or when running Lighthouse in your Chrome browser.
Click the icon on the right of any metric to be redirected to the corresponding page at Google’s web.dev site for more information, or view a short description of each below.
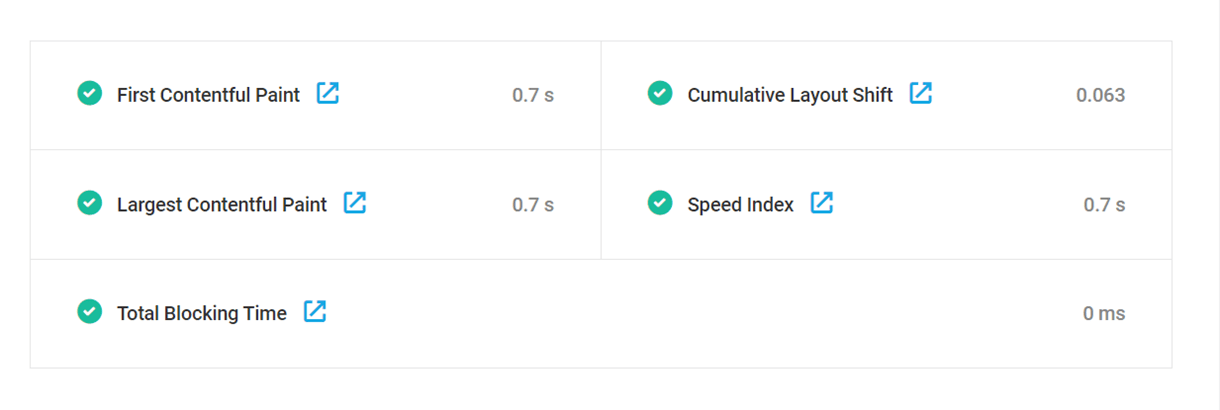
To the left of those metrics, you’ll see a handy pie-chart that illustrates how much each metric contributes to your overall performance score. According to this page at web.dev, the weighting of each metric is chosen to provide a balanced representation of the user’s perception of performance.

Here’s a breakdown of each metric, and how it affects your overall performance score. Click any one to jump to the corresponding section in this document for more information about each:
- Speed Index – 10% of your overall score
- First Contentful Paint – 10%
- Largest Contentful Paint – 25%
- Total Blocking Time – 30%
- Cumulative Layout Shift – 25%
Speed Index
The Speed Index score reflects the average time it takes for content to appear on the visible screen, or “above the fold.” It is a bit of a composite score since there are multiple sub-tasks that impact how long that takes.
Additionally, factors outside the site admin’s control also impact the speed index, such as the types of devices accessing the site as well as their various screen sizes.
This metric contributes to 10% of your overall performance score. For more information about this metric and how to improve it, see this page at web.dev.
First Contentful Paint
The First Contentful Paint score reflects the amount of time it takes for any piece of visible content to render on the screen.This includes images, non-white textual elements and SVGs. Note that content delivered to the page in iframes does not affect this metric.
This metric is significant because users increasingly expect pages to load very fast and often associate slow loading pages with a lack of quality or professionalism.
This metric contributes to 10% of your overall performance score. For more information about this metric and how to improve it, see this page at web.dev.
Largest Contentful Paint
The Largest Contentful Paint score reflects the amount of time it takes for the largest image or block of text to fully render on the screen.
This is very similar to the First Contentful Paint metric above, but it better reflects user experience as it is a more reliable indicator of when the user sees your page fully loaded.
This metric contributes to 25% of your overall performance score. For more information about this metric and how to improve it, see this page at web.dev.
Total Blocking Time
The Total Blocking Time score reflects the total amount of time that a page is blocked from responding to user input. This includes mouse clicks, screen taps, or keyboard clicks.
Inefficient script loading, parsing or execution are some of the major factors that contribute to a low blocking time score.
This metric contributes to 30% of your overall performance score. For more information about this metric and how to improve it, see this page at web.dev.
Cumulative Layout Shift

The Cumulative Layout Shift score refers to the sum total of all individual layout shift scores. That’s any time an element changes its position while the page is still loading.
For example, this can happen when images or buttons load slower than the text, or when slow ad scripts cause ad content to be dynamically inserted into the content.
This metric contributes to 25% of your overall performance score. For more information about this metric and how to improve it, see this page at web.dev.
2.3.2 Historic Field Data
Link to chapter 3The Historic Field Data displays a site’s performance data for the past 30 days as reported by the Chrome User Experience Report.
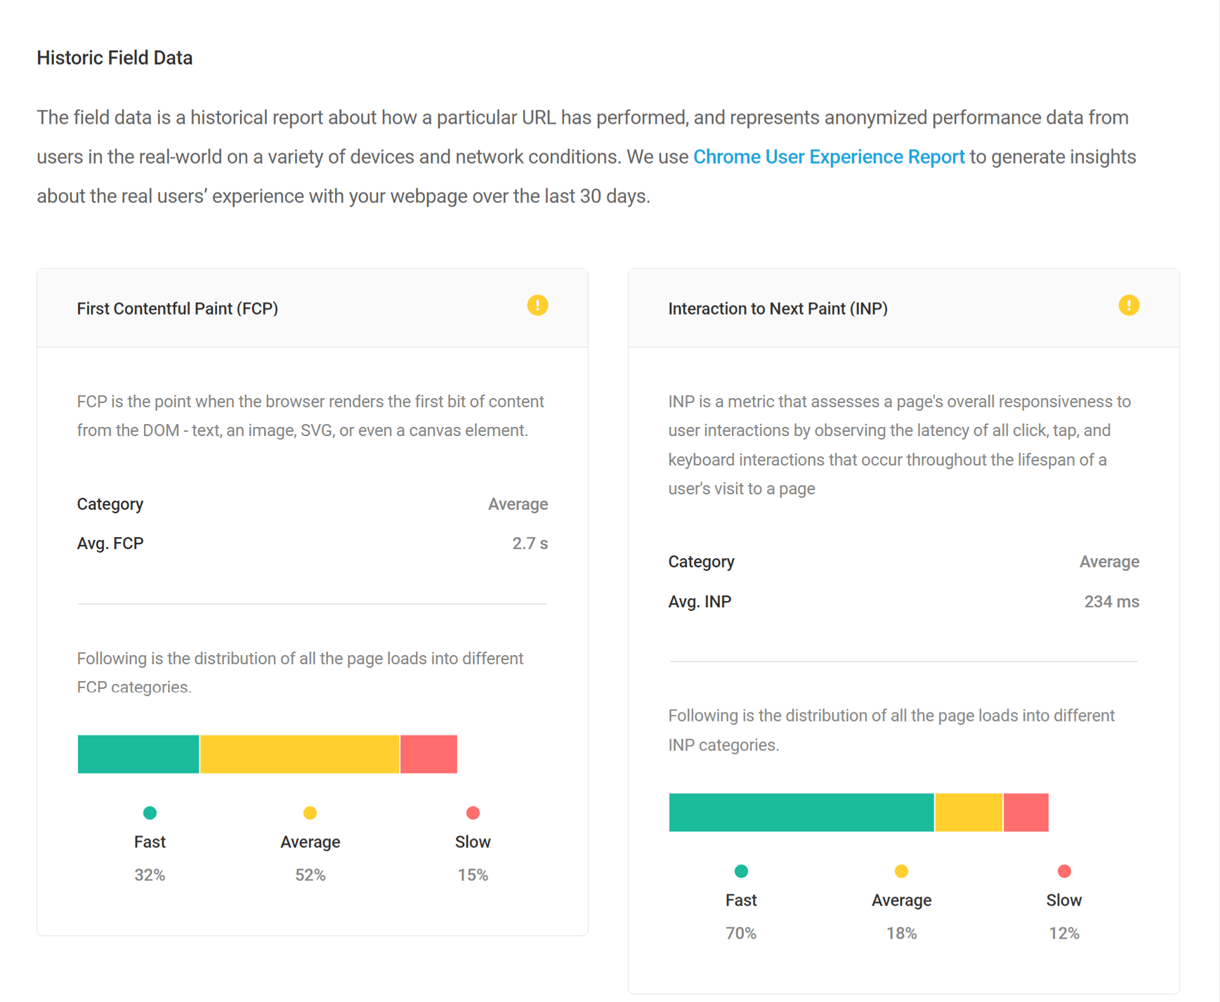
New sites or those with very little traffic can take a long time, even months, to generate enough data for this report to materialize.

The Chrome User Experience Report measures user experience metrics across the public web. This is aggregated from users who have opted-in to syncing their browsing history, have not set up a Sync passphrase, and have usage statistic reporting enabled.
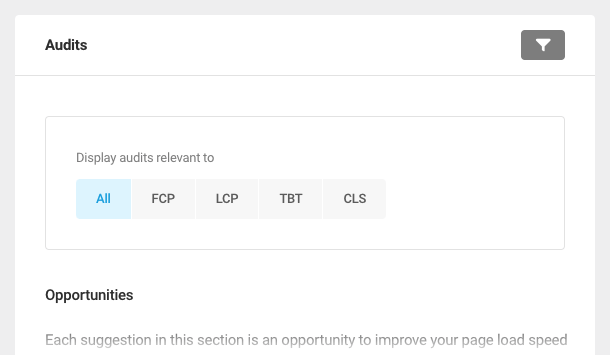
2.3.3 Audits
Link to chapter 3The Audits section details Performance Test results, broken down by type and outcome.
By default, all opportunities, diagnostics, and passed audits are displayed in this section. To filter audits by metric type, click the filter icon.

Then, select a metric type. In addition to displaying all audits, the list of audits can be filtered by the following metrics:
- First Contentful Paint (FCP)
- Largest Contentful Paint (LCP)
- Total Blocking Time (TBT)
- Cumulative Layout Shift (CLS)
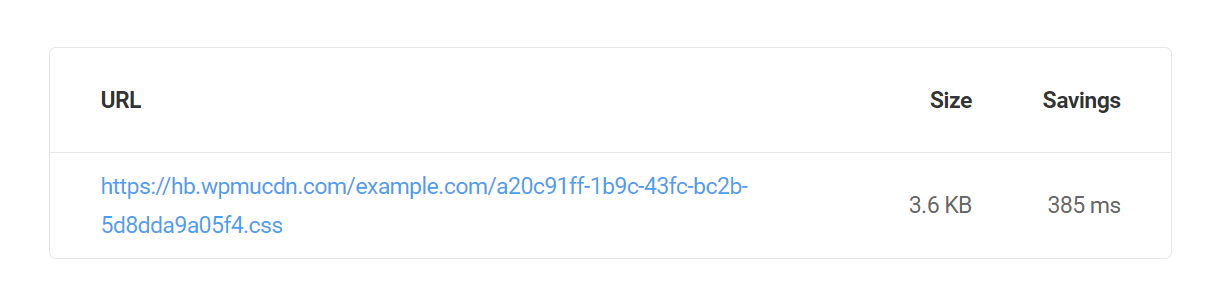
Note that if a file is shown in any of the Opportunities or Diagnostics below with a hashed filename (as a result of being combined with other files and/or served by the Hummingbird CDN), you can click on the file URL to pop it open in a new tab where you can see the actual filename(s) shown at the top of the screen, in the handles: section.

2.3.4 Opportunities
Link to chapter 3This section outlines opportunities to improve your page load speed and overall performance score, as reported by the Hummingbird Performance Test.

Click on a reported opportunity to view additional details about the issue, as well as tips on how to address it.
The list of opportunities that may be reported by the Performance Test are outlined below.
Every site is different. It’s possible that not every recommendation can be implemented for your site, and some recommendations may not produce a notable improvement to site performance.
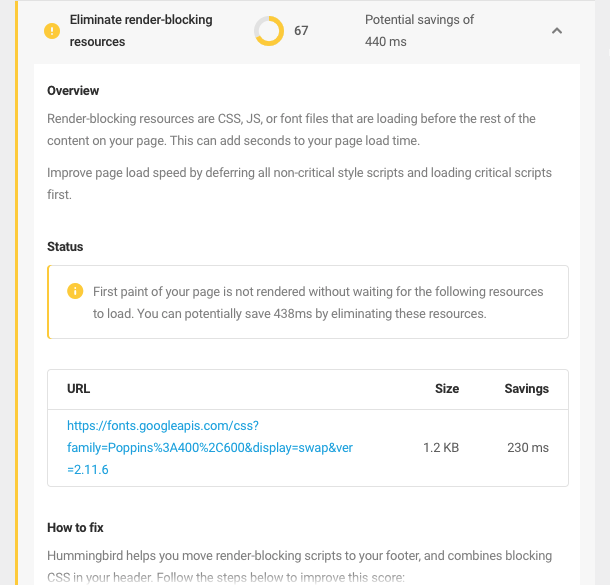
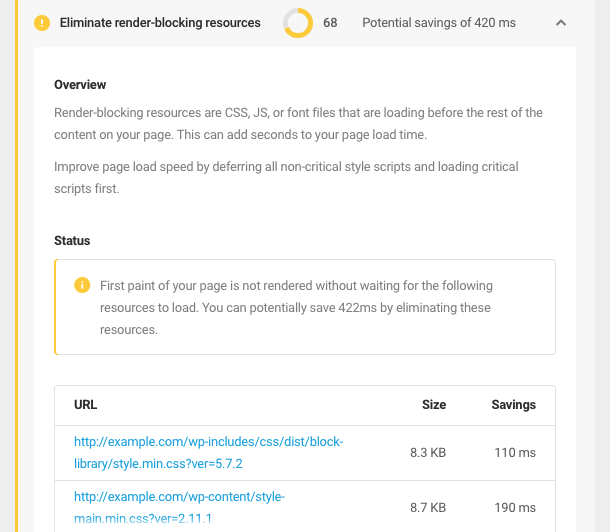
Eliminate Render-Blocking Resources
Render-blocking resources are CSS, JS, or font files that are loading before the rest of the content on your page. This can add seconds to your page load time.
Improve page load speed by deferring all non-critical style scripts and loading critical scripts first.
To eliminate render-blocking resources:
- First, run a file check in the Asset Optimization module.
- After making any initial optimization, switch to the “Inline CSS” option to inline the styles which are critical for the first paint of your page.
- Combine as many of the non-critical styles as you can, compress them, and then move them to the footer.
- Move critical scripts to the footer and defer the non-critical scripts using the option “Force load this file after the page has loaded”.
Learn more about how render-blocking resources can affect site performance from web.dev.
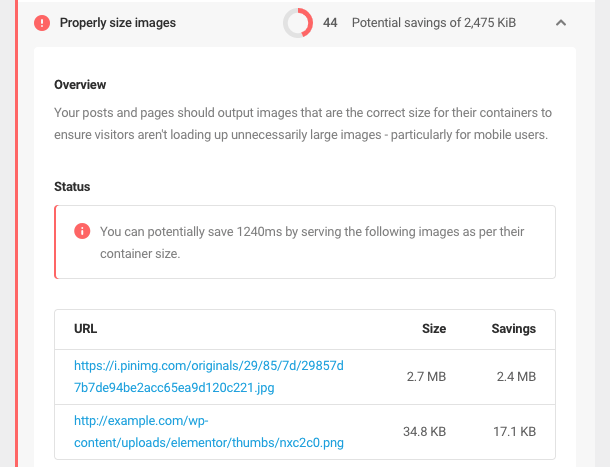
Properly Size Images
Your posts and pages should output images that are the correct size for their containers to ensure visitors aren’t loading up unnecessarily large images – particularly for mobile users.
Smush is the easiest way to serve properly sized imagery on your site. To serve properly sized images in Smush:
- Enable Detect and show incorrectly sized images. This will add functionality to your website that highlights the images that are incorrectly-sized for their container.
- For Pro users, Smush has a CDN option to automatically resize and serve correctly sized images for their containers. If you’re not using the Auto Resizing option, you can crop or scale the highlighted images using the WordPress image editor to match the container size.
Learn more about how image size can affect site performance from web.dev.
If you’re looking to level-up your image delivery and improve page speed at the same time, Smush’s features are perfect. Automatically resize images to fit their containers at the click of a button, condense image sizes, and much, much more.
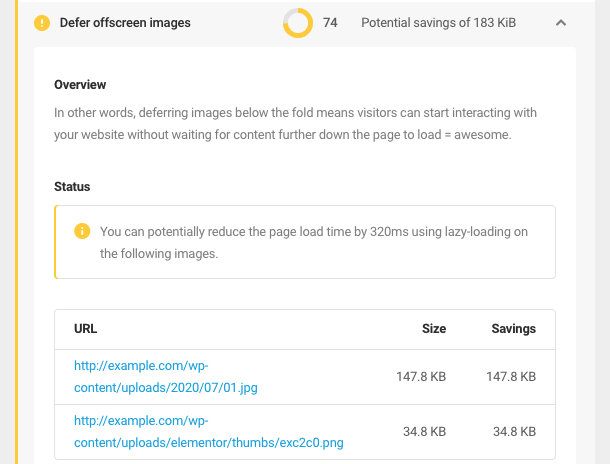
Defer Offscreen Images
Deferring images below the fold (offscreen) means visitors can start interacting with your website without waiting for content further down the page to load. This is called lazy loading.
Smush comes packed with bullet-proof lazy loading. To defer offscreen images, activate Lazy Load and configure your preferred loading animation – no coding required.
Learn more about how offscreen images can affect site performance from web.dev.
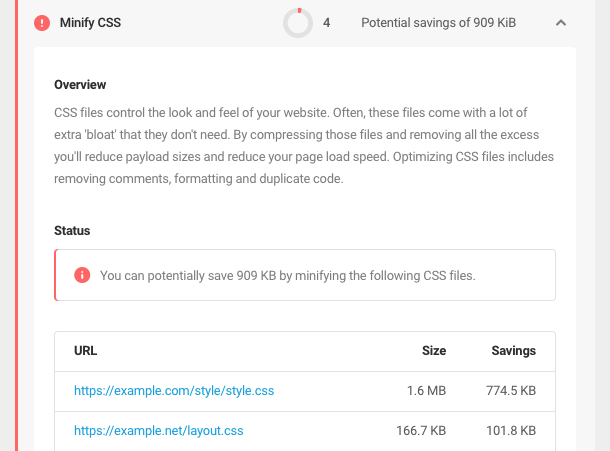
Minify CSS
CSS files control the look and feel of your website. Often, these files come with a lot of extra ‘bloat’ that they don’t need. By compressing those files and removing all the excess you’ll reduce payload sizes and reduce your page load speed. Optimizing CSS files includes removing comments, formatting and duplicate code.
Use the Hummingbird Asset Optimization module to compress your CSS files. To minify, locate the CSS files in the assets page and click the Compress button on the right. For Pro users, Hummingbird provides access to the WPMU DEV CDN for additional savings.
Learn more about how unminified CSS can affect site performance from web.dev.
Minify JavaScript
Compressing JavaScript files removes unnecessary code such as comments, formatting, and other non-critical information. This makes the file smaller allowing your pages to load faster.
Use the Hummingbird Asset Optimization module to compress your JavaScript files. To minify, locate the JavaScript files in the assets page and click the Compress button on the right. For Pro users, Hummingbird provides access to the WPMU DEV CDN for additional savings.
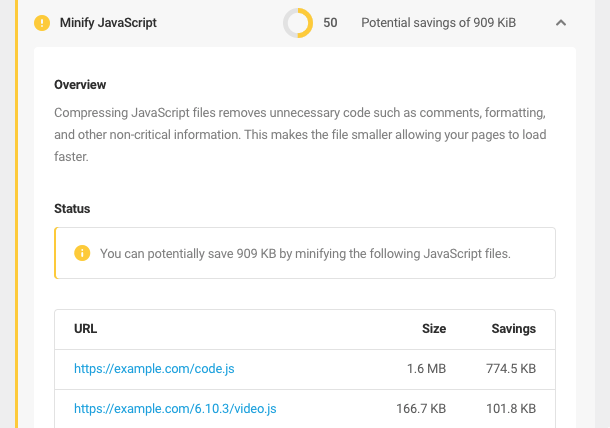
Note that some of your files may not be hosted on your server. Hummingbird cannot compress JavaScript files hosted on a separate domain – if one of these files needs to be minimized, you can:
- Find where the asset originates (plugin, theme, or custom code) and replace it with an optimized file.
- Ignore this recommendation and continue using the file as is. While leaving files uncompressed may affect your performance score, it is recommended for essential plugins or themes when the files can’t be altered.
Learn more about how unminified JavaScript can affect site performance from web.dev.
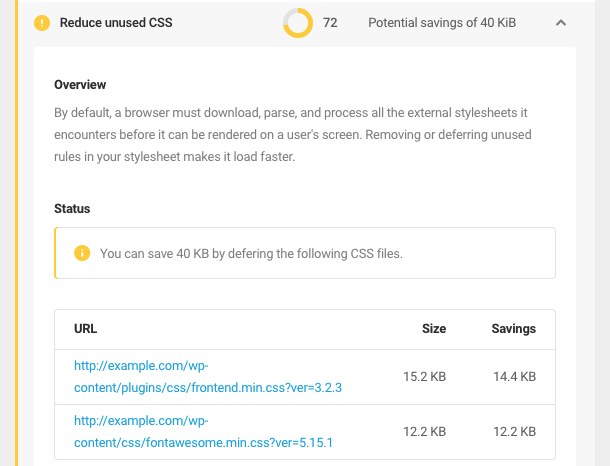
Reduce Unused CSS
By default, a browser must download, parse, and process all the external stylesheets it encounters before it can be rendered on a user’s screen. Removing or deferring unused rules in your stylesheet makes it load faster.
To reduce unused CSS:
- Use Hummingbird’s Asset Optimization module to move critical styles inline.
- Combine non-critical styles, compress your stylesheets, and move them into the footer.
Learn more about how unused CSS can affect site performance from web.dev.
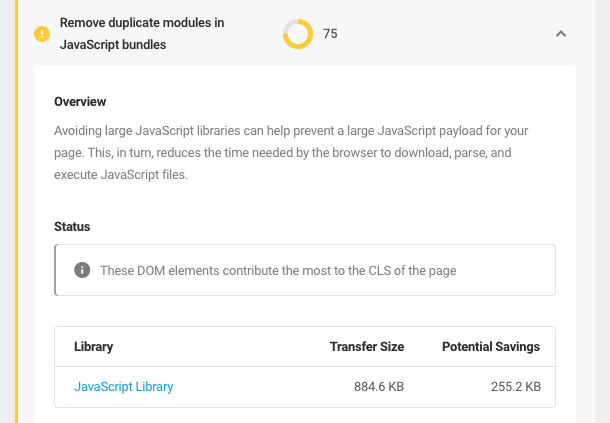
Remove Duplicate Modules in JavaScript Bundles
Avoiding large JavaScript libraries can help prevent a large JavaScript payload for your page. This, in turn, reduces the time needed by the browser to download, parse, and execute JavaScript files.
It is always preferable to use smaller yet functionally equivalent JavaScript libraries to prevent a large JavaScript bundle size.
To improve your performance score, optimize your dependencies in order to achieve significant reductions in JavaScript library size.
Learn more about optimizing your dependencies from Google Web.
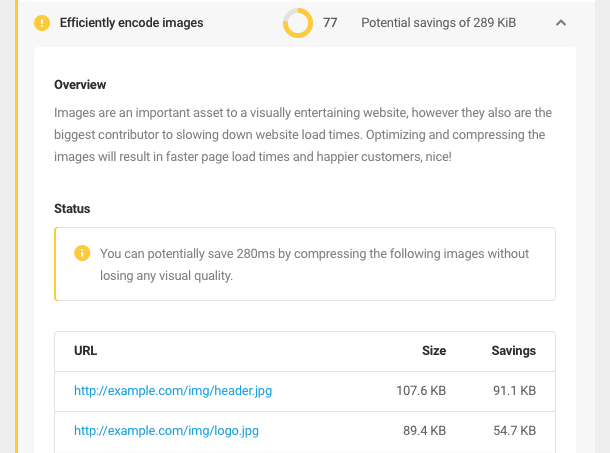
Efficiently Encode Images
Images are an important asset to any website, however they also are the biggest contributor to slowing down website load times. Optimizing and compressing the images will result in faster page load times.
Smush’s automatic bulk optimization feature is the easiest way to remove unused image data without reducing quality. To optimize and compress images in Smush:
- Install Smush and follow the instructions to get set up. Once you’ve chosen your desired settings, smush all your existing images to ensure they are compressed.
- Next, switch to the Directory Smush tab and start a directory smush. Find your active theme, select it and proceed to optimize all the images in your theme.
- WPMU DEV members get access to the pro features of Smush, including double the compression, the ability to serve your images via the WPMU DEV CDN, and an option to serve images to WebP. If you’re a serious user, Smush Pro could be the ideal option for you.
- Lastly, images should be displayed at the same size as their container. Enable the Detect incorrectly sized image feature and check your key pages to ensure images are being output correctly – this will highlight images you may be serving too large, or too small.
Learn more about how uncompressed images can affect site performance from web.dev.
Serve Images in Next-Gen Formats
Image formats like JPEG 2000, JPEG XR, and WebP often provide better compression than PNG or JPEG, which means faster downloads and less data consumption.

Smush Pro‘s CDN feature is the easiest way to serve images in next-gen format on your site. When in use, the CDN will automatically convert and serve images in WebP format whenever possible, while still serving PNGs or JPEGs to non-compatible browsers.
Learn more about how image formats can affect site performance from web.dev.
Enable Text Compression
Compressing text-based resources such as HTML, CSS, and JavaScript with GZIP shrinks your files and makes your site faster.
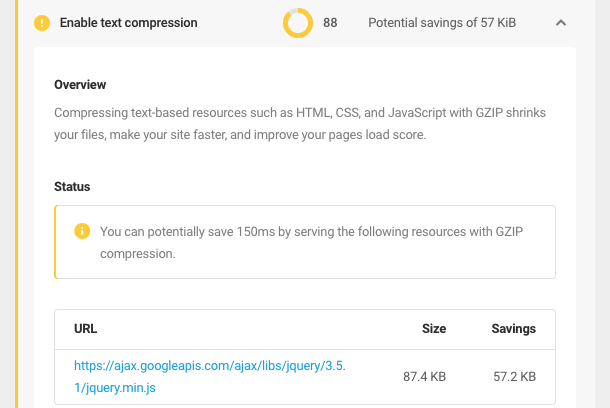
You can easily enable GZIP compression for any local files using the GZIP Compression tab. For any externally hosted resources, you’ll have to make sure the provider enables the compression there.
Learn more about how text-based resources can affect site performance from web.dev.
Preconnect to Required Origins
Establishing a connection with a third-party origin often involves significant time as it involves DNS lookups, redirects, and several round trips. Whenever your site needs to fetch resources from a third-party origin such as a CDN, you should consider pre-connecting to that origin to make your application feel snappier.
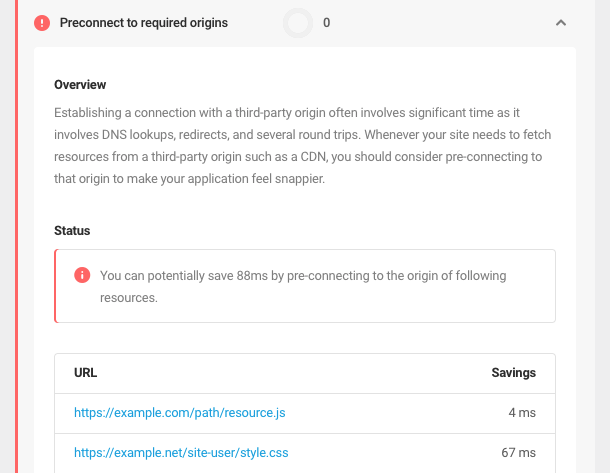
You can use <link rel=”preconnect”> to inform the browser that your page intends to establish a connection to another origin and that you’d like the process to start as soon as possible. As an example, if your page is fetching multiple resources from another origin (https://example.com), you can add the following code inside the <head>:
<link rel="preconnect" href="https://example.com">
The browser won’t begin fetching the resources before it needs them, but at least it can handle the connection aspects ahead of time, saving the user from waiting for several roundtrips when your browser is fetching the resources from this origin.
Learn more about how establishing connections can affect site performance from web.dev.
Reduce Initial Server Response Time
Time To First Byte identifies the time it takes for a visitor’s browser to receive the first byte of page content from the server. Ideally, TTFB for your server should be under 600 ms.
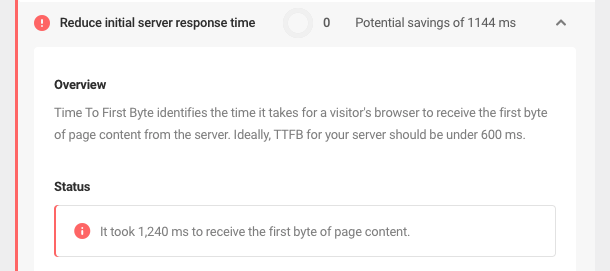
To reduce initial server response time:
- Enable Hummingbird’s page caching. This can substantially improve your server response time for logged out visitors and search engine bots.
- Usually, your installed WordPress plugins have a huge impact on your page generation time. Some are horribly inefficient, and some are just resource-intensive. Test the performance impact of your plugins using a plugin like Query Monitor, then remove the worst offenders, or replace them with a suitable alternative.
- If yours is a high traffic site, upgrade your server resources to improve your server response time.
Learn more about how initial server response time can affect site performance from web.dev.
Avoid Multiple Page Redirects
When a browser requests a resource that has been redirected, it must make an additional HTTP request at the new location to retrieve the page. This extra step can delay your page from loading by hundreds of milliseconds.
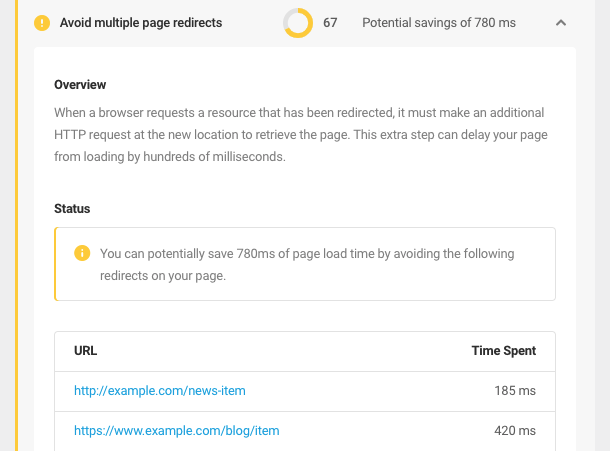
To avoid multiple page redirects, consider the following suggestions:
- The Status section lists resources that are being redirected. Update the links to these resources to point to the new location.
- If you’re using redirects to divert mobile users to a mobile version of your page, consider using a responsive theme instead.
- Redirects can also be caused by a plugin or theme. Disabling plugins one at a time can help you find the culprit.
Learn more about how redirects can affect site performance from web.dev.
Preload Key Requests
The late-discovery of critical resources hidden in CSS or JS files can delay the first render, the rendering of text, or the loading of critical parts of a page. Use <link rel=preload> to tell the browser to fetch critical resources earlier.
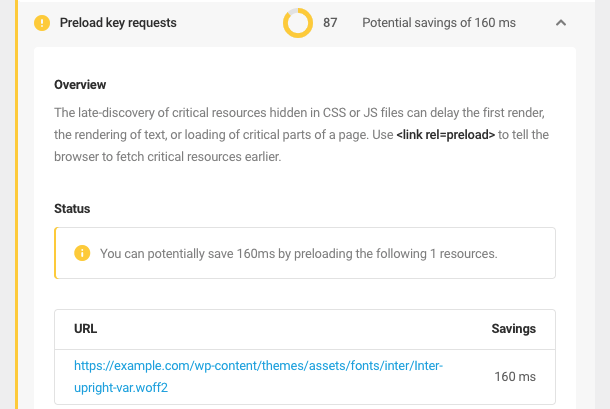
To preload key requests, instruct your browser to download key resources as early as possible:
<link rel="preload" href="late-discovered-styles.css" as="style">
The as attribute tells the browser the type of the resource and hence helps to set the priority accordingly. A few common values for the as attribute are script, style, font, and image. For a complete list, click here.
Learn more about how preloading can affect site performance from web.dev.
Use Video Formats for Animated Content
Replacing animated GIFs with videos will reduce the amount of data you send to your users and the load on your system. Converting GIFs to video files can provide a massive performance improvement with very little effort.
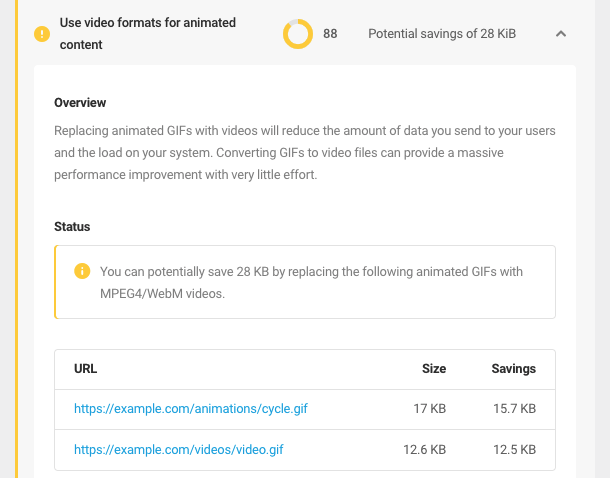
To replace animated GIFs with videos, follow the steps below (if you need help, a developer can help walk you through the process):
- Convert your GIFs to videos. There are CLI packages available that will do this for you or you can use a standard online GIF-to-Video converter.
- Once converted, replace the <image> tag with a comparable <video> tag and configure the element to behave like a GIF. Set your video to auto-play, no sound, on a continuous loop. If the image is hardcoded in your theme template, you can replace the <image> tag with the following code:
Note: You’ll need to upload the video to your media library and replace the source.
- If you have your homepage set to a post or page using the block editor, delete the image block and replace it with a video block. Enable auto-play, mute the audio, and use the loop option under the block settings on the right.
Learn more about how animated content can affect site performance from web.dev.
2.3.5 Diagnostics
Link to chapter 3This section outlines additional issues that may impact overall performance, as reported by the Hummingbird Performance Test. These diagnostics are not necessarily related to page speed, but are related to web development best practices.

Click on a reported diagnostic to view additional details about the issue, as well as tips on how to improve it.
The list of diagnostics that may be reported by the Performance Test are outlined below.
Every site is different. It’s possible that not every recommendation can be implemented for your site, and some recommendations may not produce a notable improvement to site performance.
Avoid Enormous Network Payloads
The time your page takes to load is directly proportional to the total size of network requests it makes. Reducing the overall size of resources visitors have to load will increase your score here. The recommended size is around 1600Kb for the average site, which would mean a load time of less than 10s for poor 3G connections.
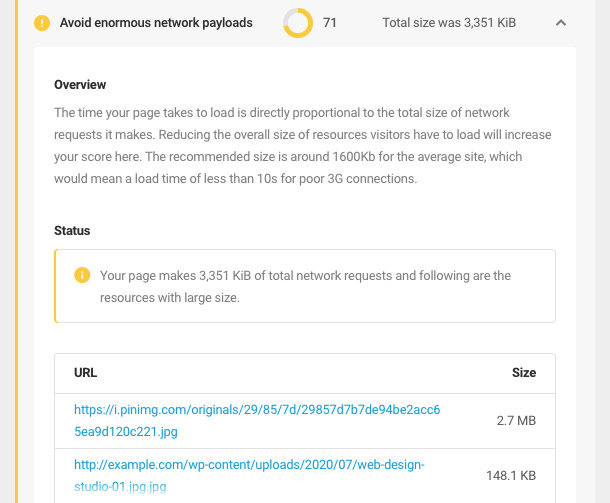
To reduce resource size, consider the following suggestions:
- Optimizing your resources removes unnecessary or redundant bytes of code and hence reduces payload size and script parse time. Hummingbird’s Asset Optimization module can help you to minify your resources.
- Text-based resources such as your HTML, CSS, and JavaScript files should be served with GZIP compression to minimize total network bytes. Hummingbird can enable GZIP compression for all the compressible resources.
- Caching your files can reduce network cost as the browser can serve cached resources instead of fetching them from the network. You can configure file caching using Hummingbird.
- Serve compressed images, and serve them in WebP format whenever possible since it provides better compression than PNG or JPEG, which means faster downloads and less data consumption. Smush Pro has a blazing-fast CDN which can automatically convert and serve your images in WebP format to compatible browsers and gracefully fall back to original PNGs or JPEGs on non-compatible browsers.
Learn more about how resource size can affect site performance from web.dev.
Serve Static Assets with an Efficient Cache Policy
Browsers download and cache (store) assets locally so that subsequent visits to your pages load much faster. You have the ability to specify how long cached assets are stored before the browser downloads a newer version. Ensuring your resources have reasonable expiry times will lead to faster page loads for repeat visitors.
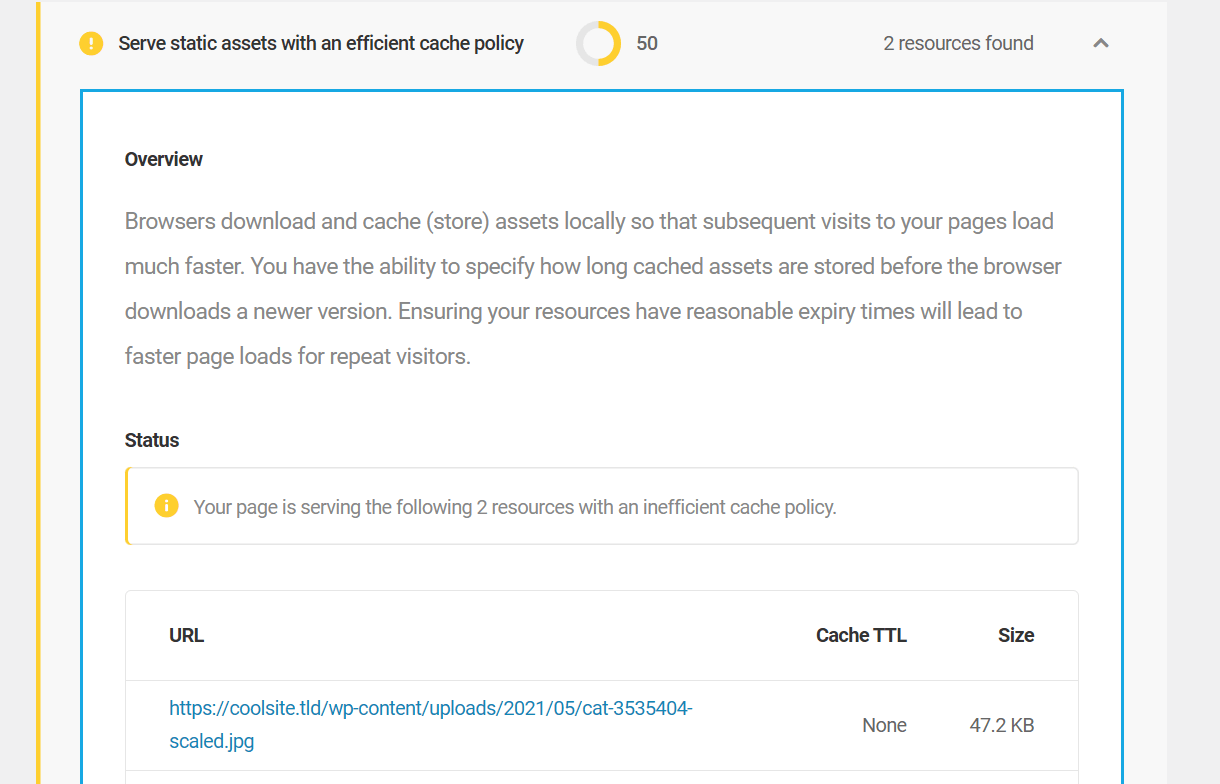
Use Hummingbird’s Browser Caching feature to enable browser caching on all your resource types. We recommend setting an expiry time of at least 1 year for all file types.
Unfortunately, there is no way to control the caching headers of external resources served from another domain. Resources from other domains mentioned in the Status section are likely being added by a plugin or your theme. For these, you can:
- Deactivate the theme and/or your plugins one by one to find the culprit, then remove it or find a comparable substitute.
- Continue using the theme or plugin. This may be a perfectly valid option for services you just can’t live without.
Learn more about how caching can affect site performance from web.dev.
Avoid an Excessive DOM Size
Everything inside your document is a node – HTML tags, text inside the tags, and comments. These nodes have a hierarchical relationship, making a tree of nodes called the DOM tree. A large DOM tree harms your network efficiency and load performance as the browser has to parse lots of nodes that aren’t displayed above-the-fold. Additionally, a large DOM tree increases memory usage, requires massive style calculations, and produces costly layout reflows.
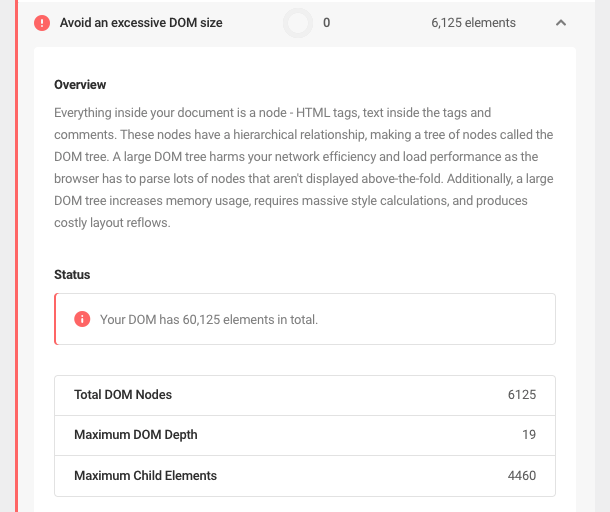
This diagnostic’s score depends solely on the total number of nodes found on the page. The median is 1400 nodes; however, for a perfect score, your DOM’s total nodes should be lower than 275. To improve your score, try the following suggestions:
- Most of the time, your theme is responsible for adding redundant DOM nodes to your site. Activate the default TwentyTwentyOne theme, and compare the performance score. If the score improves, that means your current theme is the culprit, and you should either use another efficiently coded theme or work with the developer to see what changes can be made.
- Since the total number of nodes depends on the size of the page, break large pages into multiple smaller ones to reduce the total node count.
Learn more about how DOM size can affect site performance from web.dev.
Avoid Large Layout Shifts
Large layout shifts can create a frustrating experience for your visitors as they make your page appear visually jarring, as page elements appear suddenly, move around, and affect how your visitors interact with the page.
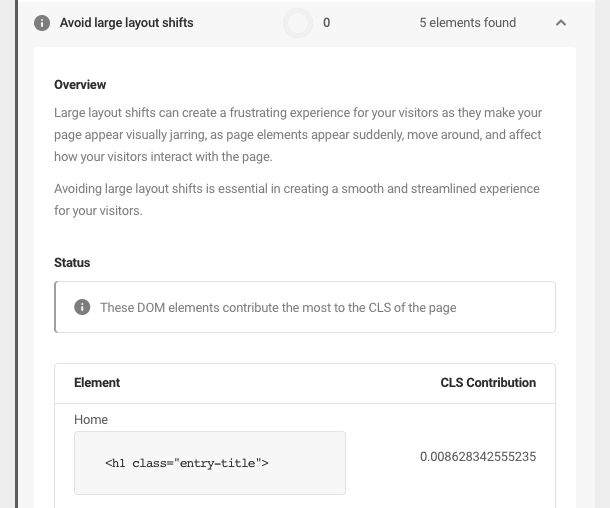
Avoiding large layout shifts is essential in creating a smooth and streamlined experience for your visitors.
Learn more about how layout shifts can affect user experience from web.dev.
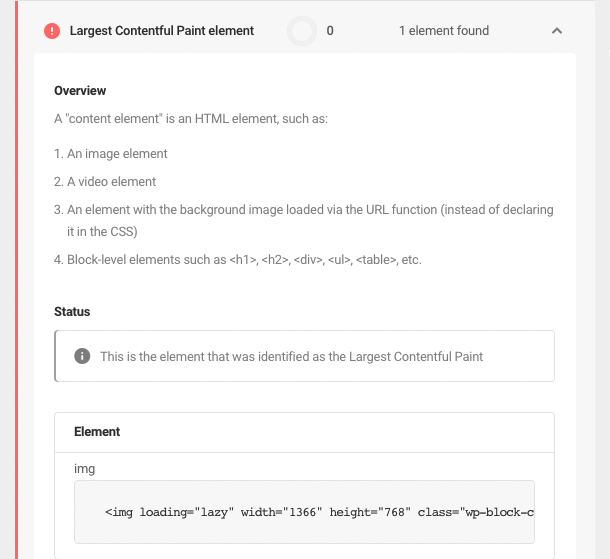
Largest Contentful Paint Element
A “content element” is an HTML element, such as:
- An image element
- A video element
- An element with the background image loaded via the URL function (instead of declaring it in the CSS)
- Block-level elements such as <h1>, <h2>, <div>, <ul>, <table>, etc.
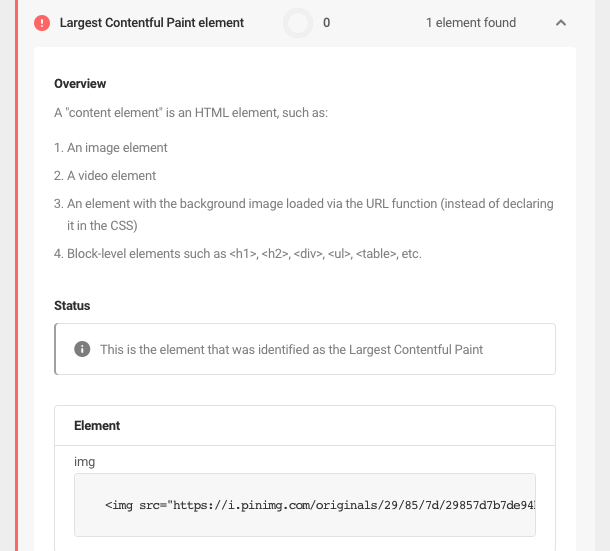
This diagnostic is purely informative. Learn more about how content element painting can affect user experience from web.dev.
Reduce JavaScript Execution Time
This audit measures the total impact of JavaScript on your page’s load performance. JavaScript can slow down a page in many ways, including parsing, compiling, executing, as well as network and memory usage. Reducing the size of your JavaScript files can dramatically improve this metric. Ideally, the JavaScript bootup time should be less than 500ms.
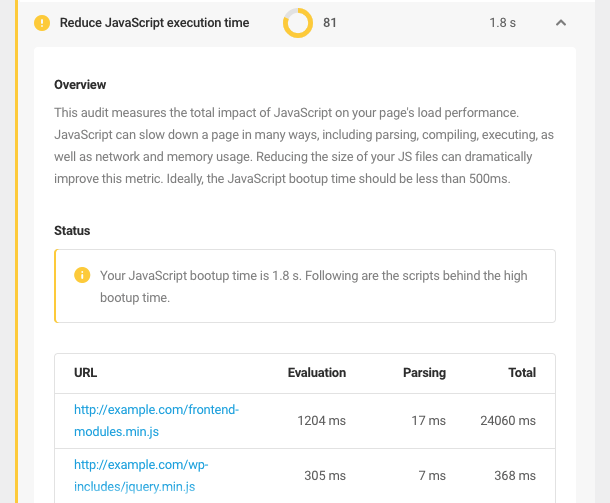
To reduce JavaScript execution time, try the following suggestions:
- Optimizing JavaScript files removes unnecessary or redundant bytes of code and hence reduces payload size and script parse time. Hummingbird’s Asset Optimization module can help you to minify your JavaScript files.
- JavaScript files should be served with GZIP compression to minimize total network bytes. Fewer bytes downloaded means faster page loads. Hummingbird can help you compress your JavaScript files.
- Caching your JavaScript files can reduce network cost as the browser can serve cached resources instead of fetching them from the network. You can configure caching of your JavaScript files using Hummingbird.
Unfortunately, there is no way to improve bootup time for scripts served from another domain. Scripts from other domains mentioned in the Status section are likely being added by a plugin or your theme. For these, you can:
- Deactivate the theme and/or your plugins one by one to find the culprit, then remove it or find a comparable substitute.
- Continue using the theme or plugin. This may be a perfectly valid option for services you just can’t live without.
Learn more about how JavaScript execution time can affect user experience from web.dev.
Minimize Main Thread Work
This audit breaks down your main network thread into its different tasks. The browser generally spends the most time parsing, compiling, and executing your JavaScript. In most cases, delivering smaller JavaScript payloads can reduce the time the browser spends on your main network thread.
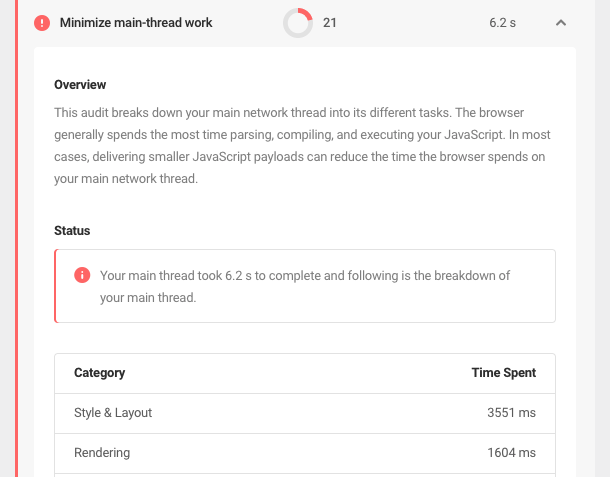
To minimize main thread work, try the following suggestions:
- Optimizing JavaScript files removes unnecessary or redundant bytes of code and hence reduces payload size and script parse time. Hummingbird’s Asset Optimization module can help you to minify your JavaScript files.
- JavaScript files should be served with GZIP compression to minimize total network bytes. Fewer bytes downloaded means faster page loads. Hummingbird can help compress your JavaScript files.
- Caching your JavaScript files can reduce network cost as the browser can serve cached resources instead of fetching them from the network. You can configure caching of your JavaScript files using Hummingbird.
Unfortunately, there is no way to optimize scripts served from another domain. Scripts from other domains mentioned in the Status section are likely being added by a plugin or your theme. For these, you can:
- Deactivate the theme and/or your plugins one by one to find the culprit, then remove it or find a comparable substitute.
- Continue using the theme or plugin. This may be a perfectly valid option for services you just can’t live without.
Learn more about how main thread load can affect user experience from web.dev.
Ensure Text Remains Visible During Webfont Load
When you use web fonts on your website, browsers have to download them before any text can be displayed. Most browsers have a maximum timeout, after which a web font will be replaced with a fallback font. It’s recommended to use a font-display descriptor in your @font-face rule to control how text renders when web font download delays occur.
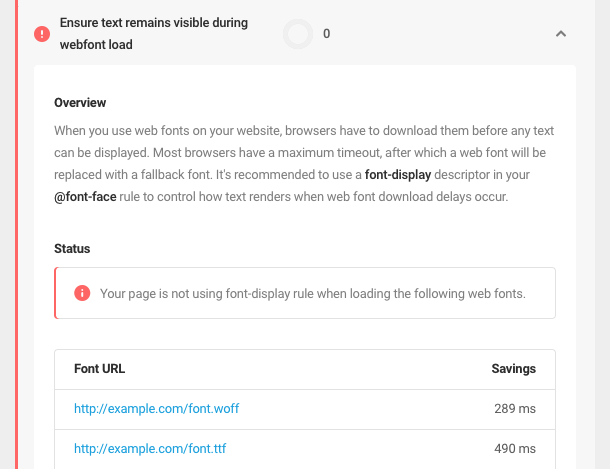
To ensure text remains visible during webfont load for Google Fonts, pass the desired value in the query string display parameter:
https://fonts.googleapis.com/css?family=Roboto&display=swap
For fonts hosted locally, add the font-display property to the @font-face CSS rule:
The font-display supports “auto | block | swap | fallback | optional” values – try different values to achieve the desired result. You can read about the different values here.
Learn more about how webfont loading can affect site performance from web.dev.
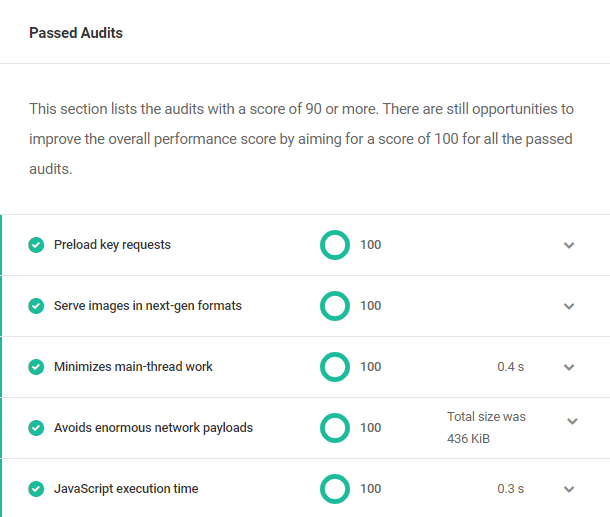
2.3.6 Passed Audits
Link to chapter 3This section lists all audited elements that have a score of 90 or above. While it is by no means necessary to take action on any element in this section, there may still be opportunities for improvement.
Just like with Opportunities and Diagnostics above, click on any element to pop it open and view details about it. If any have a score between 91 and 99, you’ll see suggestions on how that score may be improved.
2.3.7 Performance Test Settings
Link to chapter 3Ignore Current Score
At times, you may wish to ignore test results or ensure that other admins do not take action based on performance data. Enable Ignore Current Results and both the Dashboard and Hub widgets will display greyed-out icons.

2.4 Caching
Copy chapter anchor to clipboardCaching is a fundamental part of enhancing site performance. For more information about caching, check out our video below.
Click Activate to enable the caching module.
2.4.1 Page Caching
Link to chapter 4Here you can configure whether you want to use the Local Page Cache or Static Server Cache for your site. You can switch between the cache types by clicking on the cache name at the top right corner of the screen.
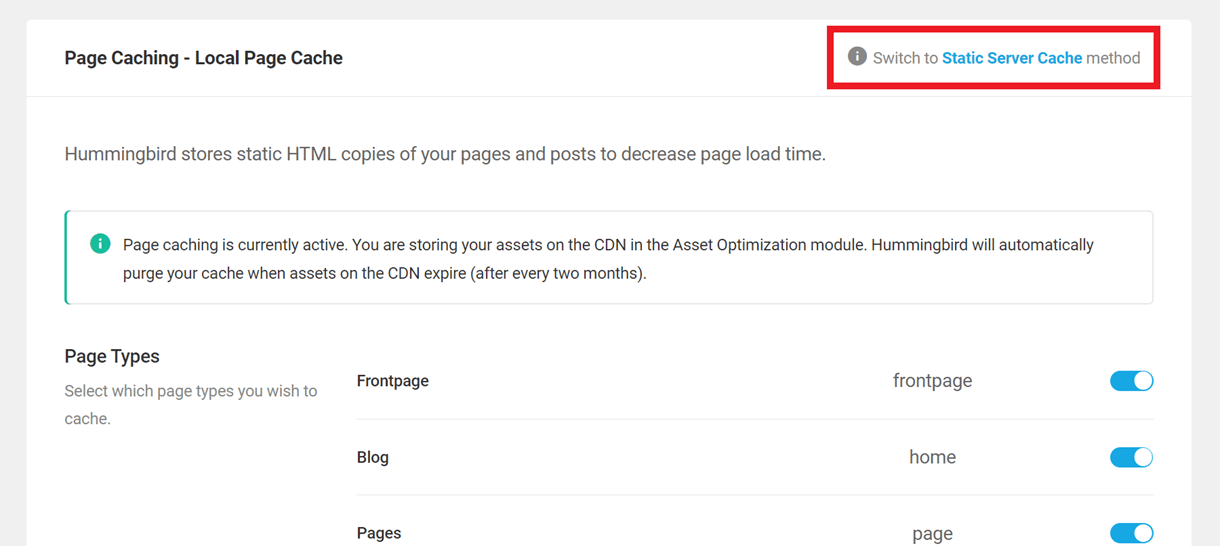
Local Page Cache
Local page cache creates and stores static HTML copies of your pages and posts, which require fewer scripts and no database interaction to load. These static pages are served to visitors whenever possible, reducing server load and dramatically improving pagespeed.
If your site is hosted by us and you have the Static Server Cache option enabled in your Hub, Hummingbird Page Caching is automatically disabled. Static Server Cache will be automatically cleared when you update a post or page. See static server cache compatibility for more details.
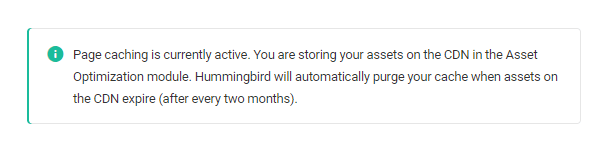
If you have also activated the Asset Optimization module in Hummingbird and have enabled the option to serve your optimized assets from the WPMU DEV CDN, the notice here will display a reminder that page cache will clear when those assets expire (automatically every 2 months).
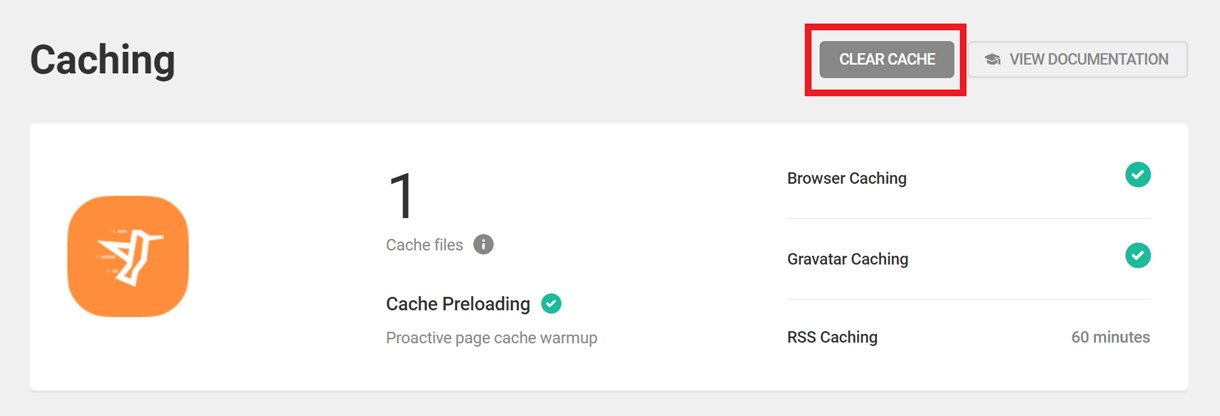
To clear the full page cache manually at any time, click the Clear Cache button at the top-right of the screen.
Static Server Cache
This is page caching at the server level using FastCGI. It can significantly speed up your site and allows an average of 10 times more concurrent visitors.
Preload Caching
Enable preload caching to create and preload the cached page and post files automatically. This is marginally faster than the default setting, which waits until someone visits your site to load cached pages.
Note that preload caching should have no adverse performance impact on the average site but it may have an impact on very large sites while it’s running. This can occur both on the frontend and in the admin as well as in the database, as wphb_cache_preload is running in SQL.
Tick the checkboxes to select which pages you want to include in the preload cache feature. We recommend that you always have the homepage checked if this is enabled.
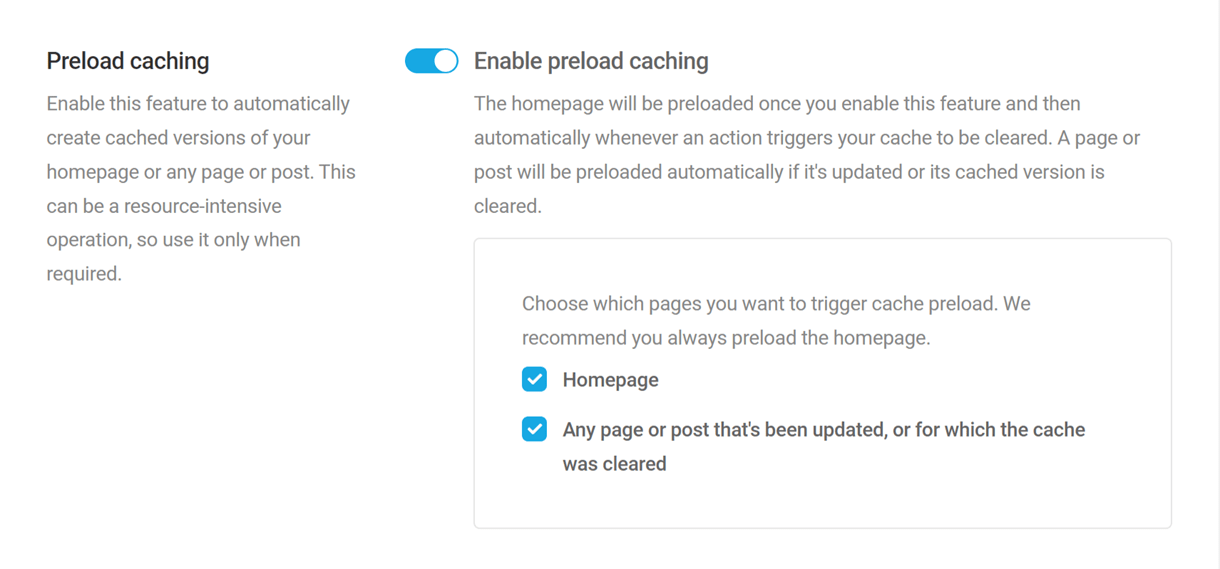
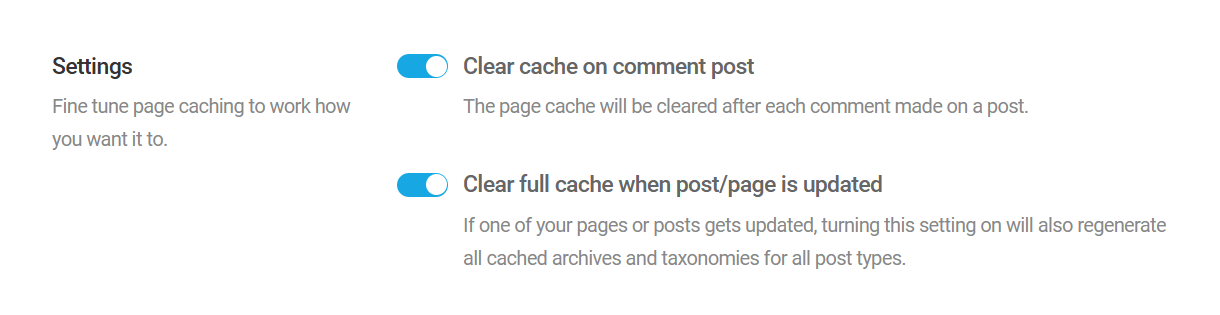
Settings
Enable these options to clear the page cache when a comment is made on a post, or when any post or page is updated.
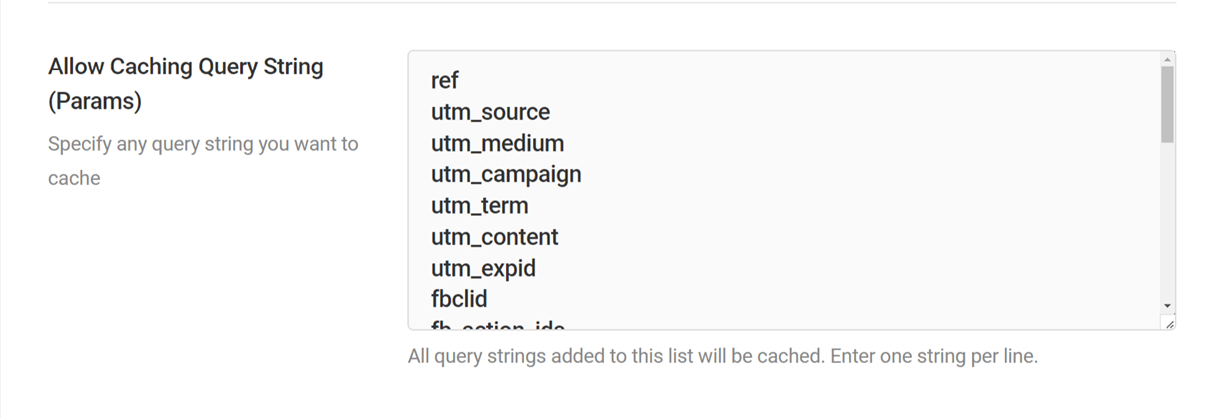
Allow Caching Query String (Params)
Enter any query strings (e.g., ref, utm_source, utm_medium, utm_campaign, etc), one per line, that you want to be cached.
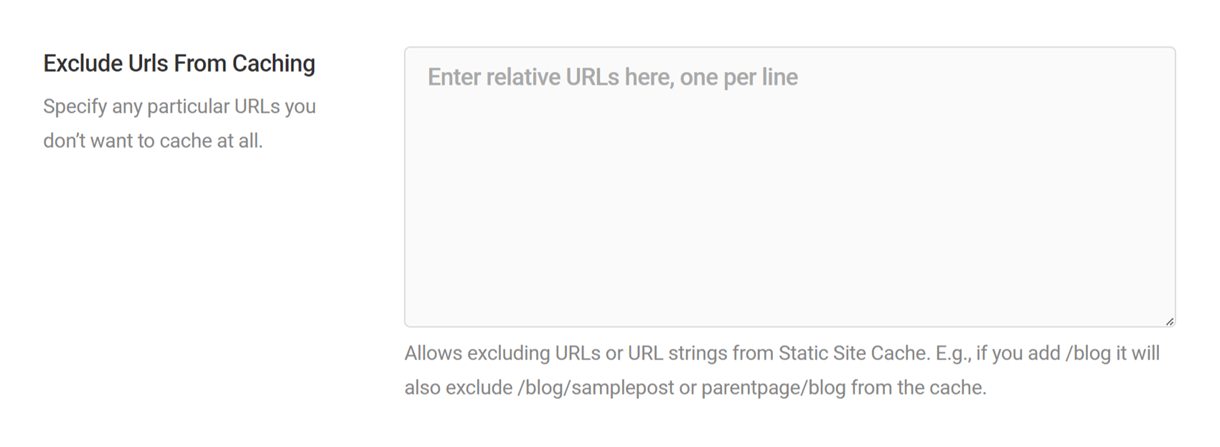
Exclude URLs From Caching
In this field, you can specify any URLs or URL strings that you want to exclude from caching. E.g., if you add /blog it will also exclude /blog/samplepost or parentpage/blog/ from the cache. See also Static server cache exclusions on a multisite network.
Cache Lifetime
This option lets you set the cache lifetime to the static server cache. From the drop-down select the duration for the validity of the static server cache. The cache will regenerate automatically each time it clears.

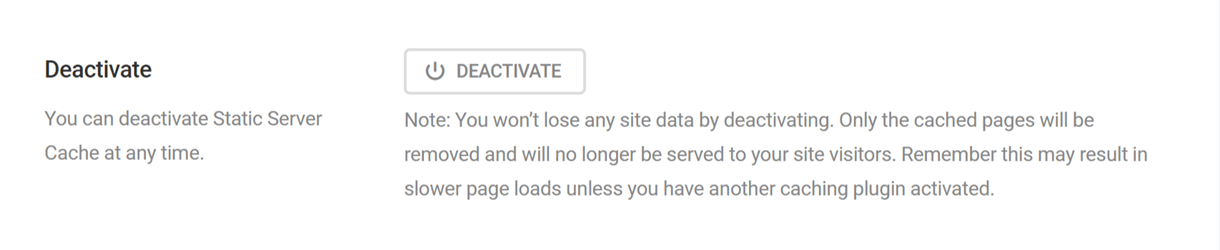
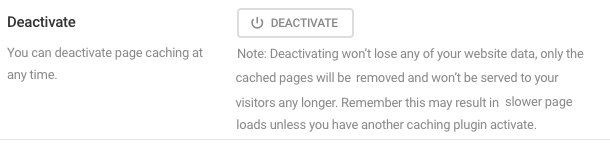
Deactivate
Click the Deactivate button if you want to completely deactivate the Static Server Cache. Deactivating will remove the cached pages.
Actions that automatically clear full page cache
In addition to manually clearing page cache as seen above, Hummingbird includes options to trigger a full purge of page cache automatically when certain actions are made.
Changes to file structure
When there is a change to your site’s file structure, like when installing or updating a plugin or theme, a full page cache purge is most likely needed to ensure that your content displays correctly on the frontend after the change. By default, Hummingbird will clear the cache for you automatically when it detects a change to your file structure, but you can adjust that behavior in the File Change Detection section of Caching > Settings if needed.
On a schedule
You can schedule the automatic full purge of page cache to occur at any interval you need. This can be handy for sites that only update rarely or on a set schedule. See Cache interval below for more info.
Whenever a post or page is updated
Page cache can be set to clear automatically when any post or page is updated, ensuring the frontend of your site always displays current content to your visitors. See Clear full cache when post/page is updated below for more info.
When comments are posted
Page cache can also be cleared any time a comment is published to a post on your site, ensuring your comment sections are always up-to-date. See Clear cache on comment post below for more info.
Note that actions related only to WordPress settings & options, like changing your timezone in general settings for example, will not trigger an automatic cache purge. WordPress does not have any hooks available for those actions that Hummingbird can use.
After automated updates
If you have set up automatic updates on the Hub, page cache is cleared automatically after the automated update is completed.
Page Types
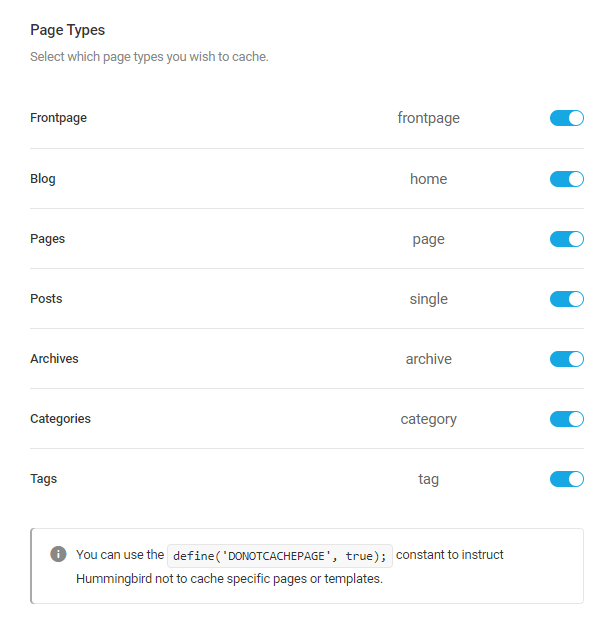
Choose the pages you want to be served from cache. Only pages that update frequently should not be cached.
Users developing their own themes can use the define('DONOTCACHEPAGE', true); constant to prevent their page template from being cached.
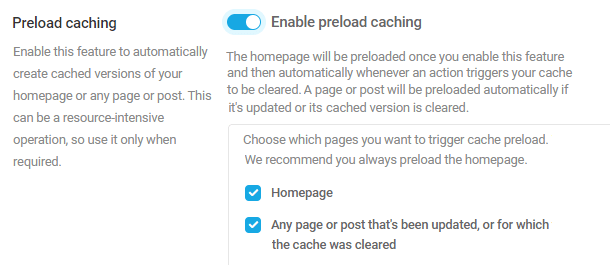
Preload caching
Enable preload caching to create and preload the cached page and post files automatically. This is marginally faster than the default setting, which waits until someone visits your site to load cached pages.
Note that preload caching should have no adverse performance impact on the average site but it may have an impact on very large sites while it’s running. This can occur both on the frontend and in the admin as well as in the database, as wphb_cache_preload is running in SQL.
Tick the checkboxes to select which pages you want to include in the preload cache feature. We recommend that you always have the homepage checked if this is enabled.
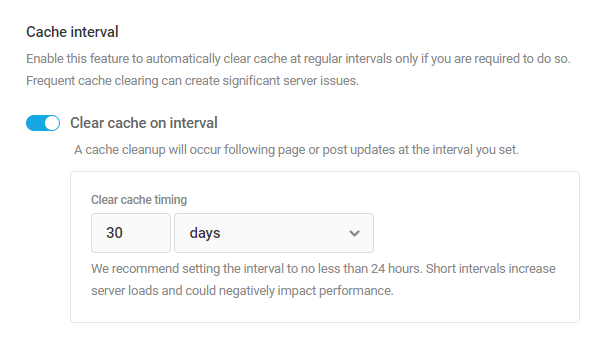
Cache interval
Cache interval is the maximum period of time you want to pass before Hummingbird refreshes your site’s page cache. Overly frequent cache clearing – more than once a day – can cause server issues.
We recommend setting this time relative to the frequency that content is updated. There is no reason, for example, to refresh cache every 24 hours for a site that is only updated once a week.
Enable Clear cache on interval, and then use the timing tool to set the interval period.
The interval you set here will check against the “last modified time” of the wphb-cache.php file located in your wp-content/wphb-cache directory.
If the amount of time you set here is greater than the time elapsed since that file’s last modified time, page cache will be cleared and regenerated for a page the next time it is visited.
Note that the wphb-cache.php file’s last modified time updates whenever you save Page Caching settings, so that effectively “resets” the clock for this feature.
Integrations
Hummingbird includes built-in integrations with popular server-side caching solutions.
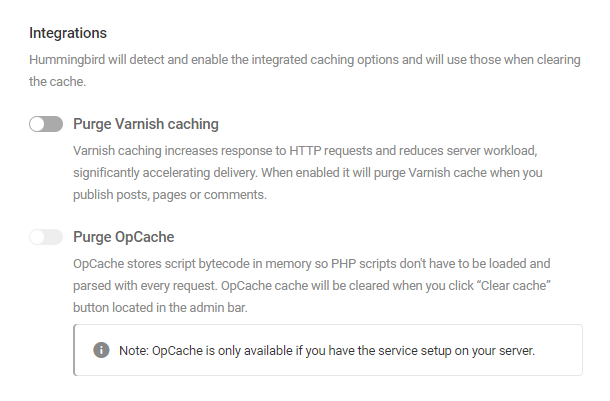
- Purge Varnish caching – Enable this option to automatically purge Varnish cache on your server, if enabled, whenever you publish posts, pages or comments.
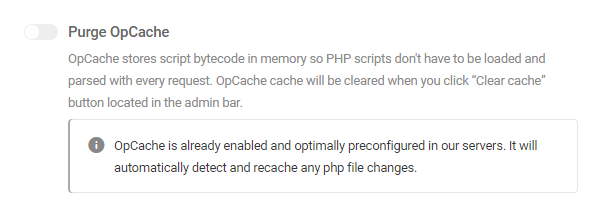
- Purge OpCache – Enable this option to clear OpCache, if enabled, when you click the Clear Cache button in the admin bar.
Note that these options can only be activated in Hummingbird if the respective cache features are enabled on your server.
If your site is hosted by WPMU DEV, you will see that, while the OpCache option is greyed out, a notice appears there to inform you that the integration is already enabled by default for your site.
Page Cache Settings
These settings include special case considerations and housekeeping options you may wish to enable.
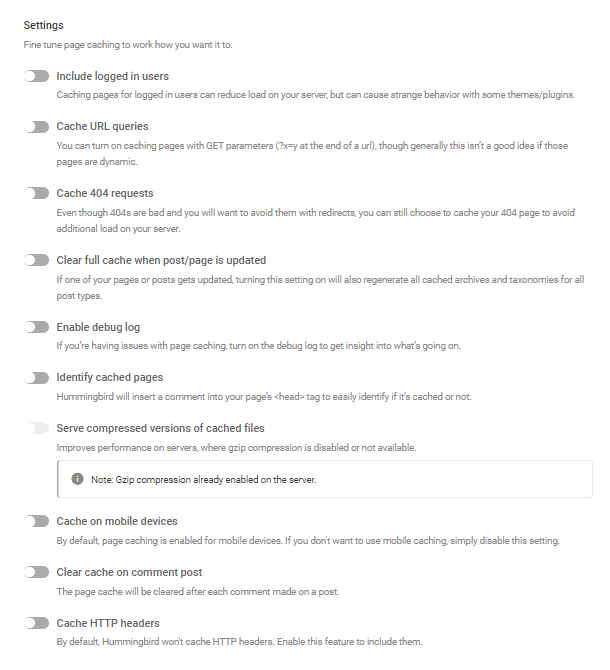
Include logged in users
By default, logged in users are not served cached pages, and therefore, are assured of seeing the most up-to-date content. However, if a site hosts a large number of logged-in users simultaneously, serving them cached pages can improve performance.
Cache URL queries
Pages with URLs containing query strings, as in http://example.com/?bar1=a&bar2=b, are not cached by default, because such pages are usually dynamic. Enable this option if you want them cached. Doing so may improve pagespeed.
Cache 404 requests
404 pages are typically not cached due to the issue that it can cause for search engines. Enable this option to cache 404 pages.
Clear full cache when post/page is updated
Enabling this option will cause Hummingbird to refresh the cache when any post/page is updated, including when saving any changes made in the WordPress Customizer. This means that cache will be cleared for the post/page, as well as any archive pages where the updated post can be found (blog, category, tag, author, date, etc.).
Enable debug log
The debug log contains information that can be very helpful in case something goes wrong. The log file is located here: wp-content/debug.log
Identify cached pages
Enable this option and Hummingbird will insert a comment into the head tag of all cached pages, making it easy to determine if a page is being served from a cached file. An additional comment will be inserted at the bottom of the page source showing the timestamp of when the cached file was created.
Note that some servers may strip out comments in source code, but you can always check for this response header in your browser’s developer tools in any case:
hummingbird-cache: Served
Serve compressed versions of cached files
Enabling this option will improve performance on servers where gzip compression isn’t already in place. If gzip compression is already enabled on the server, this option will be greyed out.
Cache on mobile devices
By default, page cache only affects desktop devices. Toggle on this option to enable page caching for mobiles devices as well, and help your users save their mobile bandwidth.
Clear cache on comment post
When enabled, page cache will be cleared whenever a comment is published on a page/post, thereby ensuring the comments section remains up-to-date.
Cache HTTP headers
By default, Hummingbird won’t cache HTTP headers. Enable this feature to include them and help resolve issues if security headers are not detected on cached pages.
Subsites
By default, subsite admin are unable to disable Page Caching for their sites. To allow a network or subsite admin to disable Page Caching for their sites, toggle on Allow subsites to disable page caching.
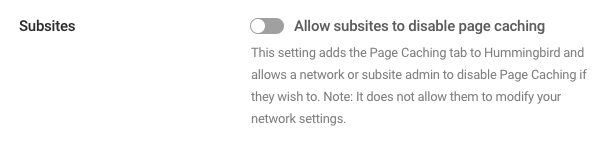
Note that this does not allow subsite admins to modify network settings.
Exclusions
Below the general settings, you can see the Exclusions settings.
URL Strings
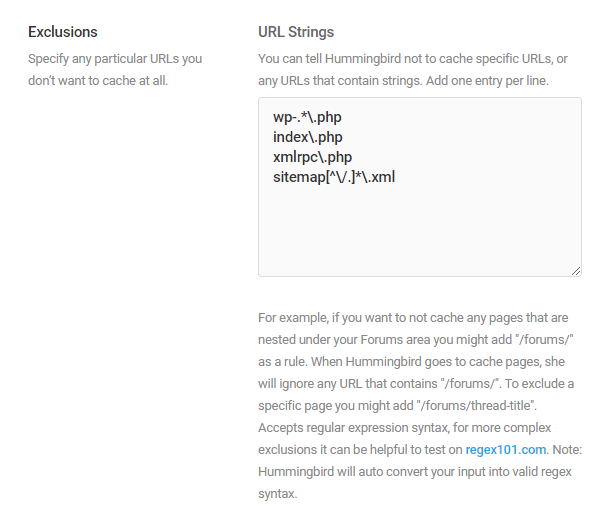
The URL Strings exclusions enable you to specify exact URL strings that should not be cached. URLs are added one per line using absolute or relative URLs, and you can use regular expression syntax.
Hummingbird has already added the following URL strings for you by default:
wp-.*\.php
index\.php
xmlrpc\.php
sitemap[^\/.]*\.xml
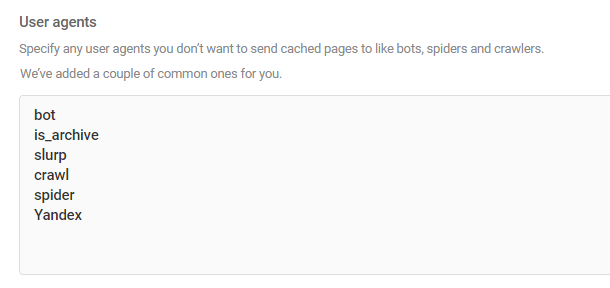
User agents
The User agents feature is used for preventing caching based on the user agent. It’s helpful to prevent caching for search engines to provide them always live data. Also in this section, we already added some useful settings for you!
Cookies
Exclude specific cookies by entering their IDs in this field.

Deactivate
Lastly, on this page, you will see the Deactivate button. You can use it if you ever want to deactivate page caching completely.
Where cache files are stored
Hummingbird stores static HTML copies of your pages & posts in the following directory:
wp-content/wphb-cache/cache/[your-site-name]/[path-to-page]...
Cached versions for mobile users are stored in:
wp-content/wphb-cache/cache/mobile/[your-site-name]/[path-to-page]...
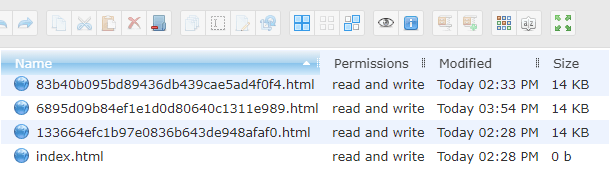
Each page & post is stored in its own folder, and each has a unique hashed filename, like:
133664efc1b97e0836b643de948afaf0.html
Customizing the hashed filename
Hummingbird can create and serve separate cached files for your pages according to whether a cookie is set or not, and what its value is set to. This can be very useful for marketing campaigns where you want page cache enabled, but need different versions of a page to be served to different users depending on the cookie.
To do that, you need only create a cookie with this at the beginning of its name (the rest of its name can be anything you like):
wphb_cache_
Once done, a separate cache file will be created for any page that has that cookie/value combination, in addition to the standard cache file for a page without the cookie.
For example, you could set a campaign cookie like this on your site, set to trigger for whatever conditions you need, and you would find a separate cache file for any page where the cookie has been set by your site visitors:
If you have another campaign cookie set up, that too would create a cached version of the page and be served to any other visitor for whom that particular cookie is set.
The image below illustrates an example of what you might see in your File Manager for a page where cached versions have been created for the default page, as well as a couple for various cookies set.
2.4.2 Browser Caching
Link to chapter 4Browser caching stores temporary data on your visitors’ devices so that they won’t download assets twice if they don’t have to. This results in a much faster second time around page load speed. Enabling caching will set the recommended expiry times for your content.
If your site is hosted with us, Browser Caching has already been configured and no further action is needed.
We automatically set the Expiry Time to the max (10 years) to ensure your cached content always loads in your visitors’ browsers and provides the fastest loading time possible for your pages. Don’t worry about that duration either as browsers always check for if-modified-since and last-modified expiry headers and will load the most recently updated content if it changes during that time.
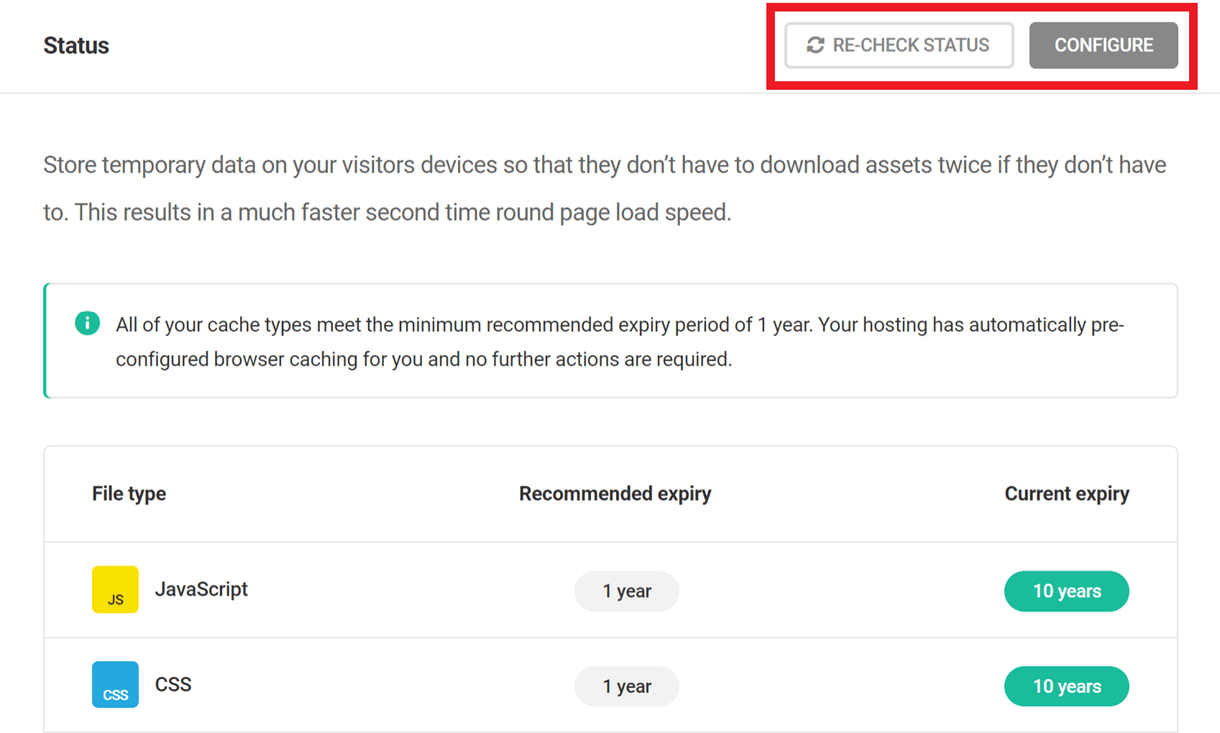
Status
The Status panel at the top displays the current expiry time of all filetypes: Javascript, CSS, Media & Images.
Click the Configure button to open the setup wizard. Click the Re-check Status button to ensure the status displayed is up-to-date.
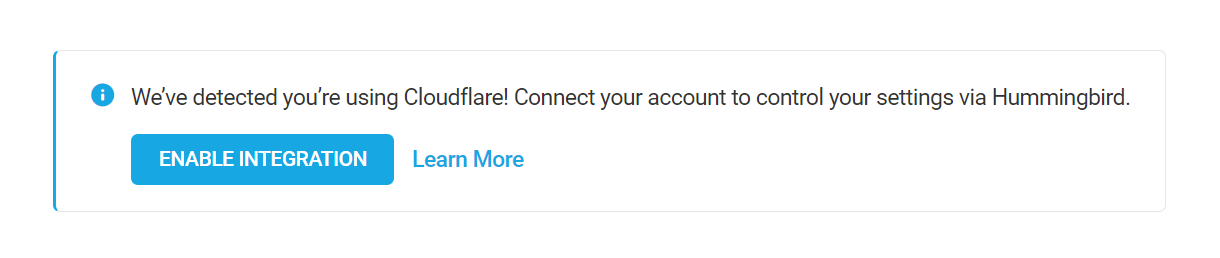
Directly beneath the list of filetypes, you’ll find an option to enable CloudFlare Integration directly from this screen. If your site is currently routed through CloudFlare, enable this to control CloudFlare cache directly in Hummingbird. If you are not yet using CloudFlare for your site, we do recommend you check out their free plan. If you need guidance on setting up the integration, please see the Integrations chapter below.
Configuration
Clicking the Configure button will open the setup wizard where Hummingbird will automatically detect the Server Type used for your site. If the detected type is incorrect, click on the correct server type to change the selection.
Note that if you have enabled CloudFlare integration, the wizard will skip this step and go directly to the Set Expiry Time step.
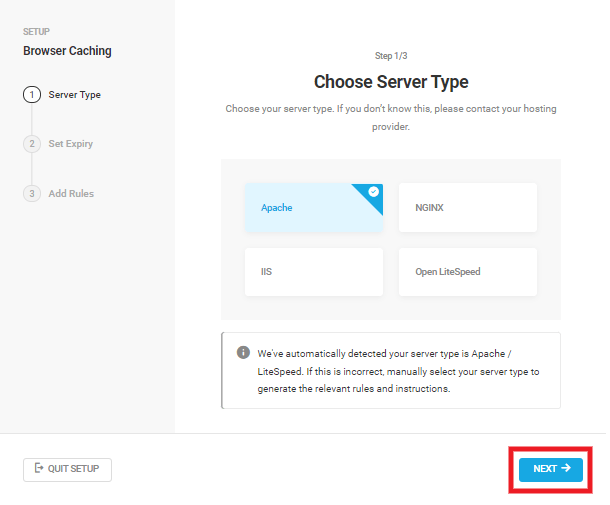
Click the Next button to proceed to the next step in the setup where you can select to set the Expiry Time for All file types or Individual file types. Ideally, this should be set to the longest value possible; Google recommends 1 year as a good benchmark.
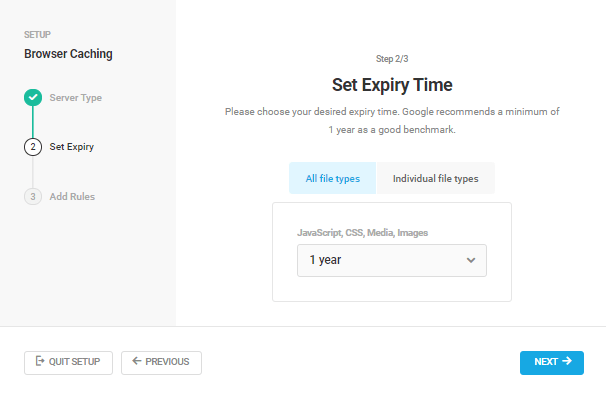
Click the Next button to proceed to the next step in the setup: Adding Rules for your server type.
CloudFlare
If you have enabled CloudFlare integration, the wizard will apply the rules directly to your CloudFlare account for this site, and no further action will be required from you after this step.
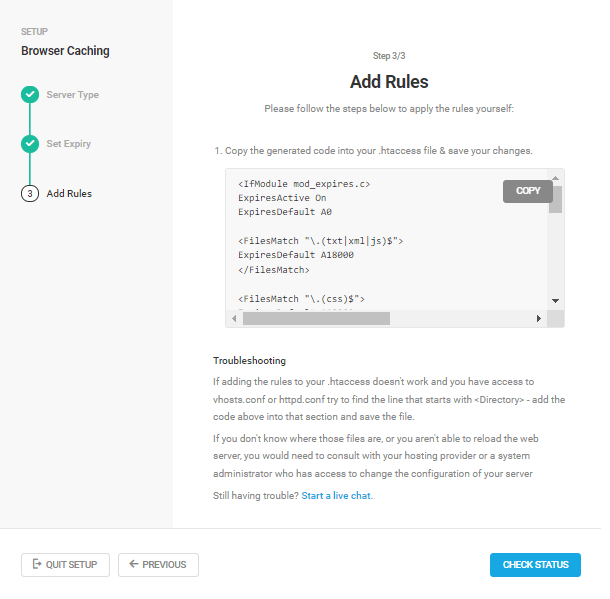
Apache
The wizard will attempt to apply the browser caching rules automatically to the .htaccess file on Apache servers.
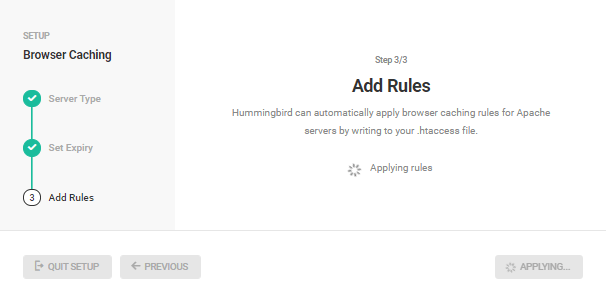
However, if your .htaccess file is not writable or if the wizard encounters unexpected issues, you’ll be prompted to copy the code generated by the wizard, paste it in your .htaccess file & save your changes. Then click the Check Status button.
OpenLitespeed
If your site is running on an OpenLitespeed server, Hummingbird cannot configure browser cache for you automatically. You will need to manually configure the Cache-Control header for browser caching in your WebAdmin Console following their guide here.
Be sure to set Expires by Type to 31536000 (1 year) to meet Google’s recommended benchmark.
Alternatively, you can configure OpenLitespeed browser caching in your .htaccess file. Follow the directions shown in the setup wizard, then click the Check Status button.
See this OpenLiteSpeed guide to learn more about automatically loading directives from the .htaccess file.

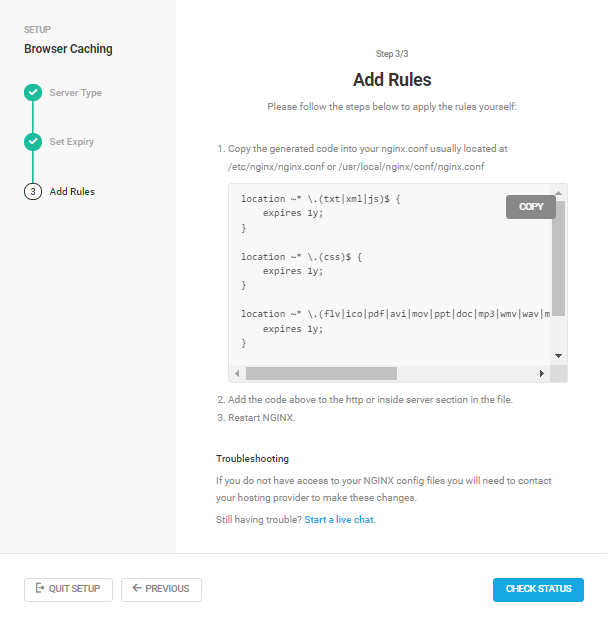
Nginx
If your server type is Nginx, Hummingbird cannot configure browser cache for you automatically. You will need to manually add the required rules to your nginx.conf file, which is usually located at either /etc/nginx/nginx.conf or /usr/local/nginx/nginx.conf
Copy the rules generated by the wizard and paste them in your nginx.conf file manually. Then click the Check Status button.
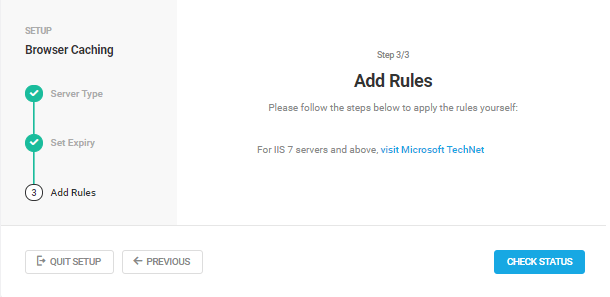
IIS
If your server type is IIS7 or above, you will be prompted to add the needed rules manually following the Microsoft guide here. Once done, click the Check Status button.
Don’t sweat it if this seems a little out of your depth. Contact support and our experts will help you out. :)
2.4.3 Gravatar Caching
Link to chapter 4![]()
Gravatar caching allows you to store local copies of avatars used in comments and in your theme. You can control how often you want the cache purged depending on how your website is set up. This is a great option to enable if you have an active blog or community!
Just click on Activate and you’re all set. Simple as that.
![]()
From here, you can choose to clear the cache when needed or Deactivate Gravatar Caching altogether.
2.4.4 RSS Caching
Link to chapter 4RSS Caching is handled by WordPress itself and activated by default. But Hummingbird gives you control over it.
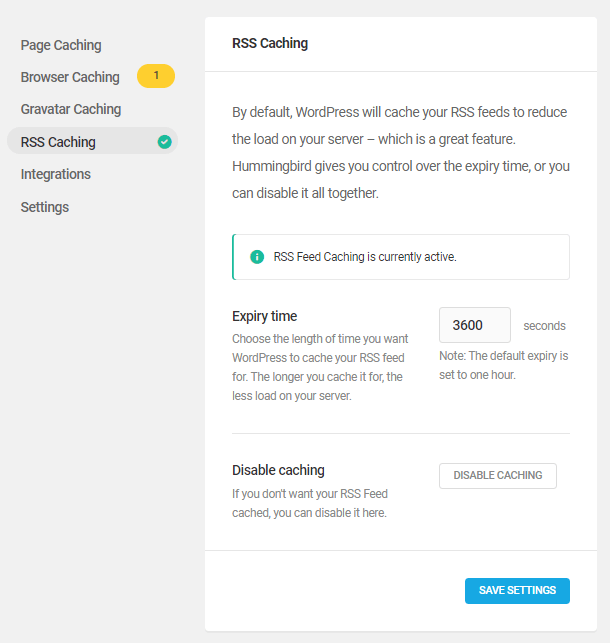
Expiry time – You can set any number of seconds for the expiry time and your RSS cache will be cleared at that time. For example, if you set to 3600 it means the RSS feed will be updated every 3600 seconds.
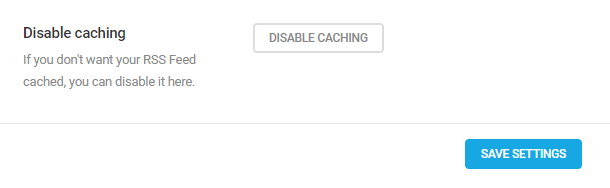
Disable – If you want to disable RSS caching for any reason, you can do it with the Disable Caching button. Hummingbird will force WordPress to stop caching RSS feed.
2.4.5 Integrations (Caching)
Link to chapter 4The integrations feature enables you to connect third-party providers to gain more control over your caching. Currently Hummingbird offers integration with CloudFlare.
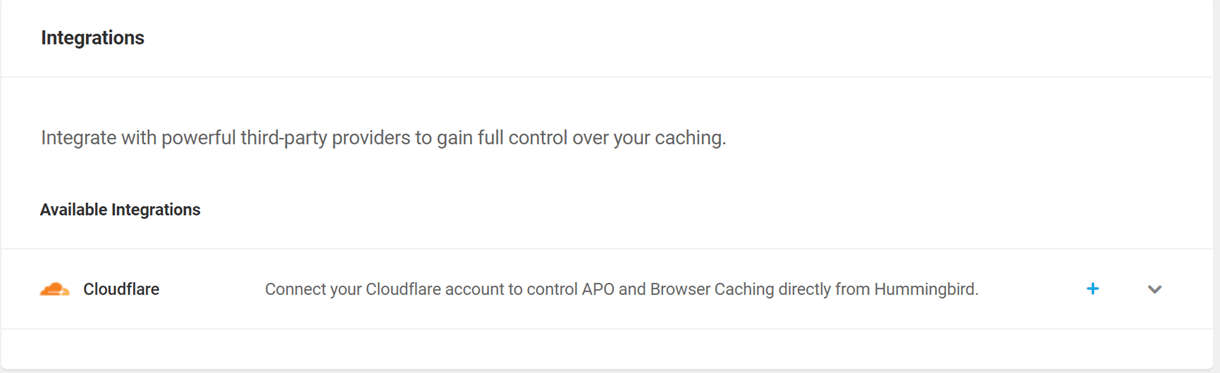
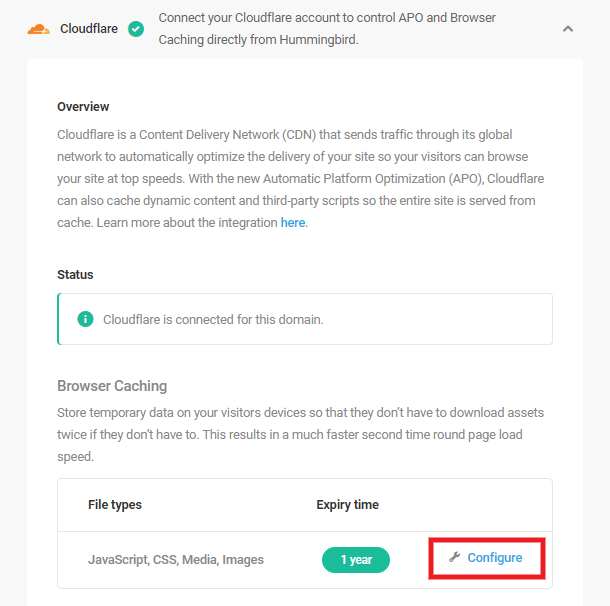
Cloudflare
Cloudflare is a Content Delivery Network (CDN) that sends traffic through its global network to automatically optimize the delivery of your site so your visitors can browse your site at top speeds. With the new Automatic Platform Optimization (APO), Cloudflare can also cache dynamic content and third-party scripts so the entire site is served from cache. To connect to Cloudflare, first click on the plus icon.
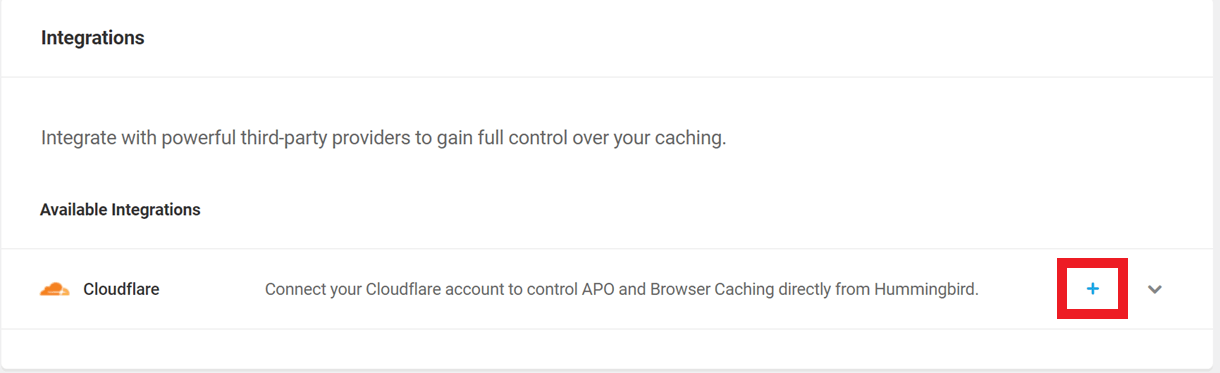
You can connect to Cloudflare using either your Cloudflare account’s email address and Global API key, or using an API token. Click either Global API Key or API Token and enter your API credentials.
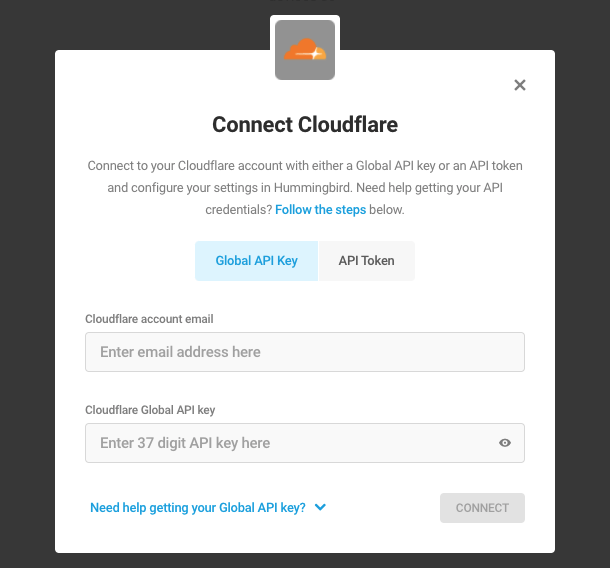
If you’re unsure how to get your Cloudflare API credentials, click either Follow the steps or Need help and follow the instructions accordingly, or else follow the steps below.
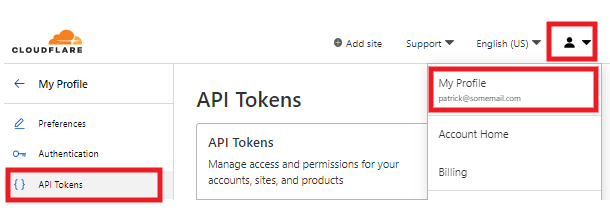
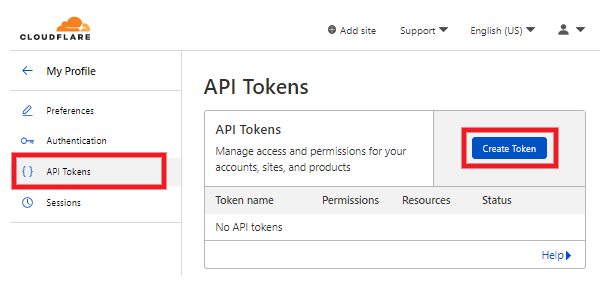
To get your Cloudflare credentials, first log in to your Cloudflare account. Then, go to My Profile, and switch to the API Tokens tab.
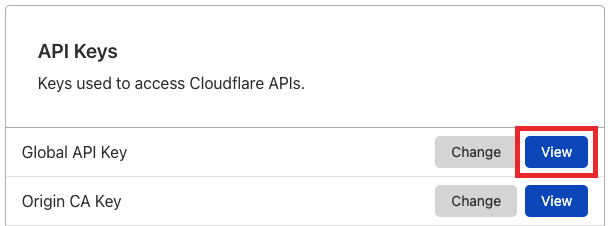
To get your Global API key, find the Global API Key row, and click View. Enter your password when prompted.
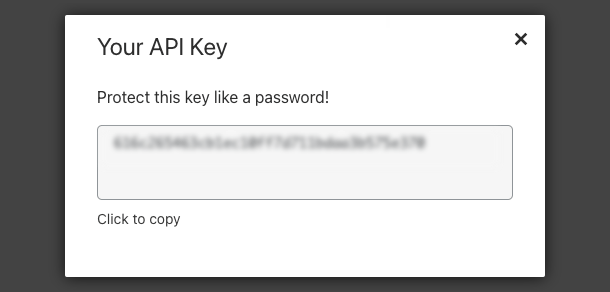
Copy the API key and enter it into the Cloudflare Global API key field in Hummingbird.
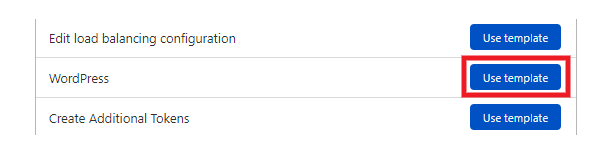
Alternatively, to create an API token, navigate to the API Tokens tab and click Create Token.
Then, find the WordPress row and click Use Template.
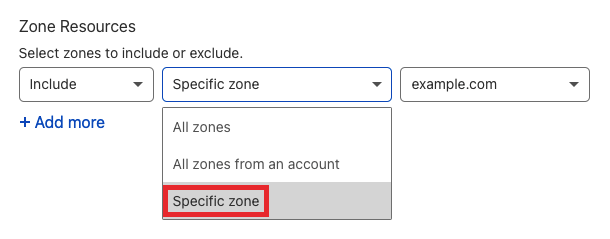
Under Zone Resources, first select Specific Zone from the dropdown menu and then select your website’s domain name.
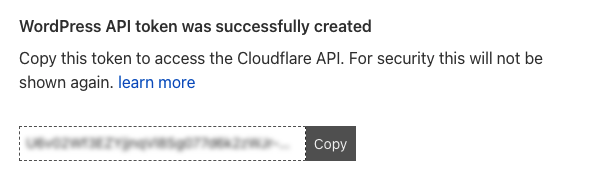
Click Continue to summary, and then click Create Token. Finally, copy the WordPress API token and enter it into the Cloudflare API token field in Hummingbird.
Browser Caching
Connecting your Cloudflare account here will automatically configure your Browser Caching settings which you can adjust if needed under the Browser Caching tab by clicking the Configure link. For details on this feature, see Browser Cache above.
Automatic Platform Optimization (APO)
Cloudflare’s APO service is an additional cache feature that will serve all site content, including 3rd-party scripts, from their network, ensuring that your site is blazing fast.
Cloudflare’s powerful Automatic Platform Optimization (APO) feature is now available in Hummingbird! Check out our blog post on Hummingbird’s Cloudflare APO Integration to learn how this feature can benefit you and your clients.
Enable the service by toggling on the Enable APO option here if desired (no additional plugin is needed). Note that this service is included with Cloudflare’s Professional, Business, and Enterprise plans, but requires payment if you are on their free plan. Details on their blog here.
Once enabled, you can also enable an additional option inside to cache content according to the device types used by your site visitors. Cache by device type ensures that only needed assets are cached and delivered to the user’s browser depending on the device type used: mobile, tablet or desktop.
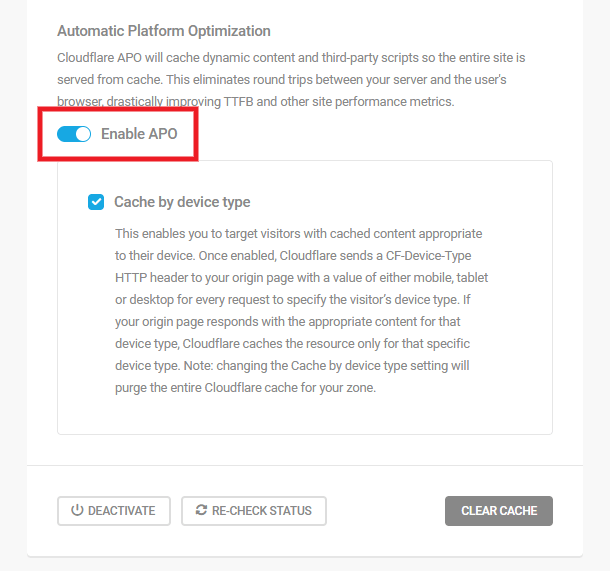
Click the Re-Check Status button at any time to ensure that data displayed is up to date. Click the Deactivate button at any time to disconnect the Cloudflare integration from your site if needed (this will also deactivate Cloudflare browser caching).
2.4.6 Settings (Caching)
Link to chapter 4The settings tab allows you to make even the smallest adjustments for your own convenience.
File Change Detection
By default, Hummingbird will automatically purge the page cache when it detects a change to your file structure, for example when a plugin or theme is activated or updated. But you can modify that behavior here if you wish.

- Automatic – This is the default which will automatically clear page cache with any change to your site’s file structure.
- Manual Notice – Select this option to display a notice on every screen in your wp-admin prompting you to manually clear page cache if a change is detected.
- None – This option disables automatic cache purge if the file structure changes, and does not show any notices.
If the Manual Notice option is selected, you will see a notice like this if Hummingbird detects a change to your site’s file structure:
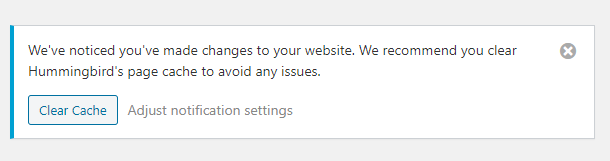
Click the Clear Cache button to clear the full page cache, or click the Adjust notification settings link to be directed to the Page Caching > Settings screen where you can change the option if desired.
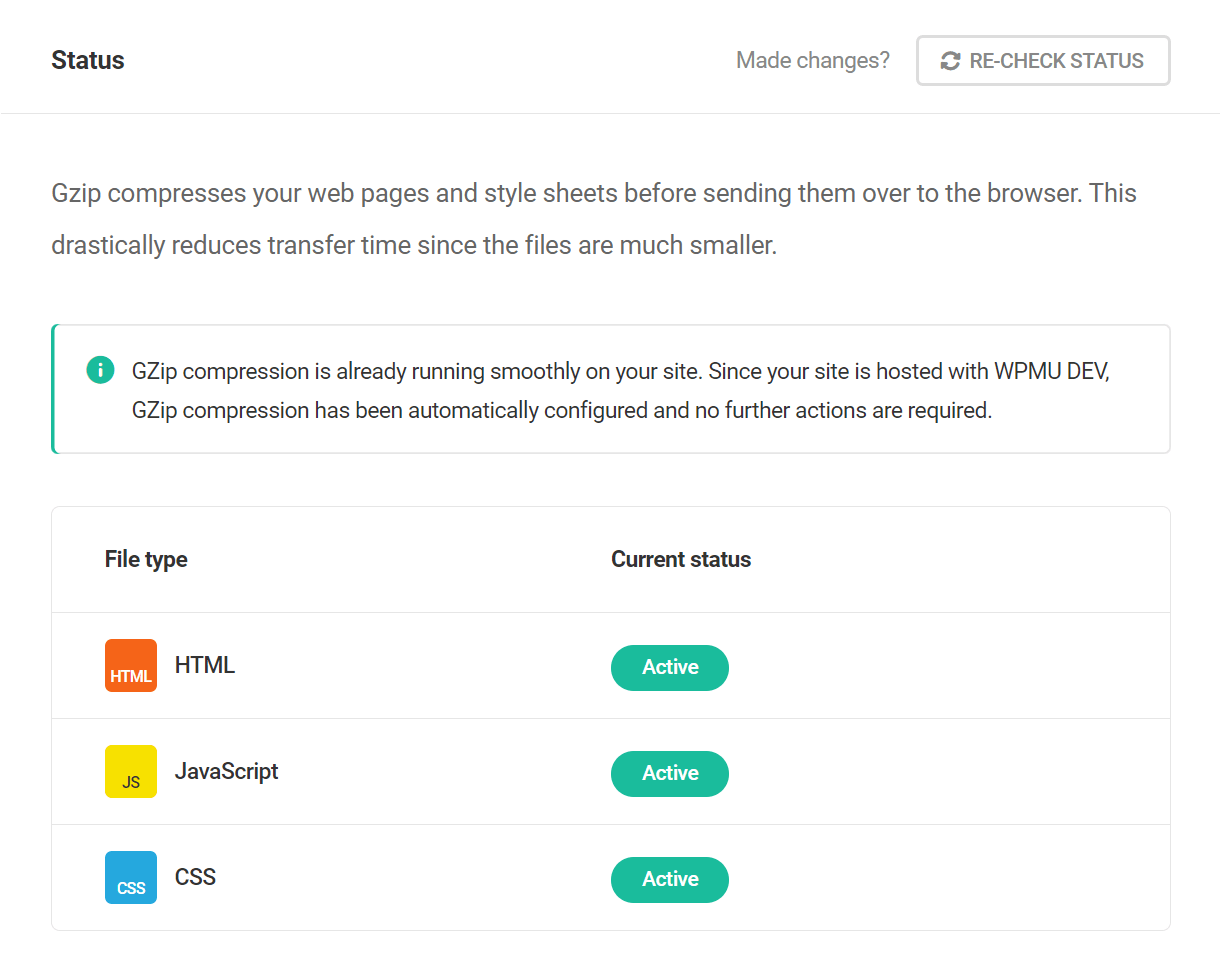
2.5 Gzip Compression
Copy chapter anchor to clipboardGzip compresses your webpages and style sheets before sending them to your visitors’ browsers, which makes for faster loading times.
The more performant Brotli compression method is configured by default on all WPMU DEV hosted sites, and no further action is needed. If Brotli is not supported by a user’s browser, compression will fall back to Gzip. You’ll find more information about this in the Content Compression chapter of our Hosting > Getting Started document.
When the feature is active on your site, a status panel will appear indicating which file types are being compressed.
If Gzip compression is not yet active on your site, the process of enabling it will vary slightly depending on the type of server your site is running on.
Select your server type, and then follow the steps stipulated to enable compression. If you do not have access to or are uncomfortable modifying your site’s file system, we recommend contacting your host for assistance enabling Gzip.
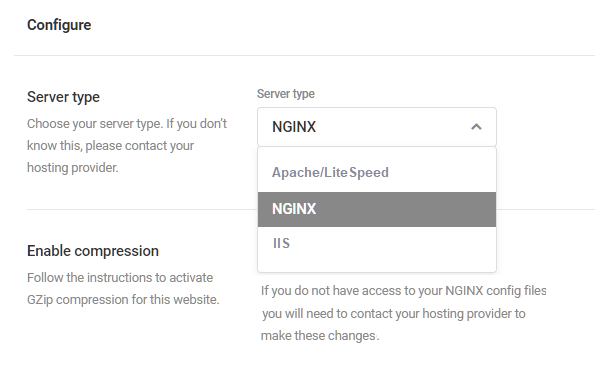
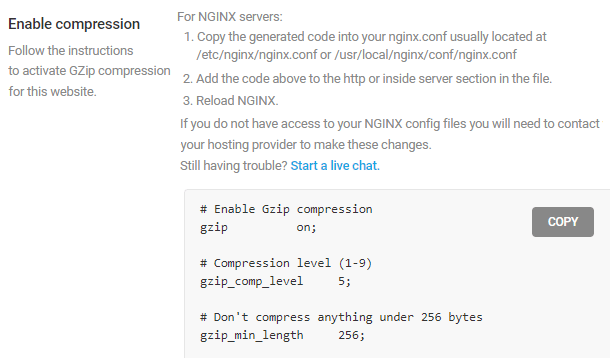
NGINX – NGINX servers will not allow Hummingbird to edit the required files, so the code necessary to enable Gzip must be added to the server configuration file manually. Hummingbird will provide the code that must be pasted into the nginx.conf file, typically located here: /etc/nginx/nginx.conf or /usr/local/nginx/conf/nginx.conf
Apache – Hummingbird can automatically modify the files necessary to enable Gzip on an Apache server. Select the Apache server type from the dropdown menu and then select Automatic compression.
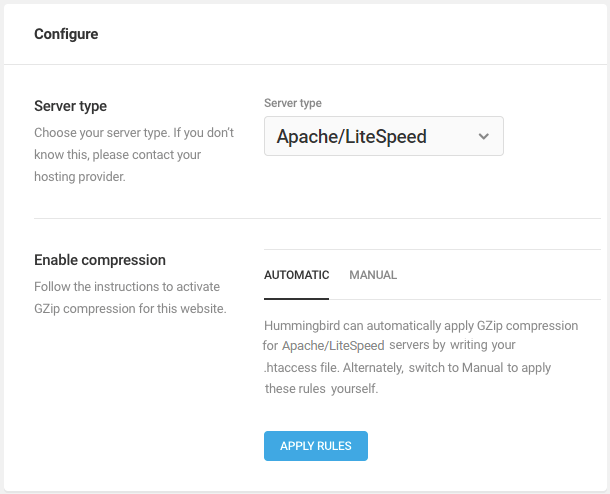
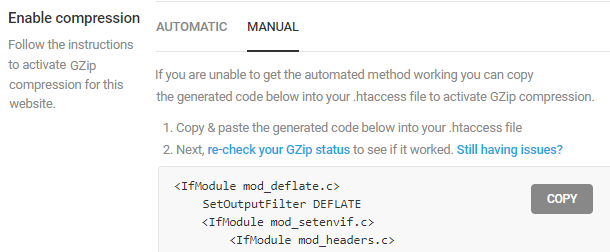
If you want to apply the code yourself, select Manual and Hummingbird will display the code that must be pasted into the .htaccess file to enable Gzip.
IIS – IIS refers to any one of several Microsoft server types. Refer to the Microsoft IIS guidance page for help configuring Gzip.
Brotli Compression
If you have enabled the WPMU DEV CDN in Asset Optimization > Settings, your optimized files will be served with the more performant Brotli compression method instead of Gzip to browsers that support it.
A notice will appear in the Gzip Compression Status panel to remind you of this.

2.6 Asset Optimization
Copy chapter anchor to clipboardAsset Optimization is where Hummingbird makes applying advanced performance enhancements as easy and efficient as possible by identifying HTML, Javascript and CSS files which may be compressed, combined or moved to improve performance.
WPMU DEV Managed Hosting servers run the HTTP/2 protocol which automatically optimizes the delivery of your assets. You can still combine and move your files, but don’t expect huge improvements, as we have already squeezed all the speed we can out of these assets.
Learn more about asset optimization and how to get the best settings with advanced settings in our Asset Optimization video guide.
- Compress – Minify files by stripping unnecessary code
- Combine – Combining smaller files results in fewer files making fewer requests
- Move to Footer – Scripts that aren’t required to load a page can be placed in the footer, ensuring they will not impede the loading of other page assets
- Inline CSS – Places CSS within the HTML file, reducing the number of files the browser has to download
- Defer – Force files to suspend loading until everything else has loaded
- Async – Asynchronously load assets, executing them as soon as they’re ready
- Preload – Preload key assets, ensuring they’re ready as soon as they’re required
- Don’t load file – Prevents specified files from loading on all pages
Please note that Hummingbird’s Asset Optimization engine cannot negotiate a site that is password-protected with a HTTP Auth form. You’d want to disable that before running Asset Optimization on your site.
2.6.1 Assets Optimization
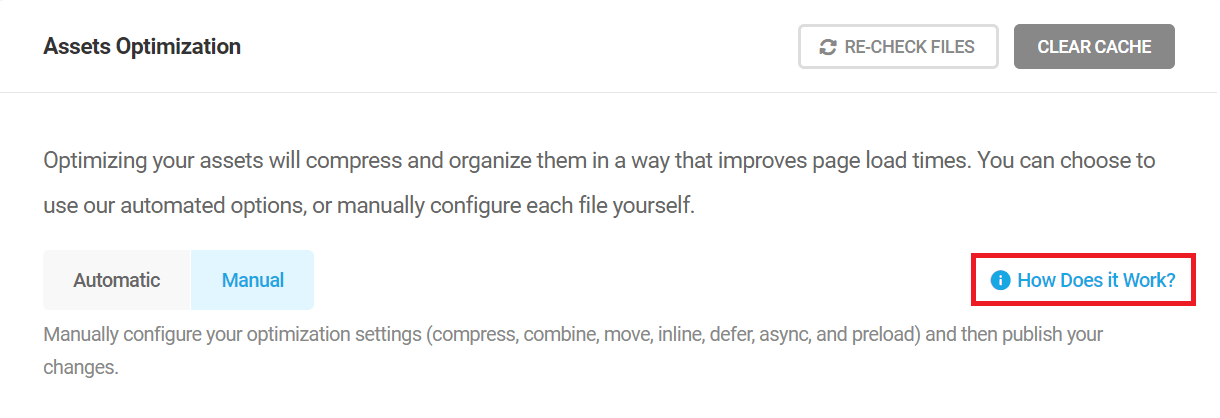
Link to chapter 6Asset optimization can be utilized in two different modes:
- Automatic – Optimize your assets and improve page load times based on our automated options.
- Manual – Manually configure each file yourself to achieve the exact setup that you require for your site.
Asset Optimization works well with the suggestions found in a site’s Audit section. See the Opportunities and Diagnostics sections in Audits to identify assets which may be slowing down your site, and then use Asset Optimization to apply the suggested fixes when possible.
There may be a situation where you don’t need the extensive features of Assets Optimization on a site, and prefer to use only the Extra Optimization options. In such a case, you can use the following filter in your active child-theme’s functions.php file or a mu-plugin to skip any Assets Optimization configuration on the site. Note that this does not affect anything in the plugin interface, it simply bypasses assets optimization on the frontend of the site.
function qa_wphb_do_not_run_ao_files( $do_not_run_ao ) {

    return true;

}

add_filter( 'wphb_do_not_run_ao_files', 'qa_wphb_do_not_run_ao_files', 10 );
When Asset Optimization is activated, Hummingbird immediately scans your site’s assets to identify those which could be optimized for performance.
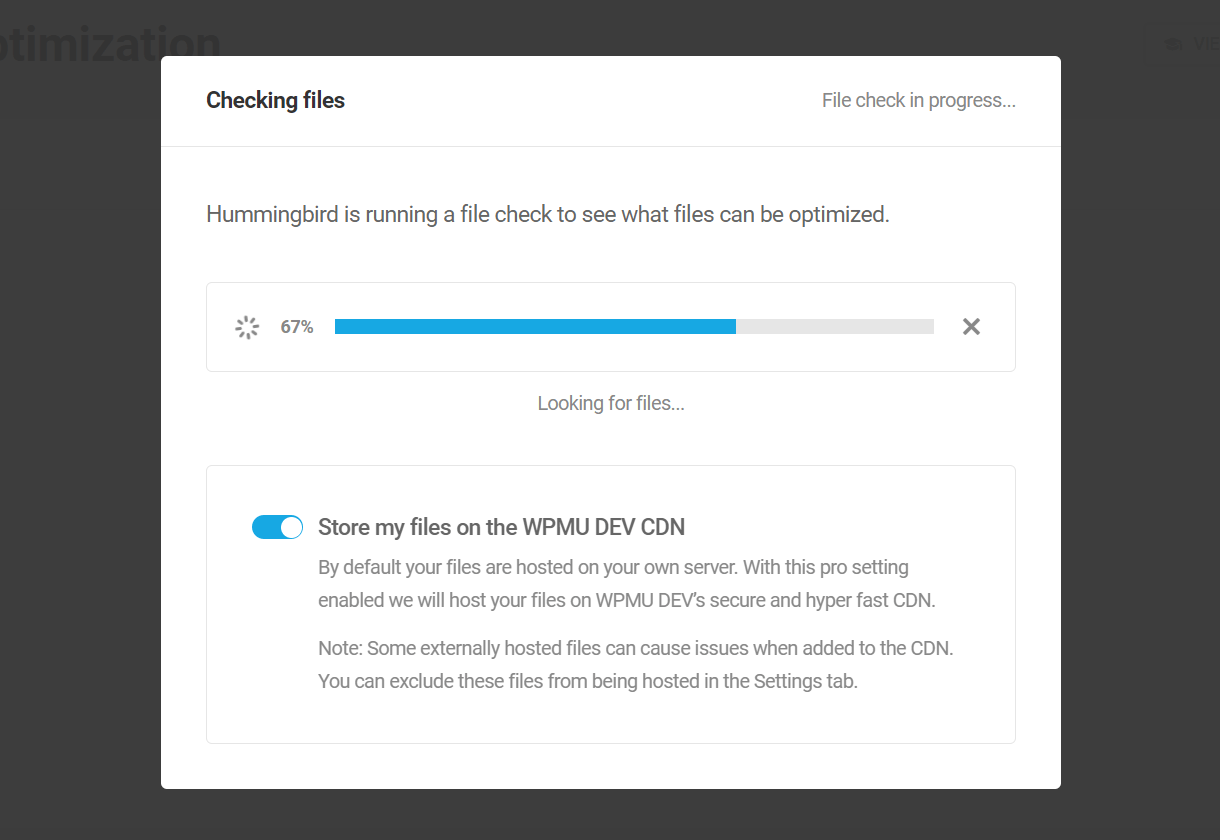
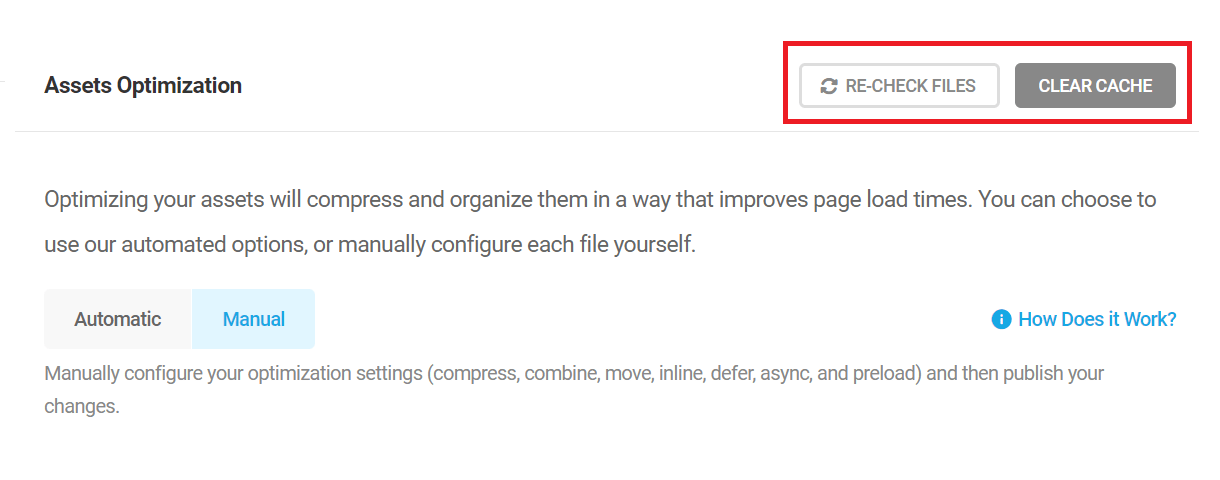
In the top right-hand area, you will find two tools that are relevant to both Automatic and Manual optimization. These features are:
- Re-check Files – This option allows you to have Hummingbird scan your site again to check for any new files while preserving the current settings. For example, this is handy if you installed (or uninstalled) a plugin and are not seeing the files added to the list here.
- Clear Cache – This option clears all local or hosted assets and re-compresses files that need it.
Automatic
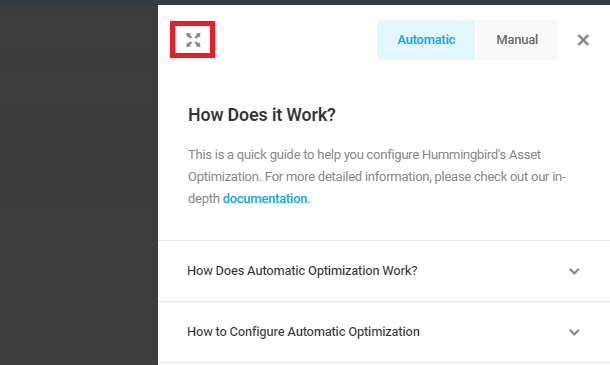
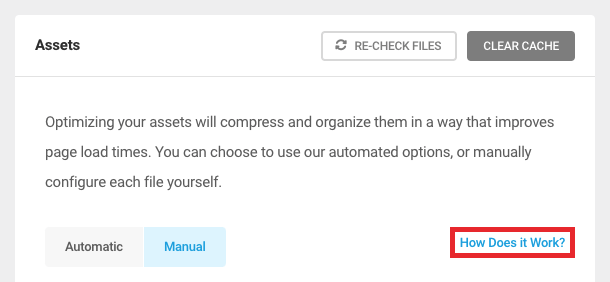
Automatic Optimization is a great way to reap the rewards of Asset Optimization without the hassle of doing a whole manual configuration. If you would like more information about Automatic Optimization, click How Does it Work? to open the information panel.
You can navigate between the Automatic and Manual tabs to view both sets of information. The Automatic information panel gives you access to:
- Summary – A concise explanation of Automatic Optimization and a guide to configuring it.
- FAQ – A list of commonly asked questions accompanied by detailed answers.
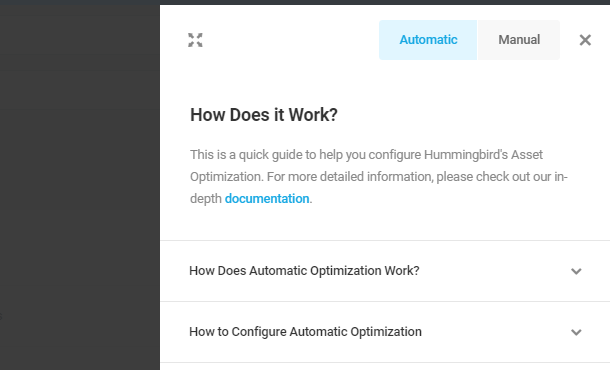
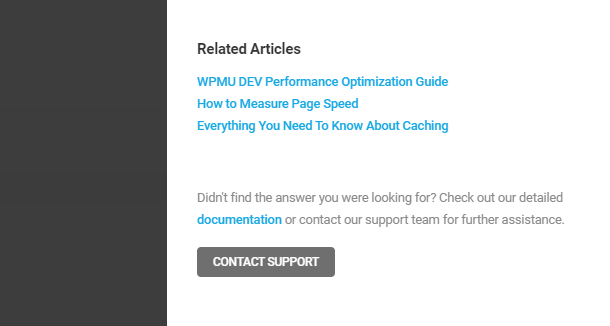
- Related articles – Quick links to articles packed full of valuable information.
- Support – A link to our technical documentation, as well as easy access to our 24/7 live support team.
Click on the expand icon to enlarge the information panel and make it full-screen. To close the panel, click outside or click the X in the top right-hand corner.
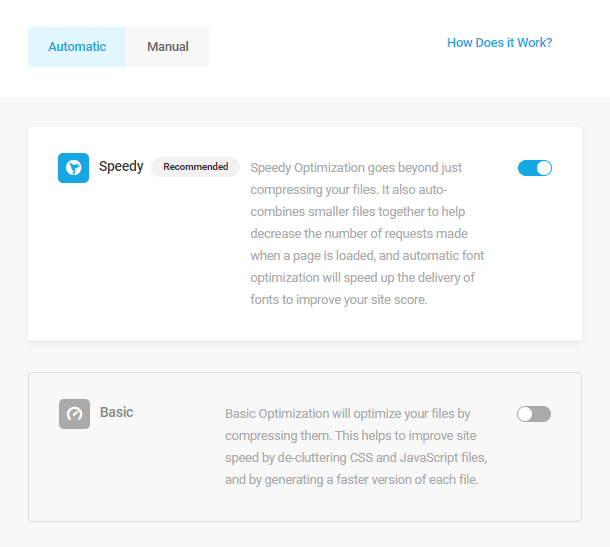
Automatic Options
The two different options for the Automatic module are as follows:
- Speedy (recommended) – The Speedy optimization compresses and auto-combines smaller files together, and optimizes your fonts for faster delivery. Files will only be combined together when two or more of them have identical attributes.
- Basic – Compresses all your files to deliver a faster version of each of them. Site speed is also improved by decluttering your CSS and JavaScript files. This is considered a safe option and is very unlikely to cause any issues or break your site.
Click on the toggle for the respective option to activate the ideal Automatic mode for your site.
Automatic Configurations
Whichever Automatic option that you choose, it can be configured to your liking. The configurations cover the two sections below.
Files – Allows you to choose whether you want to optimize CSS files, JavaScript files and/or Fonts.

Exclusions – If there are any files that you want to exclude from optimization, they can be listed here and they will be left as-is.
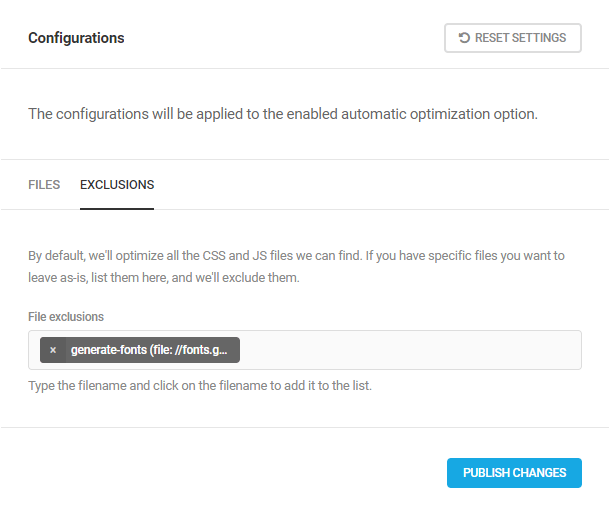
Remember to click Publish Changes to save your configurations.
Note that when you’re in Automatic mode, Hummingbird will auto-detect newly added plugin and theme files and optimize them for you. However, to avoid conflicts and issues, Hummingbird won’t remove any old files from a plugin or theme that was removed. That’s why we recommend file scanning once in a while to keep everything in sync.
You’ll see a reminder of this in the FAQ section of the How does it work information panel, as described above.
Manual
Manual Optimization mode is a great way to handpick which files to target and it allows you to fully customize your optimization.
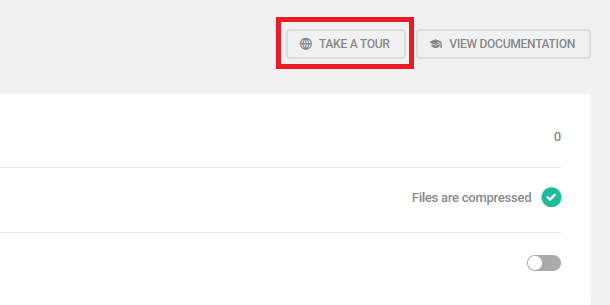
For a quick rundown of the features offered in Manual Optimization, click the Take a Tour button in the top right-hand corner of the page.
In Manual mode, you can manually optimize (compress, combine, move, inline, defer, async, and preload) individual files. With this amount of freedom comes the possibility of damaging your site so if you are unfamiliar with manually optimizing your files, we recommend checking out the How Does it Work? information panel.
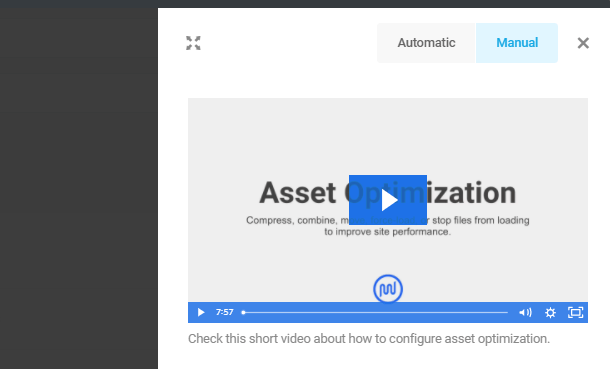
The information panel is a collection of all the resources that you may need in order to understand manual optimization and get started with your manual configurations. You can navigate between the Manual and Automatic tabs to access both sets of information. The main Manual resources are as follows:
Informational video – This short video gives an overview of the different ways you can optimize files and a general guide to making those changes.
Summary – Provides a guide to approaching Manual Optimization in a smart and safe way.

FAQ – A list of frequently asked questions with their respective answers.

Related articles – Quick links to helpful articles related to manually optimizing your files.
Support – If you require assistance at any point, this section provides access to the WPMU DEV technical documents for more information. You can also click the Contact Support button to be directed to our 24/7 live support team.
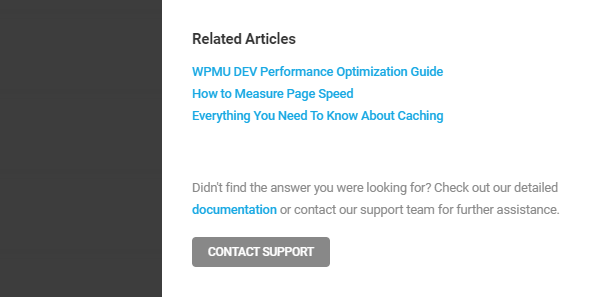
You can make this information panel full screen by clicking on the expand icon. Close the panel by clicking outside or by clicking on the X in the top right-hand corner.
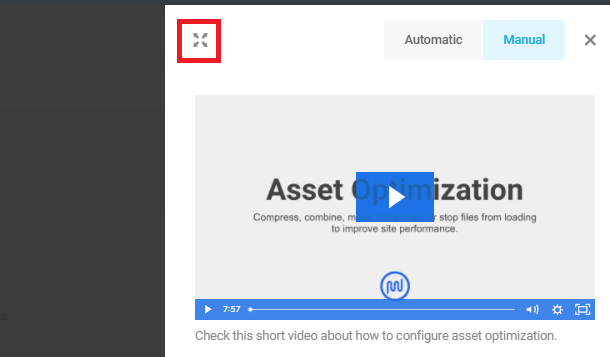
Manual Configurations
Before we get into the different optimization tools, there are a couple of important points to keep in mind when making changes to your files.
You will not be able to implement every recommendation. Every site is different, and just because an optimization tweak works for Site A, it does not mean it will work for Site B. It’s a good idea to consider every performance recommendation, but understand that not every change will improve your site.
To test different optimization settings without affecting your website visitors’ experience, enable Safe Mode. When the safe mode option is enabled, only logged-in site administrators can see the optimized version of the site.

While safe mode is enabled, tweak the asset optimization settings, then click the Preview button. This loads a front-end preview of your website where you can check different pages to verify that your asset optimization configuration doesn’t generate errors or break any elements on your site.
On the front-end, you will see a notice at the top indicating that you are viewing the website in safe mode preview.
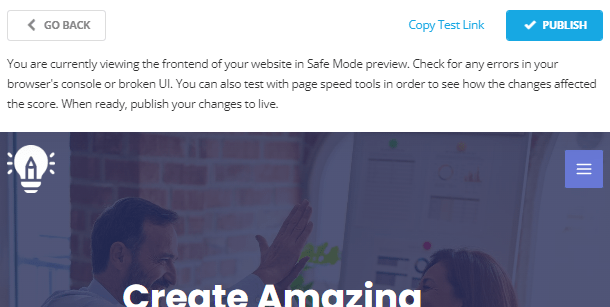
If you wish to test the performance of a specific page on your site with the asset optimization settings you applied using 3rd-party performance testing tools, click Copy Test Link. Then, paste the link you copied to your preferred performance testing tool and check the results.
In case the asset optimization settings you applied broke something on your site or didn’t improve the performance, you can click the Go Back button to tweak your asset settings further.
Once you are happy with your asset optimization configuration, click the Publish button to save the changes.
Once you are done tweaking your assets in safe mode, make sure to disable it, as it might cause page load delays on your live site.
Do not make bulk changes to assets, but rather make changes one at a time and verify that each has not broken something on your site using the asset optimization safe mode before moving to the next change. This may seem like a tedious process, but our recommendation is based on years of troubleshooting experience. Imagine finding something broken after changing 25 things at the same time. Which one of those changes caused the problem?
It is more efficient and, believe it or not, easier to make a change, check the site in safe mode, make another change, check the site again and so on until all changes have been made. If a change breaks something, you can simply revert that change and move on to the next one. All-in-all, the slow and steady approach to asset optimization is by far the better one.
Hummingbird’s Asset Optimization offers several tools to optimize each file individually and improve page load times.
Each file available to be optimized by Hummingbird will be listed in its own row, with the available tools at the far right.
Once a file has been optimized, you’ll see both the original filename and the name of the optimized file generated by Hummingbird. That makes it easier to locate any file in your site’s source code if needed. You can also click on any filename to pop it open in a new tab and inspect its contents.

Compress – Compression removes the clutter from CSS and Javascript files. Smaller files, in turn, help your site load faster, since your server doesn’t have to waste time reading unnecessary characters & spaces.

Combine – Whenever possible, Hummingbird can combine smaller files together to reduce the number of requests made when a page is loaded. Fewer requests mean less waiting, and faster page speeds!

The Asset Optimization engine is built in a way to respect WordPress dependencies for styles and scripts. That means that two or more files will be combined only when they have identical attributes, otherwise, they will be skipped. For example, if you choose to combine files 1, 2, 3 and 4, the Asset Optimization engine will first try to combine files 1 and 2 and if that fails (due to dependencies described above), it will then try to combine files 2 and 3 and so forth.
If your Asset Optimization page does not contain the Combine option, this means that the Combine option is disabled because your server has HTTP/2 activated. HTTP/2 automatically optimizes the delivery of assets for you
Move to Footer – When it comes to rendering blocking issues and WordPress, the best practice is to load as many scripts as possible in the footer of your site, so that slow-loading scripts won’t prevent vital parts of your site from loading quickly. For each and every file, you will be able to decide whether you want to move them to the footer or leave them in their original position.

Read our blog on how to Eliminate Render-Blocking Issues with Hummingbird for more information on common render-blocking issues and how to handle them.
Inline CSS – Enable this option to add the CSS from this file to a <style> tag in the head of your pages instead of loading the file.

Note that if a CSS file is larger than 4kb, the Inline option will be disabled for that file because large blocks of inlined CSS can break your page style.
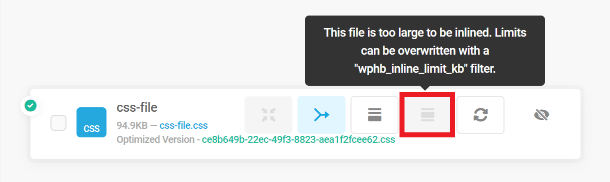
If needed, you can override this limit by adding the following filter to your theme’s functions.php file or a mu-plugin.
add_filter( 'wphb_inline_limit_kb', 'adjust_inline_limits' );
function adjust_inline_limits( $value ) {
return 50.0; // Set any value in Kb.
}
Defer – For hosted JavaScript files, you will have the option to Defer (force load it after the page had loaded). This means they will load only after everything else on your page has loaded, which allows you to load the most important files and content first.

Async (asynchronously load) – For external JavaScript files, you will have the additional option to load assets asynchronously, executing them as soon as they’re ready. For unsupported browsers, Async will automatically fallback to Defer, loading the files after the page has fully loaded.

Preload – Key assets can be preloaded, meaning they will start loading before rendering begins and will be ready as soon as they’re required. As such, preloaded files are less likely to block the page’s render, improving performance.

Optimize Font – This option only appears for Google fonts if they are being used on your site. It enables you to optimize font delivery so they don’t trigger the “Eliminate render-blocking resources” recommendation in your performance tests.

Don’t load file – If you click on this tool, it will prevent the file from loading.

Each asset will have a status icon indicating its current state. For example, the possible states for the Compress option are:
- Gray icon – Marks the files that are already compressed (like *.min.js and *.min.css.).
- White icon – Indicates which files can be compressed.
- Blue icon – New assets selected for compression.
- Can’t be compressed – This marks the files that can’t be compressed (usually it’s external resources).
Hover your mouse over any icon for additional information about its active/inactive status.
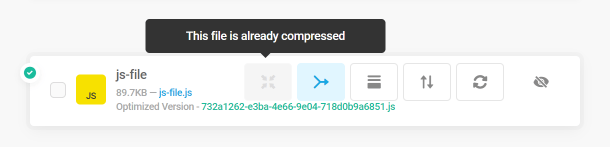
On top of the optimization tools, you will notice additional features to aid the configuration process. These features are:
Bulk Update – If you have multiple files that need to have a single action applied to them, you can click the checkbox next to each file and then click on the Bulk Update button.

A screen will then pop up that will let you choose which options to apply to all of the selected files.
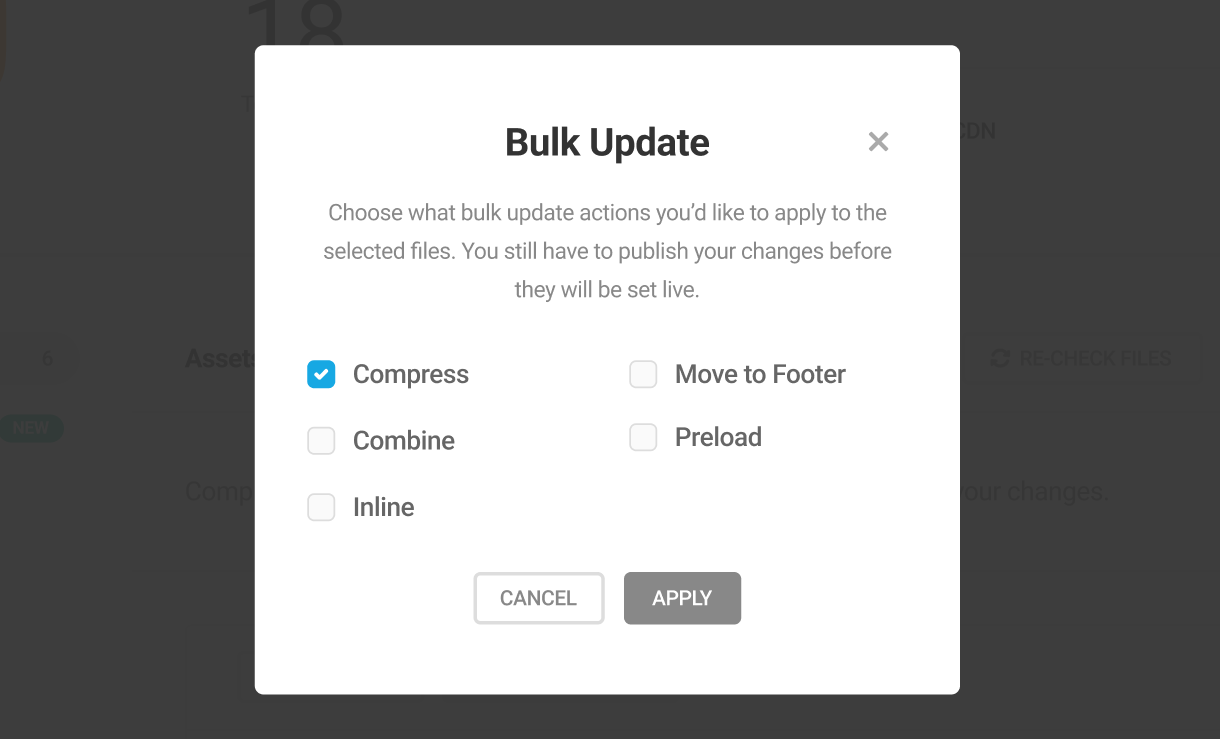
Note that you cannot Defer a CSS or set Inline for JavaScript.
Filter – Looking for something specific? No worries! Just click on the filter icon, and you’ll be able to view/sort files from a specific plugin or theme, filter your assets as either hosted or external, or even search for the file you want to optimize by name.
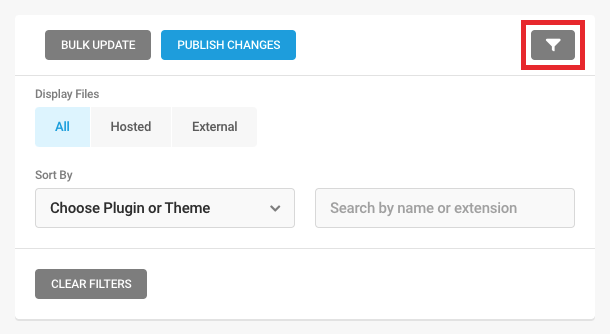
Once you have finished with all of your configurations, remember to click Publish Changes to keep the optimizations you have made.

After publishing your changes, you’ll see icons at the left of each file’s row indicating its status, as follows
- Green checkmark – The file has been optimized according to the options you’ve set.
- Spinning icon – The file has been sent to our API and will be optimized according to the optimization options you’ve enabled for it. This will occur as soon as a user visits a page on your site that requires that file to be loaded.
- Yellow icon – The file wasn’t optimized. If the optimization fails for any reason, try refreshing the screen or visit the homepage of your site to trigger a new attempt.
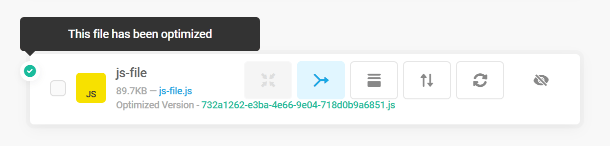
Re-Optimizing a Single File
There may be times when you want to re-optimize a single file, without having to re-do the whole Re-Check Files operation. For example, if you have made manual changes to your child-theme’s style.css file, you can re-optimize just that one.
Hover your mouse over the icon that identifies the file type, like the blue box for CSS files. If the file can be re-optimized singly, a tooltip will pop open to confirm this.

Note that this option is only available for files that are not inherently minified. Such files contain the .min extension in their filenames. For example, a style.css file could be re-optimized singly, while style.min.css could not.
Switch Back to Automatic Mode
If you wish to switch back to Automatic mode at any time, simply click the Automatic option. A modal will pop up to inform you that the Preset you had configured before (Basic or Speedy) will be applied. You can check the Don’t show me this again box to permanently dismiss that popup if you wish.
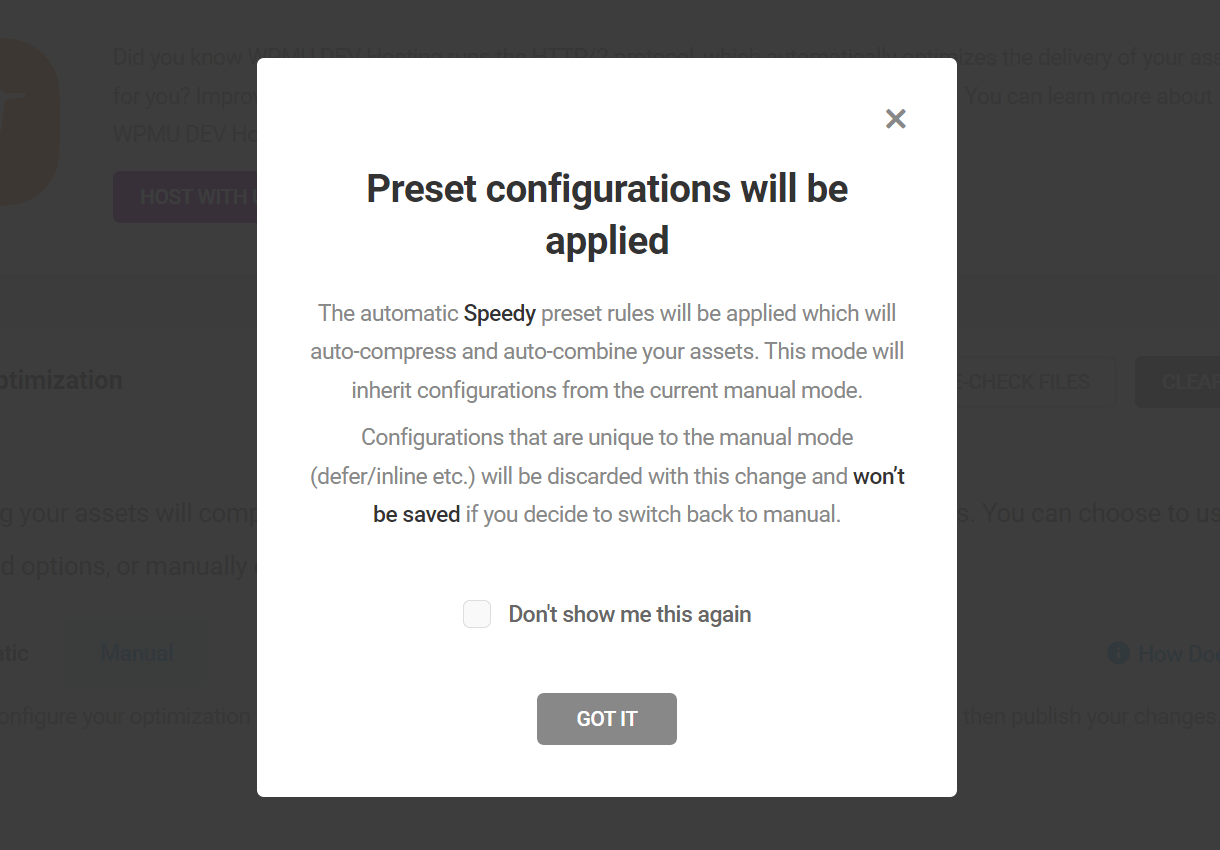
2.6.2 Extra Optimization
Link to chapter 6Delay Javascript Execution (Pro Only)
Enabling the delay javascript execution feature delays the loading of all non-critical JavaScript files and inline scripts above the fold until any user interaction, like mouse movement, keyboard action, or screen tap. This improves the page speed and enhances the overall performance of the site.
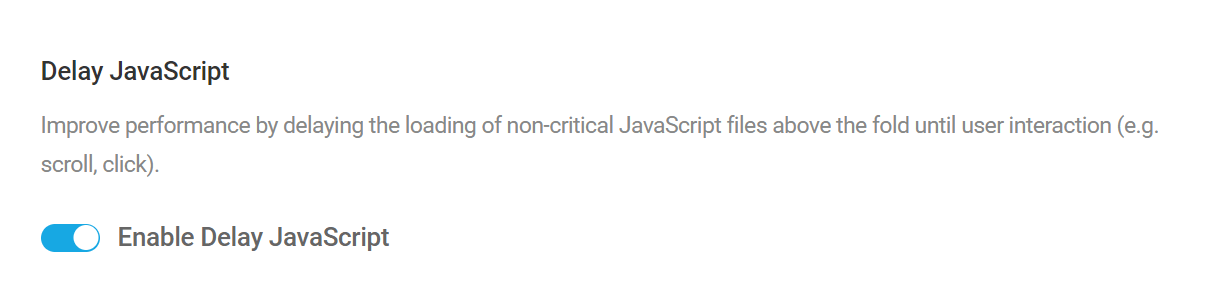
Timeout
Specify a timeout (in seconds) after which the scripts will load automatically if no user interaction is detected. The recommended default is 20 seconds.

Exclusions
Here you can mention the specific types of objects that need to be excluded from delayed JS processing.
Select the type of object to exclude from the Exclusion Type dropdown menu such as Files, Post Types, Post URLs, Plugins, Themes, Keywords, and Ads/Trackers.
Once you select an exclusion type, you can further specify your exclusions in the Active Exclusions field.
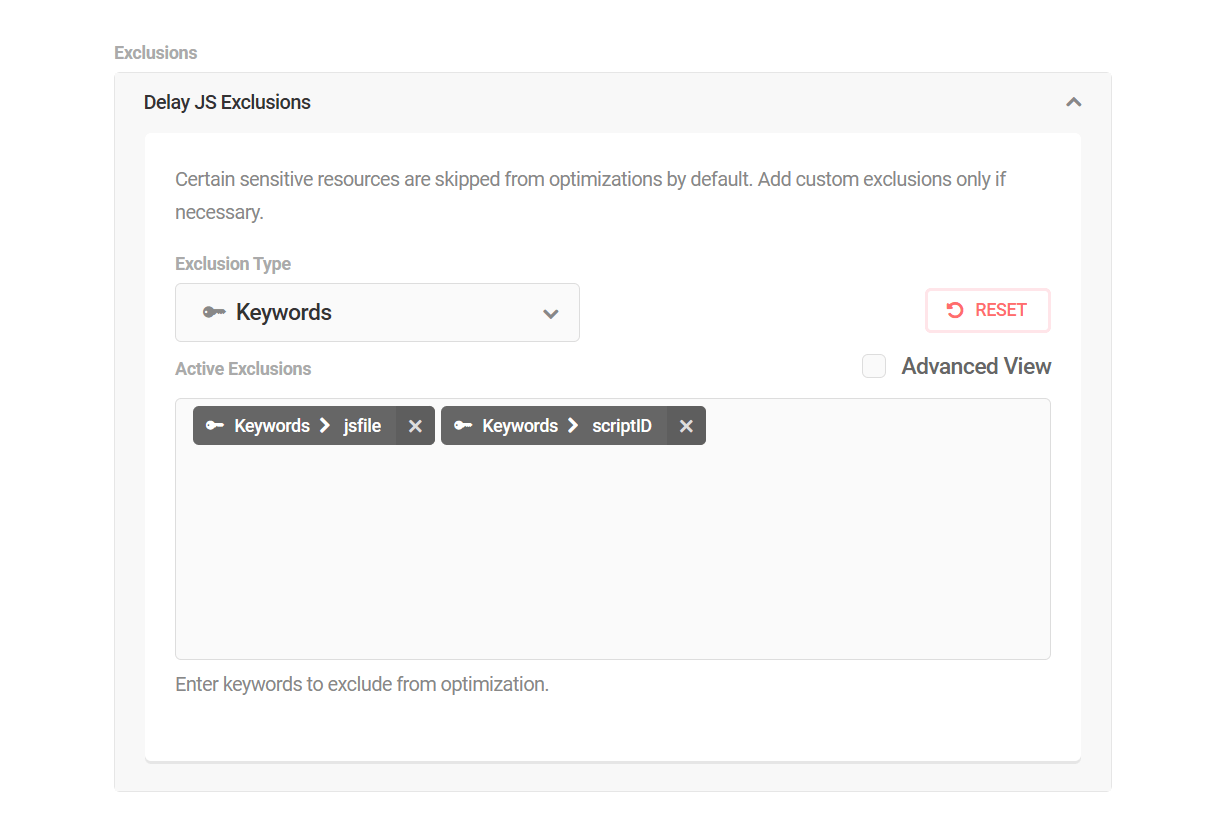
If you prefer viewing your exclusions in a list format instead of tags, toggle on the Advanced View.
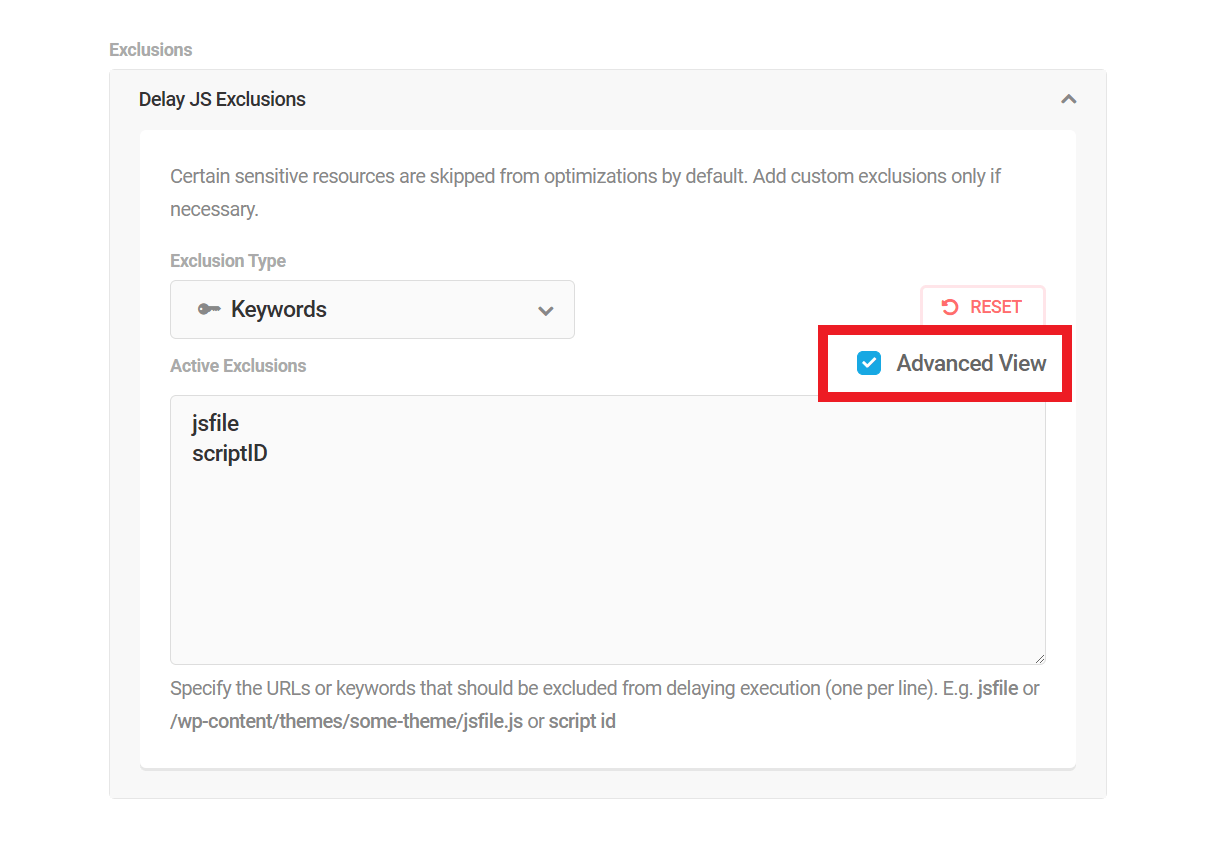
Exclude inline JavaScript
Enable this option if you have critical inline scripts that need to execute immediately for proper page functionality.

Users developing their own themes can use the define('WPHBDONOTDELAYJS', true); constant to prevent JS from being delayed on specific pages or templates.
Critical CSS
This feature replaces the CSS above the fold feature in previous plugin versions.
The Critical CSS feature enables you to drastically reduce your page load time and eliminate render-blocking resources by automatically generating the critical CSS required to load your above-the-fold content.

Once the feature is activated, you can choose how your critical CSS should be generated and loaded:
- Full-Page CSS Optimization (Recommended) – Inline all CSS used on the page, and either delay or remove the rest (see below). This option helps to resolve render-blocking and unused CSS issues that may be reported in a Performance Test.
- Above-the-Fold CSS Optimization – Inline above-the-fold CSS, and load the rest asynchronously. This option also helps to resolve unused CSS issues
If you select the Full-Page loading option, you can also choose how the rest of the CSS should be loaded:
- Load On User Interaction – The rest of the CSS loads instantly as soon as there is any user interaction on the page (mouse, tap or keyboard).
- Remove Unused – Any CSS not used on the specific page is not loaded at all.
If you select the Above-the-fold loading option, you can also choose how the rest (below-the-fold) of the CSS should be loaded:
- Load On User Interaction – The rest of the CSS loads instantly as soon as there is any user interaction on the page (mouse, tap or keyboard).
- Load Asynchronously – Any CSS not used on the specific page will be loaded in the background without blocking the rendering of the webpage.
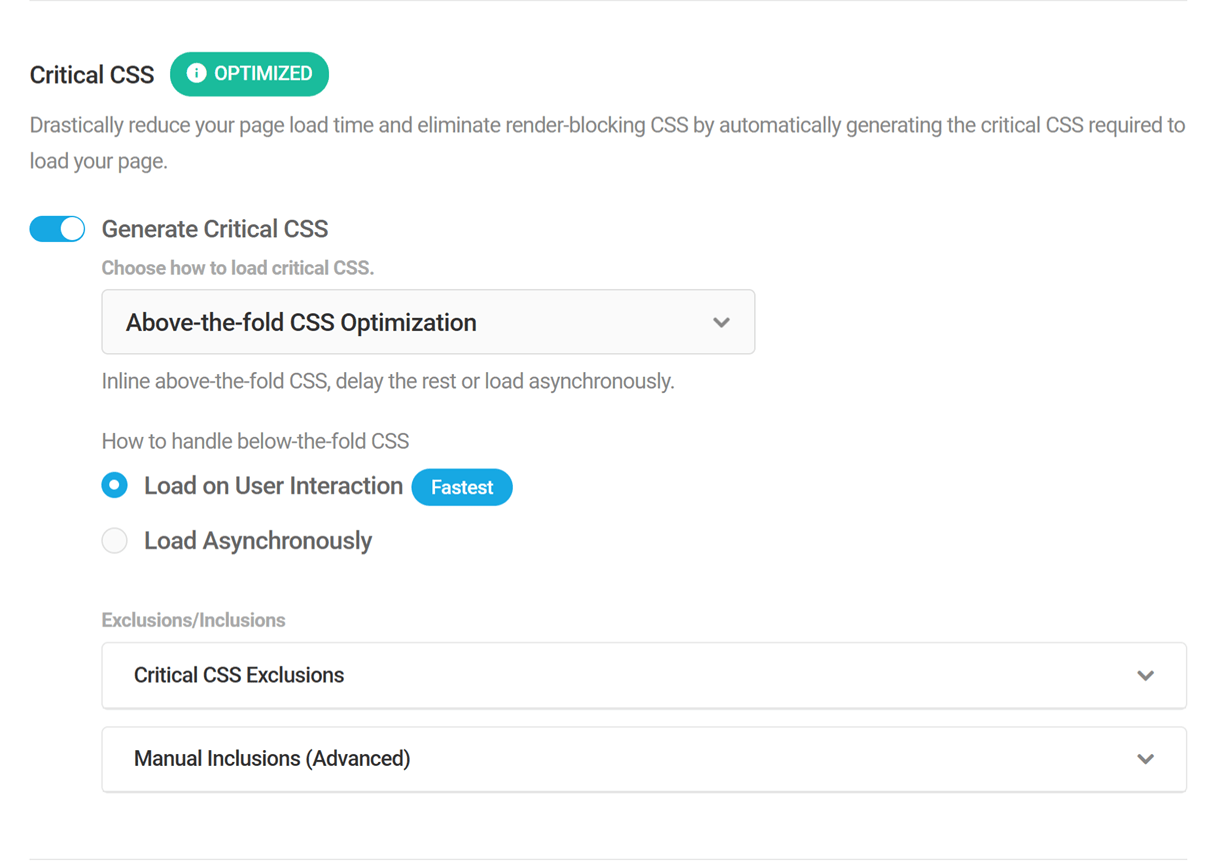
If your site is protected by a firewall in a plugin or on your server, please be sure to add WPMU DEV IP addresses to the allowlist to avoid possible connection issues with the Critical CSS API.
If you have enabled Maintenance mode on your site, the Critical CSS may return a 503 error. To ensure that Critical CSS works properly, please disable Maintenance mode. If you are using Branda, you can refer to this guide on how to disable Maintenance mode.
Critical CSS Exclusions
Regardless of the loading method selected, you can specify the type of objects for which critical CSS shouldn’t be generated.
Select the type of object to exclude from the Exclusion Type dropdown menu such as Files, Post Types, Post URLs, Plugins, Themes, and Keywords.
Once you select an exclusion type, you can further specify your exclusions in the Active Exclusions field.
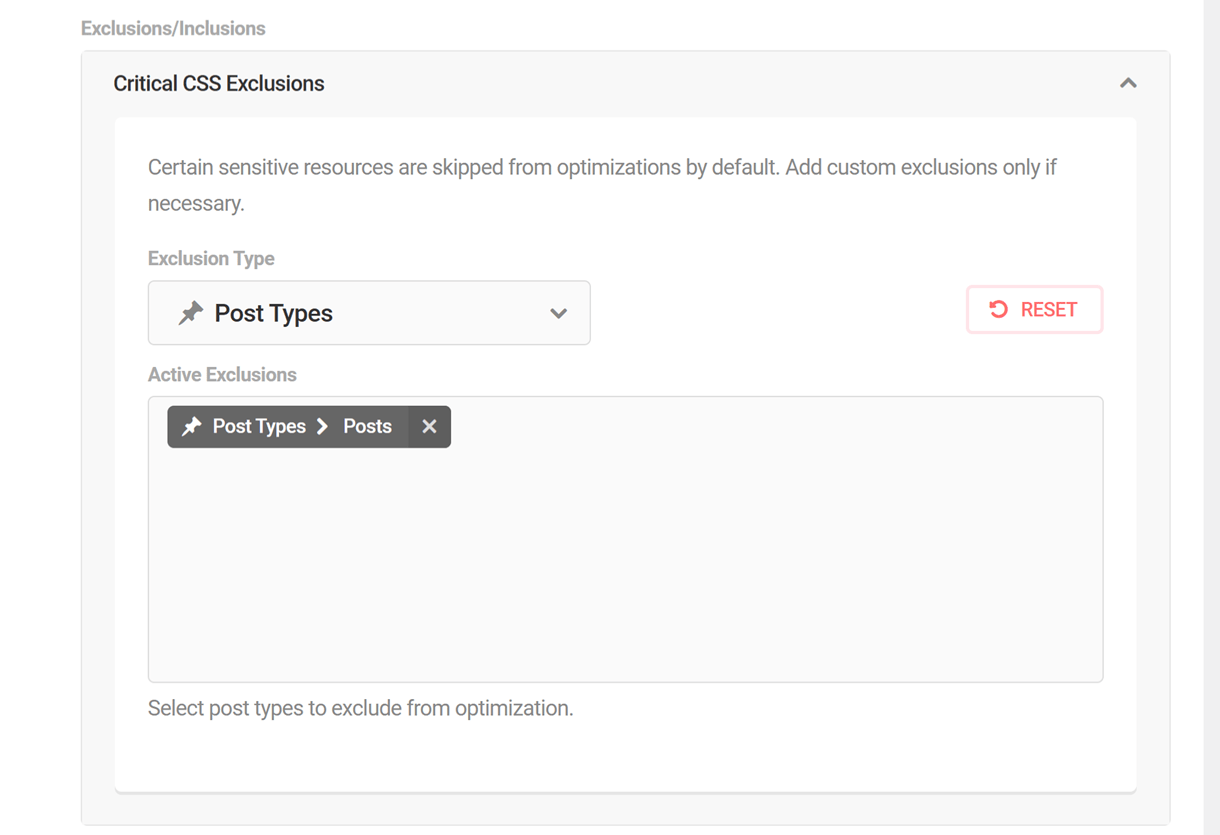
Users developing their own themes can use the define('WPHBDONOTOPTIMIZE', true); constant to prevent Critical CSS from being generated on specific pages or templates.
Manual Inclusions
Also regardless of the loading method selected, you can choose to include any manual CSS rules you deem necessary by adding them in the Manual Inclusions textarea. They will be included on all post types selected above.
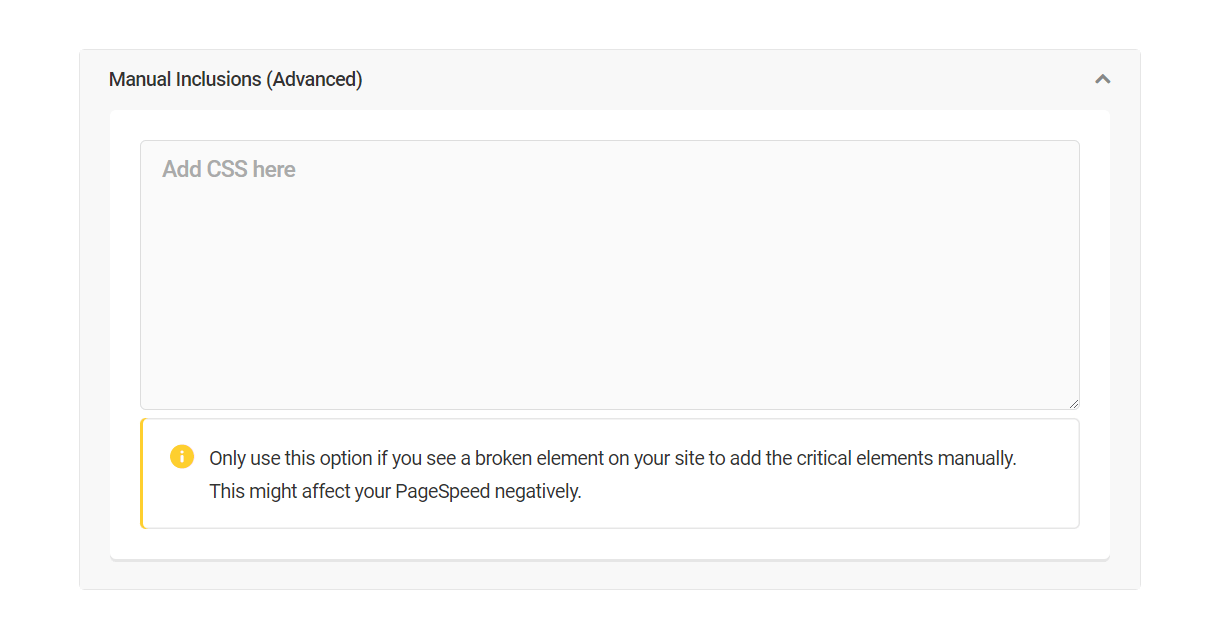
Click Save Changes at the bottom of the screen to save your configuration. You’ll see a confirmation message appear at the top of the screen once the critical CSS has been generated. You’ll also see a Regenerate Critical CSS button at the top of the screen that you can click if you ever need to clear the CSS cache and regenerate the critical CSS for all selected post types and taxonomies.
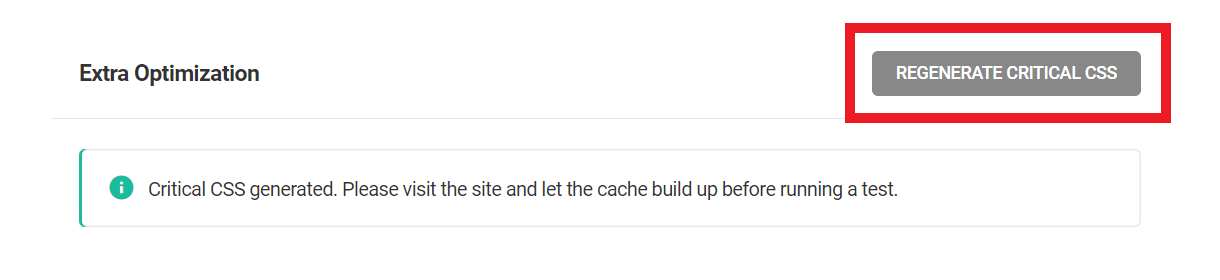
Note that if you were using the CSS above the fold feature before upgrading to version 3.6.0, you’ll see your critical CSS is still in the textarea where you saved it. But you’ll have a new option to Switch now to the new feature where you can automatically generate Critical CSS for all your site pages if desired. Any CSS that you had manually added in the CSS above the fold box will be imported into the new Manual Inclusions area.
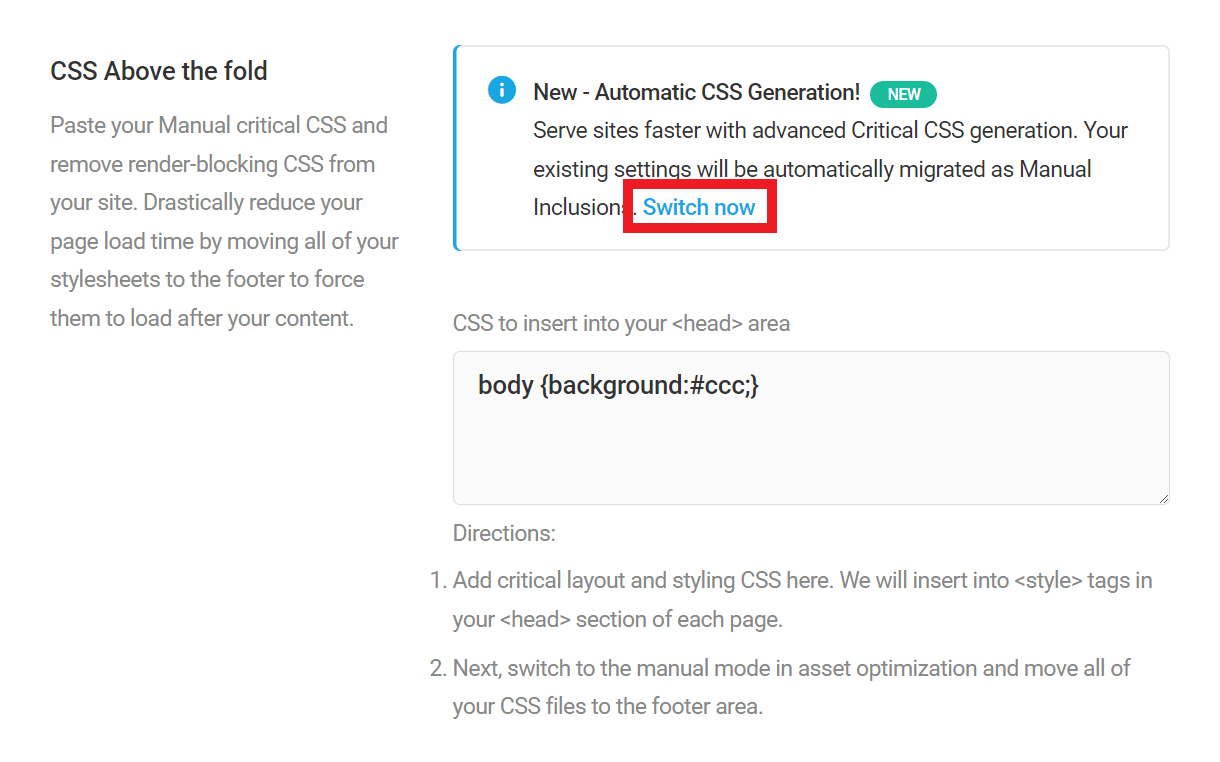
You’ll then have the option to switch back to manual mode if you prefer to continue adding your critical CSS manually.
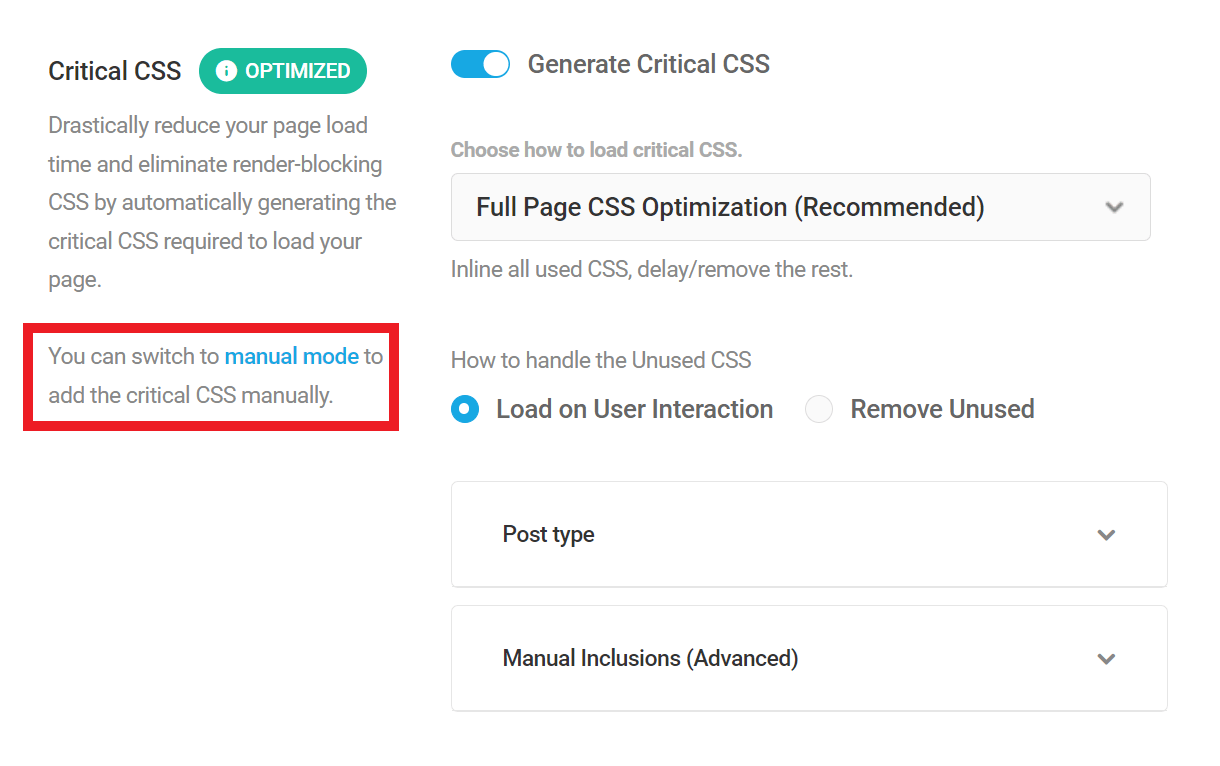
If you had not yet used the CSS above the fold feature in a previous version of the plugin, or if you delete your manually added critical CSS and switch to the new feature, the option to switch back to the old feature will not be available. You’ll simply see the new Critical CSS feature that replaces it.
Gutenberg Options
Once the Critical CSS feature is active, you’ll find additional options in the sidebar of the post/page editor for every post type you selected above.
Click the Generate CSS file button for any post or page where critical CSS has not yet been generated.
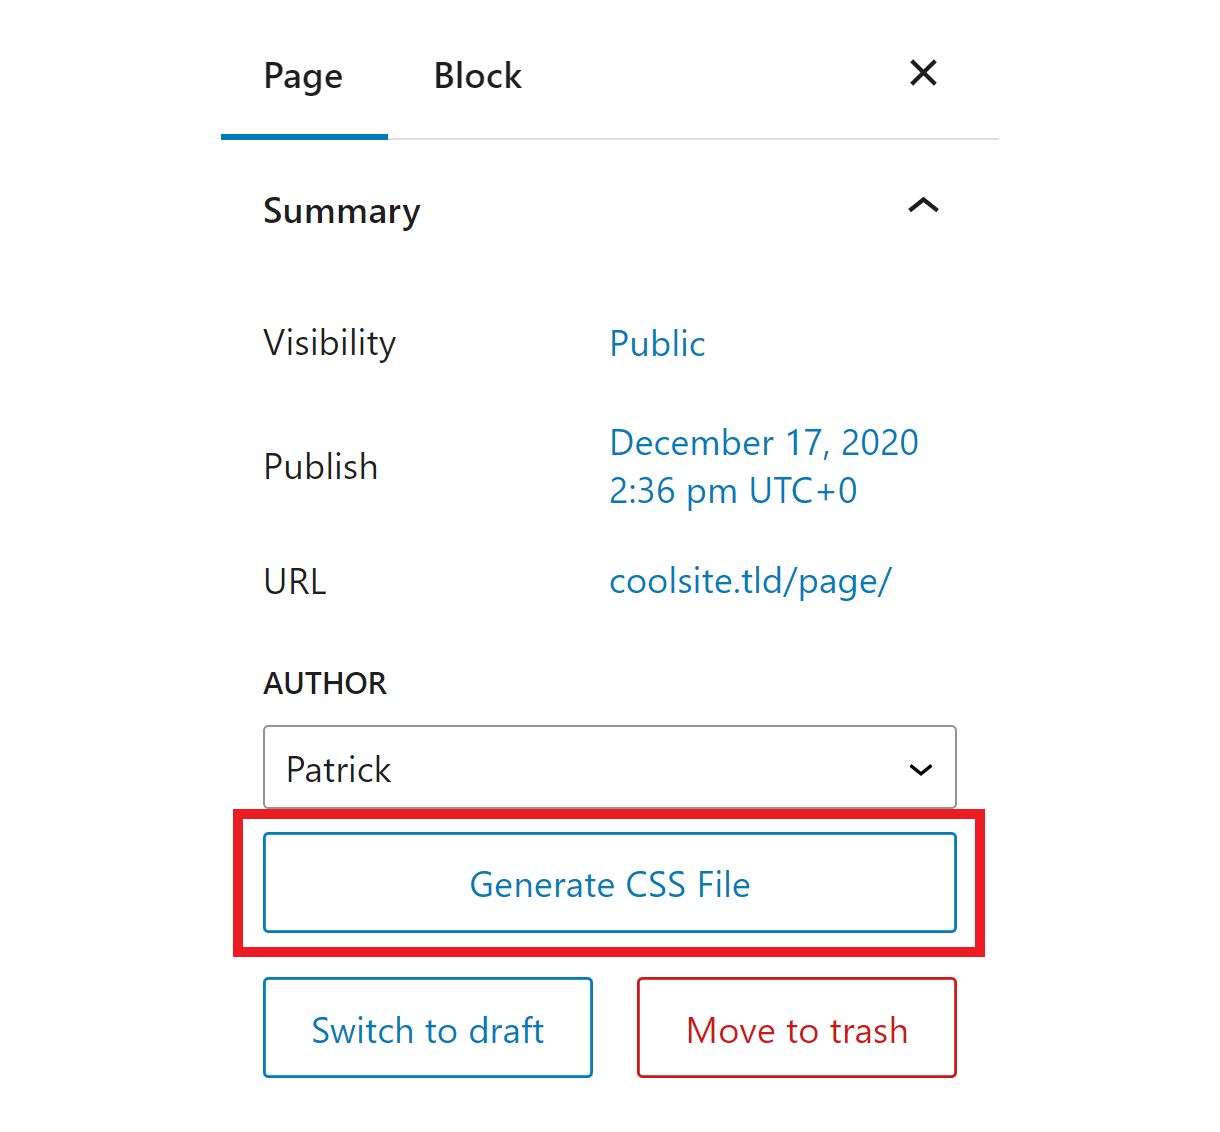
If critical CSS has already been generated for a particular page or post, you’ll see options to either Regenerate the CSS file or to Revert back to the default CSS file for that specific page or post if needed.
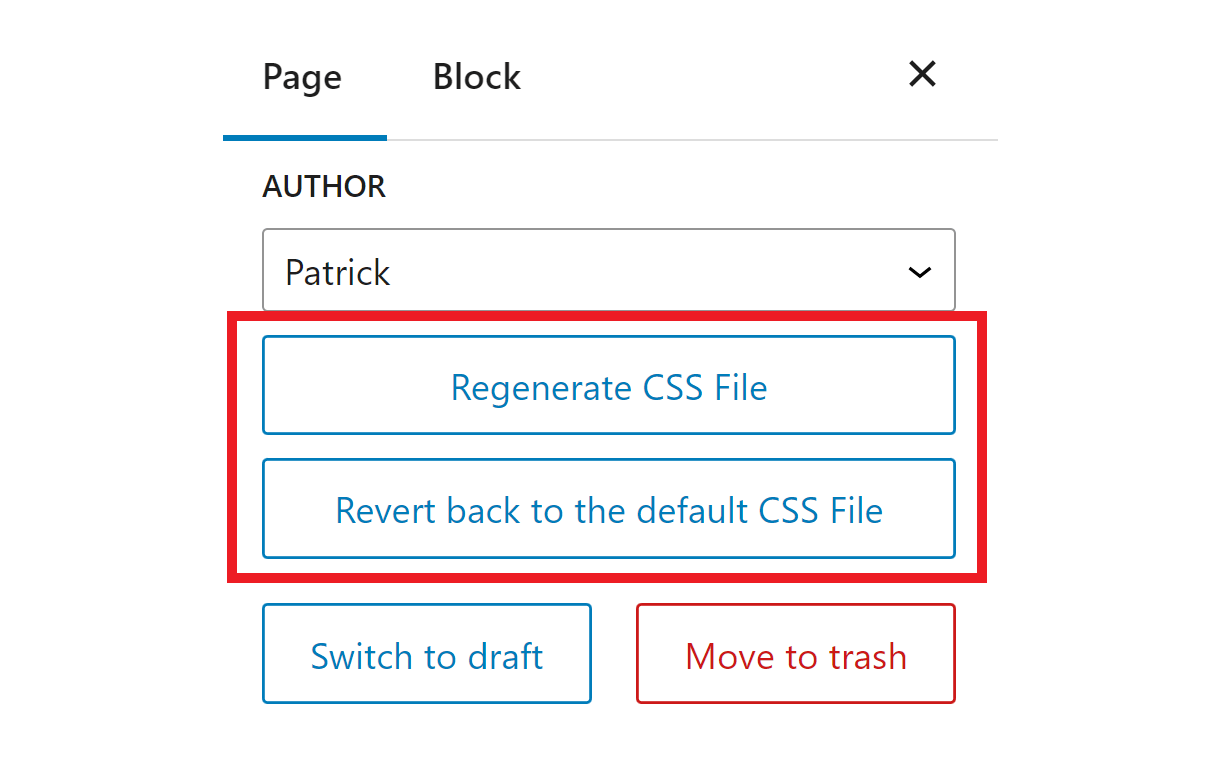
How to Confirm Critical CSS Generation
You can check to confirm that Critical CSS has indeed been generated for a specific post, page or taxonomy, if enabled in the Post Type section above, by viewing the page’s source code or by popping open your browser’s developer tools. Then look in the <head> container where you’ll find the critical CSS in a <style> tag with an ID that corresponds to the content type.
For example:
- Frontpage critical CSS –
<style id="wphb-used-css-frontpage"> - Any single post –
<style id="wphb-used-css-post"> - Any category –
<style id="wphb-used-css-category">
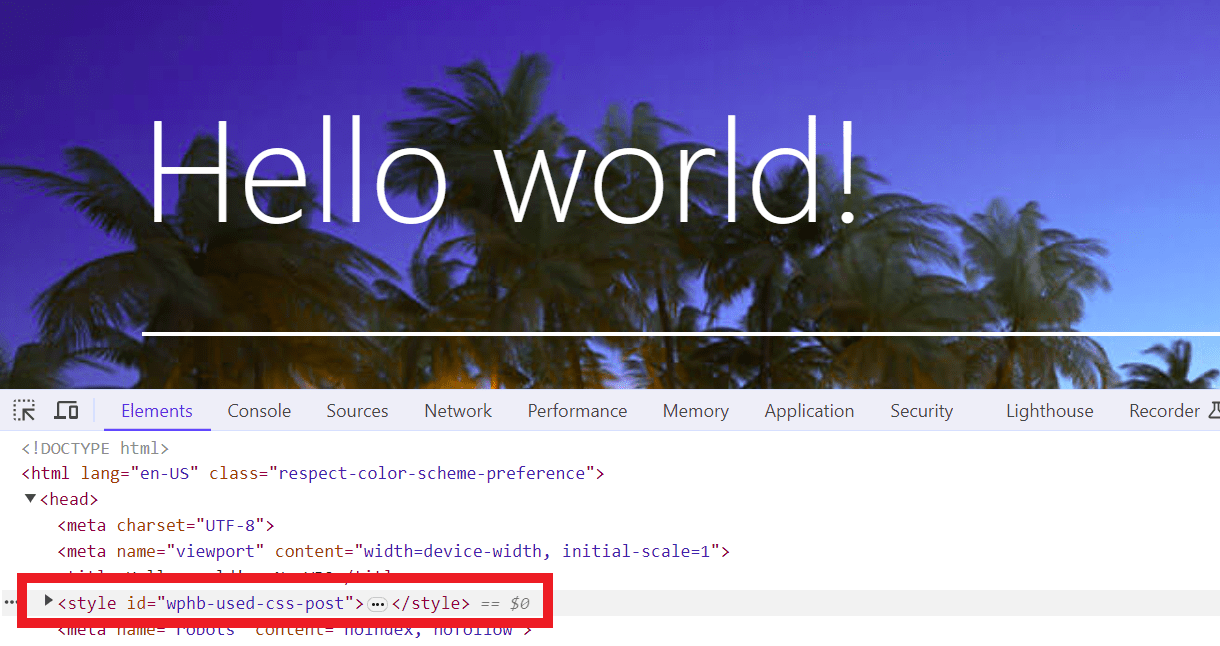
Error Handling
The Critical CSS will be generated for all valid CSS, and if the feature encounters an invalid CSS, it will display an error message to inform you of the issue(s) so you can fix it and try again.
For example, if CSS generation is aborted due to invalid CSS syntax in a stylesheet, the error will indicate which CSS rule needs to be corrected, and would look something like this:
Error: The CSS for the URL https://coolsite.tld/newwp2/category/uncategorized/?hb_doing_critical=1 has a syntax error. Please check this section in your CSS: .is-IE .post-thumbnail /.wp-post-image
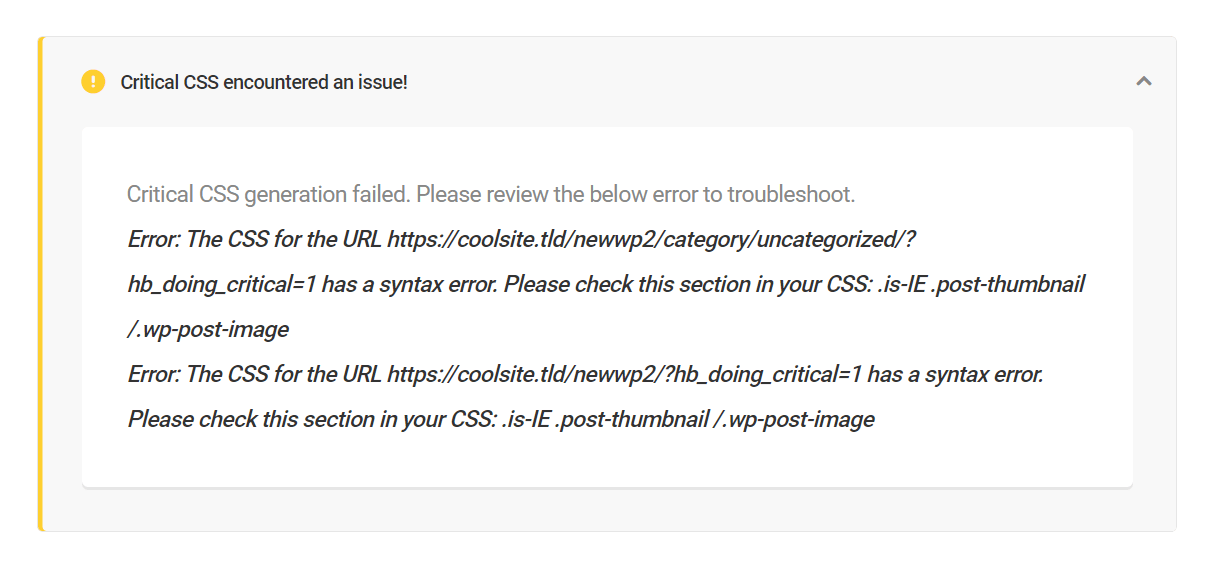
A similar error message would appear in the Gutenberg editor if CSS generation failed there.

To find exactly which stylesheet contains the malformed CSS:
- Copy the URL indicated in the error message.
- Paste that URL into the Address field here, and click the Check button: https://jigsaw.w3.org/css-validator/
- The validator will indicate the location of the problematic stylesheet so you can fix the issue, or contact support if you need help.
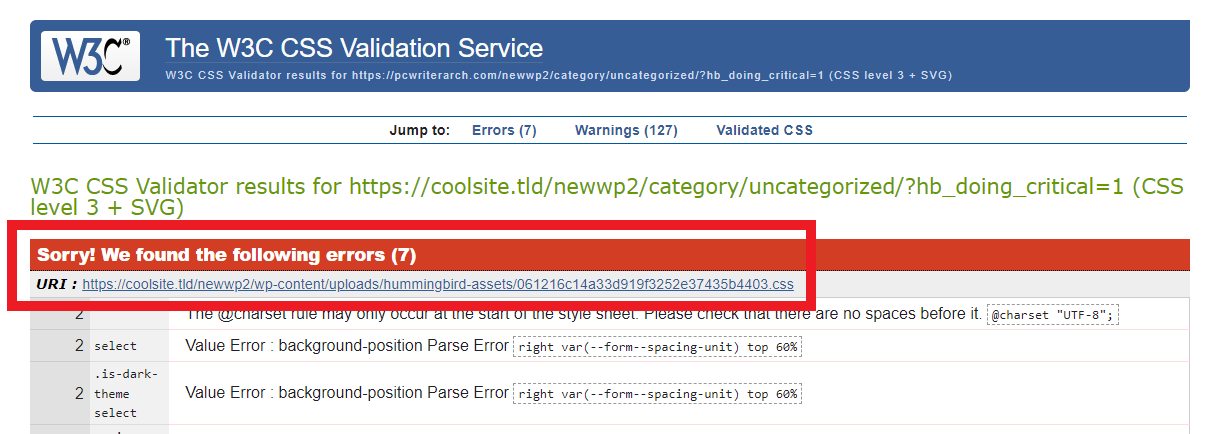
Font Optimization
The Font Optimization options enable you to customize how custom fonts are served to your users’s browsers to enhance site performance, page speed, and the user experience.
Hummingbird offers two font optimization options: Swap Web Fonts and Preload Fonts. Both of these options can be used together if needed.
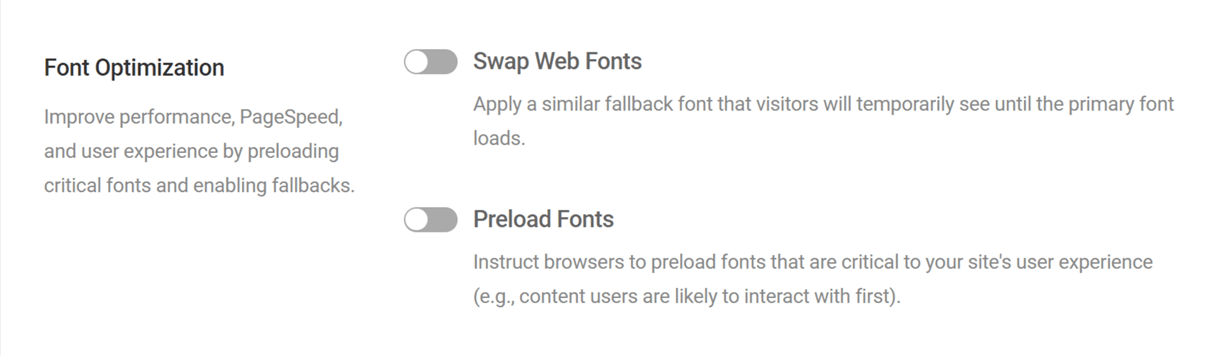
Swap Web Fonts
Enable this feature to swap out web fonts and render similar system fonts until the actual font is loaded and ready to render. It will also automatically combine multiple font files to reduce http requests.
You can choose either of the following two font display methods.
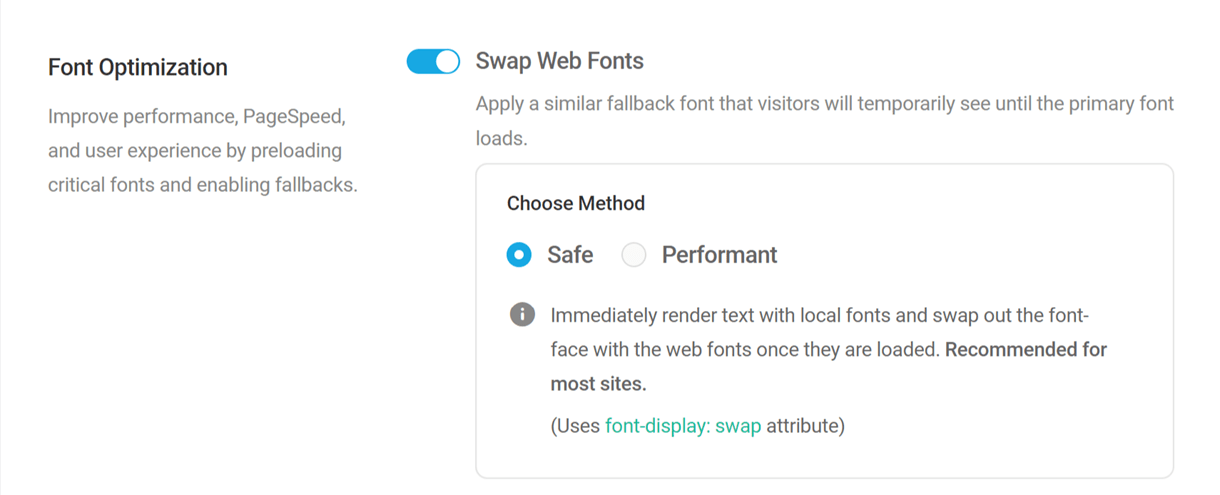
Safe (Recommended) – If this method is selected, all custom fonts used on the site will be swapped out with locally available system fonts on the site visitor’s device using the font-display: swap CSS attribute.
Performant – In this method, the site visitor’s browser will wait 100 ms for the custom fonts to load before displaying the text. But it will fall back to the user’s system fonts if the loading takes any longer. It uses the font-display: optional CSS attribute.
The Performant method will help reduce any Cumulative Layout Shift (CLS) caused by textual elements, but it may result in unstyled text on slower network connections. Hence, the Safe method is recommended for most sites, unless you are facing CLS issues
Performance Impact
- The usage of the
font-displayCSS attribute helps resolve the Ensure Text Remains Visible during Webfont Load audit on Google PageSpeed Insights. - The TTFB, Load Delay, and Load Time phases of LCP may also improve if the LCP candidate is a textual element.
Filters
- You can change the attribute from swap/optional to block, auto, or any other valid value using the
wphb_google_font_displayfilter. - Combining font files can be disabled by using the
wphb_disable_google_font_combinefilter.
See Font Optimization Filters below for details.
Preload Fonts
Enable this feature to instruct your user’s browser to preload fonts which are critical for the above-the-fold rendering, to avoid font loading delays during the rendering process and the first paint.
All the key fonts will be preloaded using the rel="preload" attribute.
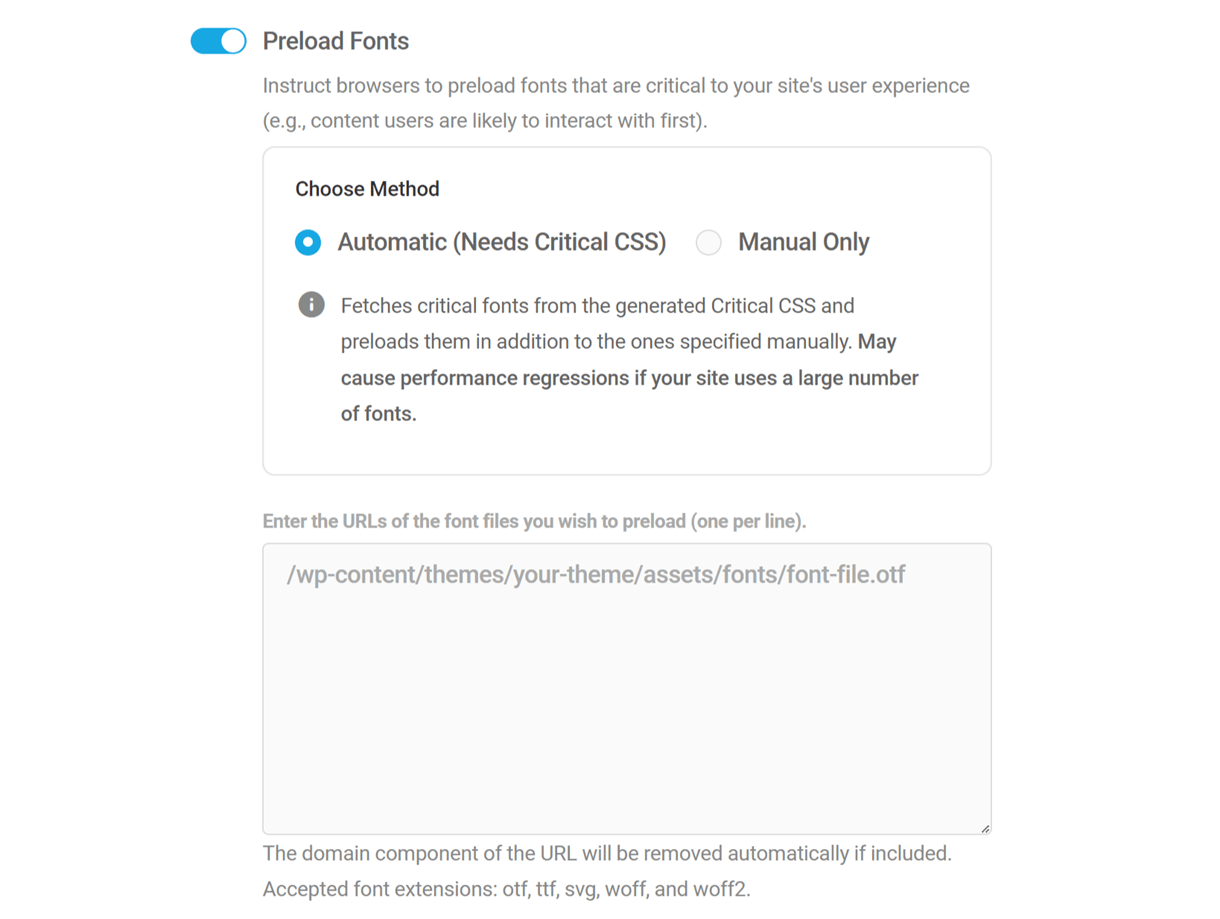
Automatic – This method requires the Critical CSS feature to be enabled to work correctly. It automatically fetches all the essential fonts within the generated critical CSS and preloads them, saving you the manual effort.
In addition, the fonts you specify manually in the provided text field will also be preloaded in the Automatic method.
Please note that this works best with the Above-the-fold method for Critical CSS. When using the Full-Page method, it would preload all the fonts used on a page instead of just the above-the-fold ones, and this may result in performance regressions, especially on sites with a large number of fonts.
Manual – Enable this option if your site uses a large number of web fonts and you wish to manually specify the fonts to be preloaded. The font URLs can be added in the provided text field, one per line.
Performance Impact
- Adding the
rel="preload"attribute to the critical fonts on a page helps with the Resolve Preload Key Requests audit when it’s failing because of font elements. - It can also help resolve FOIT, FOUT, and the resulting CLS issues, especially when used in combination with the Swap Web Fonts feature.
- The TTFB, Load delay, and Load Time phases of LCP may also improve if the LCP candidate is a textual element.
Font Optimization Filters
- wphb_add_preload_to_font_used_css – Use to disable the automatic extracting of fonts to preload and manually specify those fonts in the UI instead.
- wphb_allowed_preload_fonts – Filter to add/remove font types to be preloaded.
- wphb_google_font_display – Filter to change the font-display attribute from the default swap to optional, auto or any other valid value.
- wphb_google_fonts_domain – Filter to change the google font domain to bunny font domain or any other equivalent.
- wphb_disable_google_font_combine – Filter to disable automatic combination of multiple font files to reduce http requests.
- wphb_generated_used_css – Use to help resolve possible 404 errors related to fonts when the Critical CSS feature is enabled.
2.6.3 Asset Settings
Link to chapter 6Configure your Asset Optimization settings with the following features:
File Location
By default, Hummingbird will keep your modified assets at /wp-content/uploads/hummingbird-assets. If you want to change that you can use this setting. Note that this option is only available here in single site installations; for multisite installs, see Multisite Asset Optimization below.
This option is only available in single site installations, and is locked if the WPMU DEV CDN option below is enabled. For multisite installs, see Multisite Asset Optimization below.

Super-compress my files (Pro Only)
Compress your files up to 2x more than regular optimization and reduce your page load speed even further. This is auto-enabled on the Pro Version and is not available on the free version.

Enable WPMU DEV CDN (Pro Only)
By default, your optimized files are hosted on your own server. Enable this feature and we will host your files on WPMU DEV’s CDN. You can choose to activate/deactivate it here at any moment by clicking on the toggle.
Some externally hosted files can cause issues when trying to serve them from the CDN. To avoid such issues, exclude these files from being served from the CDN by adding them to the Exclude files from using CDN field. Hummingbird may automatically exclude files from using the CDN if they might break scripts and styles.
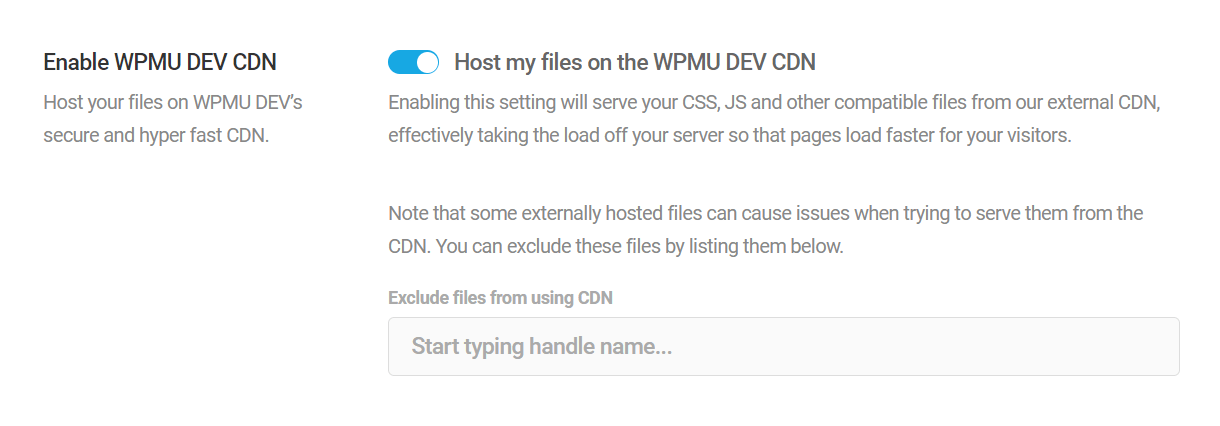
In multisite installations, the WPMU DEV CDN cannot be activated/deactivated via individual subsites, but can be controlled through the Network Admin settings for all the subsites. See Multisite Asset Optimization below.
Note that the Hummingbird CDN only serves CSS and JS files. To serve image assets from our CDN (jpg, png, gif, webp only; SVG is not supported), you’ll want to use the CDN option in Smush Pro.
Learn more about the CDN in our CDN tutorial video.
Debug
If you experience any issue with Asset Optimization, you can enable the debug option to get more information about the process.
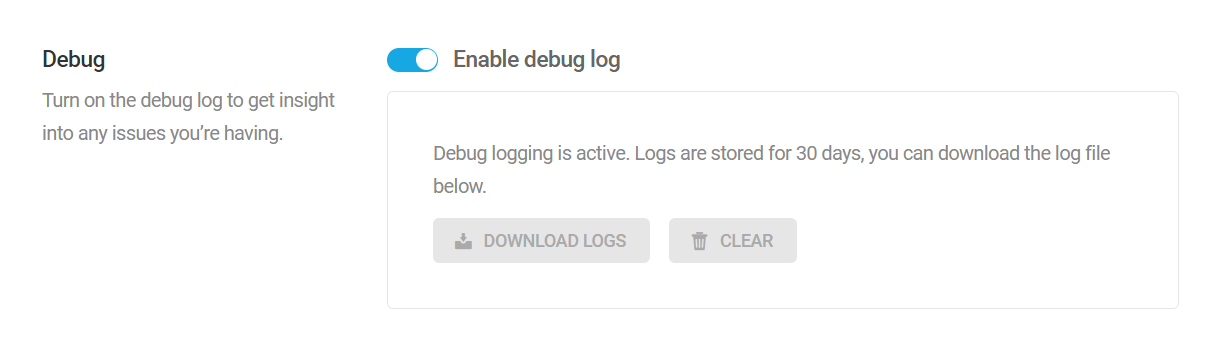
Reset to defaults
If your frontend has fallen apart or you just want to go back to the default settings, click this button to clear all your Asset Optimization settings and run a new file check.

Deactivate
You can completely turn off Asset Optimization here.

Remember to click the Save Settings button at the bottom of the page once you’re done.
2.6.4 Multisite Asset Optimization
Link to chapter 6Asset optimization can only be configured on a per-site basis. So in multisite installations, Asset Optimization for subsites must be enabled in the network admin before the module is available in main site and subsite menus.
To do so, open the Asset Optimization tab from Network Admin, and click Enable Asset Optimization module for your subsites.
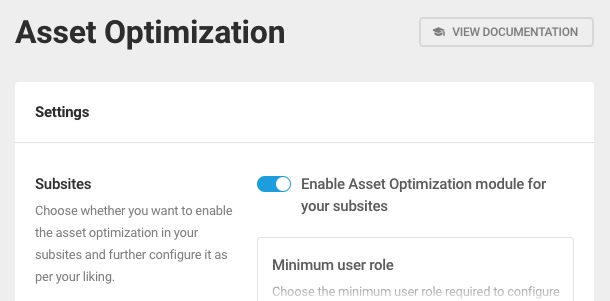
Once enabled in the network admin, asset optimization must be conducted for each subsite, individually. But you can configure the following options in your network admin.
- Minimum user role – Select whether to limit control to the Super Admin or allow the Subsite Admin to conduct asset optimization tasks.
- Host files on WPMU DEV CDN – Enable this to use our CDN for your asset delivery instead of serving them from your own server.
- Debug logs – Enable this option if you’re troubleshooting issues.
- File location – You can optionally define a custom storage location for your optimized assets. Note that the directory you define here must already exist.
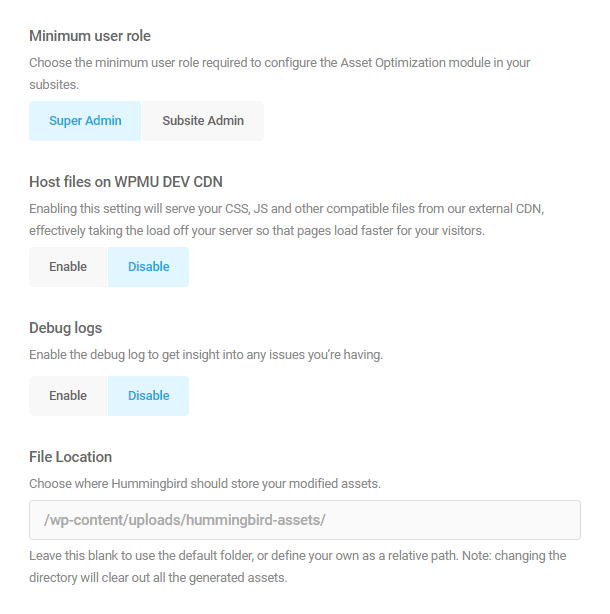
2.6.5 Asset Optimization Tips
Link to chapter 6Successful asset optimization varies greatly from site-to-site, depending on the plugins and themes installed and activated.
In this section, we will look at steps for using Hummingbird’s advanced Asset Optimization tool for successfully compressing, combining, and moving your CSS and JS files without breaking the style or functionality of your website.
While you’re configuring things, you can use a handy little Hummingbird feature that allows you to temporarily disable Asset Optimization on the page you’re viewing to check if there are any unwanted layout issues.
In the toolbar on the frontend, click “See this page unminified” in the Hummingbird menu.
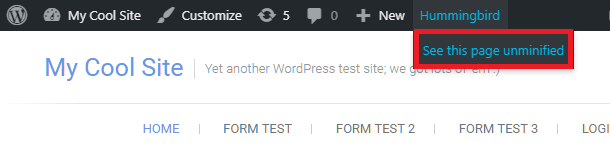
Clicking that will append this to the URL in the browser’s address bar to let you know Asset Optimization is disabled temporarily on the page:
?avoid-minify=true
To get the optimized page back, simply remove that from the URL and reload the page, or click to any other page on your site, then click back to one you’re viewing. Don’t use your browser’s “Back” button though, as you’ll just come back to the unminified page again.
When configuring Asset Optimization, remember to turn off or clear cache, including page, preload, browser, and server-side object cache.
1. Install and configure your plugins and theme – If you add or delete a plugin or theme it will change available assets. If you are not seeing assets from a specific plugin or theme, clear your cache and use the Re-Check Files button to reload available assets.
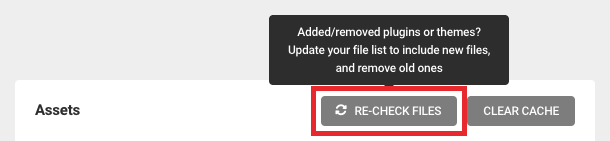
2. Use your theme’s file optimization tool first – Premium themes and page builders sometimes include an asset optimization feature that will resolve 80% of your issues. This should be configured before you setup Hummingbird Asset Optimization. Here are some examples of popular theme asset optimization features:
Avada is one of the most popular premium WordPress themes. Check out our blog on How to Speed Up and Optimize Avada for Free Using Our Smush and Hummingbird Plugins for more information on using these two world-class plugins for maximum performance.
Check out our blog on How To Utilize Page Builders Built-In Optimization Options to learn more about the first steps to take in making your site fly!
3. Run Hummingbird Asset Optimization – Now that your plugins and theme are activated and setup, run the Hummingbird asset optimization scan. Compress and combine everything. To bulk compress and combine, click the CSS/JavaScript checkbox above each section, click the Bulk Update button to open the Bulk Updater module.
Select the Compress and Combine options and click apply. Then click the “Publish Changes” button to push the changes live.
4. Move files to the footer – Move all your files to load in the footer except the JQuery, JQuery-migrate, and core theme JavaScript files. Use the Plugin or Theme filter sort tool if you are unsure which files belong to your theme files.

Click the Publish Changes button to push your changes live. This may break functionality or styling but stay calm and continue with testing.
5. Move files with an error to the header – Visit key pages on your site and use the browser console to check for errors. To check for errors with Google Chrome, visit a page on your site, right-click, select Inspect, and open the Console tab.
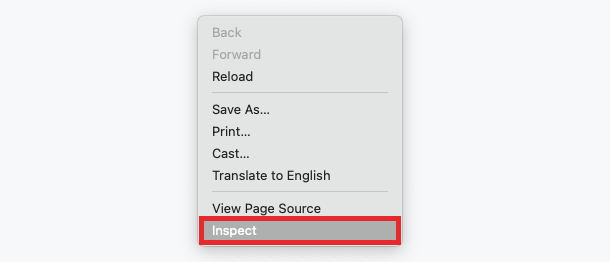
Return to the Hummingbird Asset Optimization tab and move files flagged with an error to load in the header.
6. Defer scripts not needed immediately – Finally, use the Force load this file after the page has loaded button available in the JavaScript section to defer scripts that you don’t need immediately (like a form script or a spam protection script).
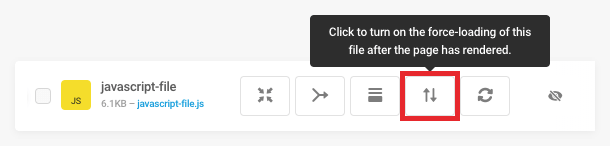
If you run into any issues, you can quickly deactivate Asset Optimization under the Asset Optimization Settings tab, and contact our support team. Your WPMU DEV membership includes performance optimization consulting from our support experts. Open a support ticket to get started.
2.7 Image Optimization - with Smush
Copy chapter anchor to clipboardOnce you’ve run your first Hummingbird scan, you may find that some of your images need to be optimized.
Our blog post, How To Ace Google’s Image Page Speed Recommendations With Smush, focuses on Smush features that directly impact your Google Page Speed score.
Your Hummingbird results will tell you if these images just need to be compressed, or if compressing and resizing is necessary.
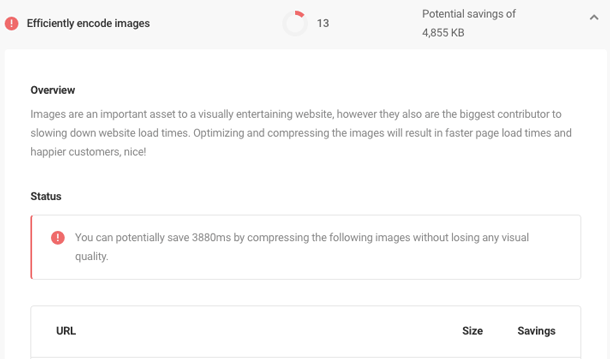
For resizing, you can turn to the WordPress image editor to crop and scale those images to match the embedded size in your content.
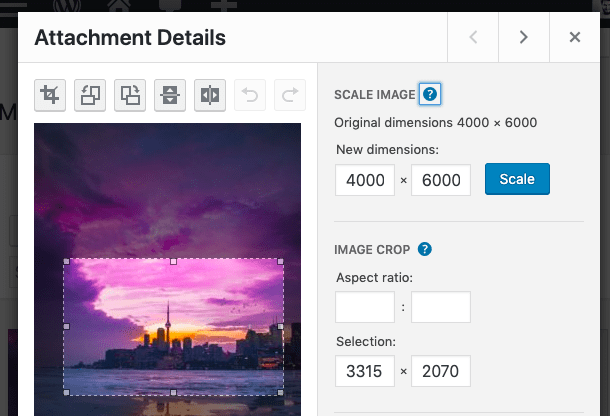
For compressing, Hummingbird enlists the help of Smush. You can find Smush in the WordPress repository if you are not a member of WPMU DEV. Or you can install Smush Pro from the WPMU DEV Dashboard Plugin.
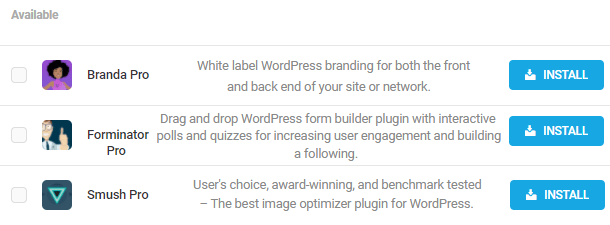
If you already have Smush installed & activated, you will see an Image Optimization module on the Hummingbird Dashboard that gives you a quick overview if you have any images that need to be optimized.
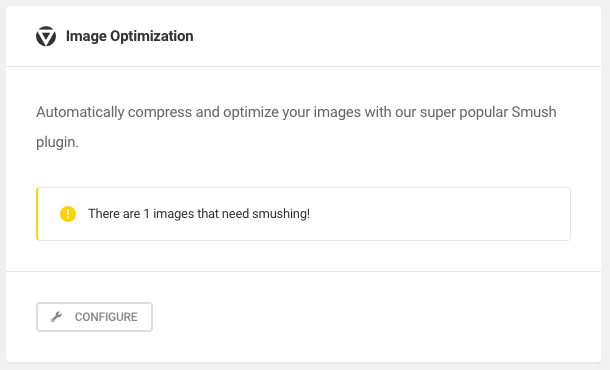
After you have activated Smush, head over to our Smush documents to learn more about all of the features. You can also check out our blog for a comprehensive Guide to Image Optimization.
2.8 Advanced Tools
Copy chapter anchor to clipboardThe Advanced Tools tab allows you to further configure Hummingbird to meet your specific site requirements in the following sections:
- General – Reduce your page load times by introducing a few additional tweaks.
- Database Cleanup – Clean your database of unnecessary data that could be slowing down your server.
- Lazy Load – Implement lazy loading to improve page speeds by delaying the loading of specific content.
- System Information -Provides up to date information on your current system.
- Plugin Health – Enables you to address critical plugin issues from right inside the plugin.
2.8.1 General
Link to chapter 8Viewport Meta Optimization
Enabling this feature automatically applies the viewport meta tag to all the pages on your site, improving mobile responsiveness and Core Web Vitals scores.
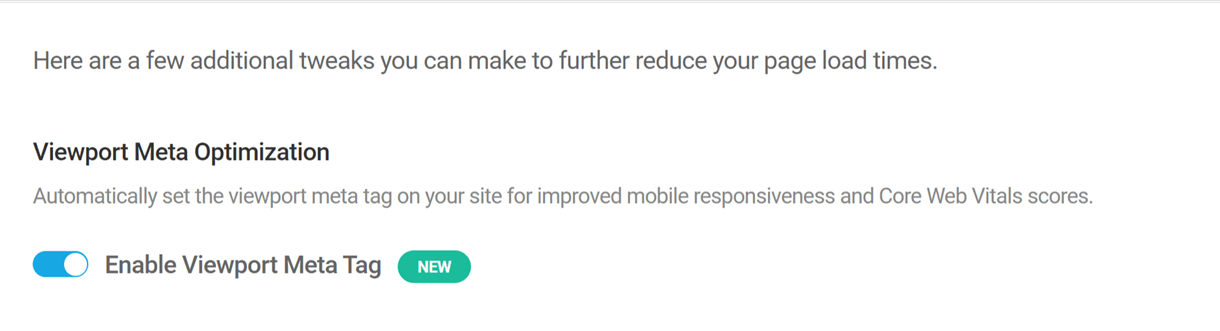
URL Query Strings
Some of your resource URLs can end with something like “?x=y”, these are the query strings of the URL. Some servers, CDNs or caching systems don’t like query strings and removing them can help to increase speed. Enable this option by clicking on the Remove query strings from my assets toggle.
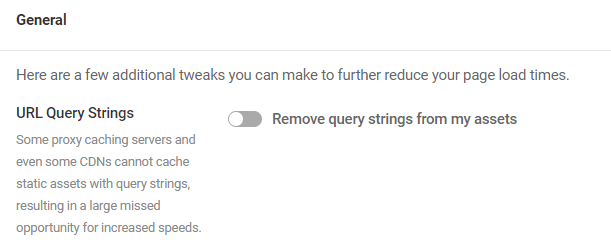
On a Multisite network, you have the option to check a box that will apply the settings globally. If this feature is enabled in the network admin area, the URL Query Strings feature will be hidden on subsites.

WooCommerce Cart Fragments
WooCommerce uses ajax calls to keep the cart numbers up to date even when the page isn’t refreshed. This is super useful on WooCommerce pages but we highly recommend disabling cart fragments on all other pages as it can drastically slow down your page speed.

Emojis
By default, WordPress has its own Emoji set and loads custom CSS/JS files to convert symbols to emojis. You can remove those files with this feature which will result in faster load times.
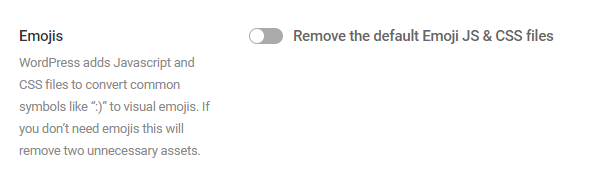
On a Multisite network, you have the option to check a box that will apply the settings globally. If this feature is enabled in the network admin area, the Emojis feature will be hidden on subsites.
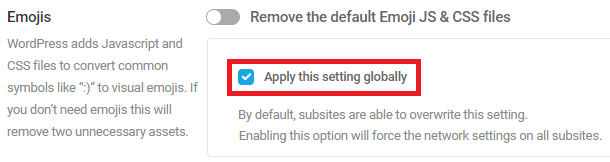
Post Revisions
To restrict the number of revisions for each post, specify the limit for the maximum number of revisions to be stored in the Post Revisions field. For example, entering 5 will retain the last 5 post revisions. If you wish to disable post revisions, enter 0.
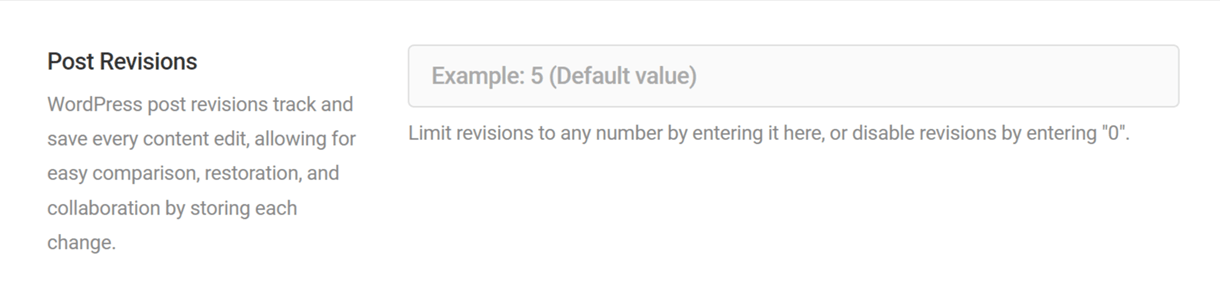
Prefetch DNS Requests
If you are using third-party services like Google Fonts, Youtube or Google Analytics, telling the browser to prefetch that service’s DNS can help to load your pages faster. We already add the most commonly used third-party services, but you can add any missing ones.
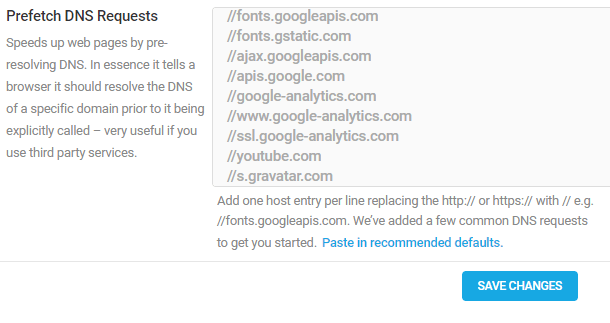
Preconnect
If your site loads resources from other domains, using Preconnect can provide a faster page loading experience for your users. It tells the browser to set up early connections in the background to lower latency.
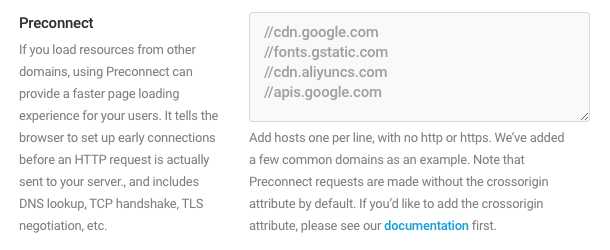
By default, preconnect requests are made without the crossorigin attribute. The crossorigin attribute indicates to the browser that resources on the connection are loaded using Cross-Origin Resources Sharing (CORS), which improves web security. If you’d like to make a preconnect request with this attribute, add the word crossorigin at the end of the relevant host.
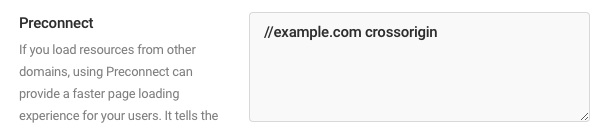
Note that resources loaded with CORS are loaded via a separate connection than resources loaded without CORS. Therefore, in some cases, it may be necessary to add separate preconnect requests for the same host – one request for resources loaded with CORS, and one request for resources loaded without CORS.

Improper configuration of the crossorigin attribute in preconnect requests may potentially slow down your site and thus reduce your Hummingbird Performance Test score. You can find more information about crossorigin from Mozilla here.
2.8.2 Database Cleanup
Link to chapter 8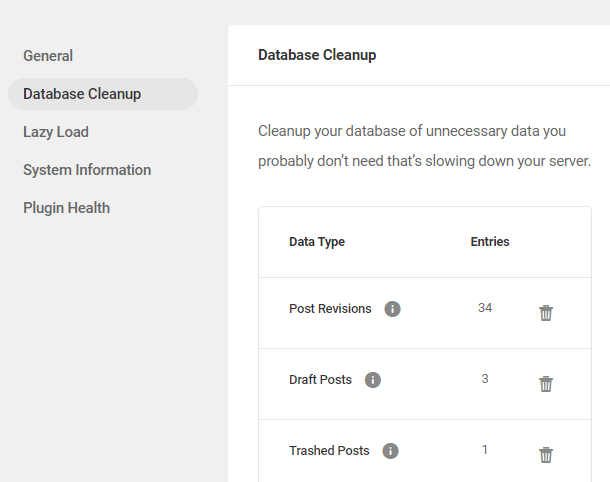
WordPress saves some less necessary things on your database, like post revisions or spam comments. If you have a big website, those things can become very big and slow down your website. This feature allows you to address that problem by cleaning your database.
You can delete specific sections or you can delete all of them from the Delete All button.
Note that, to help prevent accidental deletion of draft posts, clicking the trash icon to clear Draft Posts entries from your database will move those drafts to the trash; it will not delete them. To delete them permanently afterwards, use the Trashed Posts option.
Note that you can enable and schedule automatic database cleanups in the Notifications settings.
2.8.3 Lazy Load
Link to chapter 8Lazy loading delays loading specific content to speed up the overall page speed. In particular, sites with lots of comments, iframes and images can delay your page speed over time.
Be sure to also activate Lazy Load in our Smush plugin, especially for media-heavy sites, to get the most out of this feature.
Lazy loading comments
Loading comments using the native WordPress comment system can slow down your page speed dramatically. Click the Enable lazy loading comments toggle to enable this feature and reveal the configuration options to help boost your page load speed.
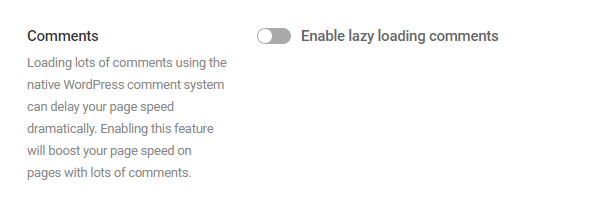
Method
Select the lazy loading method you prefer.
- On click – This method will require the visitor to click a button to load up the comments.
- On scroll – This method will automatically load the comments section when it scrolls into view.
If you select the On click method, you can adjust the Dimensions, Color and Alignment of the Load Comments button using the options in the Button Styling section.
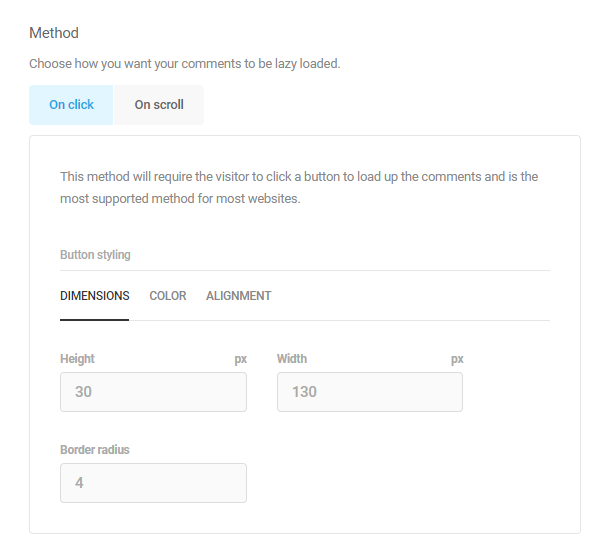
Both the On Click and On scroll methods have the same additional configuration options as follows.
Comment limit
The comment limit displays the number of comments that are set to be pulled from your database.
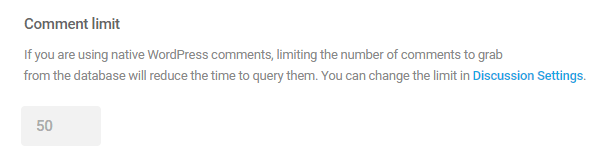
Note that grabbing too many comments from the database can result in a slower page speed, so it may be beneficial to limit the number of comments and minimize the query time. This can be changed in Settings > Discussion in your site’s wp-admin.
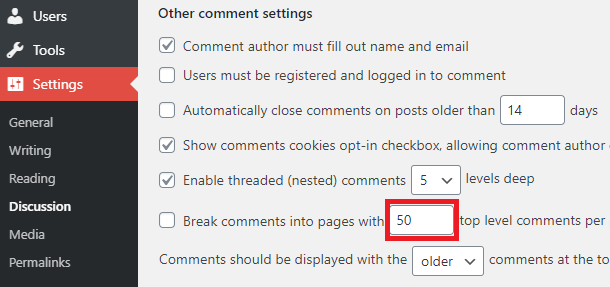
Enable comments preload
Enabling this option will preload the first page of comments.

Threshold
While the comments limit controls how many comments are lazy loaded, the threshold controls how many comments are required for the lazy load feature to kick in.
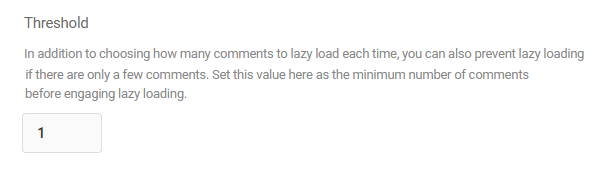
Make sure you have Gravatar cache activated as well, which will store copies of the avatars used in comments and further speed up your page load time.
2.8.4 System Information
Link to chapter 8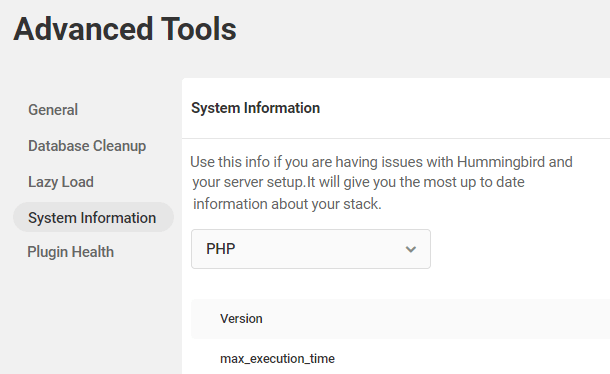
If you are experiencing some issues and need to learn your system information like PHP version or server type, you can use this section. It will show you the most relevant information about your website, WordPress and server.
2.8.5 Plugin Health
Link to chapter 8The Plugin Health feature enables you to address critical site issues from right inside the plugin. It gives you the ability to resolve issues that persist beyond the scope of your regular automatic detection and fixes. You can target issues related to the Page Cache Preloader and Asset Optimization.
Note that the options in this advanced feature should be used sparingly and only if necessary to remedy a persistent issue that may be impacting performance on your site. It is not to be considered or used as an additional optimization feature.
For example, the Preload caching feature will create entries in the wp_options table in your database while it’s building the cache; that is perfectly normal. Also, when the Asset Optimization feature has not yet completed the optimization of your files, there can be many orphaned database entries in the wp_postmeta table; that too is normal.
In most cases, you’ll see the Page Cache Preloader data disappear once it has finished building the cache, and the Asset Optimization meta data will clear as well once that’s completed.
If you are not sure whether you should use this feature for an issue on your site, don’t hesitate to start a live chat and our support superheroes will be happy to assist you.
Preload Caching – Database Data
In some sites, the cache preloader can get stuck and create an endless queue of database requests. This can be fixed by deleting the database data. Click the Delete button here to delete all relevant database data and to reset the feature.
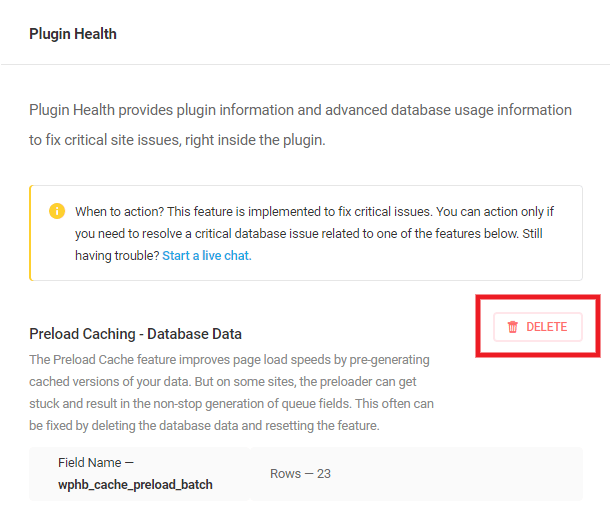
If you are using the Plugin Health feature on a WordPress Multisite Network, the Page Cache Preloader tab will only be visible in the network admin dashboard. This is expected as Page Caching can only be configured by network admins.
Orphaned Asset Optimization Metadata
Data for optimized assets is stored in hidden custom post types with multiple metadata entries in the wp_postmeta table. While clearing Asset Optimization cache should delete both the hidden post types and associated metadata, metadata can sometimes remain and bloat the database. Click the Delete button here to delete the orphaned metadata.

If this table becomes unnecessarily bloated with orphaned metadata entries (more than 100 rows), a notice will appear here with a recommendation to delete this data.

Asset Optimization – Database Data
Much like the above, this option enables you to delete all data associated with Asset Optimization from your database, which effectively resets the feature entirely. Click the Delete button here to clear your database of all Asset Optimization data.
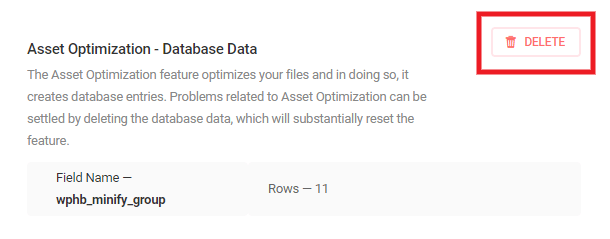
2.9 Uptime Pro
Copy chapter anchor to clipboardThis feature enables you to be immediately alerted if your website goes down, and when your website has come back up. You can track how long your site was down for, when the last time your site went down, as well as your server response times.
In Multisite networks, Uptime only reports data for the main site because subsites are always on the same server and share the same uptime data.
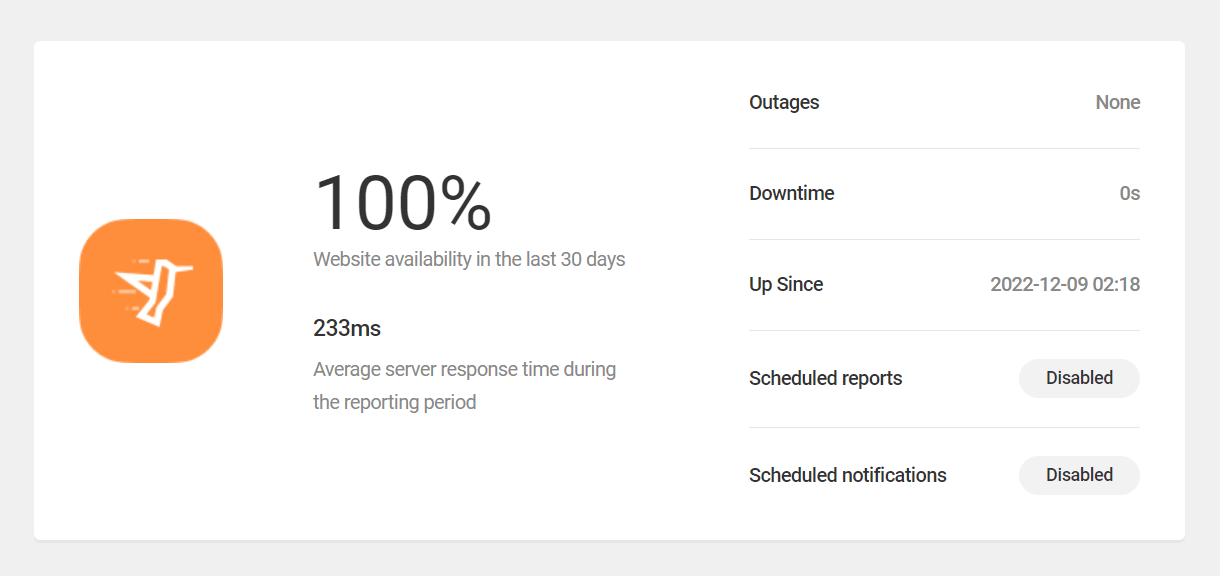
To learn how to enable Uptime notifications and schedule regular reports, see the Notifications chapter below.
Make sure you have the WPMU DEV Dashboard plugin installed and activated on your site – and ensure that you are logged into the Dashboard with an active WPMU DEV membership. (Uptime Monitoring will only work with an active membership.)
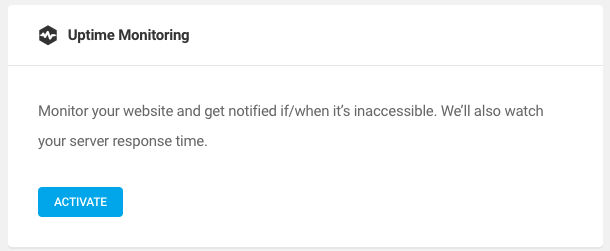
When you visit the Hummingbird Dashboard, you’ll see a blue Activate button in the Uptime module. Click on this button to be redirected to the Uptime Monitoring section within Hummingbird.
Response Time
At the top of the Uptime section, you’ll notice some key pieces of information regarding your site. If this is the first time you’ve turned on Uptime Monitoring, it’s possible that there won’t be much information to see.
Beneath this, you’ll find a nifty graph of the response time of your site at various times throughout the reporting period:
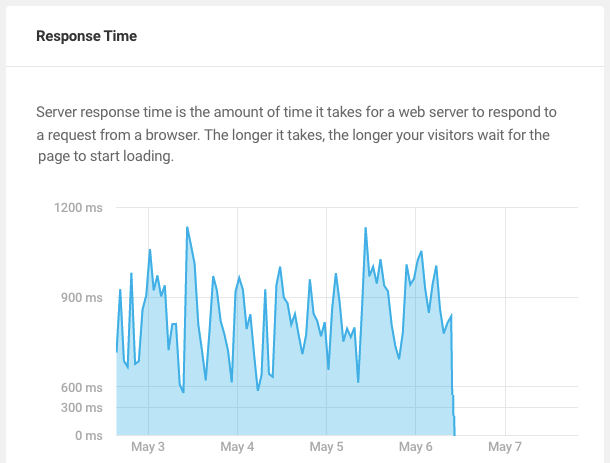
Keep in mind that Uptime response times will differ from performance test response times because Uptime pings our US-based monitor, and performance tests ping the server actually hosting your sites.
Downtime
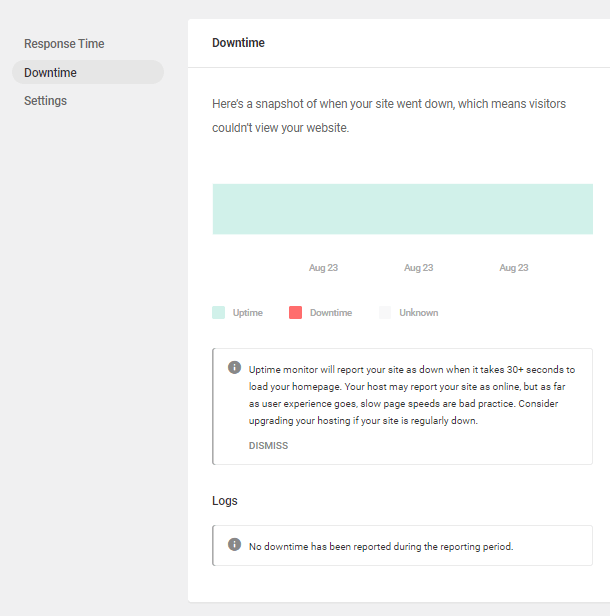
Uptime monitoring pings your site every 2 minutes from our server in Virginia, USA, and if your site did not respond or your HomePage took more than 30 seconds to load, it will send you a notice. If, on the other hand, everything works and loads normally but you are still getting Uptime notices, please check your server and/or plugin Firewall and add these 2 IP addresses to your allowlist: 34.196.51.17, 35.157.144.199.
For the full list of all WPMU DEV IP addresses you may need to allow in your firewall, see our WPMU DEV IP Addresses doc.
Note that the pings from Uptime are excluded from tracking data in your Hub and do not count as visits in the Analytics tracking section for your site. Other tracking platforms may count the pings though, but they would be counted as a single visit per day as the IP is always the same.
From the Downtime tab, you can see the report about your past downtimes and stats. It also will show you how long your downtime lasted.
Potential Cloudflare Issues
- If your domain is routed through Cloudflare with the firewall feature enabled there, add the WPMU DEV IP addresses to the allowlist in your Cloudflare Firewall.
- If your domain is routed through Cloudflare and you have a firewall enabled on your server as well, add WPMU DEV IP addresses to both firewalls. Your Cloudflare IP addresses should also be allowlisted on the server firewall to prevent any blockage.
- If your domain is routed through Cloudflare and you have Bot Fight Mode enabled there, add the WPMU DEV IP addresses to the IP Access Rules section under Security > WAF > Tools.
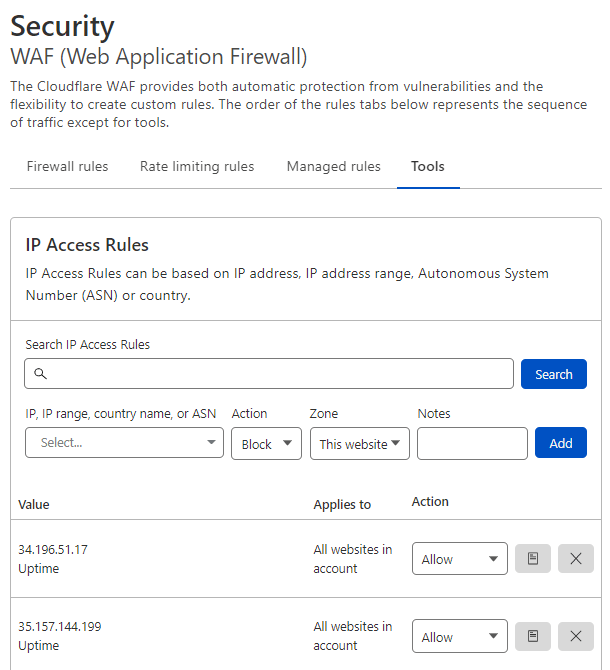
Settings

If you no longer wish to use Hummingbird’s Uptime Monitor, click the Deactivate button to disable it.
Note that if the Proactive Monitoring service is enabled on your site, it is recommended not to deactivate the Uptime Monitor.
Uptime User Agent
If you ever need to allowlist the user agent used by the Uptime Monitor in your robots.txt file or a firewall, it is called: WPMUDEV Uptime Monitor 5.0 (https://wpmudev.com)
2.10 Notifications Pro
Copy chapter anchor to clipboardThis is where you can enable and manage notifications and regular reports for the following Hummingbird features.
- Performance Test – Schedule regular performance tests of your site and send desktop and/or mobile report data to any recipients you want. This option is also available in every subsite in multisite installs.
- Uptime Reporting – Send daily, weekly or monthly reports of any downtime your site may experience in that timeframe.
- Uptime Notifications – Instantly notify recipients of any downtime so they can take action as needed.
- Database Cleanup – Schedule regular cleanups of your database and send reports to recipients of your choosing.
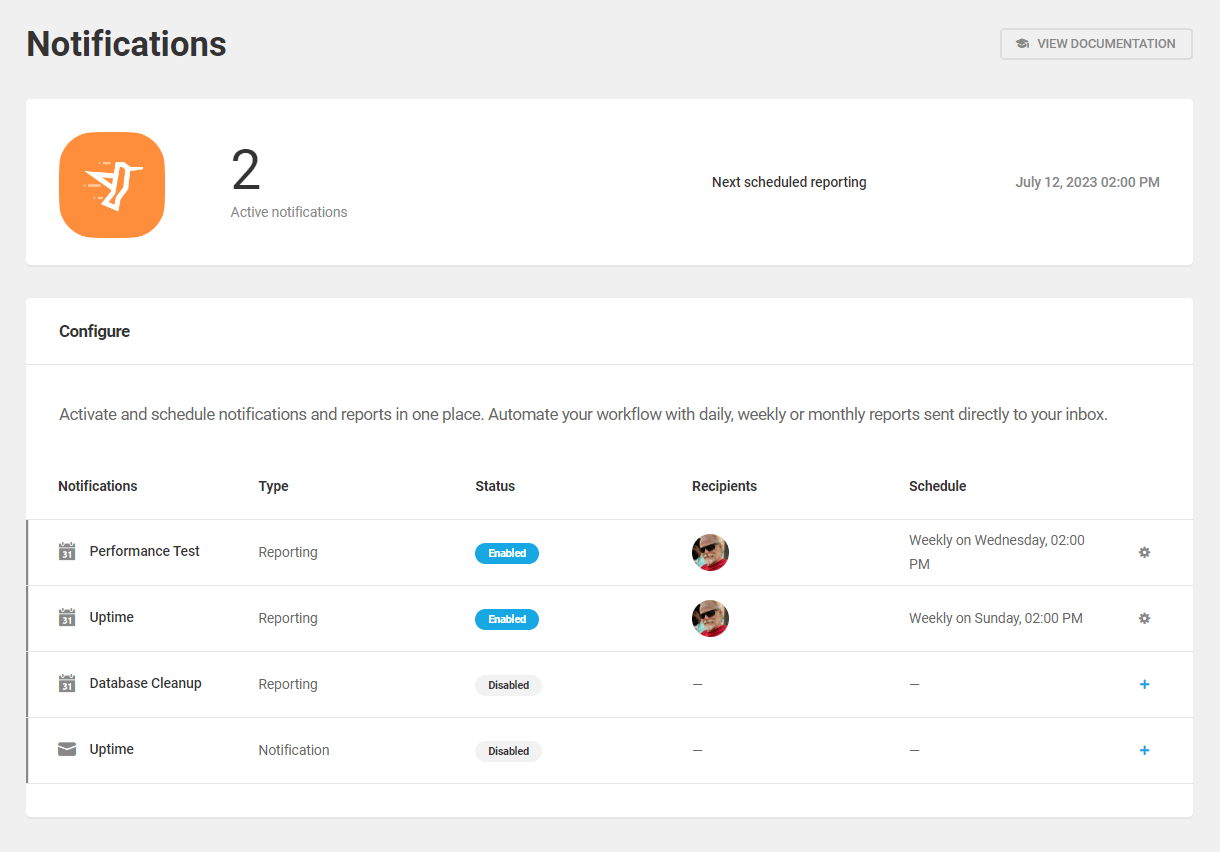
Click the plus icon of any Disabled report type to enable and configure it.
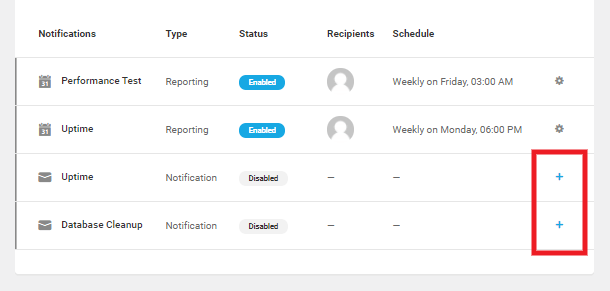
Any reporting feature that you have already enabled and configured will be clearly indicated with an Enabled label, and the schedule you have set for it will appear in its row. Click the gear icon to reveal management options for an already enabled reporting type.
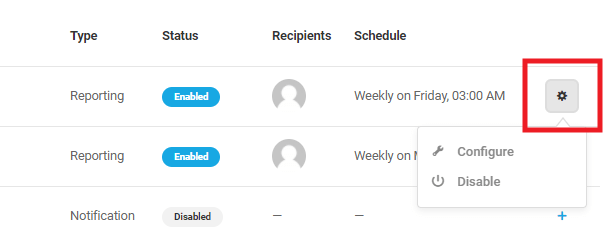
For any notification type that you’ve already enabled, clicking the Configure option here will pop open a modal window where you can adjust your existing schedule, recipients and optional settings for that report or notification.
When enabling a notification type for the first time, you’ll be guided through the configuration by a setup wizard, as detailed below..
Note that the interface for an already configured notification type will have a slightly different appearance, but the options in it will be the same as when initially configured.
Schedule
The Schedule options are available in the following notification types:
- Performance Test
- Uptime Reports
- Uptime Notifications
- Database Cleanup
The scheduling options for the Performance Test, Uptime Reports and Database Cleanup types are identical. You can set the Frequency to Daily, Weekly or Monthly and select the Day of the week and Time of day the report should run. Note that if you have multiple reports set up, it may be preferable to stagger the schedules so they don’t all run at the same time.
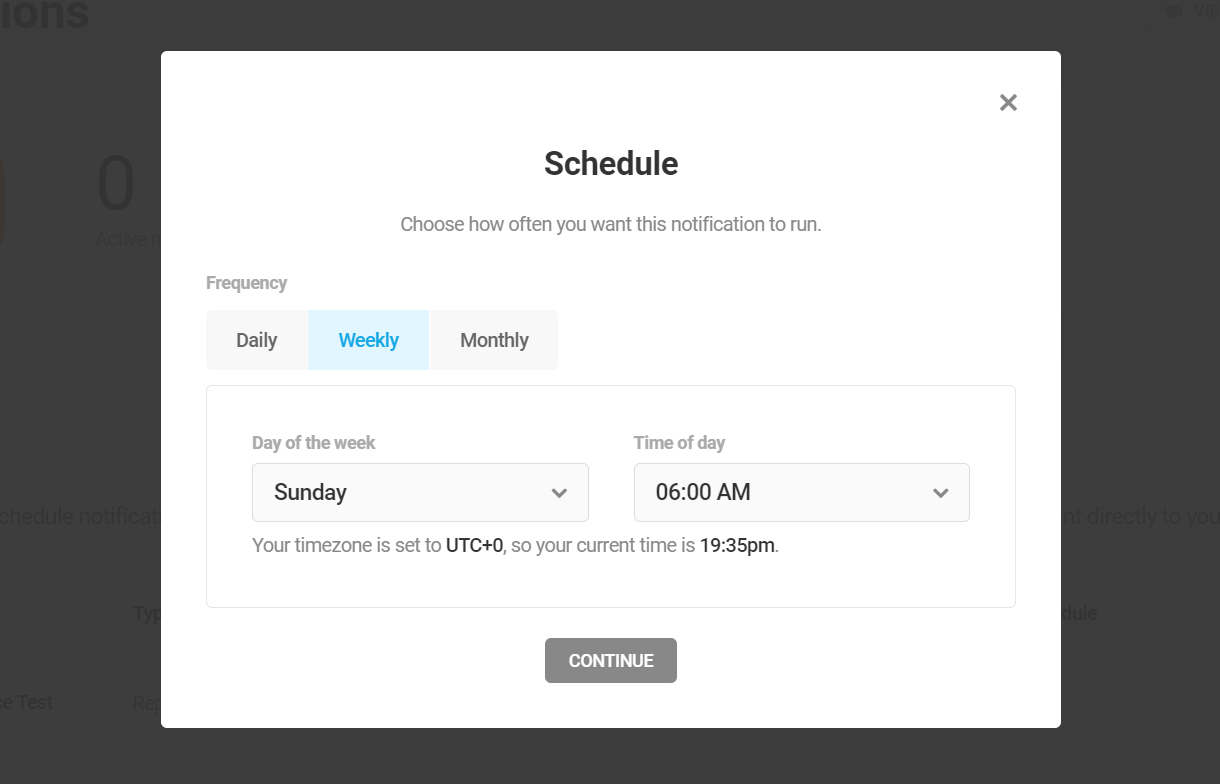
The scheduling option for the Uptime Notification type is distinct and has only one setting: Threshold. This enables you to trigger email notifications to your recipients as soon as your site is detected as down, or if it is down for 5, 10 or 30 minutes.
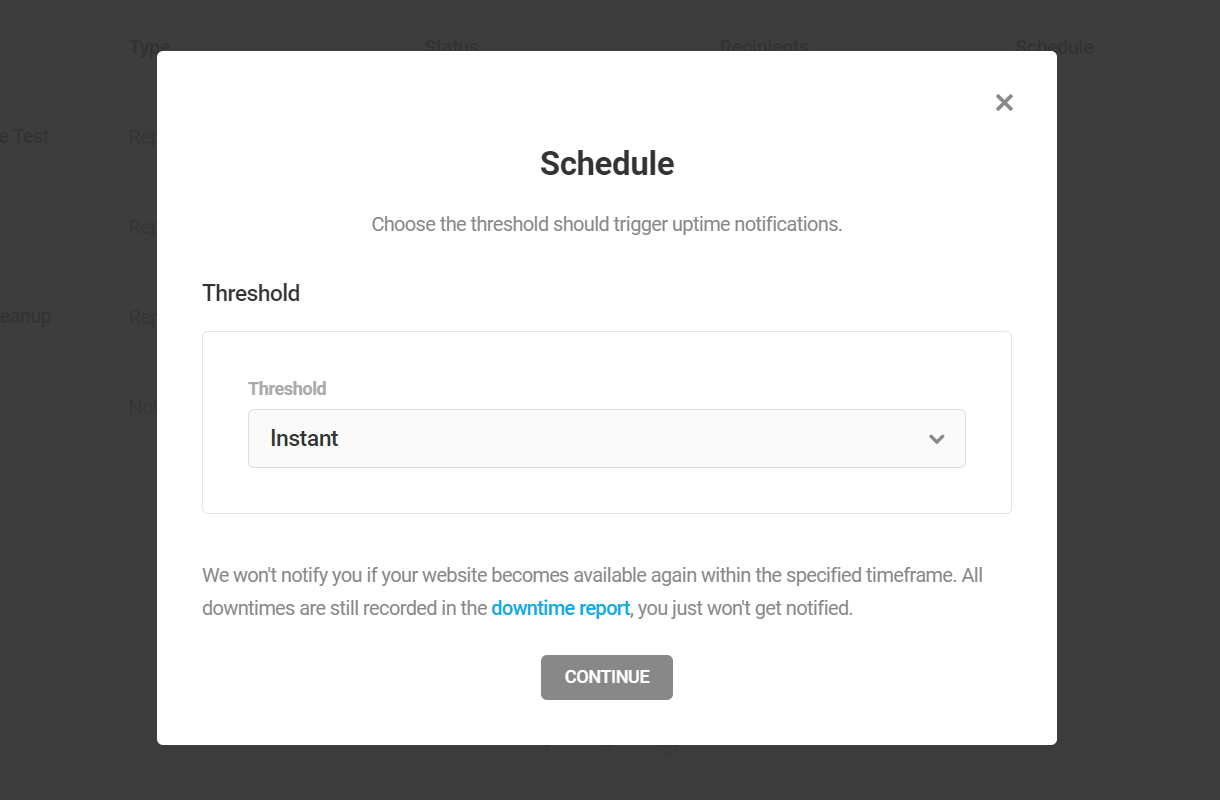
Once you’ve configured the schedule for your selected notification type, click the Continue button to proceed to the next step.
Recipients
The Recipients options are available in the following notification types:
- Performance Test
- Uptime Reports
- Uptime Notifications
- Database Cleanup
Under the Add Users tab, you can add any existing users from your site. Click the plus icon to add a user, or click the trash icon to remove an already added user.
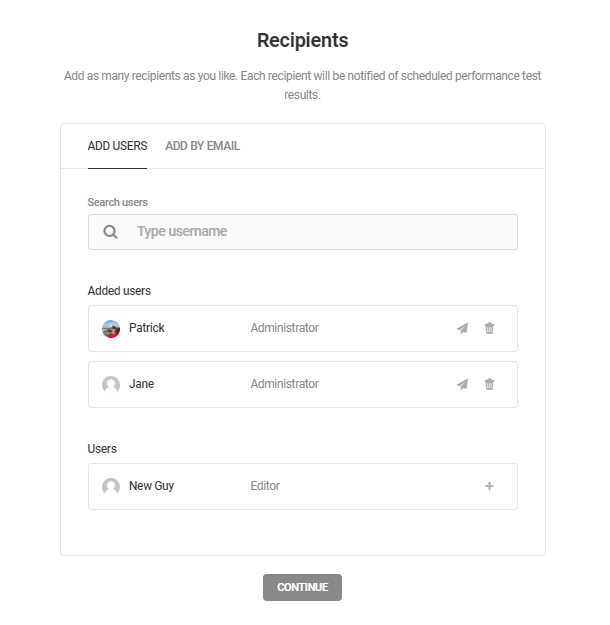
Under the Add by Email tab, you can add any other recipients you want by entering their Name and Email address in the fields provided. Then click the Add Recipient button to save.
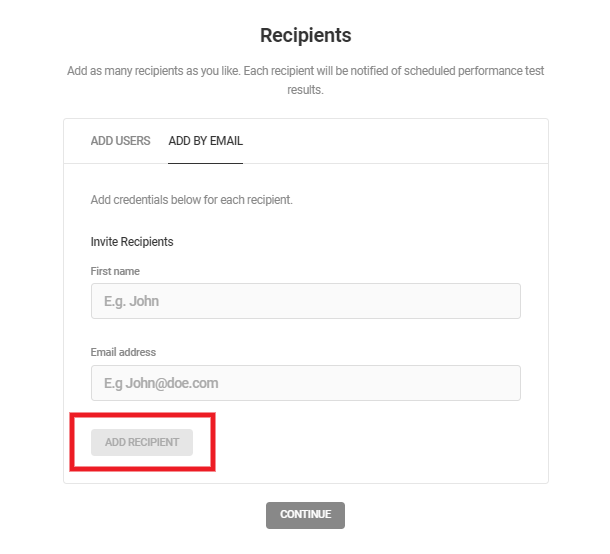
Note that recipients of the Uptime Notifications type will receive an invitation to subscribe and must click a link in that email to confirm that subscription before they will receive notifications if/when your site goes down. This is to avoid spamming unsubscribed recipients with multiple successive notifications if your site is experiencing repetitive downtimes.
If you are configuring the Uptime Notifications types, click the Activate button to finish the setup once you’re done with this step.
If you are configuring either the Performance Test, Database Cleanup or Uptime Reports notification types, click the Continue button to proceed to the Settings step.
Customize Settings
Settings options are available in the following notification types:
- Performance Test
- Database Cleanup
- Uptime Reports
As the settings are different for each report type, we’ll go over each one separately. Once you’ve configured the schedule for your selected notification type, click the Activate button to finish the setup.
Performance Test Report Settings
The Performance Test report settings enable you to specify the Device type you wish to receive reports for: only Desktop or Mobile devices, or Both. You can also specify the test Results you want included in your reports: Score Metrics, Audits and/or Historic Field Data.
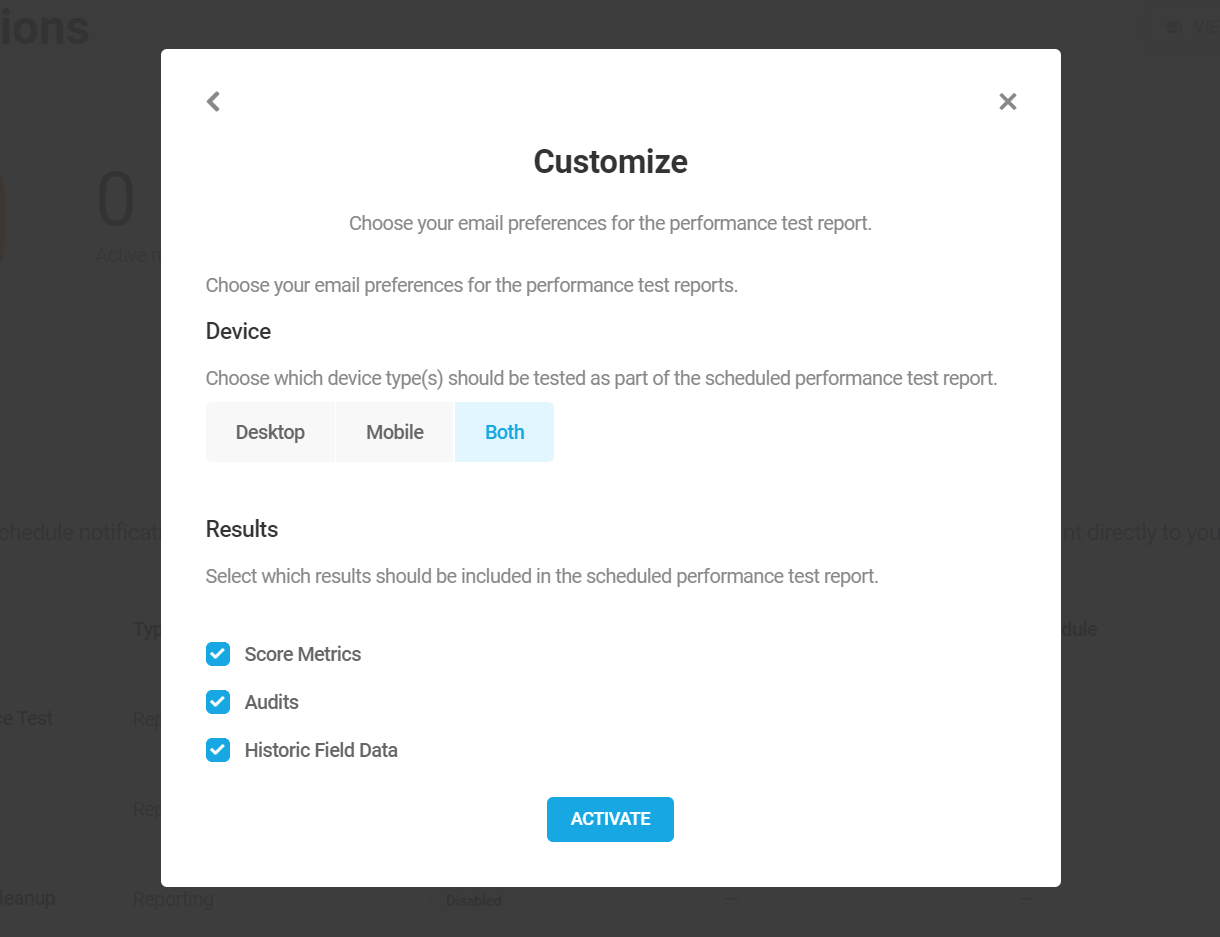
Database Cleanup Report Settings
The Database Cleanup settings enable you to specify which tables should be included in your scheduled cleanups and corresponding reports.
- Post Revisions
- Draft Posts
- Trashed Posts
- Spammed Comments
- Trashed Comments
- Expired Transients
- All Transients
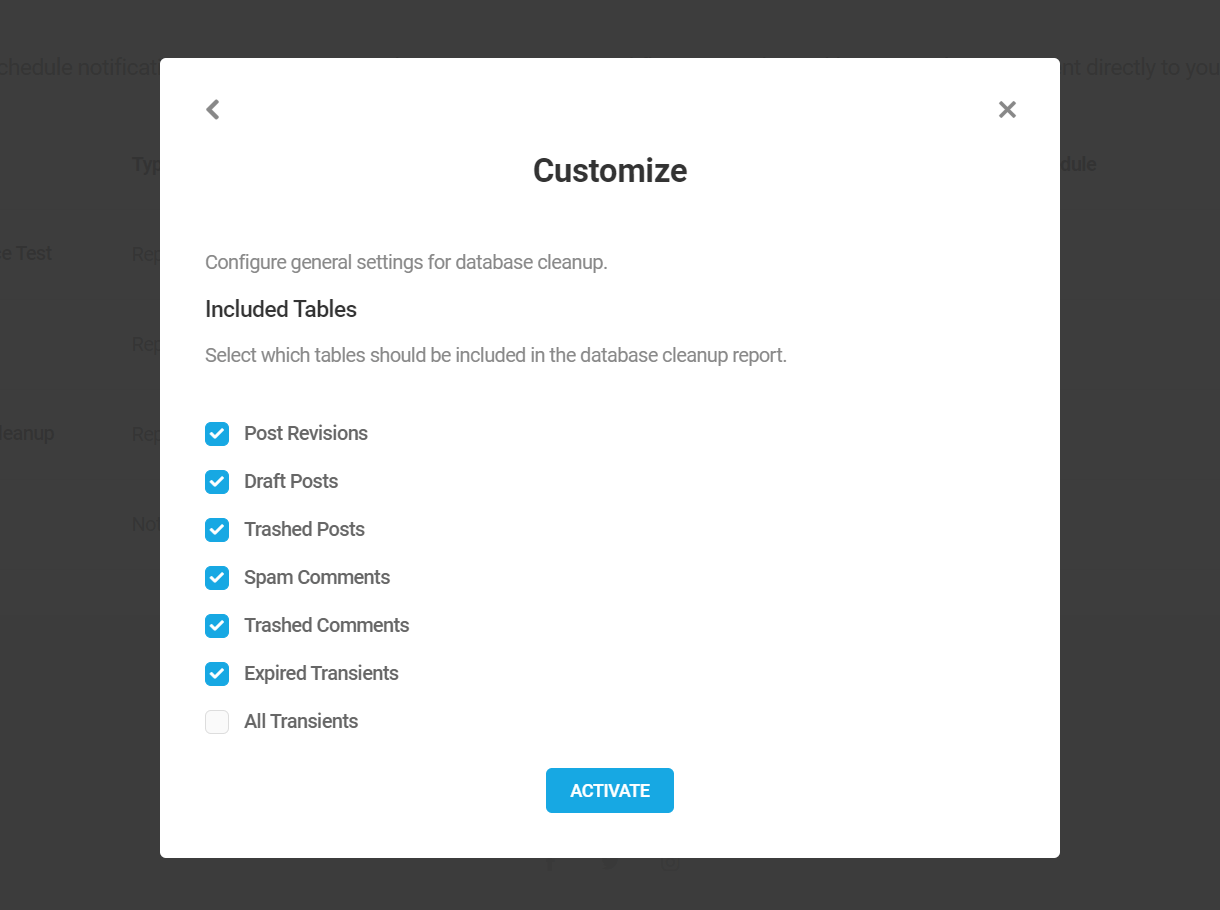
Uptime Reports Settings
By default, the average server response time data is not included in Uptime reports. If you do need that information though, you can include it by toggling on the option in this section.

2.11 Settings
Copy chapter anchor to clipboardThe Settings module allows you to change the default Hummingbird settings for translation, plugin data, accessibility, and more.
2.11.1 General (Settings)
Link to chapter 11The General settings in Hummingbird help you manage your Admin Bar, Translations and Usage Tracking.
Admin Bar
When enabled, this option adds cache clearing shortcuts to the Hummingbird menu in your WordPress Admin bar.

If All Cache is selected, then the Admin bar will include a shortcut to clear all active cache types. Note that you may need to refresh the screen for this to appear the first time.

If Specific Cache is selected, then the Admin bar will include shortcuts to individually clear selected cache types.
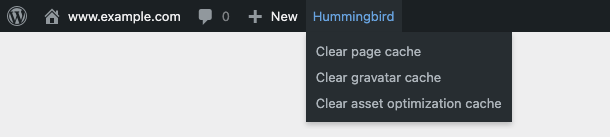
For WordPress multisite installations, the Admin bar will include a shortcut to clear the page cache for all subsites.

You’ll then be prompted to confirm the removal of the data.
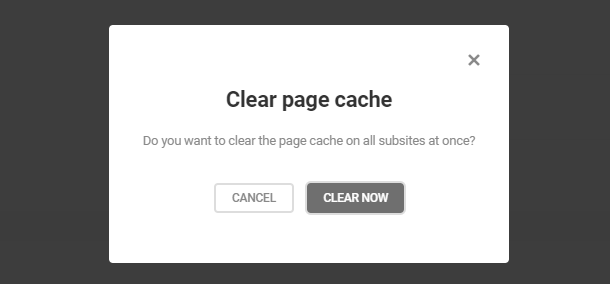
Translations
Hummingbird will automatically use the language set in your WordPress Admin Settings as the Active Translation language, provided there is a matching translation available.
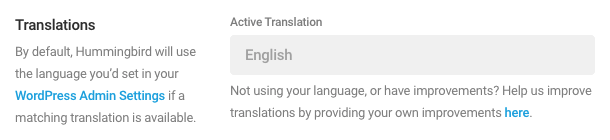
In order for the Active Translation language to reflect in Hummingbird, please ensure that the Hummingbird translation file for the relevant language has been added to your site. Read our WPMU DEV Translations document for a detailed guide to exporting and using translations. Translation files for Hummingbird can be found here.
Once the Hummingbird translation file has been added to your site and you have changed your site language in your WordPress Admin Settings, Hummingbird should fully reflect the new Active Translation language.
Usage Tracking
Usage tracking is incredibly useful for our designers, and enables us to learn more about what features you use and don’t use. It is a completely anonymous feature, and helps us deliver more relevant features in the future. See our Privacy documentation for more information about the data we collect.
To enable usage tracking, toggle on Allow usage tracking and click Save Changes.
![]()
2.11.2 Configs
Link to chapter 11The Configs module allows you to save your Hummingbird configurations so that they can be applied to another site in just a few clicks.
To help you get started, we provide a Default config denoted with a blue checkmark. It includes the recommended settings that are ideal for fresh installations.

Save a Configuration
To save your current configuration, click Save Config.

Then, enter a name and optional description for the configuration and click Save.
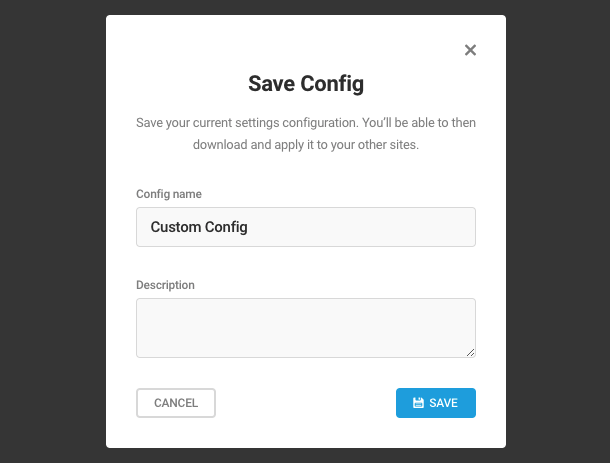
Saved configurations are listed alphabetically. To view details about a saved configuration, click the configuration in the list.
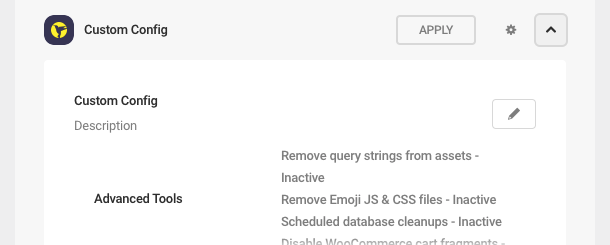
To make changes to a saved configuration, click the gear icon. The available actions are:
- Apply – Apply the saved configuration to this Hummingbird installation.
- Download – Download the saved configuration as a .json file.
- Name & Description – Edit the name and description for the saved configuration.
- Delete – Permanently delete the saved configuration.

Upload a Configuration
To upload a configuration that you’ve downloaded from another site, click Upload, and select the relevant .json file from your computer.

Hummingbird will import the uploaded configuration and add it to the Preset Configs list.
Apply a Configuration
To apply a saved configuration to your Hummingbird installation, click Apply.

You will be asked to confirm that you would like to replace your current settings with the saved configuration. Click Apply to proceed.
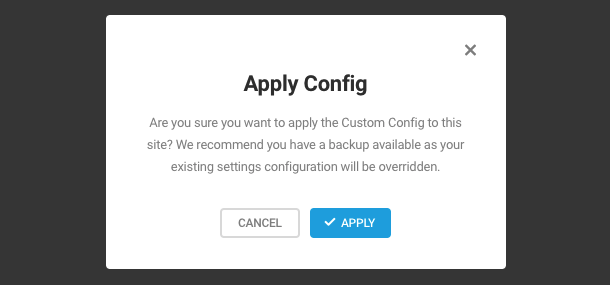
Sync with the Hub (Hummingbird Pro Only)
Hummingbird configurations will automatically be synced with the Hub. Synced configs can be accessed and applied directly from the Config or Security modules in the Hub, or from the Hummingbird installation of any of your sites.
If a new config created in the Hub doesn’t appear immediately in the Hummingbird Settings module, click Re-check to get the updated list to refresh your data.

2.11.3 Import/Export
Link to chapter 11The Import and Export features enable you to download your Hummingbird Asset Optimization configuration from one site and apply it to another. This can save you a lot of time and effort if you are managing multiple sites and want to apply the same configuration to more than one of them.
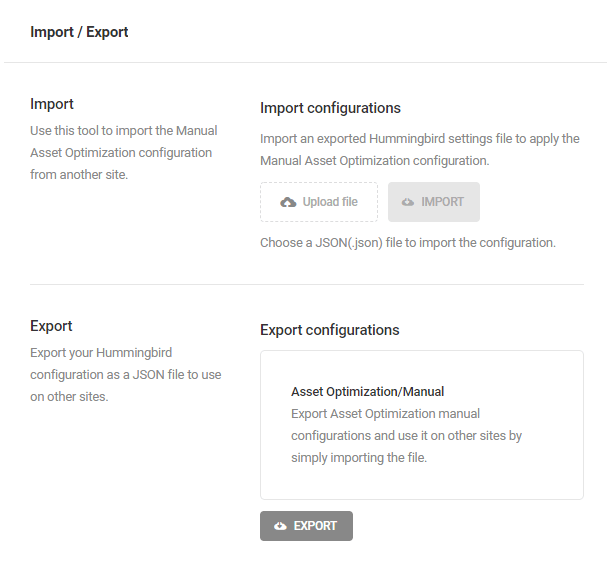
Import
To import a configuration, click Upload file, select your .json file and click Import. You will then see a pop-up module listing the configurations that you will be importing with that file. Click Begin Import to proceed and the new configurations will overwrite any existing configurations.
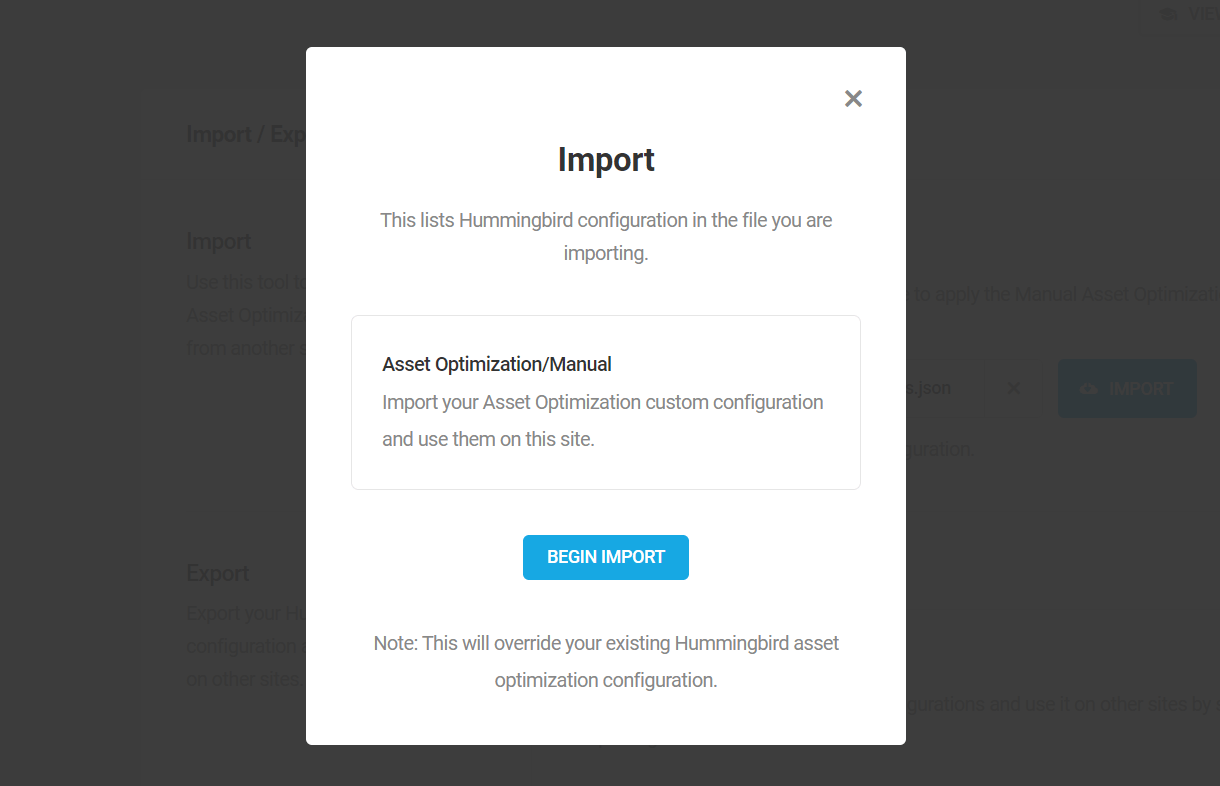
Export
The export box will show you which configurations will be included in the export. Click Export to export your settings as a .json file. Name the file accordingly, save it and you’re good to go with importing your file onto other sites.
2.11.4 Data & Settings
Link to chapter 11In the Data & Settings tab, you can change the behavior of the plugin for data. You can choose to Preserve or Reset from the Settings section. This will only affect the plugin settings. You can choose to Keep or Remove data from the Data settings. This will affect the data that the plugin collects based on your site.

Also, there is a Reset Settings button. If you want to reset all your settings immediately, you can use this button to do so.
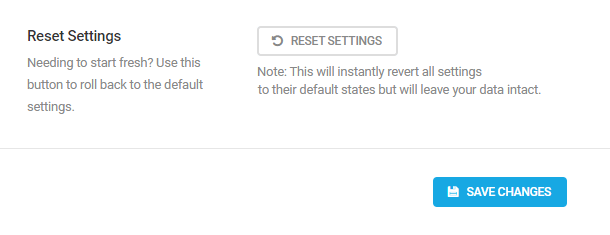
2.11.5 Accessibility
Link to chapter 11Color Accessibility
Color accessibility will improve the visibility of elements as per the Web Content Accessibility Guide requirements, up to level AAA which is the highest level of compliance. Toggle on Enable high contrast mode and click Update Settings to activate this mode.

2.12 Optimization Guide
Copy chapter anchor to clipboardAbout Your Google PageSpeed Insights Score
This chapter guides you through the best configuration options for optimizing file and code assets with Hummingbird Pro to improve performance based on asset optimization recommendations from the Google PageSpeed Insights performance scan.
Looking to optimize your image assets? See our Smush image Optimization Guide.
There are many variables when running a PageSpeed test on a real-world website, and it’s important to understand that not every site can expect a score of 100.
Ads, scripts, and network conditions will cause results to vary for each visit. It is important to note that some very valid tools, such as anti-virus scanners, complex extensions, programs that impact page load or inconsistent ad behavior, can all impact PageSpeed scores. In fact, we recommend that anti-virus scanners and any program known to interfere with pagespeed be disabled during PageSpeed tests.
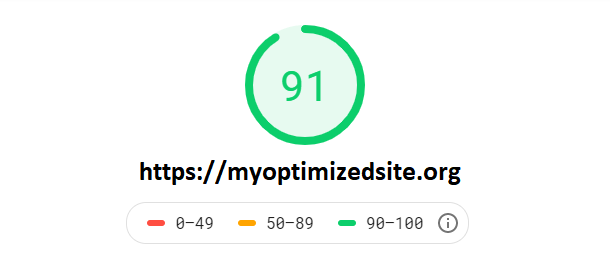
The following are some general guidelines regarding Google PageSpeed scores:
- 0 to 49 is considered slow
- 50 to 89 is good or average
- 90 to 100 is fast
For context, a website with a score of 100 is in the 98th percentile of the million top-performing sites. A site with a score of 50 is in the 75th percentile, which is still quite good relative to the vast majority of websites.
So what should your performance success metric be? A realistic PageSpeed score expectation for your website must take into account your host’s servers, content location, the number scripts or third-party calls your page is making, and the plugins and theme you are running.
2.12.1 Enable text compression
Link to chapter 12Text-based resources, like JavaScript or CSS code files, should be served with compression to minimize total network bytes.
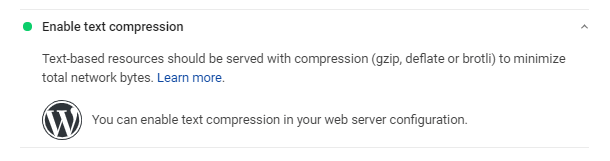
The Google PageSpeed test compresses each of your uncompressed files with GZIP to compute the potential savings.
If the original size of a response is less than 1.4KB or if the potential compression savings is less than 10% of the original size, then the file will pass the audit.
If you are failing the “Enable text compression” audit, you can use Hummingbird Pro to activate Gzip compression. After installing Hummingbird Pro, visit the Gzip Compression tab.
If your Gzip is not active, Hummingbird Pro has options for activating Gzip on NGINX, Apache, and IIS servers.
Apache
For Apache servers, use the Automatic setting to automatically apply Gzip compression by allowing it to write the rules to your .htaccess file.
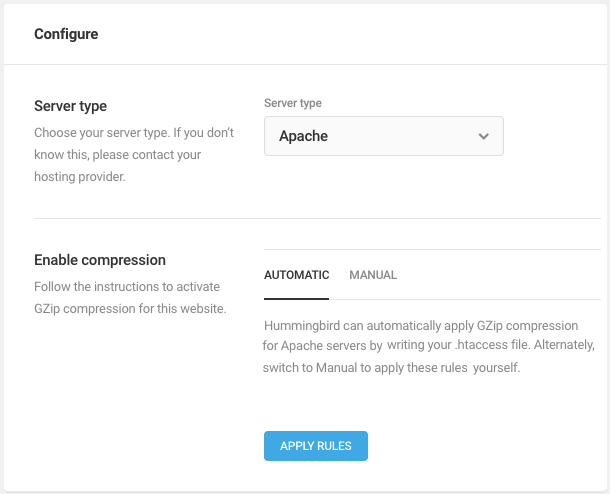
If you are unable to get the automatic method working, click Manual , then copy the Hummingbird generated code into your .htaccess file to activate Gzip compression. Click the Re-check Status button to verify that it is connected.
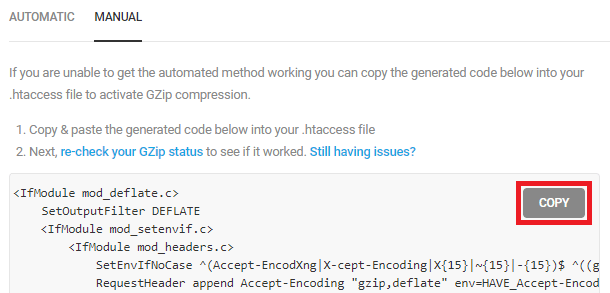
Troubleshooting
If modifying the .htaccess file does not work, and you have access to vhosts.conf or httpd.conf you can try:
- Look for your site in the file and find the line that starts with
<Directory>– and add the code into that section and save the file. - Reload Apache.
- If you don’t know where those files are, or you aren’t able to reload Apache, you would need to consult with your hosting provider or a system administrator who has access to change the configuration of your server.
NGINX
- Copy the code generated by Hummingbird into your nginx.conf file. This is usually located at /etc/nginx/nginx.conf or /usr/local/nginx/conf/nginx.conf.
- Add the code to the HTTP or inside server section in the file.
- Reload NGINX
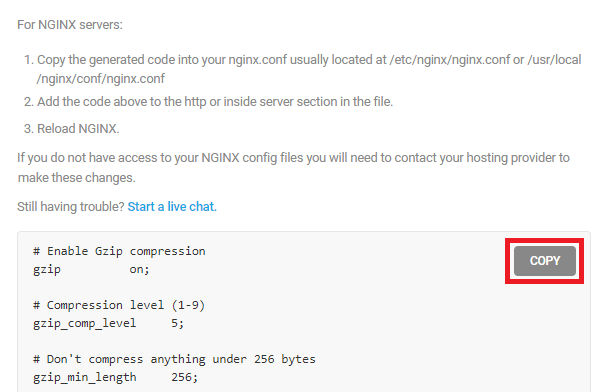
If you do not have access to your NGINX config files, you will need to contact your hosting provider to make these changes.
IIS 7 Servers and Above
Follow the Microsoft TechNet documentation.
For more information or help enabling Gzip from the WPMU DEV support team, open a Live Chat.
2.12.2 Preconnect to required origins
Link to chapter 12Preconnect, or dns-prefetch, tells the browser that your page intends to establish a connection to another origin and that you’d like the process to start as soon as possible.
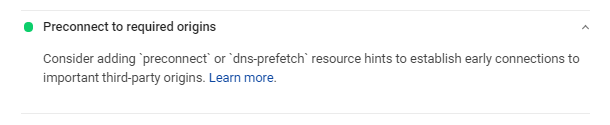
This saves time on pages loading social sharing buttons (e.g., Twitter, Facebook), video player embeds (e.g., YouTube, Vimeo), advertising iframes, analytics & metrics scripts, and more.
To activate prefetch, in Hummingbird Pro’s advanced tools, activate Prefetch DNS requests to pre-resolve DNS.
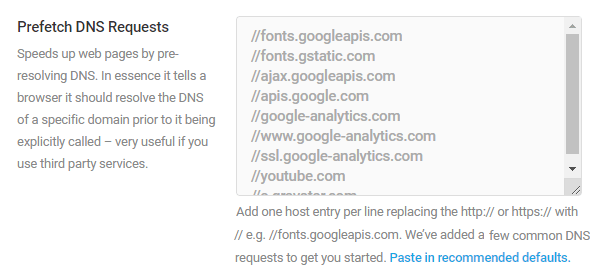
Hummingbird Pro includes a few common DNS requests to get you started.
Add additional host entries one per line replacing the http:// or https:// with // (e.g. //fonts.googleapis.com).
Be sure and click the Save Changes button after adding or updating the Prefetch DNS Requests setting.
2.12.3 Use efficient cache policy on static assets
Link to chapter 12If your site is not passing the “Uses efficient cache policy on static assets,” use the Browser Caching feature located under the Cache menu item.
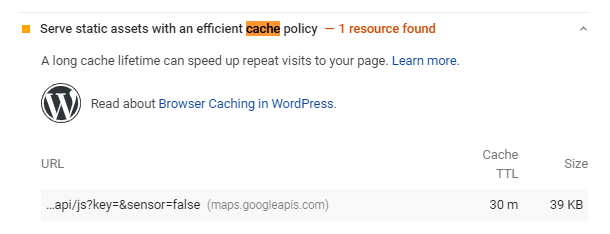
Browser Cache stores temporary data on your visitors’ devices so that they don’t have to download assets twice. This results in a much faster second time around page load speed.
Hummingbird Pro allows you to set the expiration time that recommends expiry time. The Google benchmark recommends 1 year or longer.
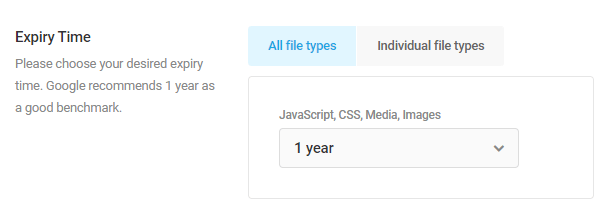
Hummingbird Pro also gives you control over the expiry time for each file type by choosing the Individual file types.
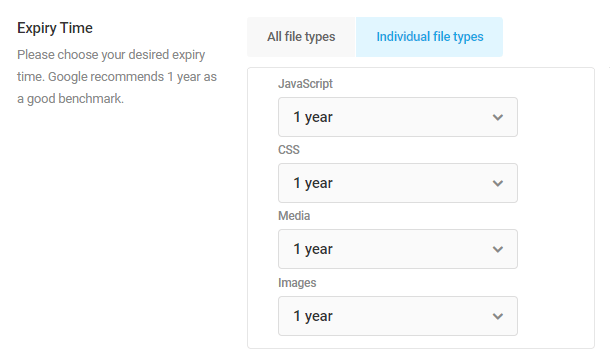
2.12.4 Minify JavaScript
Link to chapter 12JavaScript Minification is the process of removing whitespace and any code that is not necessary to create a smaller but valid code.
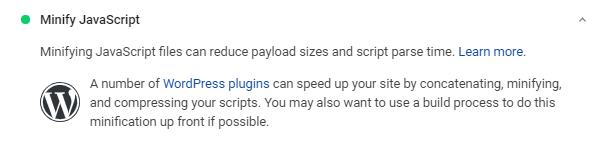
Developers use this additional code to make it more readable for humans but are unnecessary for loading the site.
Hummingbird Pro will minify your JavaScript files, generating a version that loads faster.
The Opportunities section of your PageSpeed report lists unminified JavaScript files, along with an estimate of potential savings based on the comments and whitespace characters.
Use Hummingbird Pro’s Advanced Asset Optimization to compress all your JavaScript files.
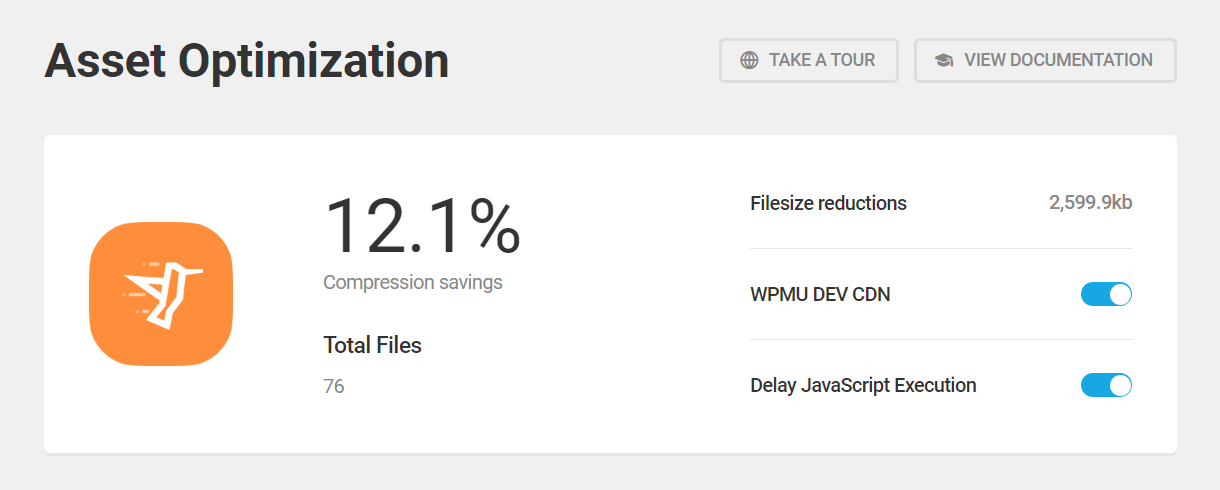
Use the Advanced Asset Optimization guide for instructions on how to do Asset Optimization the right way.
2.12.5 Minify CSS
Link to chapter 12Minification is the process of stripping blank space or unnecessary characters or lines of code from your file to make it more compact. Developers use this additional code to make it more readable for humans but are unnecessary for loading the site.
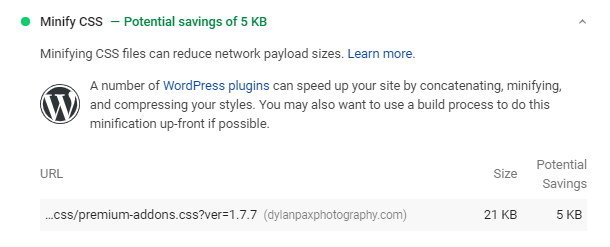
Hummingbird Pro will minify your CSS files, generating a version that loads faster.
The Opportunities section of your PageSpeed report lists unminified CSS files, along with an estimate of potential savings based on the comments and whitespace characters that it finds in your CSS.
Use Hummingbird Pro’s Advanced Asset Optimization to compress all your CSS files.
Use the Advanced Asset Optimization guide for instructions on how to do Asset Optimization the right way.
2.12.6 Eliminate render-blocking resources
Link to chapter 12If you fail the Eliminate render-blocking resources audit, the Opportunities section of your PageSpeed report will list all the URLs blocking the first paint of your page.
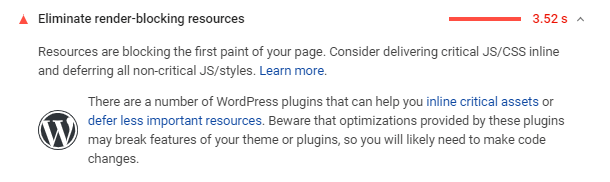
You can reduce the impact of these render-blocking URLs by moving critical resources inline, deferring non-critical resources, and removing anything unused.
The Hummingbird Advanced Asset Optimization feature has tools for moving, compressing, deferring, inlining and blocking resources.
Visit the Advanced Asset Optimization guide for more information on how to do Asset Optimization the right way.
2.12.7 Remove unused CSS
Link to chapter 12The Opportunities section of your PageSpeed test lists all stylesheets with unused CSS with a potential savings of 2 KBs or more. Removing unused CSS reduces unnecessary network activity.
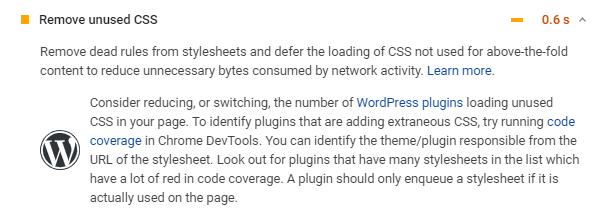
Before using Hummingbird Pro to remove unused CSS, consider reducing, or switching, the number of the plugins loading unused CSS in your page.
You can identify plugins that are adding unnecessary CSS by running code coverage in Chrome DevTools. Use the stylesheet URL to identify the theme/plugin responsible. Look out for plugins that have a lot of stylesheets in the list with a lot of red in code coverage. A plugin should only enqueue a stylesheet if it is actually used on the page.
However, if you have the pro version of the plugin, you can activate the Critical CSS feature under Asset Optimization to prevent or delay the loading of unused CSS.
Use the Advanced Asset Optimization guide for instruction on how to use the Asset Optimization tool.
2.12.8 Advanced Asset Optimization with Hummingbird
Link to chapter 12Getting Advanced Asset Optimization right requires customizing sites individually based on the plugins and themes installed and activated on each.
Asset optimization addresses failed audits in four Google PageSpeed metrics:
- Eliminate render-blocking resources
- Minify JavaScript
- Minify CSS
- Remove Unused CSS
Hummingbird simplifies advanced configuration in a few ways:
- It moves all the configuration settings to the dashboard for compressing, combining, moving, making it Inline, deferring, and stopping code from loading
- It allows you to make changes, test, and quickly revert for worry-free editing
- It includes filters for locating files by extension name, file type, plugin, and theme.
This section covers steps for using Hummingbird’s advanced Asset Optimization tool for successfully compressing, combining, and moving CSS and JS files without breaking the style or functionality of your website.
For a description of each of the Asset Optimization tools in Hummingbird, see the Manual section above.
When configuring and testing Asset Optimization, turn off or clear cache, including page, browser, and server-side object cache.
Recommended workflow for configuring Advanced Asset Optimization:
- Install and configure all plugins and a theme.
If you add or delete a plugin or theme, it will change available assets and alter your configuration. Hummingbird Asset Optimization should be the last thing you configure. If you do not see assets from a specific plugin or theme, clear your cache and use the Re-Check Files button to reload available assets. - Optimize plugins and your theme using their built-in settings
Premium themes and page builders sometimes include an asset optimization feature and will resolve 80% of your issues. Here are some examples of popular themes with built-in asset optimization tools:Using a page builder?Check out our blog on How To Utilize Page Builders Built-In Optimization Options to learn more about the first steps to take in making your site fly!
- Run Hummingbird Asset Optimization scan
After your plugins and theme are activated and optimized with their built-in settings, run the Hummingbird Asset Optimization scan.Compress and combine everything. To bulk compress and combine, click the CSS/JavaScript checkbox above each section, then click the Bulk Update button to open the Bulk Updater module. Select the Compress and Combine options and click Apply. Then click the Publish Changes button to push the changes live.After making changes check your site to ensure everything is functioning as it should. If everything is working, continue to the next step. If something seems off, check your inspector for errors or reach out to support. - Move as many files to the footer as possible.
Move all your files to load in the footer except the JQuery, JQuery-migrate, and core theme JavaScript files. Use the Filter > Theme and Plugin sort tool if you are unsure what files are from your theme. Click the Publish Changes button to push your changes live. If something breaks, stay calm and continue testing. - Move files with an error to the header.
Visit key pages on your site and use the browser console to check for errors. To check for errors with Google Chrome, visit a page on your site, right-click, select Inspect, and open the Console tab. Return to the Hummingbird Asset Optimization tab and move files flagged with an error to load in the header. - Defer the scripts that are not needed immediately.
Finally, select the Force load this file after the page has loaded button available in the JavaScript section to defer scripts that you don’t need immediately (like a form script or a spam protection script).
If you run into any issues, you can deactivate Advanced Asset Optimization under the Asset Optimization Settings tab, and contact our support team. Your WPMU DEV membership includes performance optimization consulting from our support experts. Open a support ticket to get started.
2.12.9 Resolving Other Google Recommendations
Link to chapter 12The Google PageSpeed Insight audit provides recommendations in three sections:
- Opportunities provide suggestions for improving the page’s speed. The suggestions in this section estimate how much faster the page will load if the improvement is implemented.
- Diagnostics is information about how a page follows best practices for web development.
- Passed Audits are audits that meet the basic PageSpeed requirements.
It is important to note that improving Opportunities and Diagnostics do not directly affect the Google performance score. This means you may be able to make a page load faster without seeing an increase in your overall performance score.
There are about 20 Opportunities the Google PageSpeed test can recommend, and Smush Pro and Hummingbird Pro can be used to improve the results on 11 of these. The remaining recommendations are based on server quality, scripts, and the burdens created by connected 3rd-party services.
This section offers tips for resolving PageSpeed recommendations that cannot be addressed with our optimization plugins.
- Server response times are low – This audit fails when the browser waits more than 600 ms for the server to respond to the main document request. On WordPress websites, the server, plugins, and theme all have an impact on TTFB. Ensure you are using a quality host like WPMU DEV Hosting or upgrade your plan if you are failing this audit.
- Avoid multiple page redirects – The Google PageSpeed test flags pages that are redirected multiple times. Limit the number of redirects a page does. If you have both a desktop and mobile version you are redirecting to, consider using a responsive.
- Avoid an excessive DOM size – The DOM structure is based on the size and amount of content your site contains, and the theme, page builder, and plugins that are producing your HTML. If you are failing this audit, consider shifting to a new theme. If you are working on a site that has a lot of content, this will be difficult to resolve as Google flags sites that:
- Have more than 1,500 nodes in total.
- Have a depth greater than 32 nodes.
- Have a parent node with more than 60 child nodes.
- Preload key requests – Consider using
<link rel="preload">to prioritize code that is being requested later in page load. - Use video formats for animated content – Convert Animated GIF files to looping mp4 and/or WebM video files to save space and speed up load times.
- JavaScript execution time – Compression only goes so far, execution time still depends on how much there is actually going on in the scripts.
- Avoid enormous network payloads – This is the total size in kilobytes of all resources requested by your page. Optimizing images and minifying and compressing code files will help. You will fail this audit if your page’s total network requests exceed 5,000 KB. For optimal page performance, shoot to keep your total byte size below 1,600 KB.
- Minimize third-party usage – Calling third-party services with scripts slow things down. Examples of third-party scripts include social sharing buttons (e.g., Twitter, Facebook), video player embeds (e.g., YouTube, Vimeo), advertising iframes, analytics and metrics scripts, and A/B testing scripts for experiments. It is important to note that even running the Google Analytics script to track information on your site will likely make it near impossible to score a 100 on your Google PageSpeed test.
2.13 Troubleshooting
Copy chapter anchor to clipboardThis section covers some troubleshooting tasks users can try for themselves, although members are welcome to contact support for assistance resolving any Hummingbird issues.
Cache errors after update
When updating your core WordPress with Page Cache active, things can occasionally get stuck in the cache, and a series of cache-related errors may appear on-screen at the top of the frontend pages of your site.
The solution to this issue is to delete the advanced-cache.php file from the wp-content directory. The cache-related errors will no longer exist and they will disappear from your frontend pages.
To get that done, log into your site’s server via SFTP or use a file manager utility in your hosting control panel. Navigate to the wp-content directory where you should see the advanced-cache.php file, and delete only that one file.
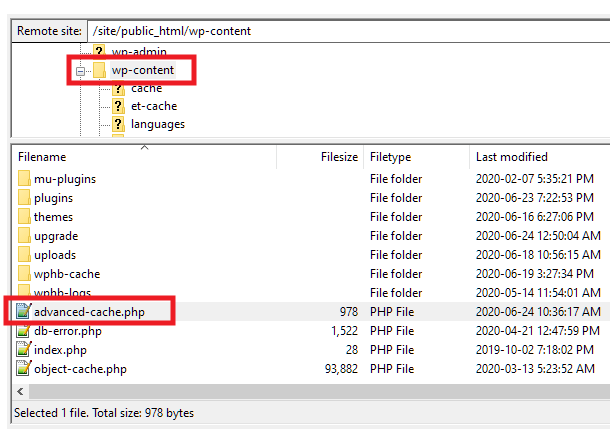
Warning: mkdir()
If you get warnings similar to the following on-screen when installing or activating Hummingbird on your site, it may be due to improper server configuration. It could also be due to a conflict with another plugin, theme or script, or even a temporary connection hiccup during the plugin installation.
Warning: mkdir(): Permission denied
Warning: Cannot modify header information – headers already sent
The first thing to try in this case is to delete Hummingbird from your site and re-install a fresh copy in case the previous attempt was corrupted. If that still returns the same errors, then log into your server as above and ensure the following 2 folders exist in the wp-content directory:
wphb-cache
wphb-logs
If either is missing, just create the missing directory and give it the correct permissions. Both of those folders should have the same default permissions as all other WordPress directories: 755
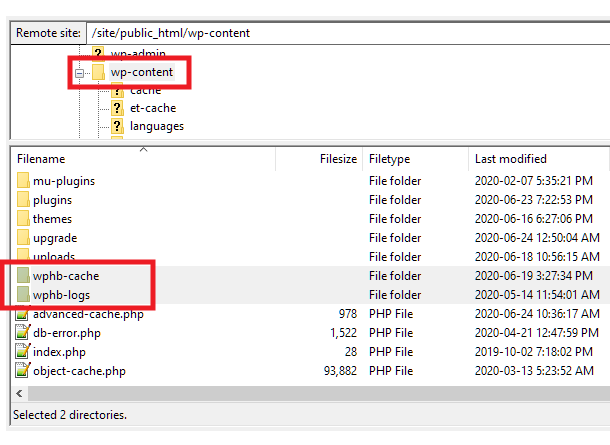
Uptime errors after changing domain
If you change the domain (URL) that your site resolves to (for example, in Settings > General in your site’s wp-admin, or when changing Primary domain name in your WPMU DEV Hub), the Uptime Monitor might still try to check the old domain that it was originally connected to, and return errors or report the site as down.
To resolve this issue, simply deactivate Uptime on the site, then reactivate it so it connects to the domain currently associated with the site.
2.14 Get Support
Copy chapter anchor to clipboardIf you still have questions or need assistance after reading this document, please don’t hesitate to contact our support superheroes using the available options under the Support tab in your Hub or via the Support tab in your WPMU DEV Dashboard.
