6. WPMU DEV Translations
WPMU DEV uses GlotPress to manage our translation project, which allows all members to collaborate and even be rewarded for sharing their translation work! (See Reward and be Rewarded below).
6.1 The Interface
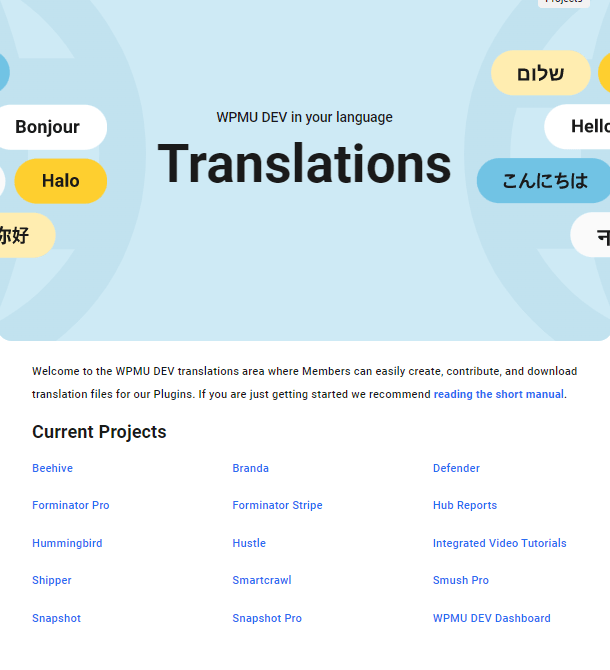
Copy chapter anchor to clipboardBegin by navigating to the WPMU DEV Translation Project page.
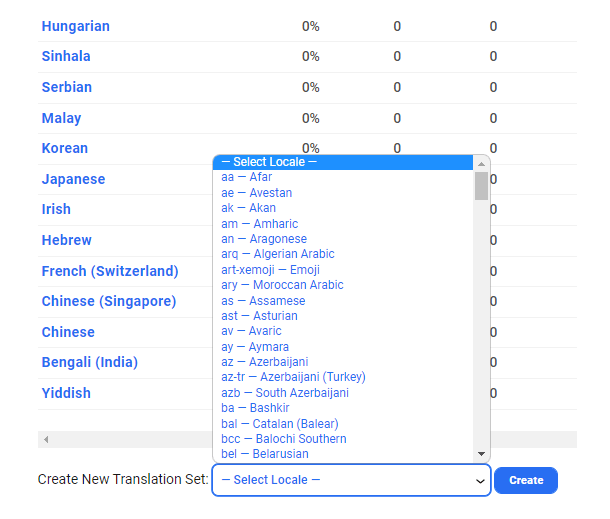
Click on the name of the project you wish to help translate. Then either click on an existing language on the page, or select the new language you wish to translate to where you see Create New Translation Set at the bottom. For the purpose of this tutorial, we’re going to use a sample French translation of ours.
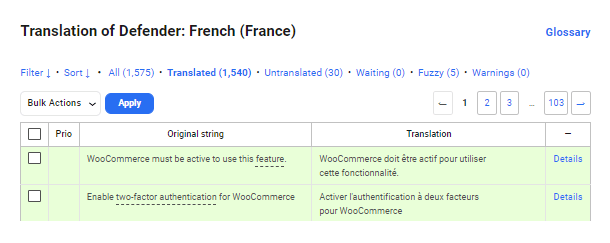
Once you do that, you’ll be taken to the page for the selected translation set where you can double click next to each of the original strings to add your own translation.
Now, before we discuss the importing of translation files, let’s take a moment to cover how to make a translation directly on our website. It’s real easy! :)
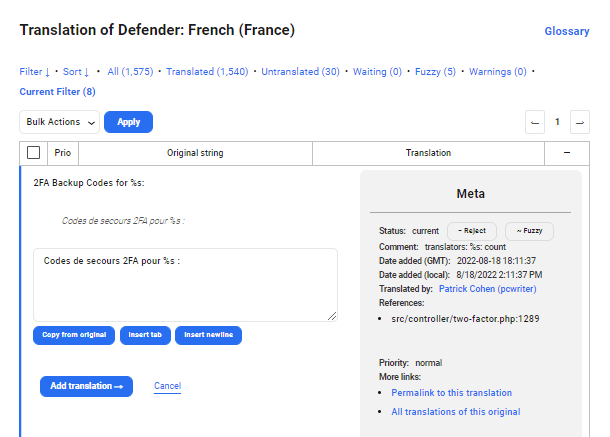
Where you see Double-click to add on the page, you can double-click there to add your translation for the Original string.
At WPMU DEV, any member can suggest translations (including free Hub users), but only our staff and members on our paid plans can accept and moderate those translations. Translations that are shown as waiting will either require a paid member or a staff member to authorize the translation.
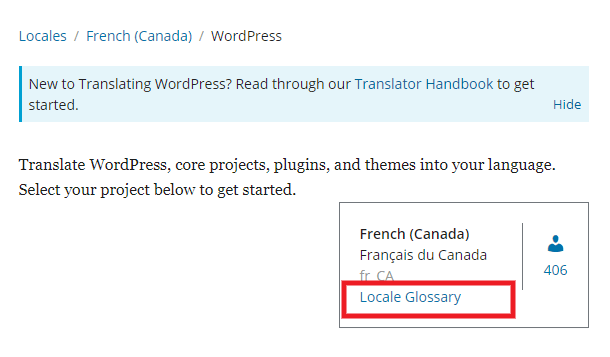
Important – Please be sure to check the official WordPress glossaries of the languages you wish to contribute translations for as we adhere to WP guidelines for our products and services where applicable.
To find the glossary for any language, visit the Translating WordPress page at wordpress.org and click on the locale you need. You’ll see a link to the corresponding glossary at the top-right of the page.
6.2 Importing Translations
Copy chapter anchor to clipboardNow that the translation set for your language has been created (or, you’ve navigated to a pre-existing translation set from main translation page for the project, if you’re looking to add translations to a pre-existing language), you’ll want to click on the the Import translations button.
You’ll then have the option to upload your pre-made translation. You can choose to Import the translation in various formats:
- Portable Object Message Catalog (.po)
- Machine Object Message Catalog (.mo)
To explain the difference between the two briefly, think of .po files as being human readable (and editable), and .mo files as machine readable. It’s the .mo files that WordPress will read when uploading to your WordPress site (which we’ll cover in a bit).
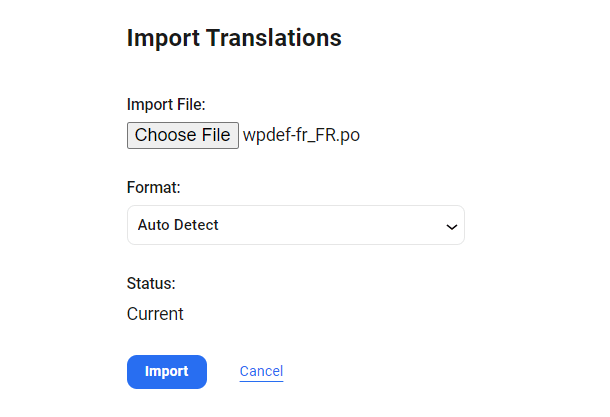
In the above example, we’ve selected the French .po translation for this plugin. Just click on the Import button, and the file will be imported.
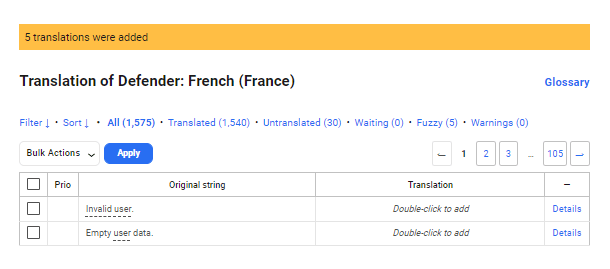
And presto, our translation has now been successfully imported! Successfully imported translations will all light up green, you’ll also see the total amount that were imported.
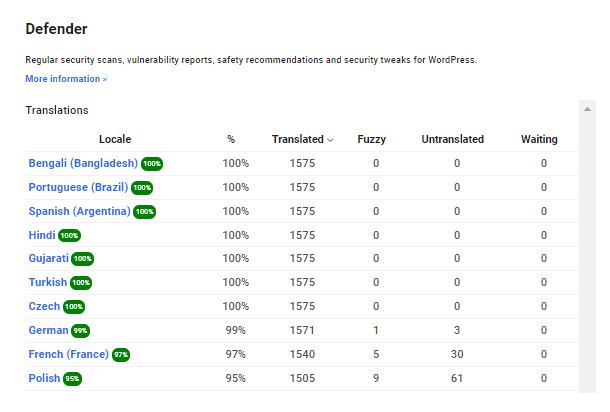
If there are still strings that need translating you can click on the Untranslated link shown in the previous image. On the main project translation page, you can see the percentage of translations completed, and how many are or are not translated. You can also see how many are waiting confirmation and acceptance.
6.3 Exporting Translations
Copy chapter anchor to clipboardYou can choose to Export the translation in the same format options mentioned in the Importing Translations section, as either a .po or a .mo file.
The main one we’re interested in is the .mo file, as this is what WordPress uses (as mentioned earlier in this tutorial).
All you need to do is select Machine Object Message Catalog (.mo) from the drop down at the bottom of the project’s translation page, then hit the Export button. The resulting download should already be perfectly named with the plugin’s textdomain and locale.
6.4 Using Translations
Copy chapter anchor to clipboardMaking use of translation files is easy. As mentioned above, the .mo file is what WordPress uses for the translation. You can just drop the .mo file in the appropriate languages folder via FTP. You’ll want to be sure you’ve also configured WordPress for your language as noted below in Configuring WordPress for your Language.
Rather than put translation files in the associated plugin/theme language folders, it is highly recommended to put them in the following global locations so they are not erased on plugin/theme updates:
- Plugins: /wp-content/languages/plugins/
- Themes: /wp-content/languages/themes/
6.5 Configuring WordPress for your Language
Copy chapter anchor to clipboardYou’ll need to ensure that WordPress is configured to use your language in order for plugin and theme translations to take effect. This is handled differently, depending on whether you’re using Multisite or a single-site instance of WordPress.
Languages in Multisite
When using Multisite, languages can be set on a per-site basis at:
Settings -> General
You can specify the language for the site via the Site language option there. The default language for the Multisite network can be set at:
Network Admin -> Settings -> Network Settings
Using the Default Language option. See Selecting the Default Network Language in WordPress Multisite for more details and screenshots.
Languages in single-site
In single-site configurations, you’ll need to go to:
Settings -> General
And choose your language from the Site language option there.
For additional reading, see the multiple articles on our blog regarding translations.
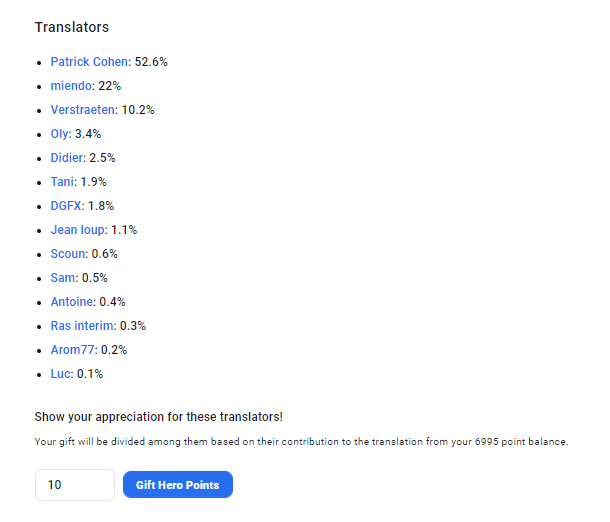
6.6 Reward and be Rewarded
Copy chapter anchor to clipboardWhen you import or contribute to a language translation, we’ll help reward you for your efforts! Your name will be listed at the bottom as a translator, along with what percentage of strings you contributed to the translation. But best of all, other members who find your translation accurate and useful are encouraged to gift you valuable reputation points for your hard work!
The points you receive will be based on your percentage share of that particular translation. So for example if you contributed 75% of the translations, and another member 25%, if a member gifts 100 points then you would get 75 and the other translator 25. Remember, gifted reputation points can get you a free lifetime membership!
Also, if you find another user’s translation helpful, please be generous and send them a few points! That’s the best way to encourage their efforts to keep the translations for the products you need up to date.
If you’re stuck, then open a support ticket and we’ll gladly help you out. You can open up a support ticket right here:
6.7 Get Support
Copy chapter anchor to clipboardIf you still have questions or need assistance after reading this document, please don’t hesitate to contact our support superheroes using the available options under the Support tab in your Hub or via the Support tab in your WPMU DEV Dashboard.
