2. Installing WPMU DEV Plugins
Downloading and installing WPMU DEV plugins couldn’t be simpler. Using our Dashboard plugin is the easiest way to add our products to your site, but we also give you the opportunity to download plugin files (even older versions!) from our site directly, so you can install via the Upload New Plugin option in WordPress, or by FTP.
Visit the new Plugins manager in your Hub to install, delete, activate or deactivate any plugins from WPMU DEV or wordpress.org, on any or all of your connected sites.
2.1 Install WPMU DEV Plugins
Copy chapter anchor to clipboardTo browse all of our plugins, simply click the Pro Plugins link at the top of your screen.
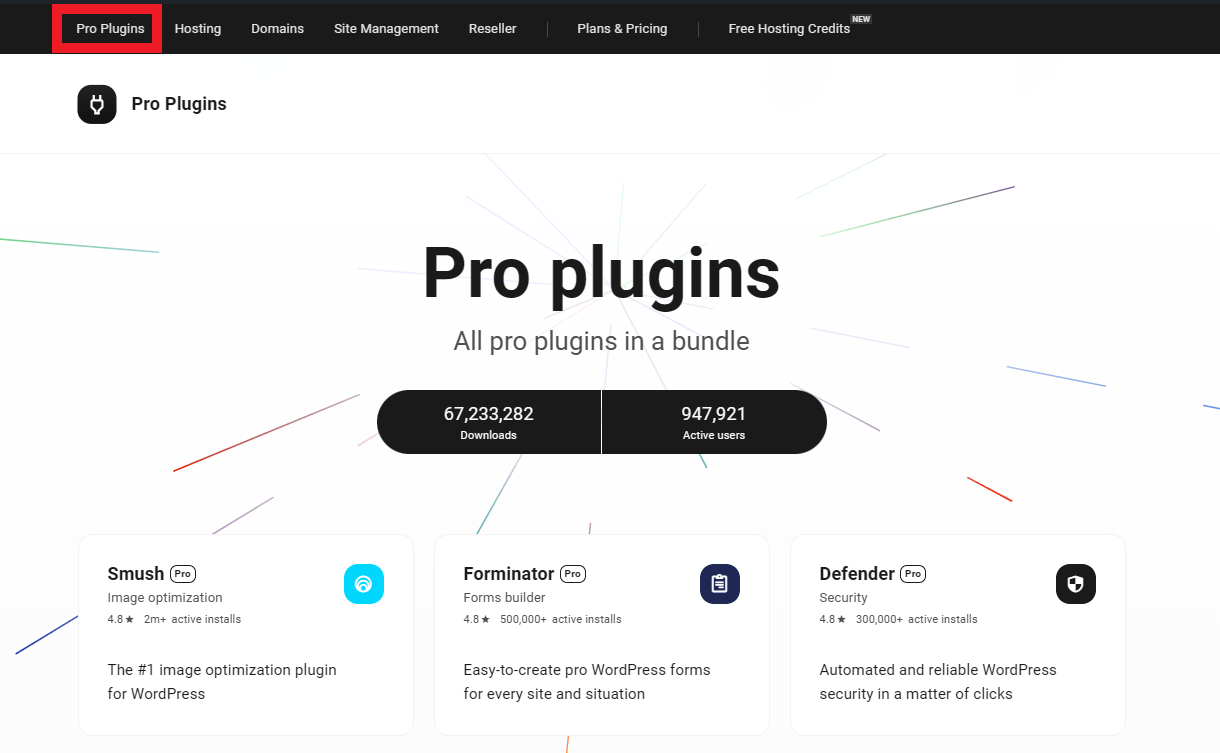
Once you’ve found a plugin that interests you, click the screenshot to go straight to its dedicated page.
Each plugin has its own project page. Click the link to see the project page for Hustle.
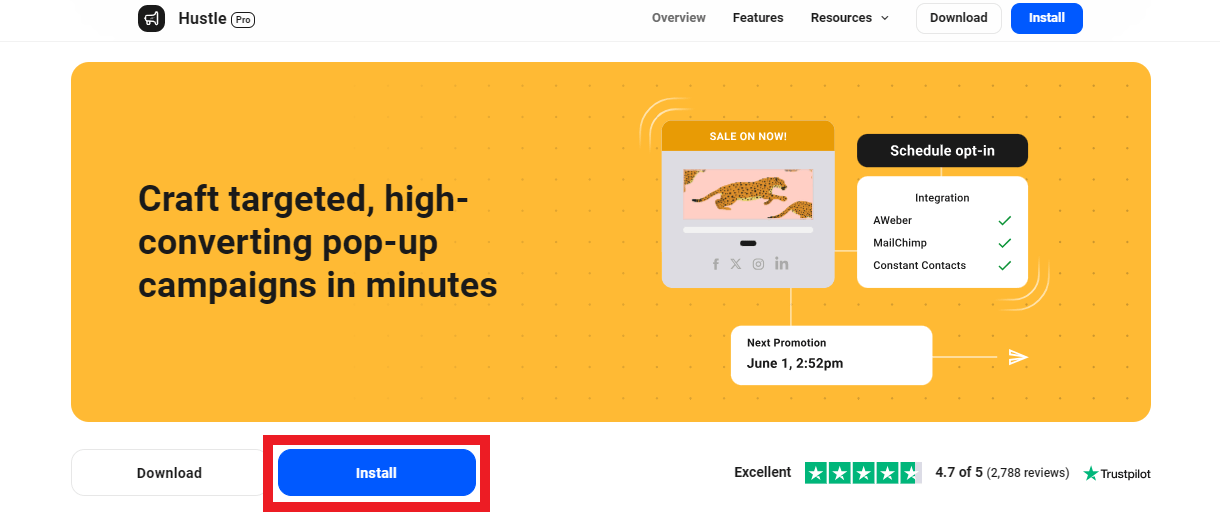
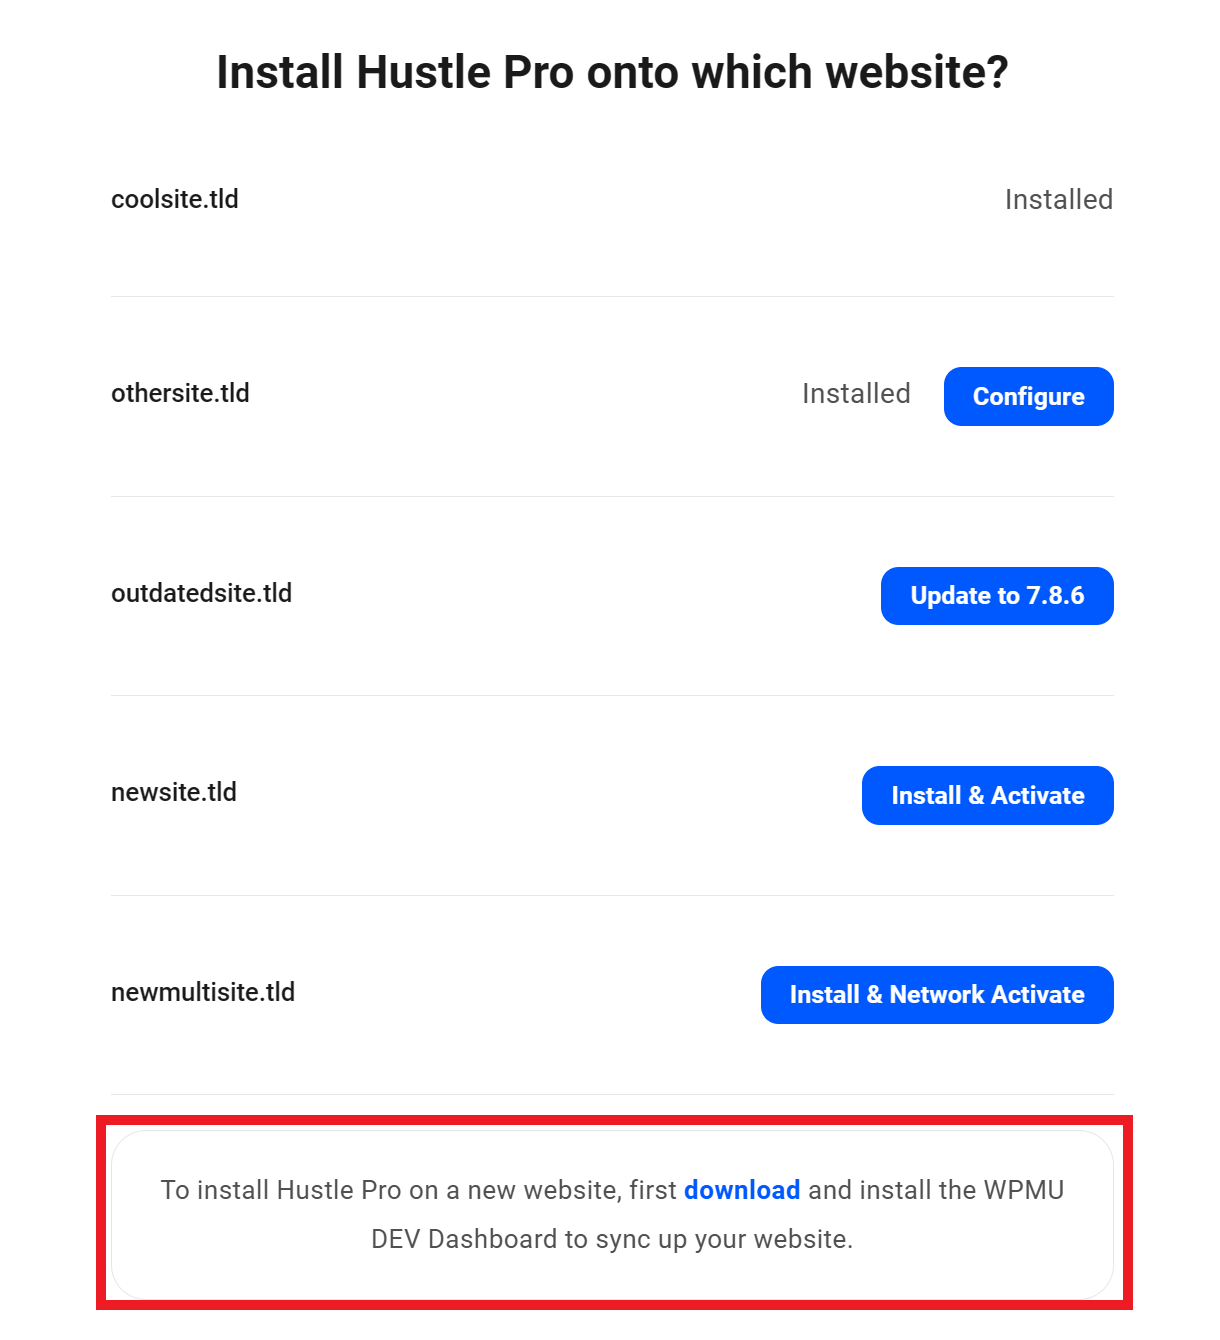
Click the Install button and you’ll see a list of your connected sites and can select the one where you wish to install, update or configure the plugin. If you do not see your site in the list, you’ll need to first install the WPMU DEV dashboard plugin to connect it to your Hub.
2.2 Download Previous Versions of WPMU DEV Plugins
Copy chapter anchor to clipboardAlthough we highly recommend always using the most current version of our plugins, there might be times you want to download an old version. Simply navigate to the plugin project page.
Click on the Changelog option in the Resources dropdown.

In the popup that appears, you can then see the two most recent previous versions we’ve released. Just click on the “Download” button for the relevant version number and the download will start.
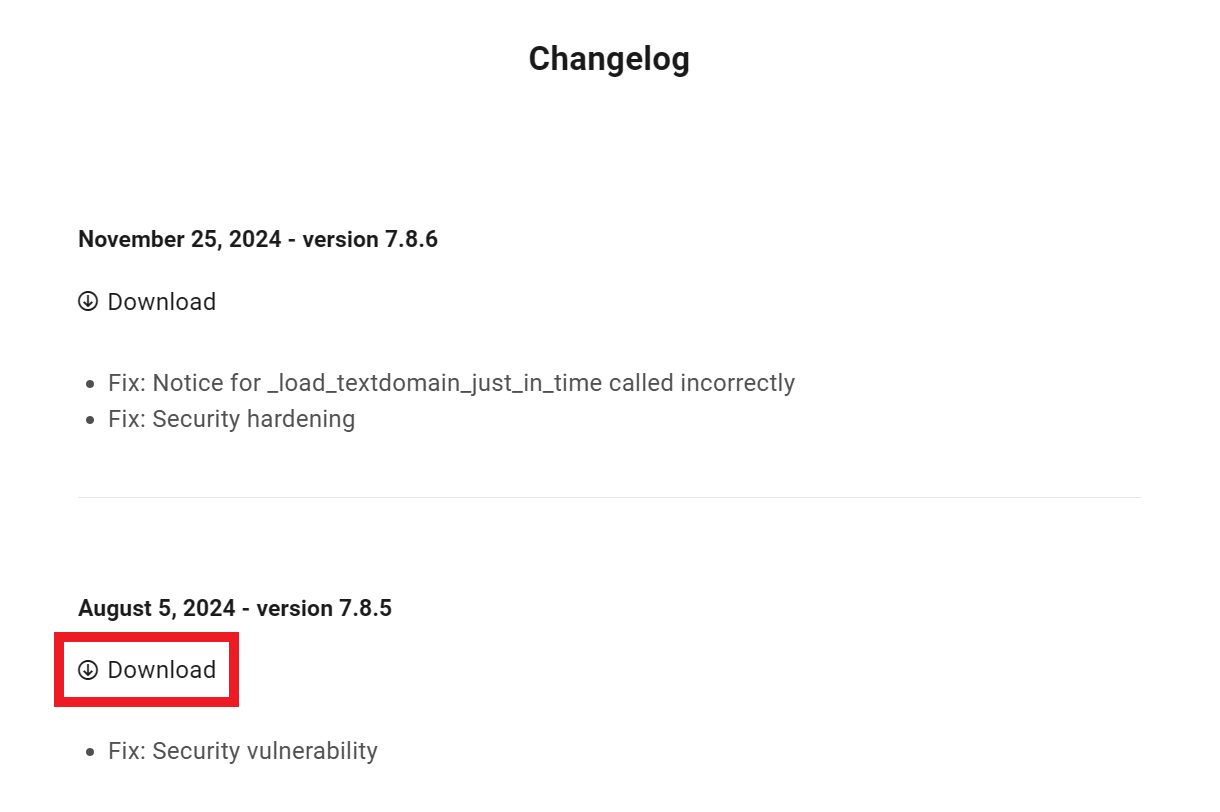
Please note: You do need to hold an active membership to download current and past versions of our Pro plugins.
The Safari browser automatically unzips archive files that you download to your computer. This means that any .zip plugin file you download is automatically unzipped and must be zipped again before you can upload it to your WordPress site. You can change this default behavior though by following this guide.
Not sure how to upload plugins in .zip format once you’ve downloaded them? See our Installing WordPress Plugins doc for help with that.
2.3 Installing WPMU DEV Plugins via Composer
Copy chapter anchor to clipboardIf you are the advanced developer type and like to manage your WP site via the Composer package manager, WPMU DEV has full support for that! We are now publishing our own Composer repository.
You can also check out our blog post on using Composer with our plugins here.
Composer Integration Example
All packages are protected by basic auth with your API key as the username, you can leave password blank. All you have to do is add https://wpmudev.com/ as a composer repository to your WP root Composer.json file. Here is an example of what you would need to add to your Composer.json file to install the latest version of Beehive and Branda plugins:
Package names use the url slug of the project as found in our listings https://wpmudev.com/projects/category/plugins/, not necessarily the folder name.
Please note that as of Composer v2, basic authentication uses the shell_exec command, which is disabled on our hosting. To get around this, you must save your API Key in an auth.json file.
Make sure that file is saved in .gitignore so your API key is not published publicly as it violates our TOS, and to avoid leaking credentials into your git history. This is how the auth.json file would look:
Updating the WPMU DEV Dashboard plugin
Note that the folder name for the Dashboard plugin changed to wpmu-dev-dashboard as of version 4.7.3.3
This means you may have trouble updating your Dashboard plugin via Composer, as the update may save to a new folder named wpmu-dev-dashboard instead of updating to the existing wpmudev-updates folder.
If this happens on your install, please edit your Composer.json file so the block related to your Dashboard plugin contains an installer-paths extra:
2.4 Installing WPMU DEV Plugins via WP-CLI
Copy chapter anchor to clipboardWPMU DEV Pro plugins can be installed with WP-CLI using the following command, where [id] should be replaced with the plugin ID.
wp plugin install wpmudev_install-[id]
Note that your site must be already connected to your Hub so it can access the WPMU DEV API. See Add a Site to the Hub for help if you’re not sure how to do this.
Here is the full list of our Pro plugins and their IDs:
| Pro Plugin | ID |
|---|---|
| Beehive | 51 |
| SmartCrawl | 167 |
| Video Tutorials | 248 |
| Branda | 9135 |
| Smush | 912164 |
| Hummingbird | 1081721 |
| Defender | 1081723 |
| Hustle | 1107020 |
| Forminator | 2097296 |
| Shipper | 2175128 |
| Snapshot | 3760011 |
| The Hub Client | 3779636 |
2.5 Retired Plugins
Copy chapter anchor to clipboardFrom time to time we may retire a product which has become outdated or unfeasible to continue supporting. To see an updated list of which of our products have been retired, please read Retiring our Legacy Plugins.
2.6 Get Support
Copy chapter anchor to clipboardIf you still have questions or need assistance after reading this document, please don’t hesitate to contact our support superheroes using the available options under the Support tab in your Hub or via the Support tab in your WPMU DEV Dashboard.
