Here’s Something To Captcha Your Attention: Defender’s Google reCAPTCHA Feature and Backup Code
Defender Pro, our answer to WordPress security, just beefed things up even more with his new Google reCAPTCHA feature! Google reCAPTCHA ensures that it’s a human that enters your site instead of automated spammers that can wreak havoc.

Defender, our answer to WordPress security, can beef up your security even more with his Google reCAPTCHA feature! Google reCAPTCHA ensures that it’s a human that enters your site instead of automated spammers that can wreak havoc.
As you’ll see, it’s as easy as ever to get reCAPTCHA activated in just a few clicks. We’ll break it all down and show you how.
We’ll take a look at how to:
- Activate Google reCAPTCHA
- Choose a reCAPTCHA Type
- Configure reCAPTCHA
- Style reCAPTCHA
- Adding a reCAPTCHA Score
- Including reCAPTCHA in Comments
- Use the Backup Code Authentication
- WooCommerce and BuddyPress reCAPTCHA
By the end of this brief article, you’ll know how to put the cap on bots and spammers with reCAPTCHA.
Activate Google reCAPTCHA
To get started, you’ll need to activate reCAPTCHA from Defender’s dashboard. That’s as easy as going to Tools, then Google reCAPTCHA.
Once there, click Activate.
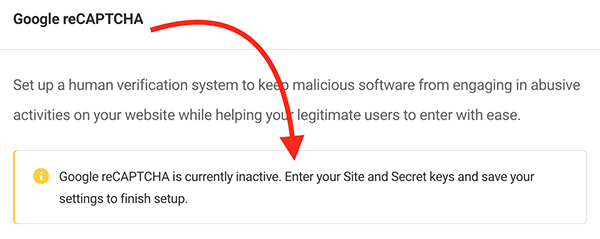
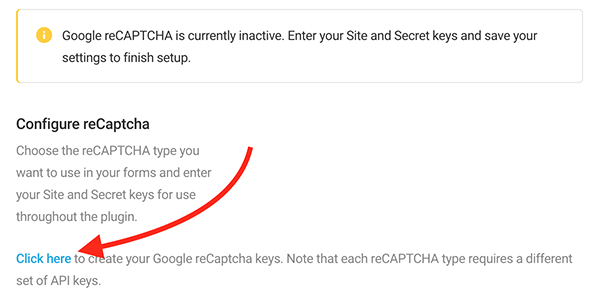
As soon as you hit activate, it’s not ready to go unless you have your Site and Secret keys set up. Defender will let you know if you don’t.
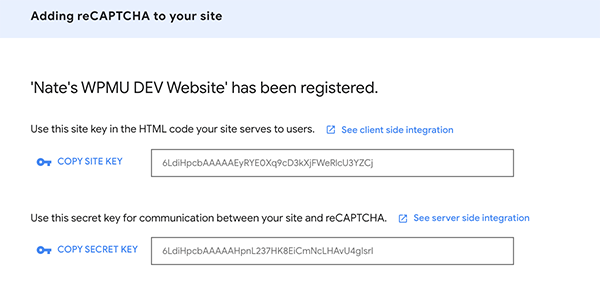
No keys? Let’s create them. Defender makes this easy by having a link to get the keys created. Just click, you guessed it, Click Here.
Clicking this opens up a new tab on Google’s reCAPTCHA page.
The first thing you’ll do is name the Label. The Label helps you identify the site for future reference.

Once you have a label, the next part leads us to…
Choose a reCAPTCHA Type
You now choose a reCAPTCHA Type in Defender and Google.
It’s important to note that during registration in Google, you’ll need to select the same reCAPTCHA type you selected in the Defender interface, as each reCAPTCHA type requires a different set of API keys.
It’s up to you if you want to pick a type in Defender or Google first. Either way, it doesn’t matter as long as they’re the same.
Since we’re already in Google, we’ll select a type here first. You have the option of reCAPTCHA v3 (verifies requests with a score) and reCAPTCHA v2 (verifies requests with a challenge).
Whatever you choose will create a unique key.
Once you decided which type is best for you, you’ll enter the domain and accept the reCAPTCHA Terms of Service. You can also opt to have alerts sent to the owner (you and your email).
Hit Submit, and it will generate your keys.
It’s now time to implement them in Defender, so we’ll head on back into Defender’s dashboard and get these activated!
For this example, I chose to create keys using reCAPTCHA v2. Therefore, I’ll select the same option in Defender.
You can pick between v2 Checkbox or v2 invisible for reCAPTCHA v2. For this demonstration, I’ll use v2 Invisible (I’ll touch more on v2 Checkbox and v3 a bit later).
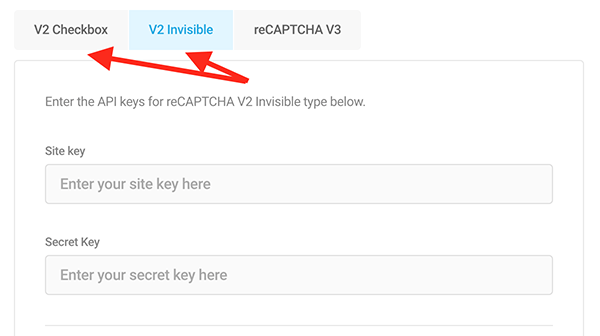
Enter the site keys from Google in the spaces provided, click Save Changes at the bottom of the screen, and Defender will give you a preview of what your reCAPTCHA will look like.

Now that you know how to set up specific reCAPTCHA types, let’s…
Configure reCAPTCHA
There’s a lot you can do when it comes to configuring Defender’s reCAPTCHA. We’ll take a look at how to edit:
- Language
- Error Message
- reCAPTCHA Locations
As you’ll see, each customization option is simple to adjust however you’d like.
Language
You can pick what language you want your reCAPTCHA to be in. By default, it’s on Automatic. That means that whatever language your WordPress site is in — the reCAPTCHA will be that language, too.
That being said, choose from tons of other languages in the dropdown. Or type in a language in the search bar.
As you can see, there are quite a few languages to choose from.
Once you have the language set up how you want it, click Save Changes.
Error Message
It’s easy to create a custom error message to display when a user’s reCAPTCHA verification fails.
Just add the message you want and hit Save Changes.
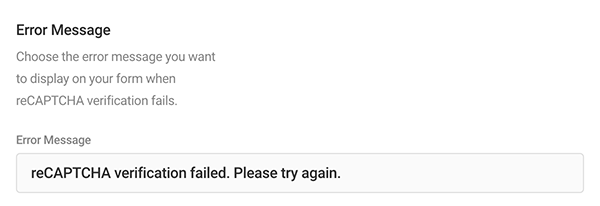
Edit and change this message at any time.
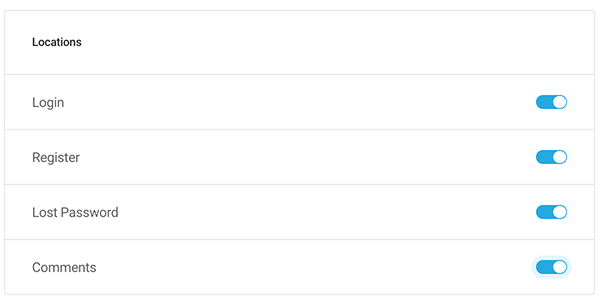
reCAPTCHA Locations
reCAPTCHA Locations is where you choose the forms where reCAPTCHA human verification will be required. You can choose to have reCAPTCHA implemented for WordPress Login, Register, and Lost Password forms.
It’s just a matter of clicking which ones where you want reCAPTCHA to be deployed.
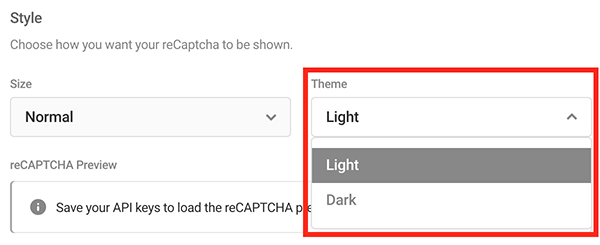
Style reCAPTCHA
With Defender’s v2 Checkbox, you can style the reCAPTCHA in several ways.
The Size can be adjusted to either Normal or Compact from the dropdown menu.
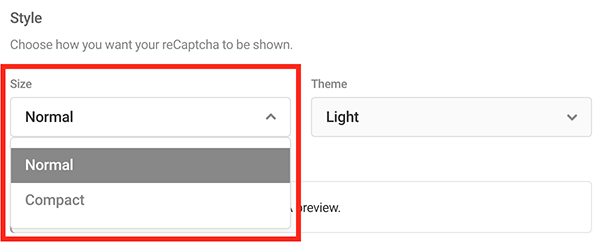
When it comes to the Theme, you can pick between Light and Dark.
Check out how your reCAPTCHA looks by hitting Save Changes. Once doing so, it’ll show you a preview.
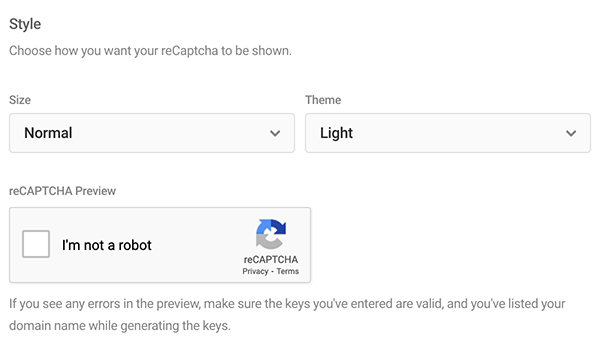
If all looks awesome, you’re all set! You can also go in and edit at any time if you’d like to make some adjustments.
Adding a reCAPTCHA Score
reCAPTCHA v3 returns a score that is based on user interactions. This score can be adjusted and changed to wherever you want the verification to fail.
Change the Score Threshold to 0-1. One is very probable it’s a good interaction, and zero is very likely it’s a bot.
It can be changed quickly in Defender’s dropdown.
Pick a threshold between zero and one.
Hit Save Changes and your threshold is saved.
Including reCAPTCHA in Comments
Choosing where you want reCAPTCHA is as easy as ever. You simply click where you’d like it to be featured. That’s also true when it comes to adding reCAPTCHA to comments.
Simply click the switch over to activate it in the reCAPTCHA Locations section.
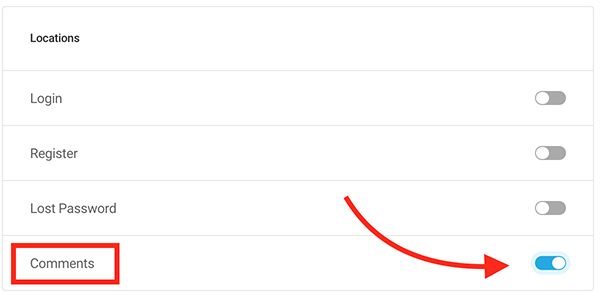
Now, users leaving comments will have to use reCAPTCHA to do so.
Use the Backup Code Authentication
Along with reCAPTCHA, you can give your login security a boost with Defender’s Backup Code Authentication.
It’s automatically an option once 2FA is enabled. You’ll find it in your WordPress dashboard under Users > Profile. Then, scroll down to Security, and you’ll have your code option.
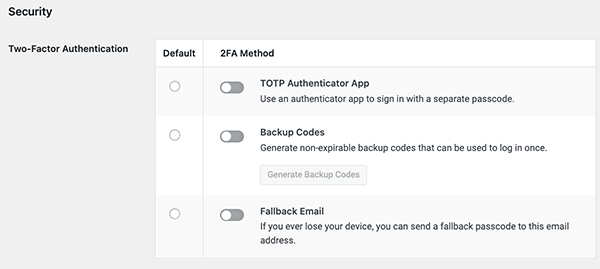
Simply select Backup Codes to enable, then Get New Codes button. That will supply you with a list of codes you can download in a safe spot and use for your 2FA.
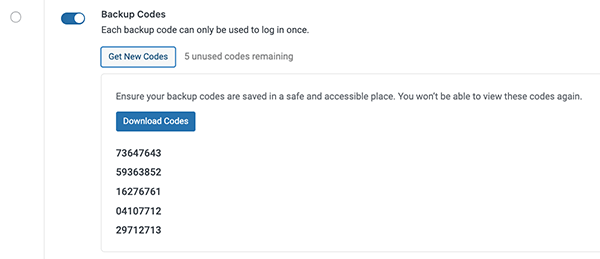
After clicking Download Codes, it will create a txt file, where you can access the codes when needed.
WooCommerce and BuddyPress reCAPTCHA
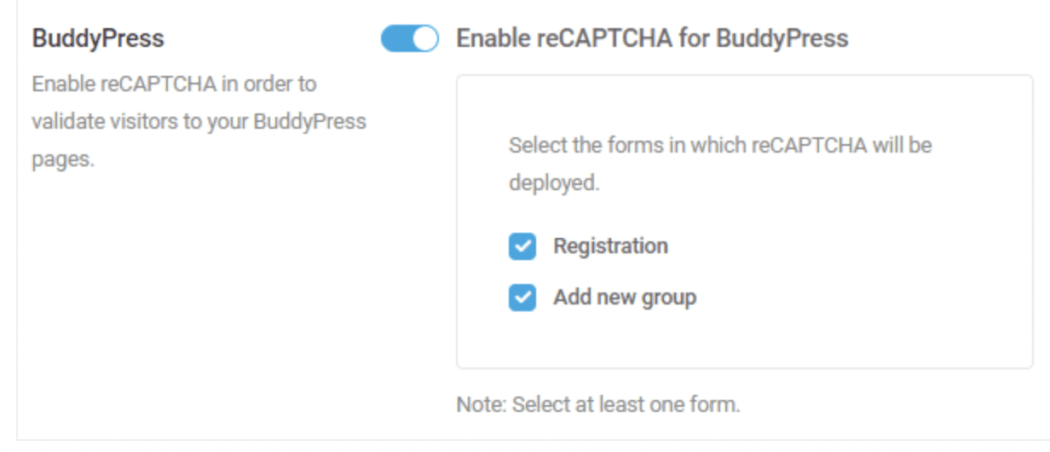
If you have WooCommerce or BuddyPress (or both!), you can implement a custom reCAPTCHA specifically for them.
When WooCommerce is activated on your WordPress site, you can turn on support for that plugin and select the form where reCaptcha should be implemented.
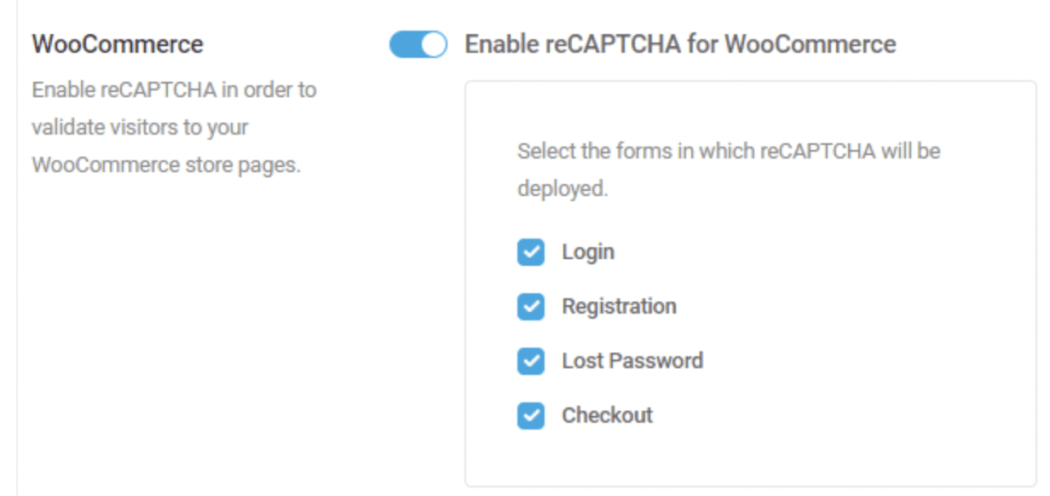
The choice is yours! Once selected, reCAPTCHA will be deployed.
BuddyPress is essentially the same. You can select where you want reCAPTCHA to be implemented.
Defender’s reCAPTHCA is CAPTCHA-vating
To help defend your site against bots and spammers, it’s as captivating as ever to use Defender’s Google reCAPTCHA for your WordPress site!
It will help ensure that your site is used by real humans for your forms, logins, and visitors — which assists with preventing abuse, stopping hackers from harvesting email addresses, and putting a hault to automated signups & registrations.
And for extra security, Defender’s Backup Codes can be an extra level of defense.
If you don’t have Defender, give it a try today for free. Also, for upgraded security features, try out Defender Pro with a WPMU DEV membership free trial. You’ll get access to all of our other premium plugins, 24-7 service, our all-in-one WordPress site manager, The Hub, and more.
reCAPTCHA later!
Share article
All the good WordPress stuff, once every two weeks
Subscribe
Create your free account to post your comment
Login to post your comment