New 2FA Integrations and Other Upgrades with Defender Pro 2.4!
Just when you thought our answer to security, Defender, couldn’t get any better -- with the release of v2.4, he did! Defender Pro now comes with two-factor authentication integrations, a new notifications interface, bulk actions for security recommendations, and more.

Just when you thought Defender, our answer to WordPress security, couldn’t get any better — with the release of v2.4, he’s now better than ever!
Defender Pro now comes with two-factor authentication integrations, a new notifications interface, bulk actions for security recommendations, and more.
These improvements help you customize your security options and streamline recommended security precautions.
Here’s a breakdown of the new features. We’ll look at how to:
- Quickly Activate and Schedule Reports in the New Notifications Area
- Easily Integrate 2FA with Google Authenticator, Microsoft Authenticator, or Authy
- Take Care of Security Recommendations in Bulk
This article will give you a quick overview of what’s new, and you’ll be able to implement them in Defender Pro today!
1. Quickly Activate and Schedule Reports in the New Notifications Area
Defender has a new look and better functionality with Notifications. It’s a centralized manager area for all notifications and reports.
The Notifications area gives you a complete overview of the reports, whether it’s enabled or not, gravatars icons of the email recipients, and reports’ frequency.
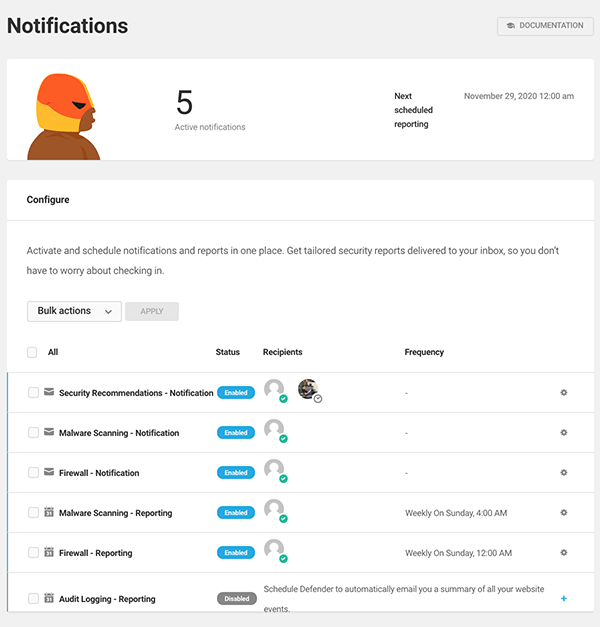
You can configure and disable reports in one-click. If a report can be enabled, you’ll see a plus sign next to it.
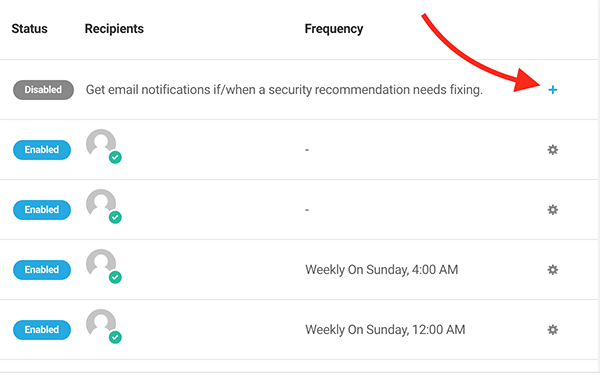
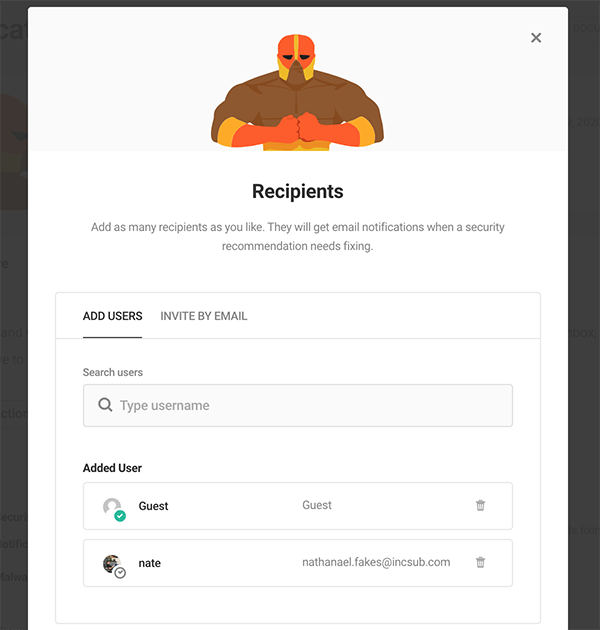
Once clicked, you can choose who to send email notifications to.
You can easily search for recipients to add by username or click on an individual user from the list. Alternatively, you can always invite a user by email by clicking Invite by Email.
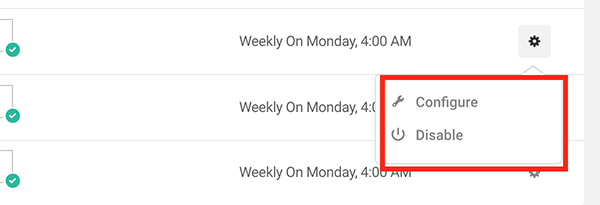
If the report is already enabled, clicking on the gear icon will allow you to configure it by adding recipients, frequency of reports, day & time of reports, and additional settings.
Want to configure reports in bulk? You can do that in a snap with the new Bulk Action dropdown. This will give you the option to Enable, Disable, and Update reports all at once.
Enable all of the security reports and notifications at once.
If you enable the reports, Defender will direct you to set up your Recipients, Configure Notifications, add the times and dates for reports, and more — all in bulk.
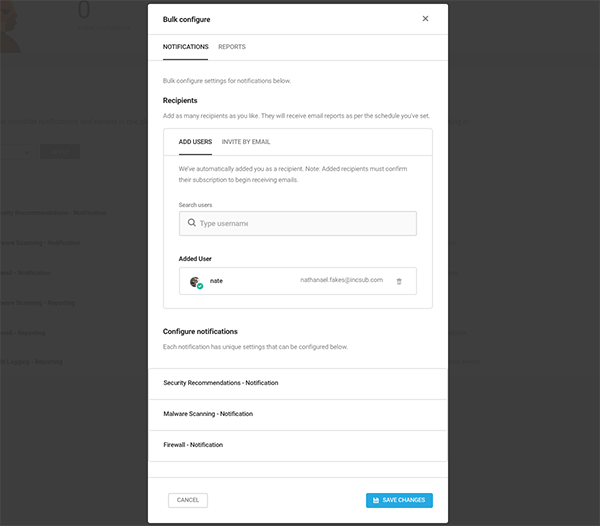
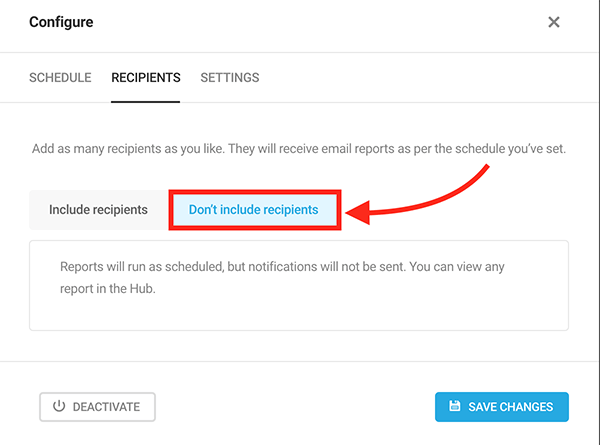
You can also send notifications without a recipient for the Malware Scanning report when you configure it.
If you opt for this, your reports will still be conducted, but they won’t go to your email and instead can be viewed in The Hub.
Defender has made it quick and easy to manage your reports, notifications, and recipients. This can all be set up in just a few clicks!
2. Easily Integrate 2FA with Google Authenticator, Microsoft Authenticator, or Authy
Another great new feature for Defender is now you can integrate two-factor authentication with more than Google Authenticator. We’ve now added options for Microsoft Authenticator and Authy!
This is all done in one click. You simply go to the 2FA section in Defender’s dashboard. From there, you choose whatever 2FA option you’d like.
Google Authenticator, Microsoft Authenticator, or Authy. The choice is yours!
Once you choose your option, select whether to download it from Google Play or the App Store and you’re all set.
3. Take Care of Security Recommendations in Bulk
Instead of handling security recommendations one-by-one, you can get them all handled in an instant with bulk updates. Likewise, you can choose to ignore all of the security recommendations at once.
This can all be done from the Recommendations area in Defender’s dashboard. From here, you’ll see the number of security recommendations at the top of the screen.

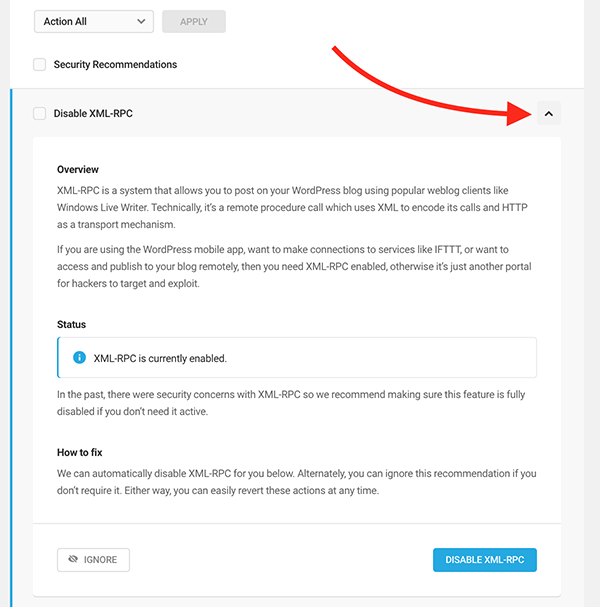
If you have recommendations, you can then bulk action them. You can choose to Action All or Ignore All.
Select all of them at once by checking the Security Recommendations box or click individual recommendations. Once you decide on what to do, it’s done by simply clicking Apply.
Handle all of the recommendations instantly.
As always, you can always view the recommendations in detail with the dropdown by each recommendation. It will give you an overview and more information.
If you have any questions or can’t decide whether to delete or ignore a security recommendation from Defender, just reach out to our 24/7 support for expert help and advice.
And That’s Not All…
We didn’t stop there. A few other new features for Defender includes onboarding that replaces the old quick setup and enables everything that is recommended and better UI/UX and performance for Malware Scanning.
Beyond that, there are always new features and developments happening regularly!
Our team of dedicated developers and programmers are always keeping Defender up-to-date with the latest recommendations, security protocols, and more!
Be sure to see what’s next for our security superhero in our Roadmap. And learn more in our article, How to Get the Most Out of Defender Security.
Managing your WordPress security with Defender just keeps getting better – making it easier for you and harder for hackers!
Share article
All the good WordPress stuff, once every two weeks
Subscribe
Create your free account to post your comment
Login to post your comment