Oh, Behave! How To Use Behavior Settings In Hustle
Is your website getting maximum value in user engagement? Hustle’s integrated modules allow for the most robust and customizable pop-up experience, ushering unrivaled potential in visitor reach. Hustle is our very own free marketing and lead generation goldmine. Pop-ups are only the beginning for this plugin powerhouse. It also presents slide-ins, embeds, and social shares — with panache. The integrated set of tools is feature rich yet a cinch to use.

Is your website getting maximum value in user engagement? Hustle’s integrated modules allow for the most robust and customizable pop-up experience around…for free!
If you run a successful site for yourself or clients, no doubt you hustle hard. We do too! Hustle is our very own free marketing and lead generation goldmine.
Pop-ups are only the beginning for this plugin powerhouse. It also presents slide-ins, embeds, and social shares — with panache.
The integrated set of tools is feature rich yet a cinch to use. There are tutorials and documentation aplenty, available directly from the WP dashboard plugins page, or right here on our blog.
In this tutorial, we’ll cover the following:
- What are behaviors?
- Meet the modules (Pop-ins, slide-ins, and embeds)
- Making behavior modifications
- Well behaved
Click on the links above to jump to any section of this tutorial.
Alright, let’s get hustlin’…
What Are Behaviors?
Behavior settings in Hustle let you specify when and how your pop-ups, slide-ins, and embeds should appear. They work seamlessly alongside Hustle’s other options — such as Visibility, which lets you specify who your pop-ups should display to.
In this post, we’re going to take a closer look at the Behavior screen, which lets you set up precise triggers for your pop-ups to display when conditions of your choosing are met.
It all begins with creating a module, then we’ll deck it out in eye-catching accessories.
Need help creating a module? Read our article on How to Make the Perfect Pop-up.
Meet the Modules
There are three Hustle modules that have associated behavior parameters: Pop-ups, Slide-ins, and Embeds.
Each module has two possible types: email opt-in, and informational.
- Email Opt-in is ideal for newsletter signups, or collecting user data.
- Informational is perfect for promotional offers with a Call to Action.
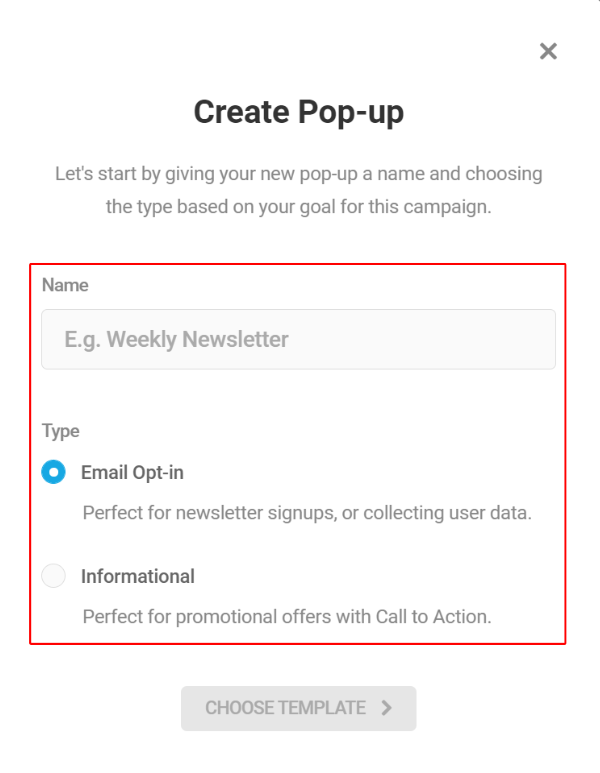
While each type suits a different intention, setting them up is much the same.
Modules and Their Associated Settings
Handy chart showing which settings each Behavior module allows.
Now we’re ready for a deep dive into the behavior settings.
Making Behavior Modifications
Let’s make sure we’re on the same page… figuratively and literally. :)
From the Hustle Dashboard, navigate to the Pop-ups section, and either Create a new or Edit an already existing module.
Click on Behavior, so we can focus on those settings.
(By default, the module landing page opens to Content.)
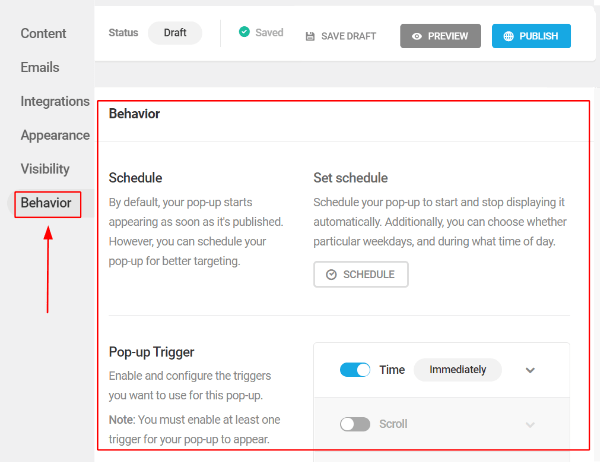
Now, let’s dig into the elements.
Schedule
Schedule is our initial selector, and strictly uses time for activation. It defaults to start immediately after publishing, and to never end. However, these choices are changeable, down to the minute.
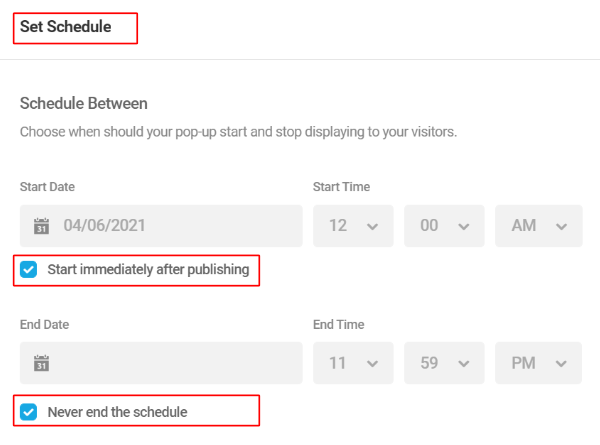
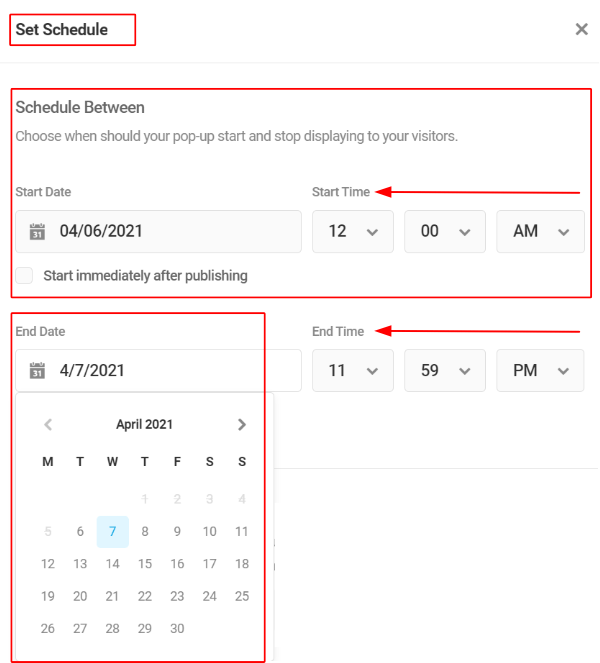
To adjust dates or times, uncheck either blue box (Start or End), then click in the date field. A full editable calendar drop-down will appear, as well as drop-downs for hour, minute, and AM/PM.
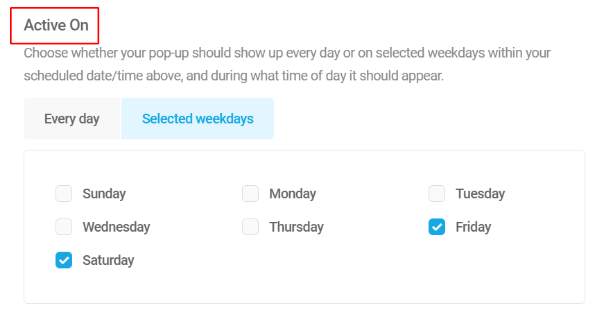
Do you want your pop-ups to show up every day, or only certain days? All day, or only during certain hours? Whatever your preference, you can make it happen with Active On.
Click Selected Weekdays, and choose whatever day or combination of days that you want.
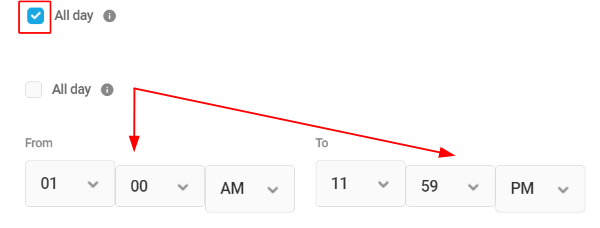
Uncheck the blue box next to All Day and the time drop-downs become active.
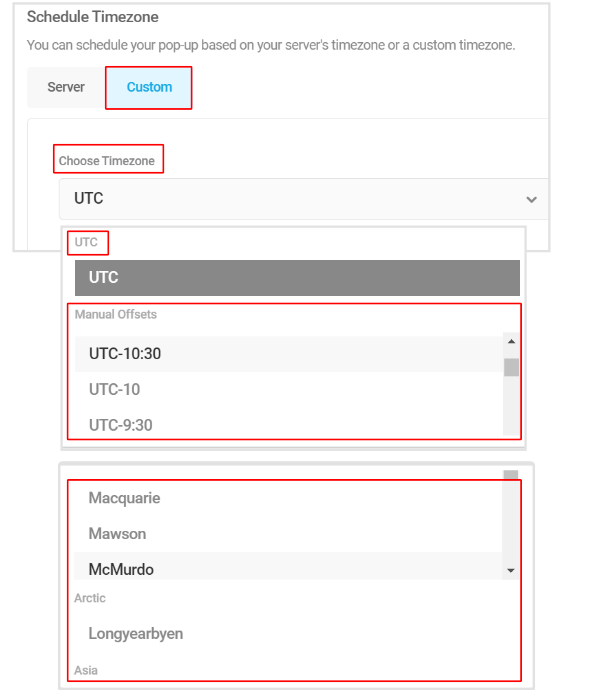
Even timezones have the ability to be tweaked. The default decides this using your visitor’s server, but you can fully customize it by clicking on Custom, then selecting from the drop-down.
Next, we’ll explore triggers.
Triggers (Pop-up & Slide-in Only)
The point at which a Pop-up or Slide-In module activates is important, and personal preference for these variables can vary widely.
Triggers allow you to decide when, where, and how a pop-up appears, goes away, and/or comes back. There is a lot to unpack in these modifications, so let’s get started.
You can enable any combination of available triggers, or keep it simple with just one.
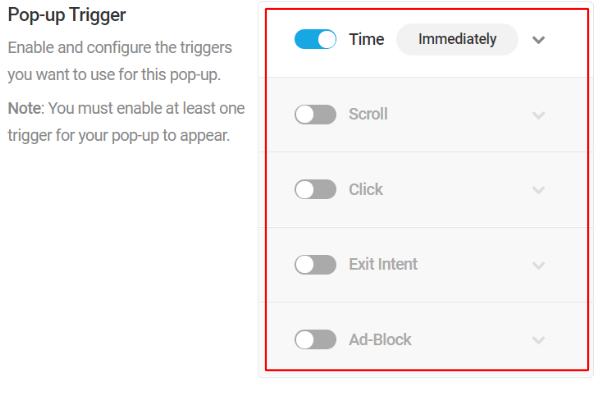
There are five different Triggers, each with its own subset of options.
- Time
- Scroll
- Click
- Exit Intent
- Ad-Block
Let’s take a look.
- Time modules will appear after the chosen period of time passes.
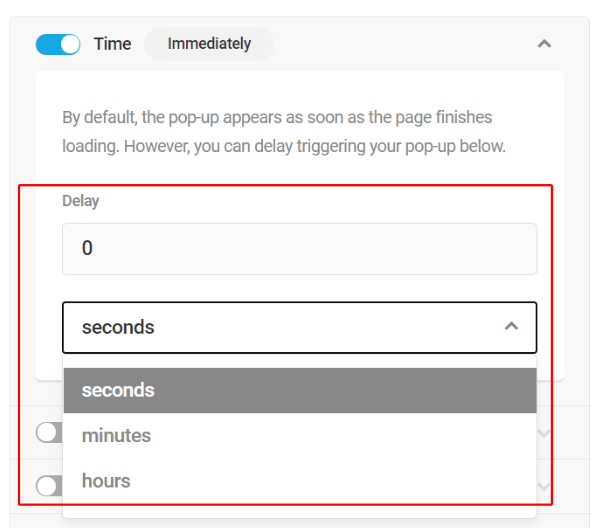
Adding a custom time delay to your pop-ups is fast and easy. - Scroll modules become active when the page is scrolled by a certain percentage, or when a user scrolls past a designated CSS element. Select the trigger you prefer, then input the settings.
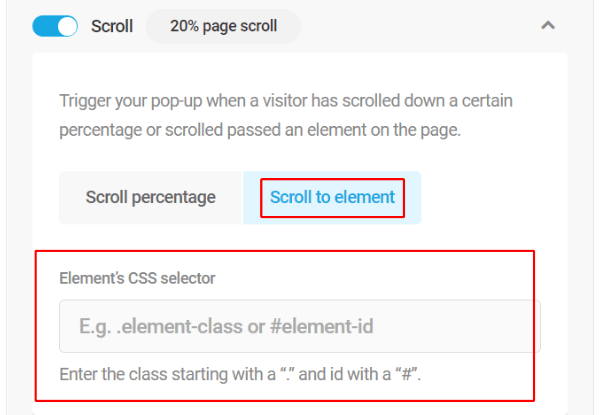
Enter the selector class or id (of any on-page element) to use the CSS trigger. - Click modules display when a specified on-page element is clicked. Both of these click triggers can be used at the same time, as well as having active multiple instances of each trigger, on any page.
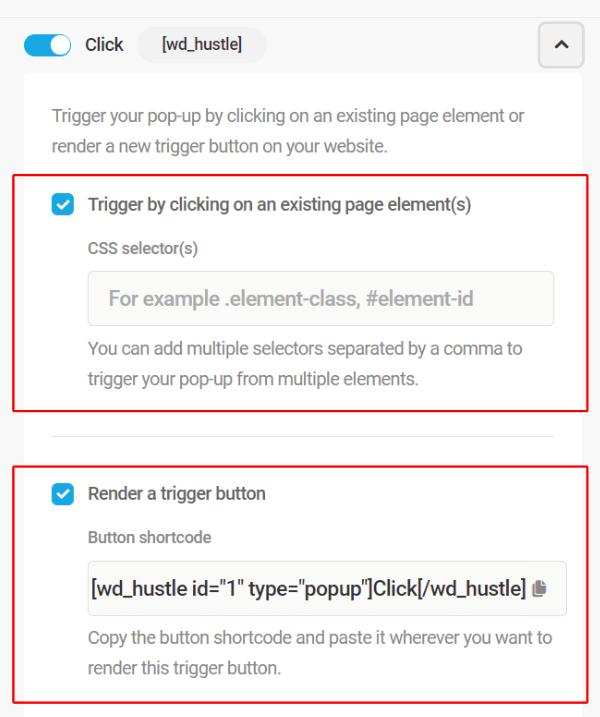
Both of these click triggers can be used at the same time, as well as having active multiple instances of each trigger, on any page. - Exit Intent ensures users see at least one conversion option before they leave a site.
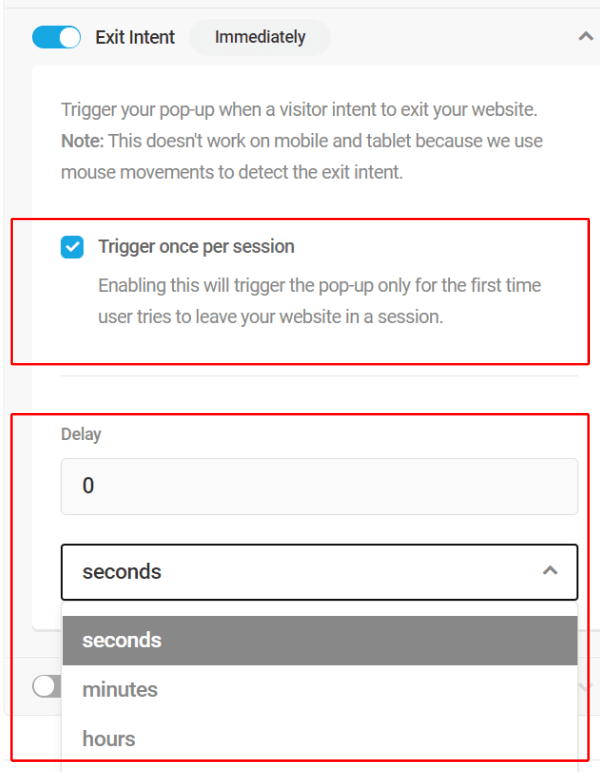
Select Trigger once per session to ensure that a module only appears once. - Ad-block will display a module every time Hustle detects an active ad-block add-on or extension in a user’s browser.
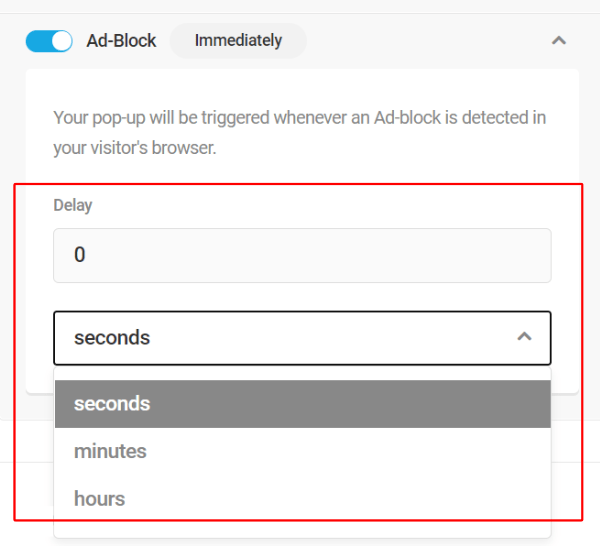
Inputting delay time for the Ad-block pop-up.
Need some help identifying your element’s selector or rendering a trigger button? Check out the relevant sections in the plugin’s documentation.
Ok, that covers all the nitty gritty on Triggers. With one final, important note: You must enable at least one trigger for your module (pop-up, slide-in, embed) to appear. Without any triggers, there is no user action that will ‘trip’ it into activation.
Animation Settings (Pop-ups & Embeds Only)
Modules can be animated as they appear and exit the screen. Choose the desired entrance and exit animations from the drop-down menus, and use the Preview button to see what they will look like.
I will note that Pop-ups have options for both entrance and exit animations, while Embeds have entrance animation only.
Twenty-eight different entrance & exit animations to choose from — wow!!
And now let’s bounce right into slide-in positions…
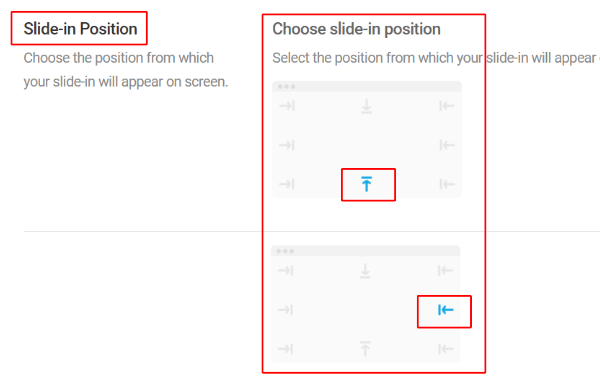
Slide-In Position (Slide-Ins Only)
Where would you like your slide-in to appear from? Click any of the available edge areas to set your designated sweet spot.
Next, we’ll look at some additional closing methods that fall outside of the ones we already covered.
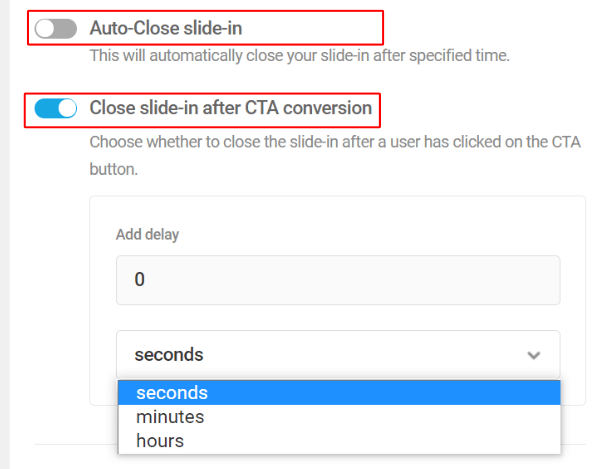
Additional Closing Methods (Pop-ups & Slide-Ins Only)
Most modules require the interaction by a user to trigger their closure. These Additional Closing Methods are intended to resolve instances when users do not interact with the module.
Let’s move on to shutting things down, or as social butterflies might say — knowing when to make a graceful exit.
Closing Behavior (Pop-ups & Slide-Ins Only)
These settings determine how a module will behave when it has been closed.
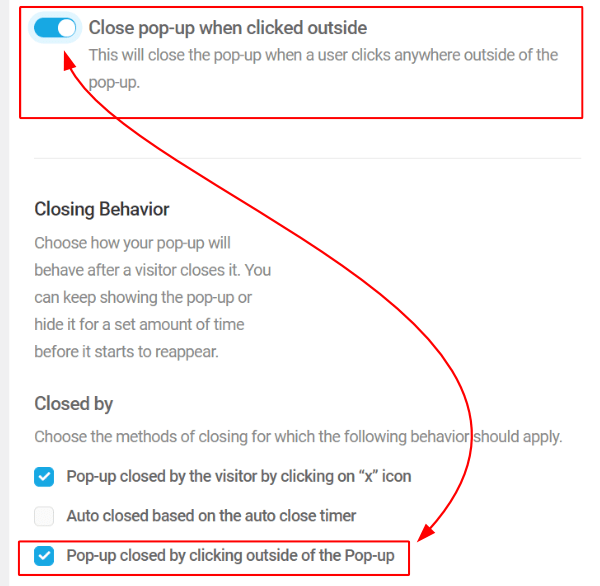
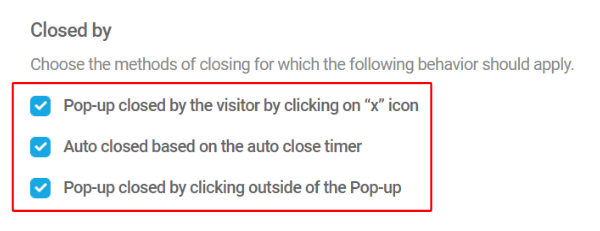
Closed by
The options that appear here depend on which options are enabled in the Additional Closing Methods above.
Pop-up closed by the visitor by clicking on “x” icon is the default, and it is recommended to leave this enabled, as it provides your visitors with the most familiar option.
You can also choose to auto close based on a timer, or by clicking outside of the pop-up. Settings allow you to select any one of these options, or any combination of the three.
Additional Closing Methods.
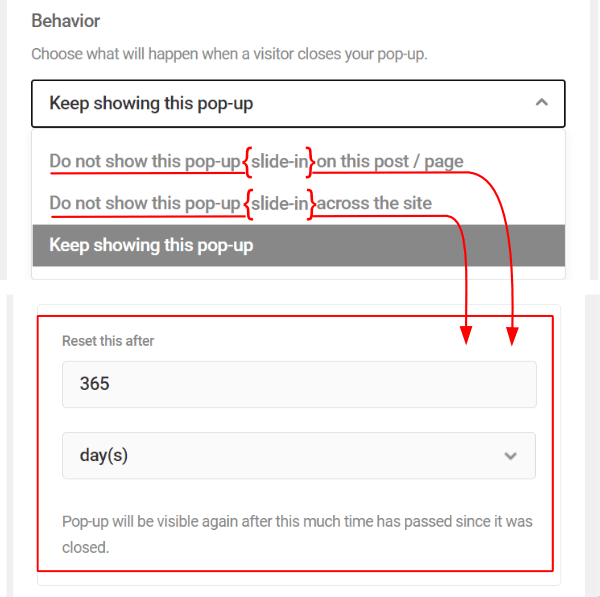
Behavior
Your selection here will apply to the Closed By methods you select.
You can choose not to show a message on the post or page, across the entire site, or just keep showing the message.
Moving on to our last set of behavior mods, providing additional settings for other conditions.
Additional Settings
These are a few additional options to give you more control over what happens when users interact with your page and/or module.
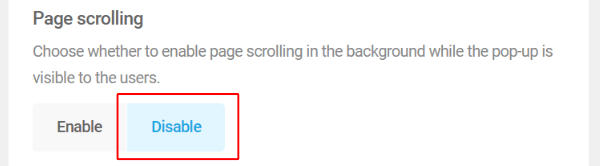
Page Scrolling (Pop-ups only)
If enabled, users can scroll a page while the pop-up is displayed.
Visibility after opt-in (Opt-in modules only)
This setting affects the pop-up visibility once a user has opted-in a form.
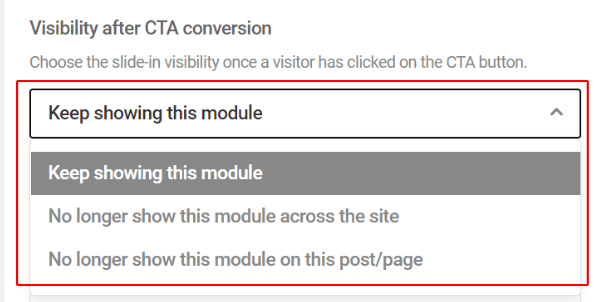
Visibility after CTA conversion
This appears only if Call to Action is enabled under the Content tab.
You can choose to keep showing, no longer show across site, or no longer show on a specific page/post.
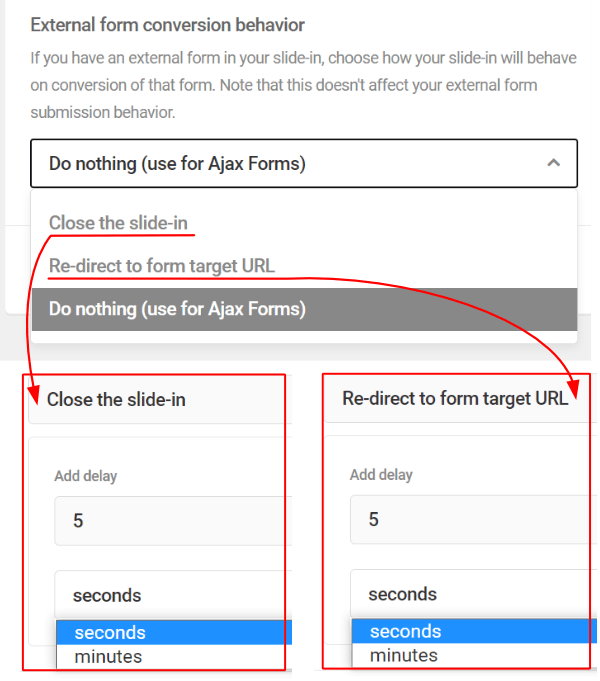
External Form Conversion Behavior
This setting applies to forms or other plugins that have been integrated into a module from external sources.
You can opt to close, redirect to form target URL, or do nothing (used for Ajax Forms).
Annnnd… that concludes our sequence on behavior settings.
Well Behaved
We’ve gone through all the Behavior options in Hustle! You rock.
Continue to tweak the settings to your heart’s content, then publish to activate them, and prepare to behold the power you just unleashed.
As with all WPMU DEV plugins, publishing is never permanent. You can edit, preview, unpublish, or delete any of the modules you created at will.
Also, keep in mind that if your site only requires one or two pop-ups, slide-ins, or embeds, the free version of Hustle should be more than ideal for your needs (you can create up to three modules for each campaign type). For unlimited opt-ins, custom content, and social sharing, we recommend upgrading to Hustle Pro.
For the entire suite of plugins and site management services, including live, 24/7 support for anything WordPress related, give our membership free trial a go.
Still hankering for more? Check out the full documentation and top tips from our Pros here: Hustle Help AND Get The Most Out of Using Hustle.
Share article
All the good WordPress stuff, once every two weeks
Subscribe
Create your free account to post your comment
Login to post your comment