How to Use Gmail to Send WordPress Emails
WordPress emails slow or not arriving? In this post, I'm going to teach you how to use the Gmail API and Gmail SMTP to send WordPress transactional emails for improved deliverability.

By default, WordPress uses the mail function in PHP, which is sufficient for the few emails that a new or small WordPress site needs to send. When your email volume increases, you’ll start to notice email delivery issues. You’ll need to switch over to a third-party provider such as Gmail at this point.
In order to prevent abuse, some web hosts have email restrictions, so they require a third-party service to send a large volume of emails from your WordPress site. Haven’t you noticed some major hosts don’t even offer email hosting and site hosting together? This is great for preventing spam, ensuring your site isn’t on a blocklisted IP address and reduces the unnecessary strain on your server.
You can set up a third-party email service for your WordPress site easily using an SMTP or Email API plugin. Many email service providers such as G Mail are also free depending on the volume of emails you send, so you can get a better solution without additional costs.
In this post, I’m going to teach you how to configure the WP Mail SMTP plugin to use the Gmail API for sending WordPress emails. I’ll also teach you a faster and multisite-friendly way to set this up using WPMU DEV’s Branda plugin (formerly Ultimate Branding). We’ll go over why using a third-party email provider is important and look at some popular transactional email service providers.
If you’re starting to notice that emails from WordPress, like password resets and contact form notifications, are slow to arrive or not arriving at all, this post will help you fix those issues.
Contents
- Email Deliverability Issues are Difficult to Detect
- Popular Transactional Email Providers
- API or SMTP
- Using WP Mail SMTP to send WordPress Emails with the Google API
- Using Branda to send WordPress Emails with Google SMTP (Multisite-friendly)
Signed, Sealed, Message Not Delivered
Ideally, you should set up a third-party hosting before email deliverability becomes a problem because most email issues are difficult to detect and can damage your reputation.
For one, your users might not report these issues to you. After attempting to reset their password or signing up for a service and not receiving an email, for example, your users may give up and move on.
Your site host will not report server issues because they don’t want to call attention to the fact that they’re falling short and aren’t able to deliver your emails. This isn’t true for all hosts though, some do have email failure logs.
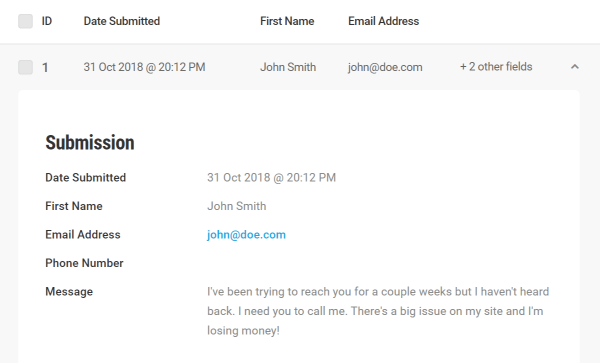
For developers and implementers, you’ll usually recognize there is a problem when a WordPress form on your site has stopped sending notification emails. By then, you’ll probably have a stack of unanswered messages that have piled up over a few weeks which won’t paint your customer service in the best light. Ouch.
Transactional Email Providers
Although there are plugins that will allow you to send bulk emails like newsletters and promotions from WordPress, WordPress isn’t the best tool for the job so you should choose a dedicated service such as MailChimp, Constant Contact, Aweber, Active Campaign and Campaign Monitor.
Transactional emails are automated emails your user requests like password resets, receipts, and signup confirmations. These one-to-one emails from WordPress are important and initiated by the user so they’re not likely to be marked as spam. Transactional email providers, like the following, can help you deliver these emails.
Gmail/G Suite
Gmail is a great option if you’re already using it for your business emails because it’s free. We’re going to go over how to use Gmail to send transactional emails later on in this post. Gmail does have a sending limit of 500 emails per day and this will also include manual emails you send out in your day-to-day activities. G Suite‘s daily limit is 2000 but only 500 for trial accounts, so that’s something to keep in mind. We’ll go over how to configure Gmail/G Suite later in this post.
Mailgun
Mailgun verifies email addresses to ensure they’re valid so you won’t waste resources sending emails to phony addresses. Mailgun is free for your first 10,000 emails a month and has their own WordPress plugin.
SendGrid
Sendgrid offers marketing emails and transactional emails. SendGrid has a less generous free option than Mailgun. With SendGrid, you can send 40,000 emails for 30 days for free, then send 100 emails/day free forever. SendGrid also has a dedicated WordPress plugin.
Mandrill and MailChimp
Mandrill is a paid extension for MailChimp. They don’t have a free option anymore but they do have their own WordPress plugin which makes the integration process easy.
Here are some additional transactional email providers who may suit your needs better than the ones above:
Apple of My API
When it comes to integrating WordPress with a Third-Party Transactional Email service provider, should you choose to use their web API or use SMTP relay? Here’s what you need to know about each.
SMTP is a global standard and it’s been around for a very long time; however, because bits and pieces have been added over the years it’s not as cohesive or efficient as something that was conceived as a whole. SMTP is widely available so it’s a viable option for legacy systems.
When WordPress uses SMTP to send messages through your email service provider, there is a lot of back and forth between the two systems in order to check the message, DNS records, and authentication, so there are multiple points of potential failure. This also means that SMTP is slower than web APIs because of all the back and forth.
As for web APIs, each email service provider’s API will be different and not all providers have one. Connecting WordPress via an API will allow you to access additional functionality that is not available via SMTP. Some of the benefits include an extra layer of security because of the use of API keys, detailed reporting so troubleshooting is easier and some providers allow you to send a higher volume of emails via their API.
Keep these things in mind as you explore email service providers.
I’m going to teach you how to use both Gmail SMTP and the Gmail API so you’ll be able to choose the one that best meets your needs.
How to Use the Gmail API to Send WordPress Emails
Gmail and G Suite are a great option for sending a few emails because you or your client probably already have a Google account. Also, since Gmail has an API, well get much better deliverability and performance.
To integrate Gmail/G Suite with WordPress, we’re going to use the WP Mail SMTP plugin that’s available on WordPress.org. With over a million installs, this plugin allows you to easily integrate WordPress with Gmail, SendGrid, Mailgun and it has an option for a custom SMTP setup.
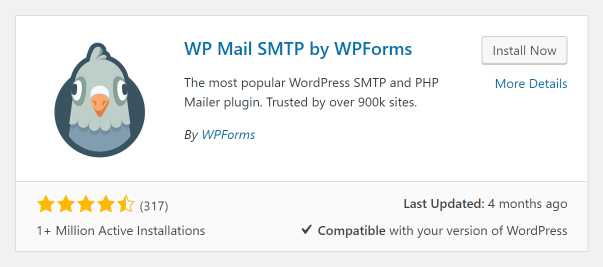
To begin the integration process, you need to install the WP Mail SMTP plugin on your WordPress site.
Once the plugin is installed, go to Settings > WP Mail SMTP to set who the email will come from. You’ll need to enter the Gmail or G Suite email address that you’re going to be sending emails from and a name. The name does not need to match the name in Gmail/G Suite.
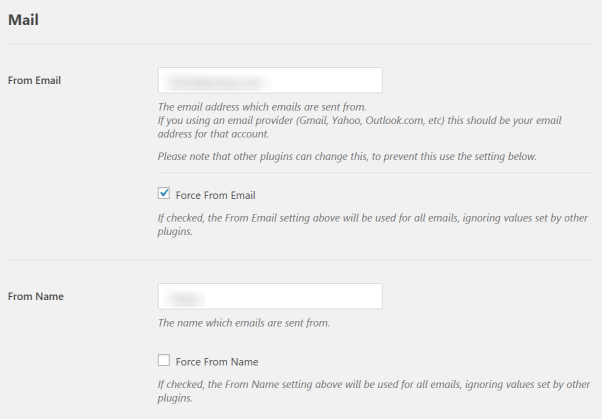
If you want all the emails on your site to come from your Gmail/G Suite address, select the Force from Email checkbox. This will save you the trouble of having to change it manually everywhere. You can do this for the name as well.
Select the Return Path checkbox to receive bouncebacks in your Gmail inbox.
When you’ve completed that, scroll down and select the Gmail option. This will open additional fields that we’ll need to configure Gmail/G Suite.

Gmail Apps and Zerts
In order to continue configuring Gmail, we’re going to need to create a Gmail app, which is a whole lot easier than it sounds. There’s no coding required. We just need to create credentials for the WP Mail SMTP plugin to use to integrate WordPress and Gmail.
Do not close the WP Mail SMTP plugin settings page because you’re going to need it in a bit.
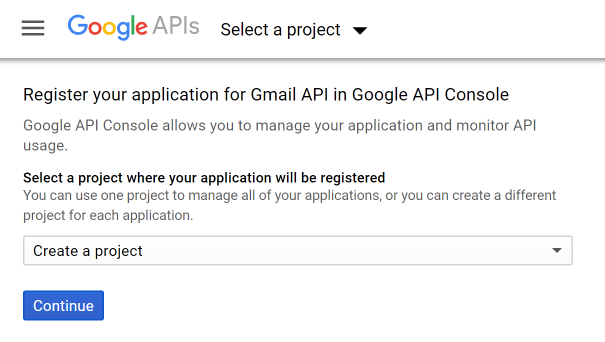
To create a Gmail app, sign in to Google’s application registration page for developers, and create a project.
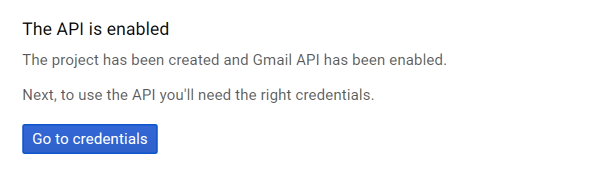
Once you do that, you’ll see a confirmation message that the API is enabled. Hit the Go To Credentials button to create your credentials to access the API.
There are three steps you need to complete to create credentials for your project.
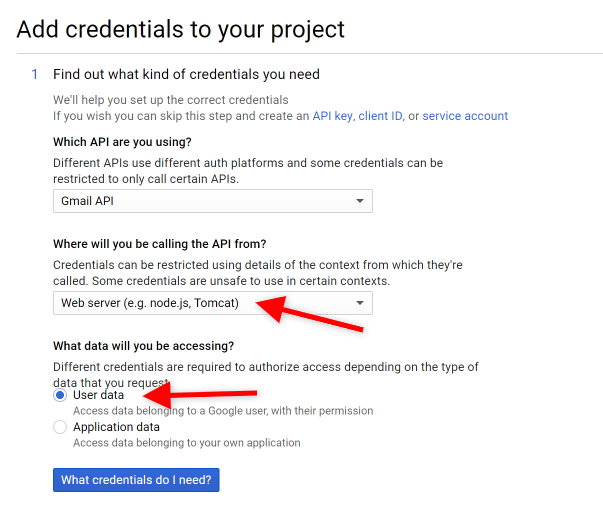
Step 1: Determine What Credentials You Need
Luckily the form will help you determine what kind of credentials you need.
- For the Which API are you using? dropdown, select Gmail API
- For the Where will you be calling the API from? dropdown, select Web Server (e.g. node.js, Tomcat)
- For the What data will you be accessing? question, select User Data
Then push the What credentials do I need button?
Step 2: Create OAuth 2.0 Client ID
Second, you’ll create an OAuth 2.0 Client ID. This is how WordPress will gain permission to use your Gmail API.
In the name box, you can leave the default or enter a custom name. Your users won’t see this information so the default is fine.
For the Authorized JavaScript Origins box, you’ll enter your WordPress site’s URL. This tells Google where the API calls are going to be coming from. This is box number 1 below.
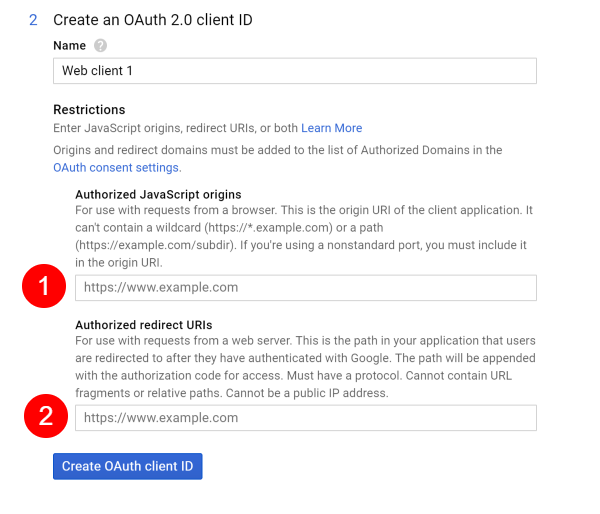
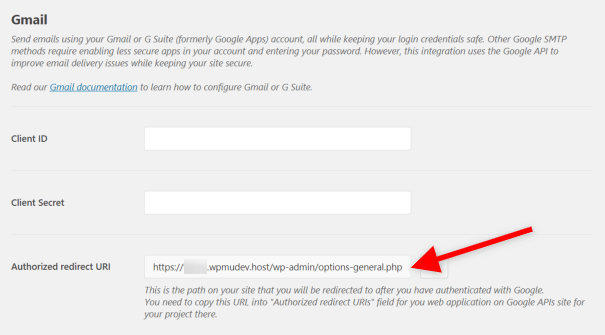
For box number 2, you need to go back to your WordPress site and on the settings page for the WP Mail SMTP plugin, in the Gmail section, copy the Authorized redirect URI and paste it in box number 2 (as seen above) in Google.
Then push the Create OAuth Client ID button in the Google API.
Step 3: Set Up OAuth Consent Screen
The third step is to set up the OAuth consent screen. Since WordPress is going to be using your Gmail app and not actual users, your users won’t see this consent screen.
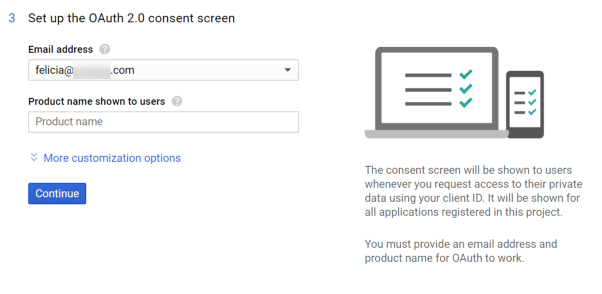
Just make sure your email is selected and in Product Name Shown to Users enter the name of your site. Then select the Continue button.
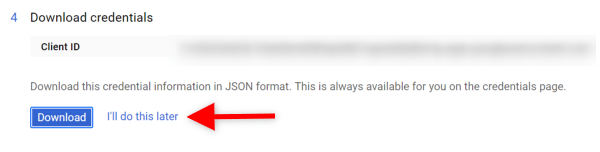
We don’t need our newly created credential information in JSON, so we’re going to bypass the next screen by hitting I’ll do this later since there’s not an I’ll do this never option :)
We’ll get the client ID and client secret together in the next step, so you don’t have to copy it from here, but you can if you want to.
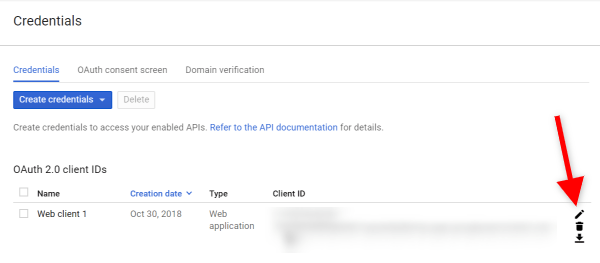
On the next screen, we’re going to hit the pencil icon to retrieve our client secret and client ID.
This will take us our credentials, finally!
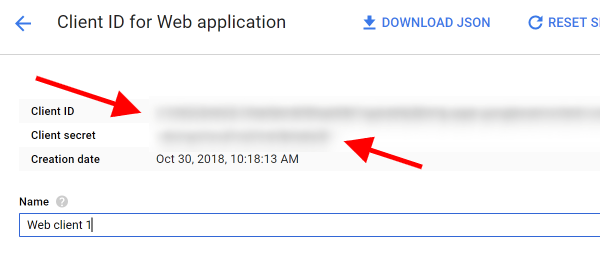
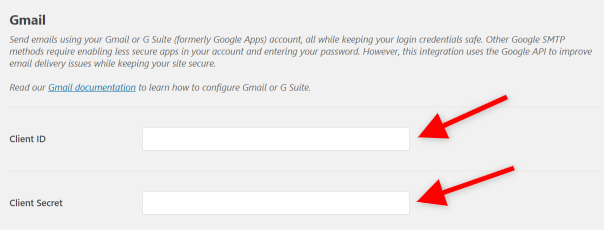
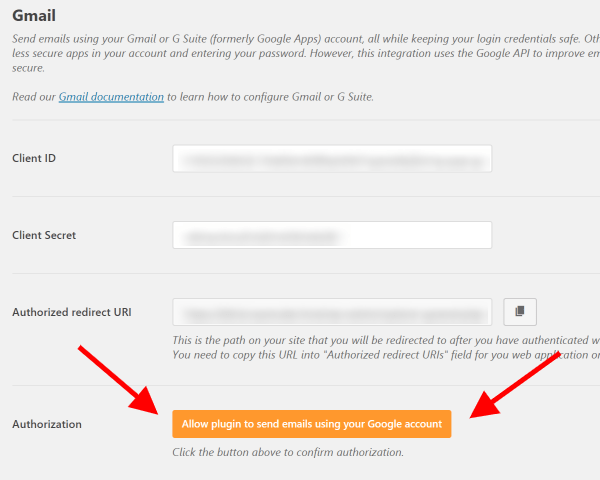
You’ll copy the client ID and client secret and go back to the WP Mail SMTP settings page to enter them there.
Then select the Save Settings button which will refresh the page and once that happens, scroll down and select the Allow plugin to send emails using your Google account button.
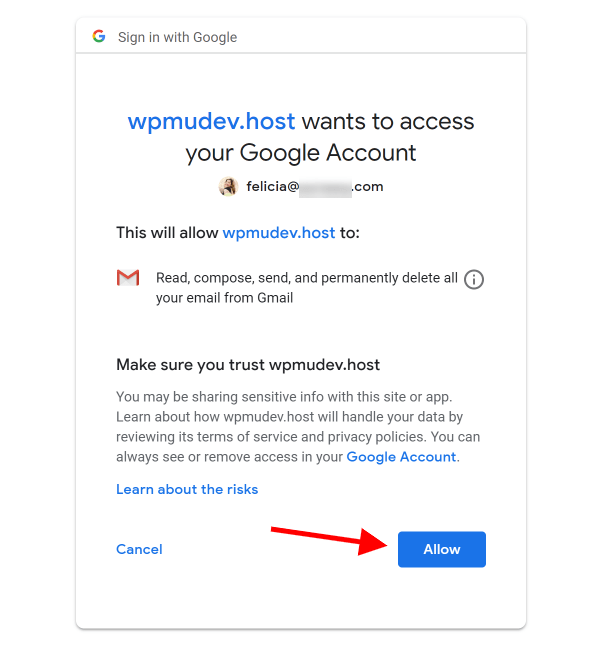
Almost done. Once you select the Allow plugin to send emails using your Google account button, you’ll be redirected to Gmail to sign in and allow WP Mail SMTP to use your account.
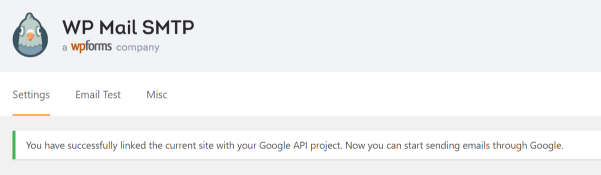
You’ll be redirected back to the WP Mail SMTP page and see a confirmation message.
And we’re done. Bring on the zerts to celebrate.
Once you switch over to sending emails with the Gmail API, you’ll be able to send newsletters from WordPress without putting extra pressure on your server.
Using Gmail to Send WordPress Emails Using Branda
Ok, that was a bit of a process. There is an easier way to use Gmail to send emails on behalf of WordPress using your Gmail/G Suite credentials using Branda. The Branda plugin does not require you to set up a Gmail app and create OAuth credentials.
This setup also works for multisite, where you can select whether subsite admins can override Branda settings or not.
To assist with deliverability, improve security, and maximize the number of emails you’re able to send, you should create a separate Gmail/G Suite address. Creating a [email protected] email account will preserve the security settings on your personal Gmail/G Suite account.
To configure Branda to use Gmail SMTP, you’ll need to first ensure that:
- you have 2-step Verification enabled in your Google account, and
- you have an app-specific password to use in the SMTP Authentication field.
Once you’ve completed the above, you’re ready to install the Branda plugin. You’ll click on the pencil icon next to SMTP in the Emails box on the Branda dashboard, then push the activate button on the second page.

Step 3: Configuring Branda SMTP
All of the configuration settings for Branda appear on one page. Here’s how to set them up.
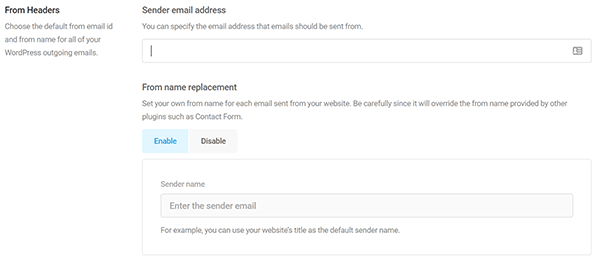
For Sender Email Address, Enter your Gmail/G Suite email address that you will be sending emails from.
If you wish to specify the name that all your emails will come from, select Enable for From name replacement, then enter the name you would like to use.
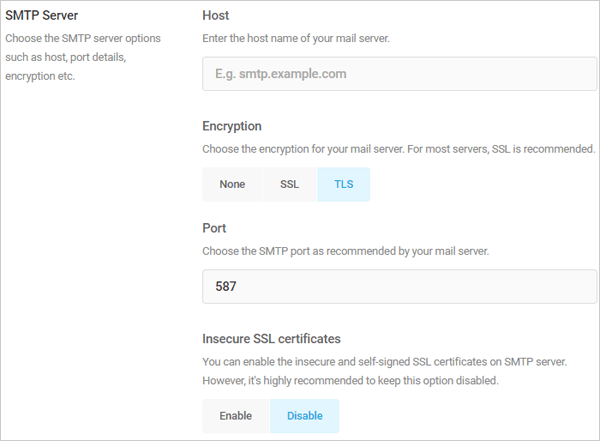
In the SMTP Server section:
For host, whether you’re using Gmail or G Suite, enter smtp.gmail.com
For Encryption, select TLS
For SMTP port, enter 587
For Insecure SSL Certificates, enter Disable
For SMTP Authentication, select Enable
For Username, enter the same email address you entered in the sender email address). These must match
For Password, enter your app-specific password.
Then push the Save button. After the page refreshes, you can send yourself a test message to ensure you configured Branda properly. Push the Send Test Email button near the top of the page and enter your email in the popup box. If it doesn’t work, double-check your settings.
Emails ending in up the Gmail spam folder? Do this:
Sometimes, emails from your domain may end up in the Gmail spam folder for various reasons, including false positives.
If this happens, you can report it to Gmail and authenticate your domain using https://postmaster.google.com/. For more information, refer to Google’s official Email Sender Guidelines and Google Help.
That’s a Wrap
As I mentioned earlier, every host has a different email volume threshold, so I recommend reconfiguring WordPress to use an email service as soon as possible. The first time this happened to me, I couldn’t figure out the issue for a few weeks because the issue would come and go. Now, shortly after I launch a site, I configure a third-party email provider in less than half an hour and save myself the headache later.
Also, when all your emails come from the same name and address, it’s easier for your users and clients to trust you and recognize you, which solves a lot of problems before they begin. When you switch over, you’ll also realize how many of your emails were ending up in spam because you’ll see improvements across certain metrics. You might have a higher email open rate because people are actually getting your emails. You might have more returning visitors because people can reset their passwords.
You’ll start to see benefits immediately and you’ll wish you had switched over sooner.
One last tip…
If you’re a WPMU DEV member, we offer email forwarding as part of our email hosting service. This lets you send an email from [email protected], then forward it to [email protected], and then configure Gmail to ‘send as’ [email protected]. Although forwarding doesn’t let you log into [email protected] using Outlook, or your iPhone mail app, our free email accounts do.
Share article
All the good WordPress stuff, once every two weeks
Subscribe
Create your free account to post your comment
Login to post your comment