Debugging WordPress: How to Use WP_DEBUG
Learn how to turn on WordPress debugging and use the basic debugging tools available to locate any errors on your website.

Every good developer should turn on debugging before getting started on a new plugin or theme. In fact, the WordPress Codex “highly recommends” that developers use WP_DEBUG mode while working on code they plan to release publicly.
Unfortunately, many developers don’t follow this advice simply because they forget about the debugging tools built-in to WordPress or just don’t know how to use them.
In this post, I’ll go through the basic debugging tools available and show you how easy they are to use.
- Debugging With WP_DEBUG
- Logging Errors With WP_DEBUG_LOG
- Turn Off Displaying Errors On Your Site With WP_DEBUG_DISPLAY
- Putting it All Together
Debugging With WP_DEBUG
The most important debugging tool you need to know about is WP_DEBUG.
WP_DEBUG is a boolean constant, which triggers the “debug” mode throughout WordPress. It’s found in the wp-config.php file in your WordPress install.
When set to “true,” you’ll start seeing PHP notices – not so much errors as they are helpful messages for developers – and WordPress-generated debug messages, particularly deprecated function usage, displayed on your site’s pages.
Deprecated functions, which are contained in many WordPress releases, are functions that have been flagged to die at a later date. It’s important to know if you are using a deprecated function in a theme or plugin you’re working on so you can find a replacement to use instead.
To turn on WP_DEBUG, find the following line of code to your wp-config.php file:
Then, replace false with true and save the file.
To turn the constant off, just replace “true” with “false”. WP_DEBUG is set to false by default.
WP_DEBUG provides a handy way to troubleshoot problems when something goes wrong with your site.
It’s important to keep in mind that WP_DEBUG should not be used on a live site. While it’s a useful feature during development, it can be dangerous on a live site because text in the PHP notices can reveal details about your code, paths and other information to visitors to your site.
Logging Errors With WP_DEBUG_LOG
Another handy tool is WP_DEBUG_LOG, which can be used in conjunction with WP_DEBUG to save all error messages to a debug.log file.
This is an especially useful feature if you want to review notices later.
To turn on debug logging, simply add the following line of code to your wp-config.php file:
Accessing the debug.log File
Once you have added the line above, you can find the debug.log error log located in the /wp-content/ directory of your site. You can access this directory through SSH, FTP or the File Manager in cPanel.
After logging into cPanel, go to Files > File Manager.

Navigate to the root of your site and click on the /wp-content/ folder. If errors occurred, you should see debug.log listed. Click on it, then on the View or Download buttons in the menu toward the top.
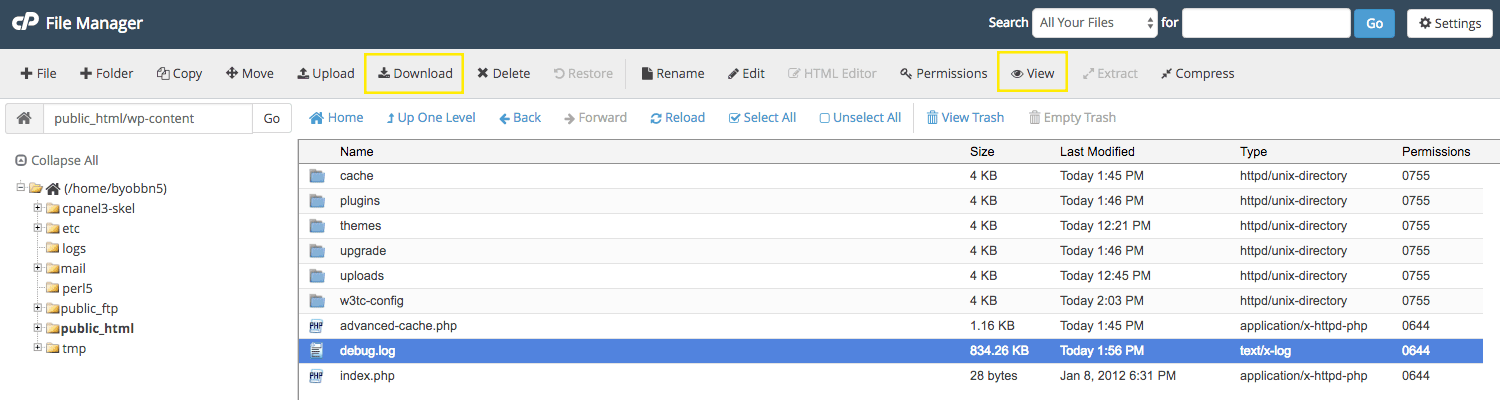
If you click View, you can see the error messages directly in your browser. You can download the file instead if you need to pass it along to a plugin or theme author or our free expert 24/7 support team.
Turn Off Displaying Errors On Your Site With WP_DEBUG_DISPLAY
If you don’t want error messages published to your site’s pages you should use WP_DEBUG_DISPLAY.
This is another useful constant, which allows you to control whether debug messages are shown inside the HTML of your site.
The default is “true,” which shows errors and warnings as they are generated. Changing this to “false” will hide all errors.
This constant should be used in conjunction with WP_DEBUG_LOG.
To use his feature, just add the following line of code to your wp-config.php file:
Putting it All Together
It’s easy to use all three constants together if you want to turn debugging on and log error messages but hide notices displayed on your site:
Don’t forget that WP_DEBUG is for local development use and should not be used on live sites.
Editor’s Note: This post has been updated for accuracy and relevancy.
[Originally Published: 2013 / Revised: March 2022]
Share article
All the good WordPress stuff, once every two weeks
Subscribe
Create your free account to post your comment
Login to post your comment